I began collecting recipes when I was at school. Some of the recipes in my large collection have been in my family for generations, others were passed on by friends and chefs around the world. Many have been adapted over the years to make them lighter or update their presentation. I’ve served them to royalty, PMs and other VIPs and there have been no complaints. I hope you are inspired to make some of them.
Woolworths was selling 400g Toblerones for half price so I bought a couple and put them in the pantry (trying to forget they were there) until I came up with inspiration for a new dessert.
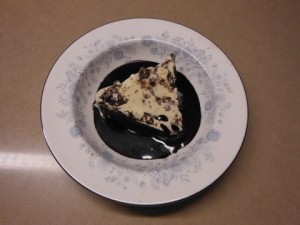
By using good quality bought vanilla ice cream you can make this parfait in a jiffy. If you have time to make your own ice cream so much the better. While you could make this in an ordinary loaf shape, using a triangular tin looks snazzier, especially as Toblerones are that shape. You can buy them online.
If preferred, leave out the chocolate coating. This chocolate sauce recipe is an old family favourite. Great to have in the fridge to serve with ice cream or waffles, though one batch doesn’t last long if you have kids around, or even grown up kids!
2 litres good quality vanilla ice cream
1 x 400g Toblerone chocolate bar Chocolate Coating:
200g dark or milk chocolate
2 Tbs vegetable oil Chocolate Sauce: ½ cup sugar
½ cup water
4 Tbs cocoa
2 Tbs golden syrup
Large knob of butter
1 tsp vanilla essence
Remove ice cream from freezer and spoon into a large bowl. Leave to stand for a few minutes while you chop the Toblerone into small chunks. Not too long as you don’t want the ice cream to melt. Thoroughly mix Toblerone into ice cream. Line loaf tin (triangular or rectangular) with plastic wrap, leaving the excess hanging over the sides. Fill with ice cream mixture, pushing down and smoothing the top. Cover with the plastic wrap then freeze several hours or overnight.
Chocolate Coating: Remove parfait from freezer, tip out (you may need to hold a hot towel over the base to loosen it), peel off the plastic wrap and place on serving dish. Meanwhile melt chocolate in a bowl over simmering water and mix in the oil. Working quickly cover the parfait with melted chocolate. Put back in the freezer to set.
Chocolate Sauce: Choose a large pan because this sauce has a tendency to boil over. Place all ingredients, except butter and vanilla essence, in pan. Mix with a whisk to remove lumps, then boil for 5 minutes without stirring. Cool for 10 minutes. Stir in butter and vanilla. Reheat before serving and serve warm not hot.
To serve: Remove parfait from freezer for about 10 minutes before serving. Slice with a large sharp knife dipped into very hot water. Serve with the chocolate sauce.
Serves 12
Note: if you can’t buy golden syrup substitute corn/glucose syrup or honey.
My favourite fish recipes are simple ones like this. With lots of cherry tomatoes in the garden I’m putting it on the menu about once a week at the moment.
2 x 150g thick fish fillets with skin (e.g. snapper, cod, blue grenadier)
2 Tbs olive oil
125g cherry tomatoes, halved
4 spring onions, thinly sliced on the diagonal
Small handful chopped fresh herbs (coriander, parsley, basil)
1 Tbs white balsamic vinegar
Pinch of sugar
Salt and freshly ground black pepper
Dry fish with paper towels then season with salt and pepper on both sides. Spread one Tbs olive oil over the base of a non-stick frying pan and lay fish fillets on top, skin side down. Turn the heat on to medium and slowly heat the pan and cook the fish until the skin is golden and crisp. Turn fish over and cook for about a minute on the other side or until just cooked. Remove from pan to a warm plate and cover with a large saucepan lid to keep warm while you make the sauce.
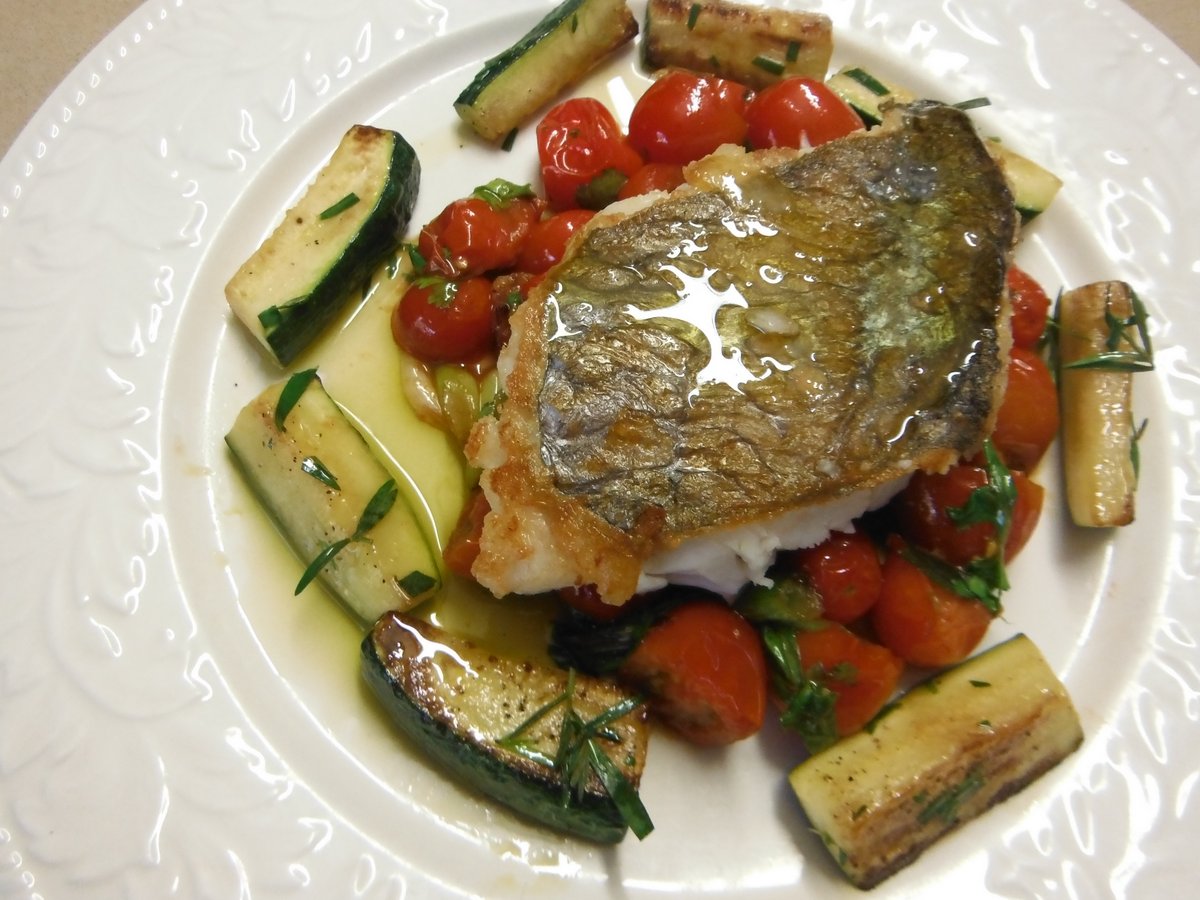
Add 1 Tbs oil to the pan with the spring onions and cook over moderately high heat, stirring, for a minute. Add tomatoes and cook for another minute, stirring. Finally add vinegar and cook for another minute. Tomatoes should be soft but still keep their shape. Season with the salt, pepper and sugar, stir in the herbs and divide between two warm plates. Place fish on top, skin side up. Serve with a green vegetable such as pan fried zucchinis (courgettes) as shown in the photo.
Serves 2
Note: white wine vinegar or verjuice can be used instead of white balsamic vinegar.
When Tetsuya Wakuda opened his restaurant Tetsuya’s in Sydney in 1989 it was a culinary breath of fresh air and Australians were literally wowed. By combining French cooking techniques he had learnt while working at Kinsela’s for Tony Bilson with the pure clean flavours of his heritage this smiley Japanese chef was an overnight success.
The Sydney Morning Herald Good Food Guide gave Tetsuya’s their highest possible award every year from 1992 until 2009. Not bad for a guy who arrived in Sydney in 1982 with nothing more than a small suitcase and a love of food.
This delicious starter appeared in a newspaper article about Tetsuya some 20 years ago and I cut it out. I’ve been making it ever since and it always goes down well. Scallops are quite expensive but three per person is enough for a light starter.
24 large scallops, without roe
1 leek, white part only, cut into fine julienne
oil to fry
3 Nori sheets, very finely sliced*
Dressing:
¾ cup vegetable or light olive oil
¼ cup salted black beans, finely chopped*
¼ cup finely chopped shallots
3 Tbs rice wine vinegar*
2 Tbs mirin*
1 clove garlic, crushed
2 Tbs fresh ginger, grated or finely chopped
1 tsp soy sauce
Thaw scallops if frozen and dry thoroughly with paper towels. Place dressing ingredients in a jar with a lid and shake well. Taste and add a bit more rice wine vinegar if necessary, to get the right balance. Deep fry leeks in hot oil until crispy then drain on paper towels. Recipe can be made ahead to this stage.
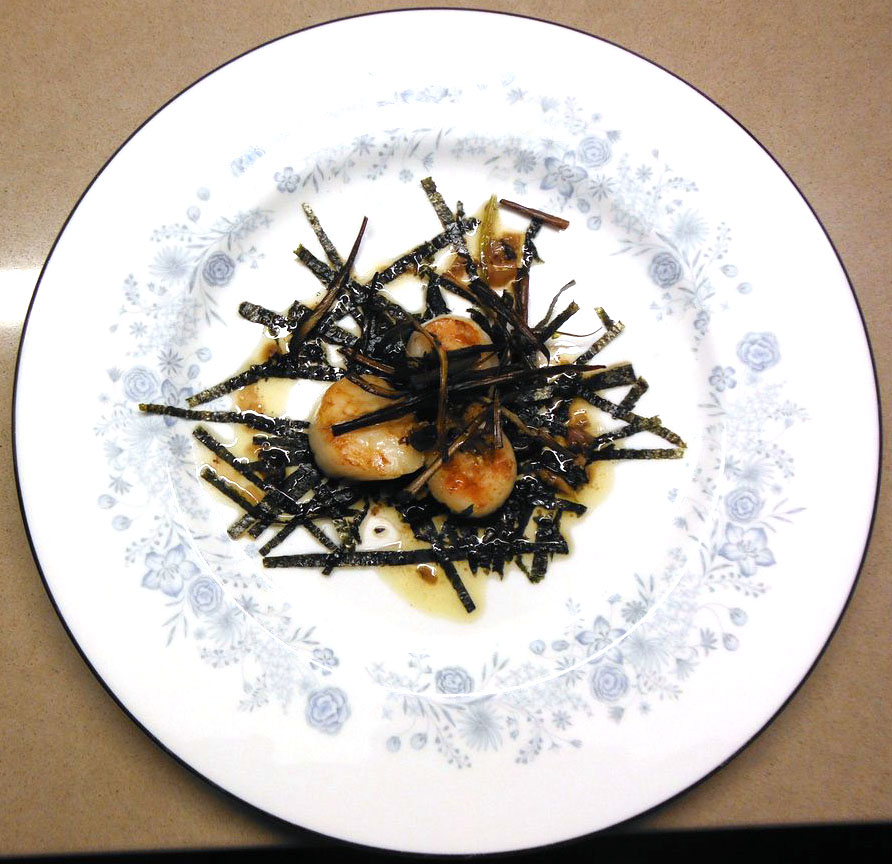
To serve, arrange the nori “straw” on 8 serving plates. Brush or lightly spray scallops on both sides with some oil, then sear on a hot pan or griddle for 1-2 minutes each side or until golden. Arrange three scallops on each plate, drizzle with some of the dressing, then garnish with the crispy leeks.
Serves 8
Notes: * ingredients marked with an asterisk are available from Asian food stores. Leftover dressing will keep for a week or two in the fridge and goes well with grilled fish or chicken. The black beans come in tins or packets. If you buy them in a tin, drain and rinse well. Large raw prawns can be used instead of scallops and if you don’t have any nori, serve on a bed of finely shredded rocket.
This quick and easy side dish is originally from Nigella Lawson. I’ve made it several times and adjusted it slightly by adding a touch of honey, which I think is an improvement. If preferred just leave it out.
It goes particularly well with lamb and is a perfect addition to a summer barbecue. It also makes a tasty lunch with the addition of crumbled goat’s cheese or feta and crusty bread to mop up the juices.
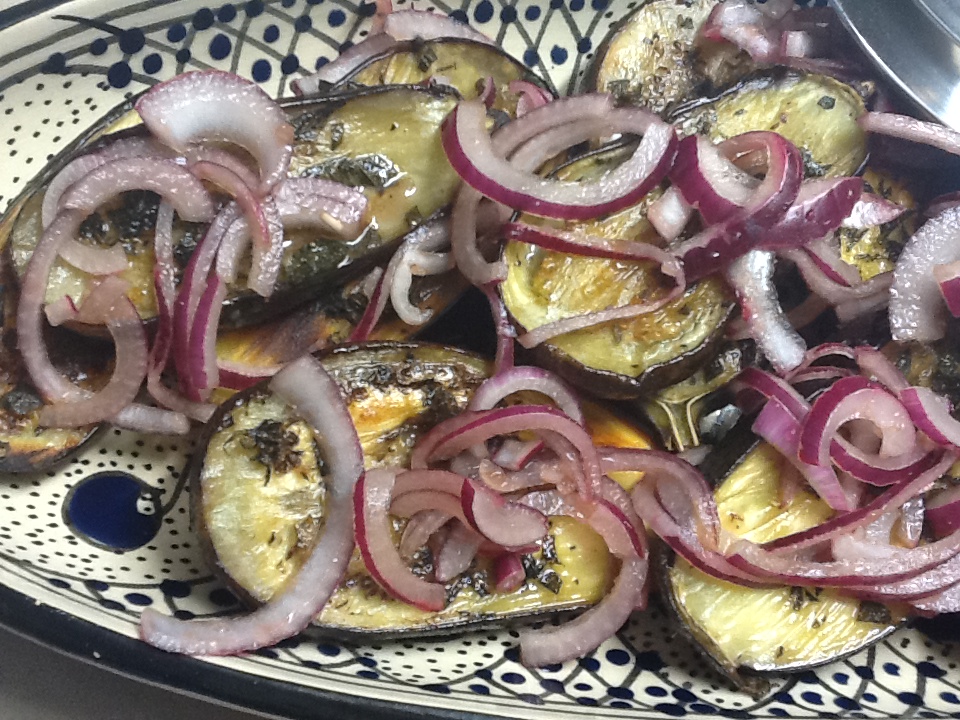
Recipes using eggplants usually require you to salt, drain, rinse and dry them. This process is said to draw out the bitterness, but to be honest I’m not convinced it makes much difference. You will be relieved to hear that you don’t need to do it in this recipe. As you can see in the photo, the eggplants I used weren’t really tiny ones, but they weren’t massive either. Use whatever you can find. If you leave the onions to pickle for longer, before adding the oil, they get softer. Any leftovers are very tasty.
500-700g small/baby eggplants (aubergines)
3 Tbs olive oil
3 Tbs chopped fresh oregano or marjoram (or 3 tsp dried)
Salt
1-2 red onions, depending on size, halved and thinly sliced
3 Tbs red wine vinegar
½ tsp salt
¼ cup water
3 Tbs extra virgin olive oil
2 tsp honey
1 clove garlic, finely chopped
Freshly ground black pepper
Fresh oregano or marjoram, chopped, to garnish
Preheat oven to 200º C. Slice eggplants in half lengthwise. Keeping the stalks on makes the dish look more rustic. Place the regular olive oil in a shallow roasting pan and mix in the fresh or dried herbs. Rub the cut side of each eggplant in the oily mixture to coat it, then arrange them cut side up in the pan. Season with salt then bake for 15-25 minutes or until tender and starting to turn golden brown. Cooking time will depend on the size of the eggplants.
Meanwhile mix onion with vinegar, salt and water and set aside to macerate for an hour or more, mixing from time to time. Recipe can be made several hours ahead to this point.
To serve, arrange eggplants on a serving platter. Add the extra virgin olive oil, the garlic, honey and pepper to any juices left in the baking pan. Drain the onions, discarding liquid and add them to the pan and mix well. Distribute onions over the eggplants and sprinkle the fresh herbs over the top. Serve at room temperature.
Serves 4-6
Notes: substitute other fresh herbs in season such as coriander or basil. If liked, crumble some goat’s cheese or feta over the top to make the dish more filling.
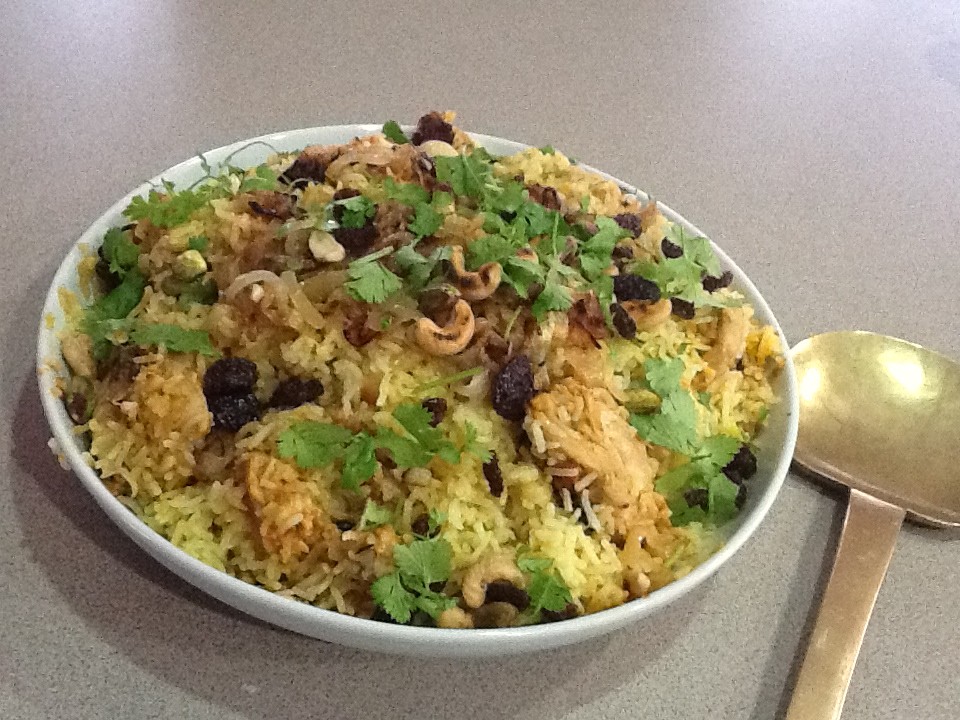
I watched Rick Stein make this on his TV programme about India and decided to give it a try. We’re not big meat eaters, but we prefer to fill up on protein and vegetables rather than carbs. So I cut the 600g of rice in Steins recipe down to 400g and increased the chicken meat from 600g to one kilo. If you prefer to use the original recipe you can find it online.
This recipe serves 6-8 and is perfect for entertaining. We didn’t have guests coming which meant there were delicious leftovers to reheat and serve later in the week. I found it easier to mix the saffron and rosewater into the rice rather than sprinkling it over the layers as Stein does. If you don’t have any rosewater don’t worry – the flavour is very subtle so just leave it out. I’ve added a teaspoon of sugar as I always do with savoury sauces, especially if they contain tomato.
A Biryani is supposed to be dry with separate grains of rice. If you prefer more sauce don’t do the final layering in the casserole. Instead boil the rice completely, then drain and serve in one dish. And stop cooking the chicken when there’s more sauce left and serve it in another dish. Alternatively serve the Biryani with another curry which has lots of sauce, such as a vegetable curry.
When we lived in Copenhagen we had an Indian housekeeper called Rajan. He was always telling me that the two steaks or chicken pieces we were having for dinner would feed his family in India for a week. Having inherited my mother’s War mentality I hate to see good food go to waste, so I’m pretty frugal and good at using up leftovers. But by Rajan’s standards all Westerners are wasteful. He would often rock his head from side to side and say “Madam very wasteful”.
Once we had a reception for several hundred people and I needed lots of coriander for one of the dishes. That week the supermarket only had it growing in pots so I bought eight. When Rajan saw me throwing the completely denuded plants into the bin next day he was horrified. Unbeknownst to me he rescued them, took them to his room and kept them on the window sill. It was the middle of winter and far too cold to plant them outside. Two months later in walks Rajan clutching eight flourishing coriander plants, a big smile on his face. It was a real “Ta da” moment, so I made all the right noises and told him how wonderful he was. He was very pleased with himself, this incident being further proof that Madam was indeed very wasteful.
Rajan and I spent many happy hours working together in the kitchen and putting the world to rights. He was often difficult to understand, especially when discussing India-Pakistan politics or cricket, so I usually found it easier just to agree with him. I tried on several occasions to get him to call me Mrs Peek, but he would always reply “Yes Madam”.
400g basmati rice, soaked in cold water for an hour Marinade:
1 cup plain thick yoghurt
2-3 green chillies (mine were 10cm+ long so I used 2)
1 tsp chilli powder (I substituted a rounded tsp of Sambal Oelek)
6 cloves garlic, crushed
1 heaped Tbs grated fresh ginger
1 tsp ground coriander
½ tsp ground turmeric
1 kg boneless, skinless chicken thighs, cut in halves Fried Onions:
1 cup vegetable oil
3 medium onions, thinly sliced Remaining ingredients:
10 whole cloves
1 cinnamon stick, broken
5 cardamom pods, bruised with a rolling pin
2 bay leaves
1 tsp cumin seeds
2 medium tomatoes, chopped
1 tsp salt
1 tsp sugar
100g clarified butter or ghee, melted
Pinch saffron soaked in 4 Tbs warm milk for 15 mins
2-3 tsp rosewater To garnish:
A handful of dry roasted cashews and/or pistachio nuts to garnish
A handful of raisins (not in Stein’s recipe but in many others)
Fresh coriander, roughly chopped
Mix chicken with marinade and put aside for an hour or more. Drain rice and cook in plenty of boiling salted water for 5-7 minutes or until just tender but still firm. Put aside to drain. Heat oil in a wok or large frying pan and cook the onions for 10-15 mins or until golden brown and crispy. Drain on paper towels.
Remove all but 3 Tbs oil from the pan. Keep the rest of the oil for another use. Cook the whole spices for a minute then add the chicken and its marinade, the tomato and salt and cook, stirring and turning the chicken from time to time over a moderate heat for 20-30 minutes, or until chicken is tender and liquid has mostly disappeared. Stein says to add a splash of water to the sauce if it starts to catch before the chicken is cooked, but I didn’t find this necessary.
To assemble the dish, mix saffron mixture and rosewater into the cooked rice. If you don’t have any saffron, substitute 1-2 teaspoons of turmeric. Place half the clarified butter or ghee and 3 Tbs water in a large heavy casserole with a well fitting lid. A Le Creuset-type is perfect. Spread over a third of the rice, then half the chicken and a third of the fried onions. Repeat with another third of rice, the remaining chicken, another third of the onions and finally the rest of the rice. Keep the remaining third of fried onions to garnish. Drizzle the remaining clarified butter or ghee around the edges of the rice so it drips down the sides and prevents sticking. Put the lid on the pot and place on the stove on a high heat. Lift up the lid to check and as soon as you see steam rising put the lid back and turn the heat to very low for 30 minutes.
Tip the Biryani onto a large serving platter, making sure you scrape up the crispy bits from the bottom of the casserole, as they are particularly delicious. Garnish with the remaining fried onions, the nuts, raisins and coriander.
A side dish of raita – a yoghurt and cucumber dish for which there are plenty of recipes online – goes well, as does a dish of fruit chutney.
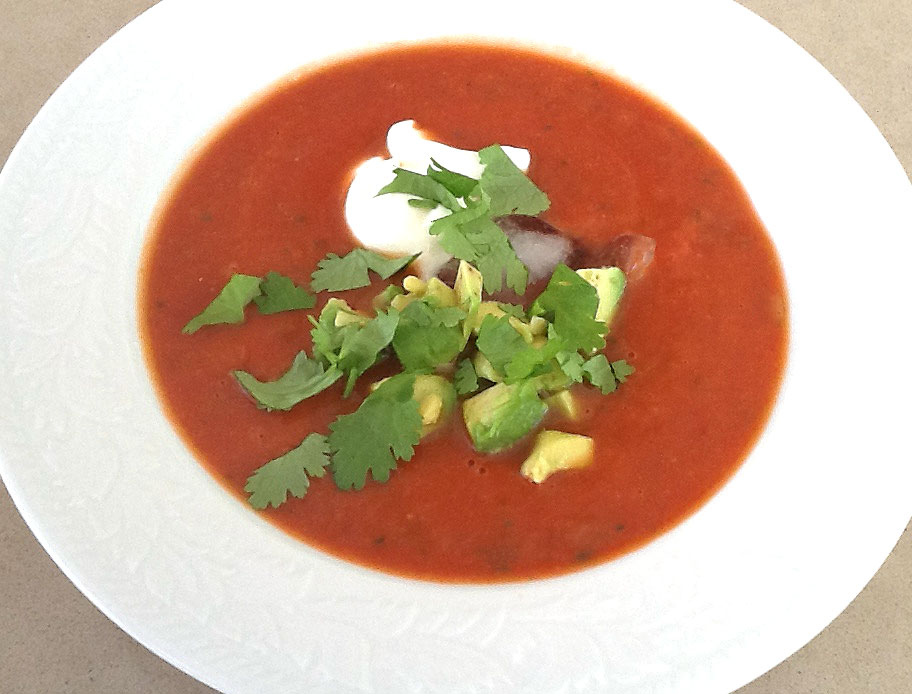
Having just picked our first Lebanese cucumber I decided to whip up a quick gazpacho and serve it for lunch 10 minutes later. I have a good recipe which makes several litres and serves a crowd, but it takes more than 10 minutes to make. So I threw the cucumber into the food processor, added some other ingredients until it tasted right, and here it is.
2 cups tomato passata from a jar 1 small Lebanese cucumber, washed and ends trimmed ¼ cup olive oil 1 thick slice of onion, red or white 1 Tbs sweet chilli sauce 1 small clove garlic, crushed Salt and freshly ground pepper to taste Juice of ½ a lemon Water To garnish: Greek yoghurt 1 small or ½ large avocado, diced Fresh coriander or parsley, roughly chopped with scissors
Place all ingredients except garnish in a food processor and whiz till smooth. Add enough water to make to desired consistency (it won’t need much) and adjust seasoning, then whiz again. Chill until serving time, or if you’re in a hurry just add a couple of ice cubes when you add the water. Divide between two serving bowls. Garnish with a dollop of Greek yoghurt, some diced avocado and chopped fresh parsley or coriander
Optional extra: some home made croutons. You can also add some red capsicum or a touch of fresh chilli. Instead of avocado top with some diced cucumber and/or tomato.
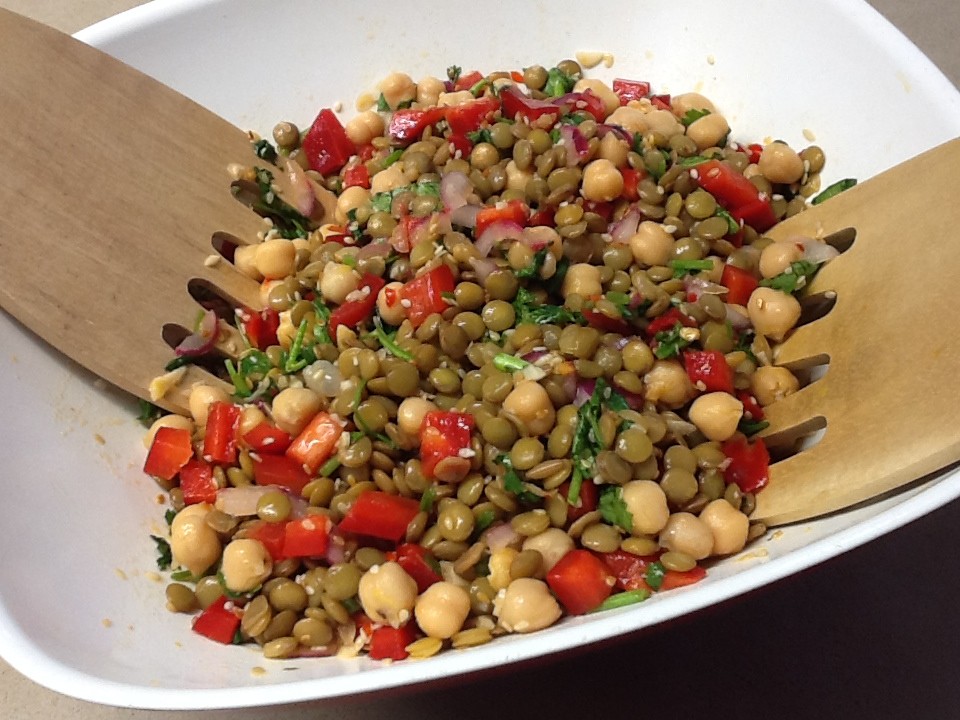
Some friends are on my culinary wave length, so I know when they give me a recipe and say this is great I will like it. This lentil salad recipe came from my friend Lynne. I just added the chick peas which provide a nice flavour and texture contrast. Leave them out if you prefer.
1¼ cups (250g) green lentils
½ red onion, finely chopped
1 small red chilli, seeded and finely chopped
1 red capsicum (pepper) seeded and diced
Grated rind and juice of 1 lemon
¼ cup olive oil
¼ cup sweet chilli sauce
2 cloves garlic, finely chopped
½ cup fresh coriander, chopped
2 tbs sesame oil
2 tbs toasted sesame seeds
Pinch salt
1 can chick peas, rinsed and drained
Place lentils in a saucepan and cover with plenty of water. Bring to the boil and cook gently for 5 mins. Remove from heat and stand for 5 mins or until lentils are al dente. Time will vary according to the lentils you use, but don’t overcook or you won’t get a nice crisp salad. Drain and rinse under cold running water. Add remaining ingredients, then cool. Can be made a couple of days in advance and kept in the fridge, which only improves the flavour.
I’ve always been a fan of green vegetables such as cauliflower, brussels sprouts and broccoli, which a lot of people don’t like. When I was growing up cauliflower was boiled – usually for far too long – and served with a knob of butter, or margarine, if you were lucky. Sometimes a parsley or a cheese sauce would vastly improve the situation. But when I think back to those over-boiled veggies, I realise it’s hardly surprising some people were put off eating them for life.
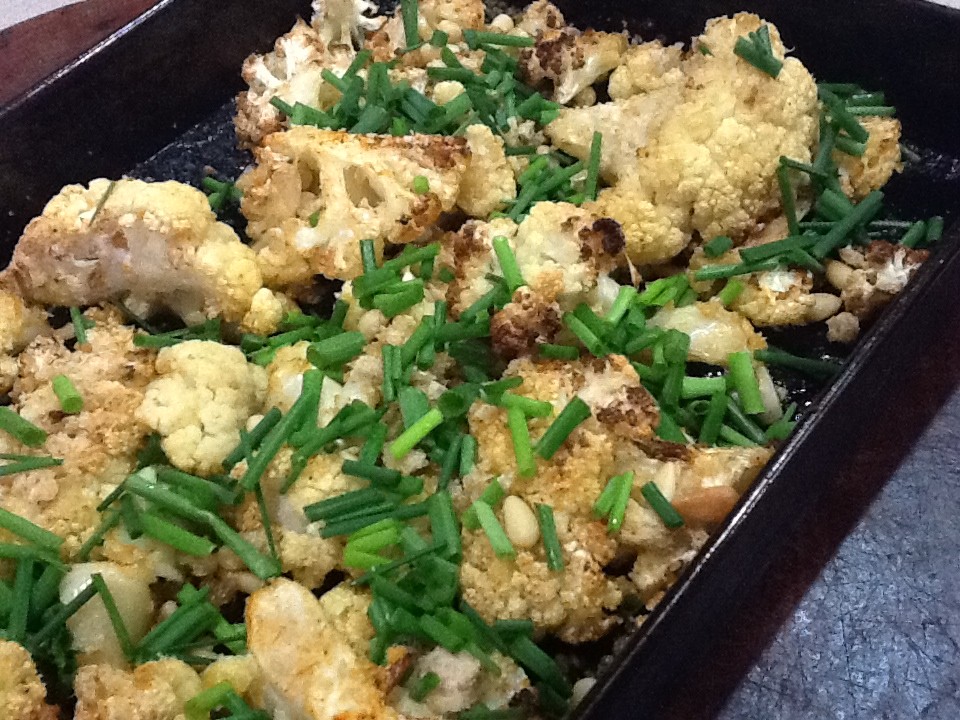
All those vegetables which were traditionally boiled in water are much nicer when roasted in the oven with olive oil. Asparagus for example takes on a whole new character when cooked in this way. If you’ve never roasted caulfilower, give it a try. You might even convert some members of the family who don’t normally like this vegetable.
1 small or half a large cauliflower, cut into large flowerets
1 tsp cumin
1 tsp paprika
Salt and freshly ground black pepper, to taste
2-3 Tbs olive oil
3 Tbs pine nuts
1 slice bread, made into crumbs in food processor
2-3 Tbs snipped chives
Pre-heat oven to 180ºC. Place cauliflower in a shallow roasting pan. Sprinkle with cumin, paprika, salt and pepper and drizzle with oil. Mix with fingers to coat thoroughly, then bake for 30-40 mins or until cooked “al dente”. About halfway through the cooking time give the cauliflower a stir and sprinkle with the breadcrumbs and pine nuts.
Serve garnished with the chives, either hot or at room temperature. It’s even nice cold.
As an Ambassador’s wife – an unpaid job I enjoyed for many years – I made food for more cocktail parties than I can remember.
Working on 10 per person, I used to reckon that a two hour cocktail party for 300 guests needed 3000 canapes. Some people eat less, but others definitely eat more and it’s always preferable to have a few left over than to run out. The trick is to start a week or two before the event and freeze anything which freezes well, which covers pretty much anything using pastry, such as mini quiches and empanadas. That just leaves the things that don’t freeze well – prawns, smoked salmon and so on – to be made on the day of the party. A chest freezer is essential in order to do this on a grand scale. I used to keep a running tally of how many items we had made so far – 200 of this, 300 of that – until the grand total came to however many we needed.
Nowadays our parties are much more normal in size, but I still like to plan ahead. These little quiches can be frozen and baked when needed so they are perfect. You can use various fillings, but leek or onion, spinach and feta and quiches lorraine are always popular.
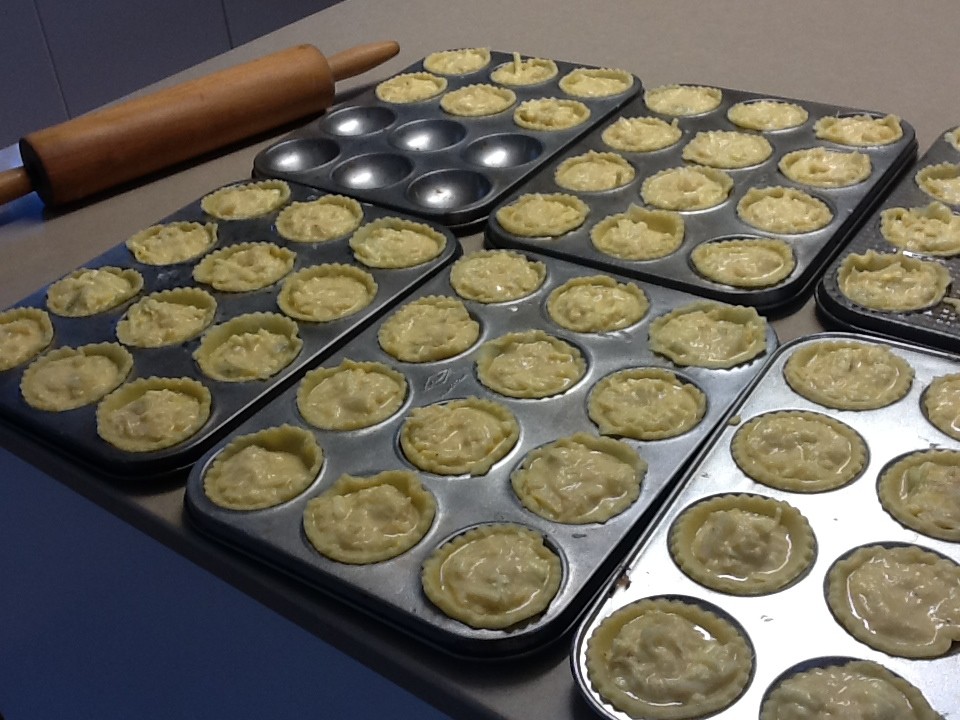
I’ve just made a few trays to have on hand over the Christmas-New Year period and you can see them in the photo, all ready to go into the freezer. Having collected them from second hand shops over the years, I have enough patty tins to make about 200 mini quiches. I also have some smaller tins, which produce a one bite, elegant little morsel, but they’re very fiddly to make so I usually make these bigger ones, especially now that I have officially retired from diplomacy!
Shortcrust Pastry (make twice):
250g plain flour
125g butter
good pinch salt
3-4 Tbs cold water Filling:
6 leeks, washed trimmed and chopped
50g butter
4 eggs
300 ml cream
150 ml milk
Salt and freshly ground black pepper
¼ tsp grated nutmeg
2 cups grated cheese (gruyere is best, but cheddar will do)
Pastry: Place flour, salt and butter in food processor and process until it looks like breadcrumbs. With the motor running gradually add about 3 Tbs cold water, stopping the motor as soon as the mixture starts to form a ball. Tip out, form into a ball, wrap in plastic wrap and refrigerate until needed. Can be refrigerated for 3-4 days or frozen for a month or two. For this recipe you will need to make this recipe twice.
Filling: in a large frying pan melt butter and add leeks. Fry gently for 15 minutes, stirring frequently, or until soft. Do not allow to brown. Cool. In a large bowl beat eggs with cream, milk, nutmeg, salt and pepper. Add cooked leeks and grated cheese and mix well.
Roll out pastry thinly using a little plain flour to prevent sticking and cut circles to fit patty tins. Very lightly grease the tins, then line with pastry circles. Fill with leek mixture, level with the top of the pastry. Freeze tins uncovered until frozen, then cover each tin with a supermarket bag. Once frozen the plastic bags won’t stick to the quiches, so you can store them stacked one on top of the other.
To serve, remove plastic bag and bake from frozen for 30-40 mins at 180°C. If not frozen they will take 20-30 mins. Cool for 5-10 minutes, then remove from tins with a knife and serve warm.
Variation: for Mini Onion Quiches use 6 large onions instead of leeks
When we lived in Chile in the 1990s I was President of Santiago Stage, an amateur theatre group which produced 3 or 4 plays a year in English. We raised money for a hospital which treated burnt children called Coaniquem and over two years we completely transformed a children’s home for 130 orphans called Los Girasoles. It was very satisfying and we had a lot of fun doing it. Our sitting room became the set for rehearsals for weeks on end. Fortunately I have a very tolerant husband.
While I was in Santiago recently my dear friend Elaine hosted a lunch to reunite our thespian friends. Elaine and I met in 1992 when we both had parts in a play called Home by David Storey. It’s about a home for people who are not quite right in the head, so we were definitely type cast. Elaine’s paternal uncle was the famous British actor Quentin Crisp and she has inherited his ability to tell a good story and make people laugh. When we took the play on tour to Concepcion (yes, we were very proud telling everyone that!) Elaine and I spent several hours in the dining car of the overnight train, drinking pisco sours and telling each other stories. We laughed so much I had a pain in my side. How we managed to get back to our carriage and into our narrow bunks I will never know. Elaine says I made her climb the ladder and sleep in the top bunk, but I honestly can’t remember.
When we arrived in Concepcion we were met by the head of the British Council. He had undertaken to book the theatre and sell tickets and we were staying at his house. As Elaine and I unpacked we could hear him making frantic phone calls. He had completely forgotten we were coming and hadn’t sold any tickets. We performed to an audience of about 20, but fortunately they all clapped loudly.
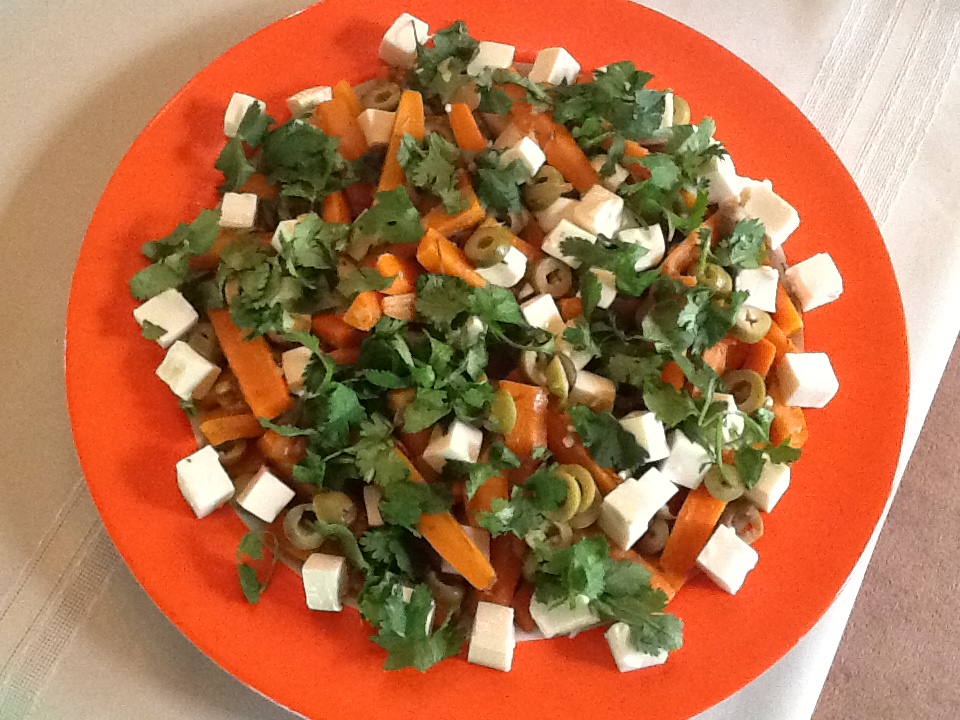
The day of the Santiago Stage reunion lunch was warm and sunny so we were able to sit outside. Elaine decided to do a buffet, consisting of quiches and lots of different salads and I helped. This carrot salad has been in my repertoire for many years and it’s always a good addition to a buffet, being both unusual and filling. Elaine had a lovely orange plate which was perfect to serve it on. Using whole baby carrots, if you can get them, makes it look even snazzier.
1 kg carrots peeled and cut into fat sticks
2 large onions, chopped
2-3 bay leaves
2 Tbs fresh thyme or 4 tsp dried thyme
1 tsp sugar
1 tsp cumin powder
4 Tbs olive oil
Salt and freshly ground black pepper
2 Tbs sherry vinegar (or substitute another vinegar)
100g stoned green olives (I use pimento stuffed ones, cut in halves)
100g feta cheese (or substitute soft goat’s cheese)
Juice of one lemon or lime
Chopped fresh coriander
2 Tbs finely chopped preserved lemon, skin only (optional)
Heat oil in a large frying pan and cook the onions gently until soft – 5 minutes or so. Add the carrots and cook, stirring for 5 minutes more. Add thyme, sugar, cumin, salt and pepper, cover and cook for another 5 minutes, stirring from time to time. Add vinegar and cook for 15 minutes, stirring once or twice. Add olives, cover again and cook for another 10-15 minutes. Carrots should still have a bit of bite left in them. Place in a serving dish. Add the feta cubes and squeeze over the lemon or lime juice at the last minute. Garnish with the coriander and preserved lemon, if using. If preferred, keep the olives till the end and sprinkle them over with the coriander as a garnish as I did in this photo. Serve at room temperature.