I began collecting recipes when I was at school. Some of the recipes in my large collection have been in my family for generations, others were passed on by friends and chefs around the world. Many have been adapted over the years to make them lighter or update their presentation. I’ve served them to royalty, PMs and other VIPs and there have been no complaints. I hope you are inspired to make some of them.
This recipe makes about two and a half cups of delicious, fresh berry jam. It’s not cooked, so it will only keep for a few days in the fridge. Serve with fresh scones, croissants or Greek yoghurt. It also makes an amazing filling for a cream and jam sponge cake.
It works on the principle that when chia seeds are mixed with liquid they swell up and thicken the liquid. Have you ever tried chia seeds for breakfast? Soak them overnight in milk or juice, then add to your usual muesli and fruit mix.
2 cups fresh or frozen raspberries (or other berries)
3 Tbs honey, sugar or a sweetener such as Stevia
4 Tbs chia seeds
¼ cup water
1 tsp vanilla essence (optional)
Thaw the berries if frozen and crush them a bit with a fork. Add remaining ingredients and stir well. The jam will thicken as the chia seeds swell. This will take several hours or overnight. Keep in the fridge and use within a few days. Can be frozen, so you might like to freeze half and use half.
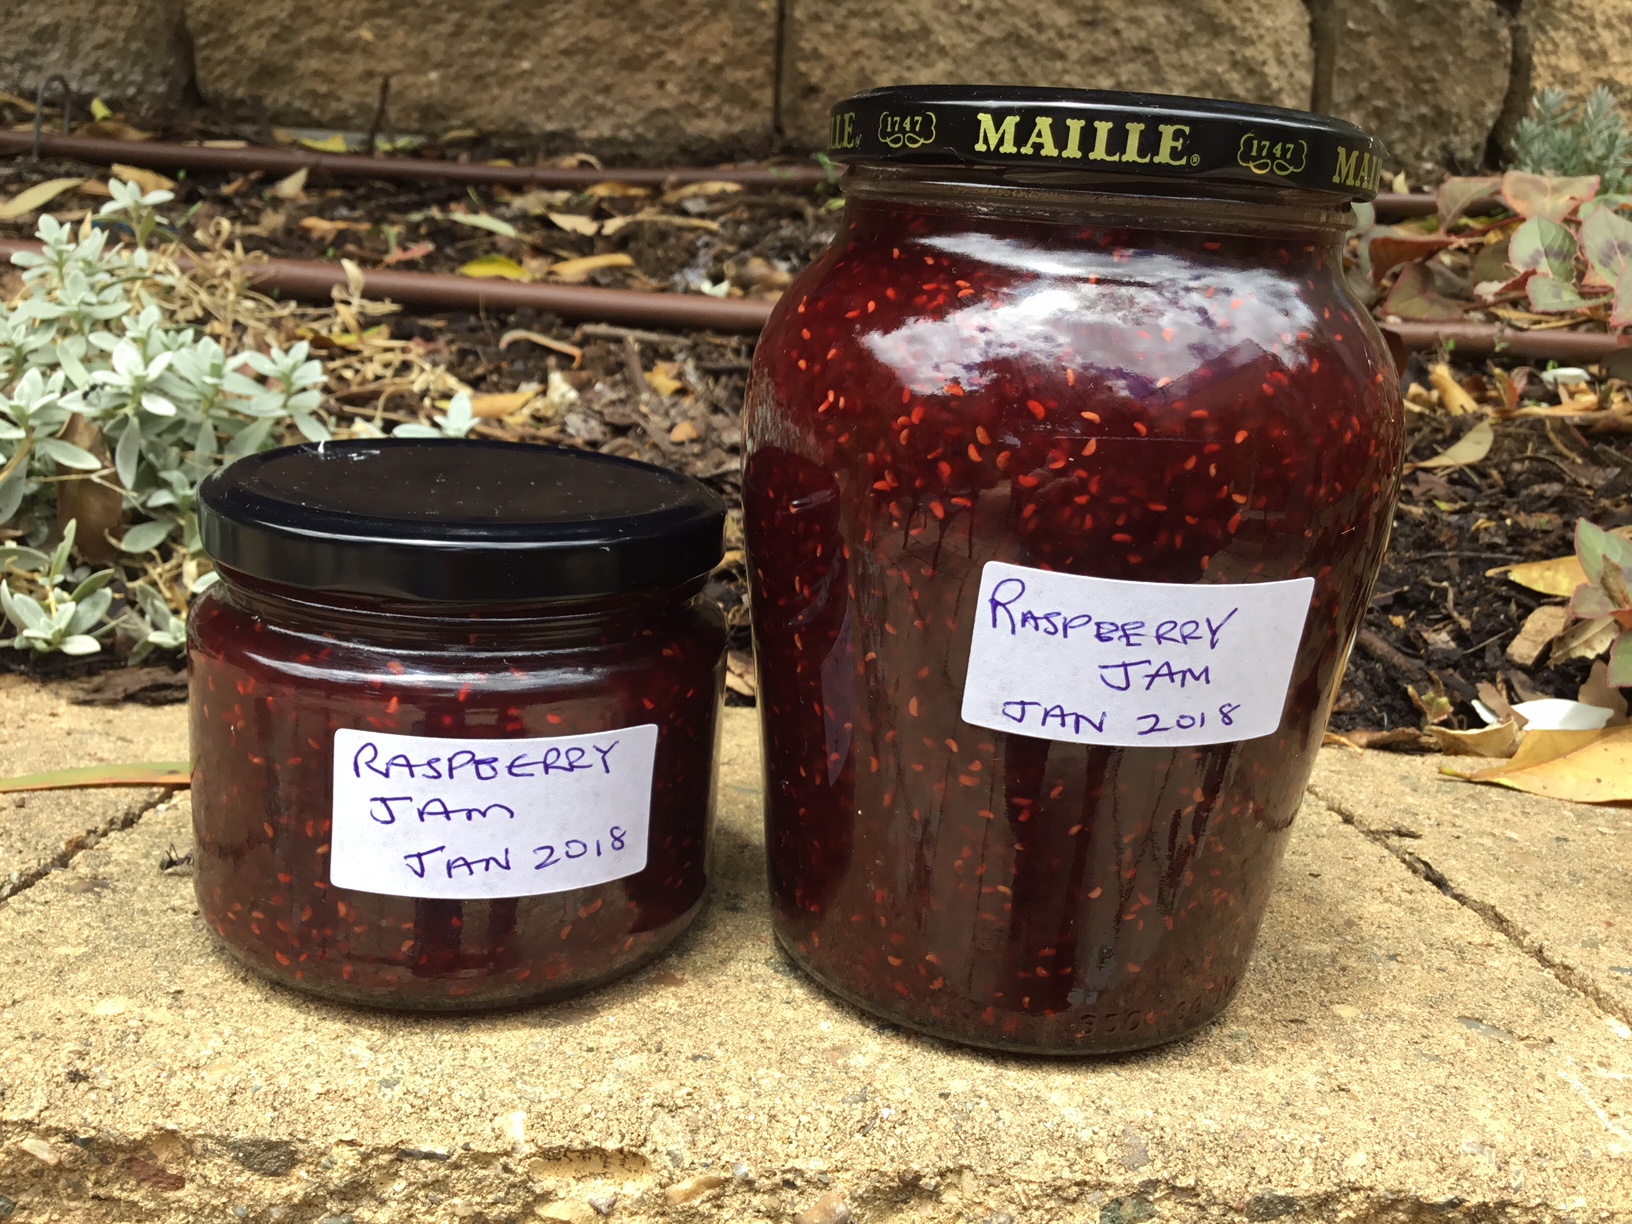
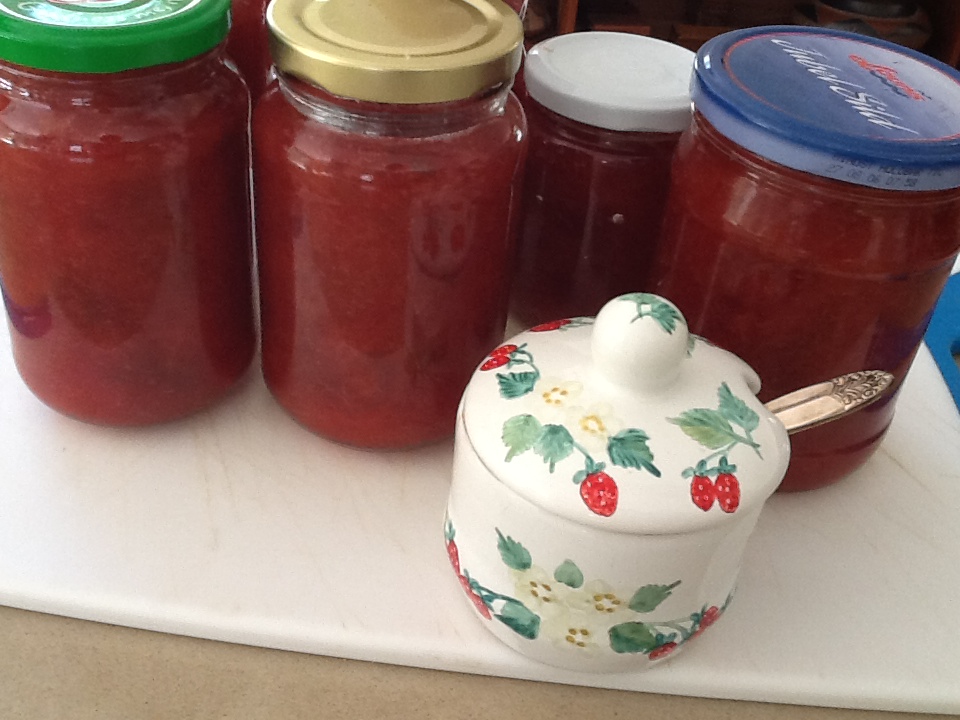
There are three good times to make raspberry jam. Firstly with fresh raspberries if you have them growing in your garden. Secondly with fresh raspberries in mid-summer, when they’re at their lowest price in your local farmer’s market or supermarket. And thirdly with frozen raspberries. So basically any time is a good time as frozen berries work just as well as fresh ones and they’re considerably cheaper. With frozen fruit the jam ends up a darker red, as you can see in the photo.
Holidays spent as a child with my Dad’s cousins at Hill House, a dairy farm in the very north of England, had a huge impact on my love of cooking. From Great Auntie Vina and Little Mary I learnt how to bake a full repertoire of cakes and pastries. And my Dad’s cousin Big Mary, so-named in order to distinguish her from her brother’s wife Little Mary, who was much shorter, taught me to make raspberry jam. She also gave me the recipe for a spectacular dessert called Mexican Bombe which I make for special occasions. It’s not on the Weight Watchers diet, but everyone loves it.
Unopened jam keeps for several months without refrigeration, but Big Mary said it was best to make a kilo or even half a kilo of raspberries into jam and keep the rest in the freezer to make another batch at a later date. Freshly-made raspberry jam, she said, was much nicer than jam made a few months ago.
With experience you will know when jam has reached setting point, just by looking at it. If you’re new to jam-making the best way to check for setting point is as follows. Put a saucer in the freezer before you start, so it gets very cold. When you think the jam may have reached setting point (which varies according to the acidity of the fruit from 5 to 20 minutes) place a scant teaspoonful onto the cold saucer then put it back in the freezer for a minute or until cold. To avoid over-cooking most cookbooks suggest you take the jam off the heat while you’re testing. Push the cold jam with your finger and if it’s ready you will see that it’s starting to gel. If it’s not ready it will still be liquid when cold.
Raspberry jam is delicious on fresh bread or with croissants. It’s also the perfect topping for thick Greek yoghurt or as a filling for a sponge cake, with some whipped cream. And if you ever make too much to eat yourself, it makes the perfect gift.
1 kg raspberries (fresh or frozen)
800g sugar
A small knob of butter
Place raspberries in a large heavy-bottomed pan with sugar and heat gently, stirring, until sugar has dissolved. A preserving pan is best. Bring to a rolling boil and boil for 5 minutes or until setting point is reached. Stir in a knob of butter which will dissolve any scum.
Pour into hot sterilised jars. Place lids on while jam is hot. Store in dark cupboard and refrigerate after opening.
To sterilise jars, wash thoroughly in hot soapy water, rinse in hot water, then drain. Microwave on High (without lids) for 2 minutes just before you pour in the jam, so they are still hot. Dry the lids and put them on immediately.
Variations: For strawberry jam add the juice of a lemon when cooking the fruit. I like to use small strawberries for jam rather than the huge ones you can buy these days. For apricot jam start by cooking the fruit in 2-4 Tbs water (less if fruit is very ripe, more if not), then proceed as above, adding the juice of a lemon.
Making Tomato Chutney was on the agenda this weekend. We were onto the last jar and running out is considered grounds for divorce in our house. A trip to the fruit and vegetable market in the last hour before closing provided some lovely ripe tomatoes at a bargain price. Matthew always helps with the chopping, so it didn’t take long to get all the ingredients in the pan.
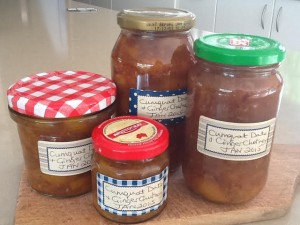
We have a cumquat bush in the garden which is well over 2 metres high. I picked several kilos of fruit a few months back and made them into marmalade as I do every year. The few ripe cumquats that I had missed were starting to fall to the ground as the new season fruit appeared. So while I was in the preserving mood I decided to pick them and see if there were enough to make something. With just one kilo and a few ingredients from the pantry I came up with this tangy spicy chutney which tastes quite different to the tomato one.
The dates add consistency and a delicious caramel flavour. Serve with ham, cold pork, duck or chicken.
1 kg ripe cumquats 1 cup fresh orange juice 2 Tbs lemon juice 2-3 Tbs grated fresh ginger 2 cups sugar 2 medium to large onions, peeled and finely chopped 1 cup chopped dates 1 tsp salt Spices: 12 cardamom pods 1 cinnamon stick, broken in two 3 star anise 1-2 dried birds-eye chillies, broken in two
Cut cumquats into halves or quarters, depending on size and remove seeds. Place in a large heavy-bottomed pan or preserving pan with remaining ingredients. Place spices in a piece of muslin and tie firmly into a small bundle with string, then add to the pot. An old cotton handkerchief or a piece of any thin cotton fabric will do.
Bring to the boil then simmer for about an hour, stirring often, until thick. Remove spice bag, cool it a bit, then remove any bits of chutney stuck to it and return them to the pot. Discard spices, wash out the cloth and keep for next time.
Place 4-5 empty jam jars without their lids in the microwave and zap on High for 2 mins. Fill with the hot chutney using a jug and seal firmly with the lids. Label then store in a dark cupboard where it will keep for several months. Refrigerate after opening.
Where would we be without the humble onion? White, brown, red, cooked or raw, pickled or fried, roasted or stewed. They’re an integral part of cooking around the world.
Onion jam is a delicious way to add some sweet onion flavour to all sorts of things. Use it in toasted sandwiches, on bruschettas, spread over the base of a savoury tart or pizza or served with a grilled steak.
2 kg onions ½ cup olive oil 375ml balsamic vinegar 2/3 cup dark brown sugar, firmly packed ½ to ¾ tsp salt, to taste 2 tsp dried thyme leaves or 4 tsp chopped fresh ones
Peel and slice onions thinly. This takes no time at all with a slicing attachment on a food processor, but you can do it by hand. Heat oil in a large heavy-bottomed pan or preserving pan. Add onions and cook, stirring, for 5 mins or until they start to soften. Cover and cook for about 45 mins over medium heat, stirring from time to time.
Remove lid and continue to cook for another 30 mins, stirring from time to time. Add sugar and balsamic vinegar, stir to dissolve sugar, then bring to the boil and simmer for a further 30 mins. Add thyme and salt and cook for about 10 mins, stirring often, until you have a thick, slightly sticky jam-like consistency.
Place 3-4 standard jam jars or 6-8 small ones in the microwave, without their lids and zap for 2 mins on High. Fill jars with the onion jam then push a knife blade in, right to the bottom, all the way round, to remove any air. Seal with lids while hot. Will keep for several months in a dark cupboard. Refrigerate after opening.
Candied or glacée fruit has been made for centuries as a means of preserving fruit through the winter months. During a recent wander around the Adelaide Central Market I came across some Candied Vanilla Pears, which inspired me to have a go at making my own. They were a rich dark brown colour and delicious. They almost looked as if they were made of chocolate.
After reading through half a dozen recipes online, I found one which uses a slow cooker. This appealed to me as you can go away and leave the fruit to cook for hours without looking at it. It’s a time-consuming activity and you only end up with a few pieces, but having successfully done one batch I think I’ll do some more. The criss-cross pattern you can see in the photo is from the wire rack!
For those who have never been, the Adelaide Central Market is fabulous. Around 80 under cover stalls selling fresh fruit and vegetables, as well as fish, meat, bread, cheeses and other gourmet delicacies. It’s open every day except Sundays and public holidays. I wish we had something similar in Canberra.
6-8 large pears, only just barely ripe water sugar 1 vanilla pod, split, seeds scraped out 2 very heaped Tbs glucose syrup (about half a 500g jar)
Halve pears lengthwise. No need to peel and you can leave the stem on one half. Use a metal skewer to pierce fruit all over. Place in slow cooker and add enough water to barely cover. Remove pears and measure the water – mine was a litre or four 250ml cups. In a medium saucepan, heat the water with one and a half times the amount of sugar – so for me that was six cups – stirring to dissolve the sugar.
Put pears back in slow cooker with enough syrup to cover, keeping the rest as spare in case you need to top up. Add vanilla pod and seeds, cover, turn the heat setting to high and cook for 6 hours. The recipe said to turn the pot down to low setting, but it also said the liquid should be gently bubbling. In my slow cooker that meant using the high setting. Keep an eye on it and if they seem to be cooking at more than a bare simmer, turn the heat down to low. If you cook the pears too quickly they will break up.
After six hours turn off the heat and leave to cool overnight. Next day turn to high and repeat the process, letting it gently simmer with the lid on for six hours. Next day do the same again, so that’s three times in total. I found I didn’t need to add more liquid but if you do, use the reserved syrup to top up.
Next day add the glucose syrup, turn the slow cooker to high and when it starts to bubble cook for about 3 hours, adding more syrup if pears are not covered.
Remove fruit from syrup while it’s still warm and place on a wire rack to drain. Keep the rich dark brown syrup to serve drizzled over pancakes or waffles. It will keep for months in a sealed bottle.
When fruit has stopped dripping preheat oven to 100ºC. Place the rack over a baking tray and place in the oven for an hour or two. When the surface of the fruit no longer feels very moist to the touch they are ready. Don’t overdo it or the pears will be a bit chewy. Leave the pears as they are for a shiny look, or roll each piece in granulated sugar for a frosted look.
Fruit will keep for several months in a tightly sealed container. Serve with cheese – they go especially well with brie and cheddar and look great on a cheese board.
Makes 12-16 pieces
Note: if preferred, cut pears into quarters instead of halves.
I’ve always made my own jams and chutneys from fruit we’ve grown or with donations from friends who have a glut. They are so much nicer than bought ones. Sometimes I freeze the fruit and make the preserve later – for example peeled tomatoes for tomato chutney or sliced cumquats for marmalade. Matthew says he married me for my tomato chutney and that running out is considered grounds for divorce. That recipe, which came from my paternal grandmother, clearly formed a crucial part of my dowry!
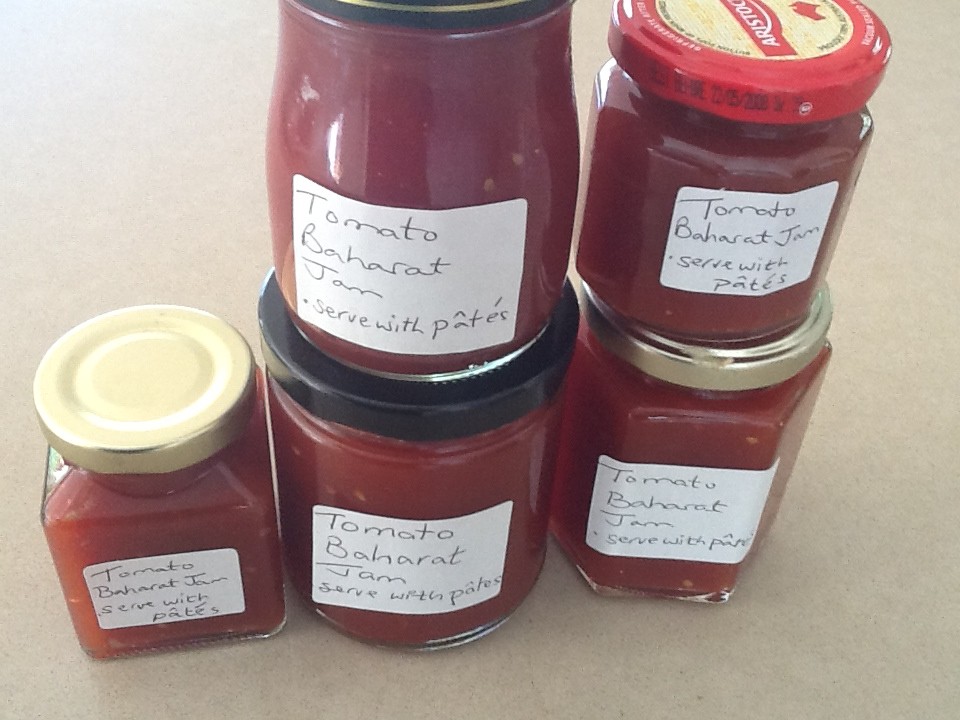
A recipe for a lovely bright red preserve called Tomato Baharat Jam appeared in a recent edition of Delicious magazine, as an accompaniment to chicken liver pâté. We found that it also goes superbly with cheese – especially brie and cheddar – and ham. I’ve doubled the recipe and cut down a bit on the sugar and I don’t think it’s necessary to discard the pulp and seeds, but you can if you prefer.
This is the first time I’ve made it so I’m not sure how long it will keep without refrigeration. The ratio of sugar to fruit is not high, so I think it will keep for a month or two in a dark cupboard and should be refrigerated after opening.
1.2kg tomatoes, peeled
300g sugar
6 star anise
5 cloves
4 cinnamon quills, broken in half
2 Tbs tomato paste
Juice of 1 lemon
Salt and freshly ground black pepper
Chop tomatoes and place in a sieve to drain off any liquid. Discard liquid and place tomatoes in a large, heavy-bottomed pan with the sugar and spices. Simmer over medium heat, stirring from time to time, for 25 minutes. Add tomato paste and lemon juice, reduce heat and continue to cook, stirring often, for 20 minutes or until reduced and thickened to the consistency of jam or chutney. Season to taste with salt and pepper and remove the spices. The cloves might be difficult to find, so just leave them in.
Place about 8 small clean jars in the microwave without their lids. Mustard jars and small jam jars are ideal. Heat on high for 2 minutes to sterilize. Fill jars with the hot tomato jam, seal with lids.
Makes about a litre
Note: if you don’t have whole spices use ¼ tsp ground cloves, 1 tsp ground star anise and 2 tsp ground cinnamon.
When I moved from the UK to Australia I was amazed to see lemon trees growing in most Canberra gardens. While night time temperatures in winter can be several degrees below freezing, the days warm up sufficiently to allow citrus trees to flourish in a sunny, sheltered spot. So the soil isn’t frozen solid for several months, as it can be in northern Europe.
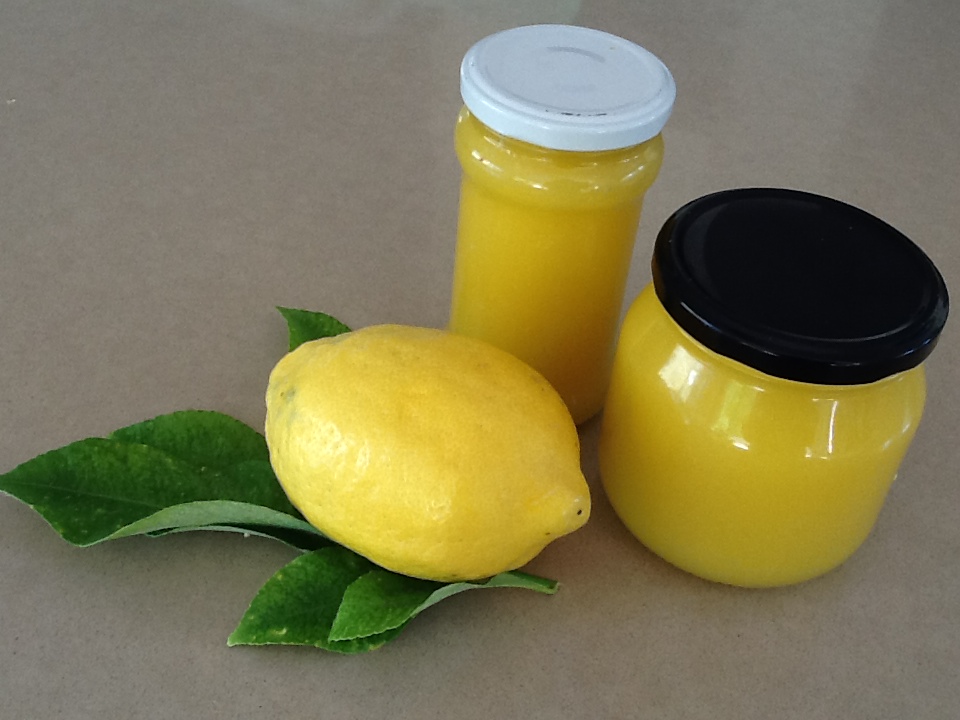
We have a large lemon tree in the courtyard just outside our kitchen and it’s always laden with fruit. At about this time of year it’s important to pick the remaining lemons, otherwise we won’t get a new crop next season. They will keep for a while in the fridge, but it’s always a good time to make some Lemon Curd or Lemon Butter, as it’s sometimes called.
In the UK where I grew up it was much too cold in winter to grow lemons, so my mother bought them. We could hardly wait for her to finish making this deliciously tangy spread which we devoured on fresh buttered bread or in small pastry tartlets. Try a dollop on some thick Greek yoghurt for a delicious snack. Or swirl it decoratively through the yoghurt in a tumbler then top with a few fresh raspberries when you need to come up with a last minute dessert. Or make this delicious and quick Blueberry Parfait.
Adding a little salt really makes a difference and brings out the flavours. A Queenslander once told me you should eat fresh pineapple with a light sprinkling of salt, for the same reason.
4 large juicy lemons
4 eggs, beaten
450g (2½ cups) sugar
125g unsalted butter
1/2 tsp salt
Finely grate the rind of the lemons and remove the juice. Place all ingredients in the top half of a double boiler or in a heatproof bowl set over a pan of simmering water. Stir constantly with a wooden spoon until butter melts, sugar dissolves and mixture thickens to the point where it coats the back of the spoon.
Heat clean jars (remove lids first) in microwave on High for 2 minutes. Pour the hot lemon curd into the hot sterilized jars and seal with lids. When cold store in the fridge.
If you live in Australia and have access to a prunus tree, now is the time to make jam. In Canberra you find them in many public areas. The fruit which is not eaten by the birds just falls to the ground and rots. I have a friend whose dog thinks they’re delicious and eats any she can find at the park where we meet with our four legged friends. Her owner has to stop her so she doesn’t get an upset tummy. While the plums are too acid to appeal to most people uncooked, they make a delicious, tangy jam with a lovely bright red colour.
Prunus plums seem to ripen at different times on different trees, so you need to keep an eye on your target and pick them before it’s too late. As soon as the birds start to take an interest you need to be quick! One week they’re ready, the next they’re all gone.
The plums are quite small so removing the stones by hand after the fruit is cooked is the easiest way to do it, but it does involve getting your hands into the pot! If you miss some it only gives authenticity to the finished product. Well that’s what Matthew who was doing the de-stoning said.
The more pectin fruit has, the more acid it tastes and the more quickly it will set. Some jams, such as strawberry and apricot, can take forever to reach setting point, which is why recipes often suggest adding some lemon juice. One way to check if the jam has reached setting point is to put a small plate in the freezer and let it get very cold, then put a teaspoon of jam on the plate (taking the jam off the heat while you do it) to see if it sets. With experience you can tell just by looking. With Prunus Plum Jam it’s not really necessary to test because the fruit has lots of pectin and the jam sets very quickly. Many jam recipes call for the same weight of sugar as fruit, but we prefer ours to be more tangy so I always cut down. This jam is delicious on toast, with scones or swirled through thick Greek yoghurt as a dessert.
2 kg ripe prunus plums
500 ml water
1 kg sugar
1 knob of butter about the size of a walnut
Wash plums and place in a large heavy-based saucepan or preserving pan. Add water, bring to the boil and simmer, stirring often, until fruit is soft. Cool then remove as many stones as possible, by squeezing the fruit by hand. Add sugar and bring slowly to the boil, stirring. When sugar has dissolved boil steadily, stirring often, for 3-5 minutes until setting point has reached, then add the butter. Meanwhile heat 6-8 clean jam jars in the microwave on high for 2 minutes (without their lids). Pour hot jam into jars and seal immediately. Keeps for up to a year in a dark cupboard. Refrigerate after opening.
With all the rain we’ve had lately, we have a bumper crop of kumquats. I usually make kumquat marmalade, sometimes with the addition of fresh ginger. Last year I also made a compote which was delicious served at room temperature with labneh. Cut them up, skin and all, removing as many seeds as possible and place in a saucepan. Add a little water and sugar to taste – as if you were stewing apples or rhubarb. Then simmer gently until tender. I also made some preserved/candied kumquats rolled in sugar. Delicious but a lot of work. This year I thought I would have a go at preserving some in salt, to use the way you use preserved lemons – in couscous, tajines, rice salads and so on. I did some research on Google, found a large jar and here is the result. In the photo you can also see two jars of lemon quarters which were preserved with salt in the same way about two months ago. Adding a little sugar is an optional extra I found in some recipes for preserved kumquats online. I have never used any sugar when preserving lemons, but thought I would give it a try.
Kumquats preserved in Salt
Enough kumquats to fill a large jar salt sugar (optional) lime or lemon juice
Wash and dry the fruit, then cut them in half. No need to remove the seeds. Pack fruit into a large jar with a tightly fitting lid, sprinkling each layer generously with salt and, if liked, a little sugar. As a rough guide I used about a tablespoon of salt and a teaspoon of sugar for every 8-12 kumquats. Fruit varies in size – ours are huge this year. Press down on the kumquat halves, so you can squeeze in as many as possible. Add enough lime or lemon juice to come about a third of the way up the jar, then seal with the lid. If you have a metal lid it’s best to put a piece of baking paper over the top of the jar before the lid. This will stop it from being corroded by the salt. Keep the jar in a sunny kitchen window for about two months, or until the fruit is soft and “preserved”. Every day turn the jar upside down to distribute the juice and salt evenly. If the jar doesn’t leak you can stand it upside down every other day. When ready the fruit will have softened and be less bright in colour – check on progress by removing the lid and having a look. Store the preserved kumquats in a dark pantry or cupboard where they will keep for at least a year
Uses for preserved lemons and kumquats: Most recipes say to throw the flesh away and just use the diced skin, but you can use the flesh if you like to add a nice citrus flavour to curries and casseroles. In Vietnam kumquats preserved in this way are used to get rid of a sore throat or cough. Just eat the whole thing!
The Kangaroo Valley is a little oasis in New South Wales, a couple of hours drive from where we live in Canberra. Very picturesque, it has a micro-climate which favours all kinds of produce. A friend has a house there and every year at about this time she takes orders for some fabulous organic limes grown by a friend of hers.
As he eats most of the marmalade in our house (I’m a confirmed muesli muncher) my husband Matthew always volunteers to do the cutting up, which is rather a tedious job, especially cutting the peel into thin shred. And to be honest I don’t have a good track record when it comes to fingers and very sharp knives. Using a food processor to speed things up just doesn’t work with this recipe – believe me, I’ve tried!
This recipe came from my sister in law Rachel and it’s fabulous. I use only two thirds of the sugar because we like our lime marmalade to be very tangy. I can’t tell you exactly how much the recipe makes, but it’s a lot. I filled 12 jars of varying sizes, as you can see from the photo. It will keep in a cupboard for at least a year. In fact we have just one jar left from the batch I made a year ago.
Rachel’s Lime Marmalade
1.5kg limes
2-3kg sugar*
3.6 litres water
Choose very ripe limes which are just starting to turn yellow as they have more juice.
Wash fruit, remove peel with a vegetable peeler and cut into fine strips. Remove pith from the fruit using a small serrated knife and place in a large saucepan with the pips (if there are any) and about half the water. Chop up the fruit and place in another large pan with the peel and the rest of the water. Simmer both pans gently for an hour or until the peel and pith have softened. Strain the pith and pips. Keep the liquid and throw the pith and pips away.
Place clean jam jars without their lids in the oven and turn to 100°C. In a large wide topped saucepan or a preserving pan place the liquid from the pith, the sugar and fruit. Heat, stirring until the sugar has dissolved. Bring to the boil, boil for 2 minutes then pour into the hot jars using a small jug and seal with the lids while hot. As limes contain so much pectin the marmalade starts to gel even before it comes to a boil, so there’s none of that boiling and testing you have to do with other jams, to see if setting point has been reached.
Makes 10-12 jars depending on size.
* Adjust sugar according to your taste.The original recipe uses 3kg of sugar. The first time I made it I used 2.5kg and it worked perfectly. I now make it with only 2kg of sugar and that’s how we like it.


 Making


 as you can see from the photo. It will keep in a cupboard for at least a year. In fact we have just one jar left from the batch I made a year ago.