I began collecting recipes when I was at school. Some of the recipes in my large collection have been in my family for generations, others were passed on by friends and chefs around the world. Many have been adapted over the years to make them lighter or update their presentation. I’ve served them to royalty, PMs and other VIPs and there have been no complaints. I hope you are inspired to make some of them.
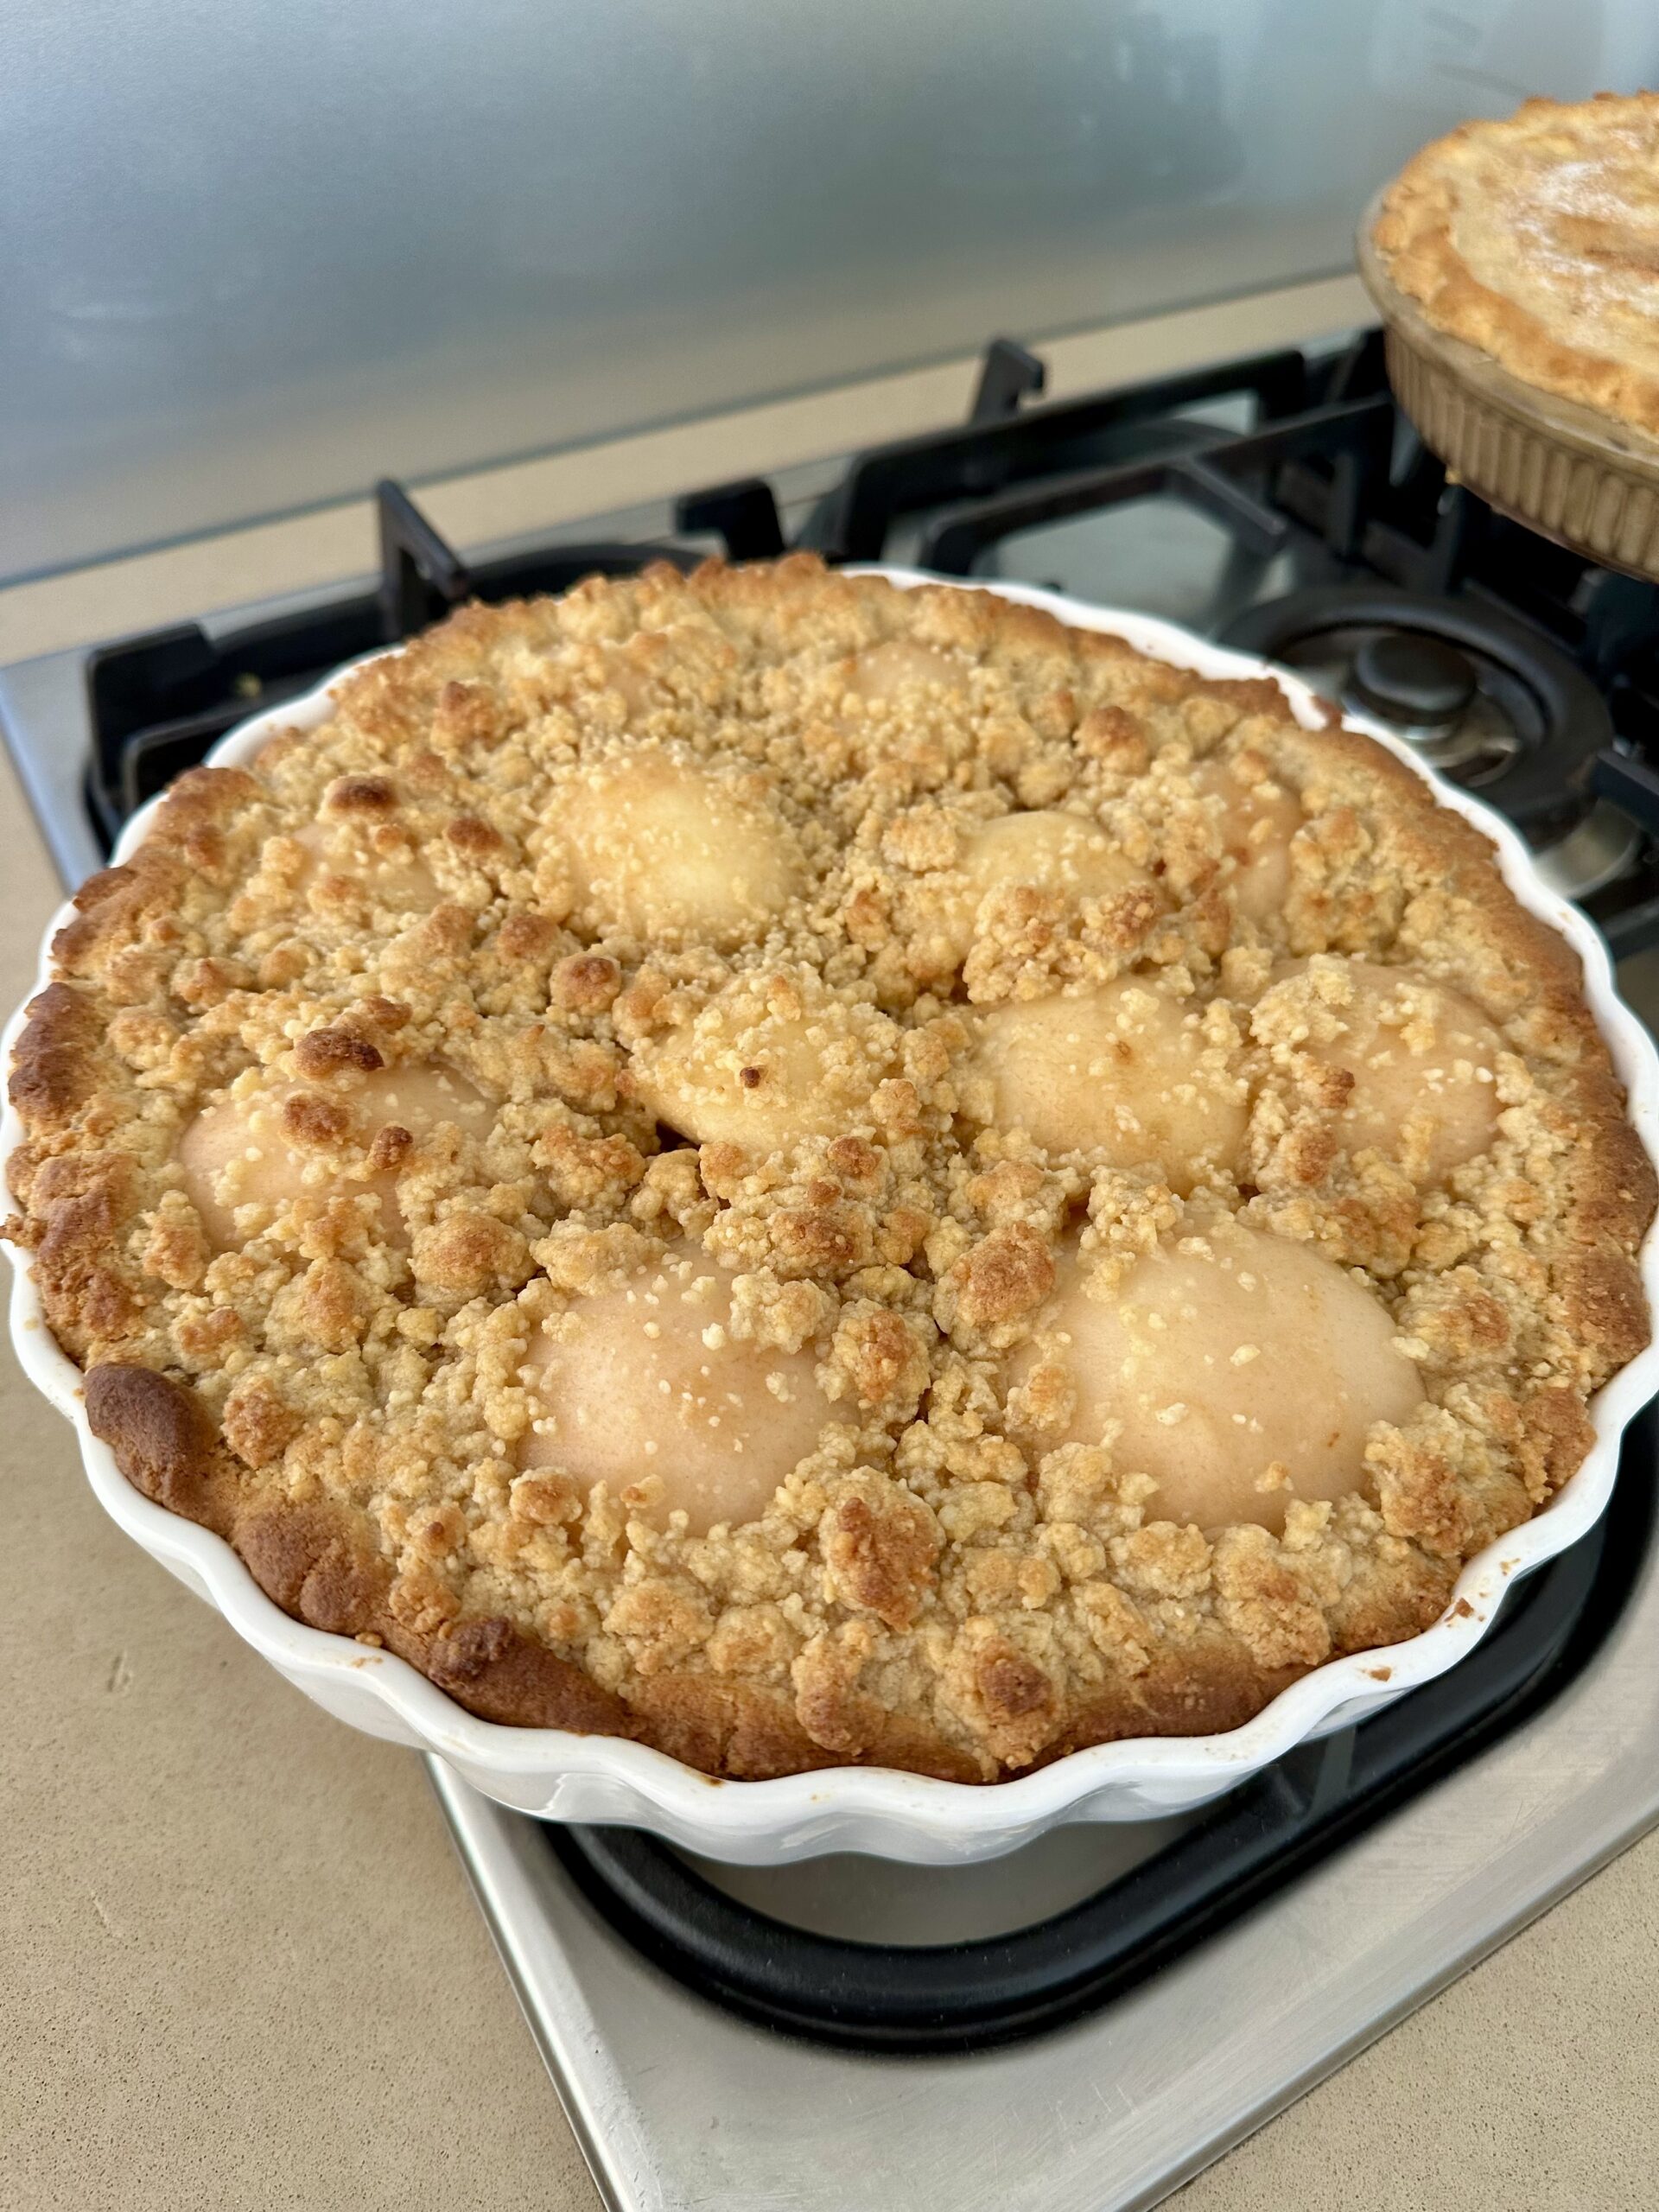
Using a food processor, this delicious cake is ready to go in the oven in the time it takes for the oven to heat up. I cooked it in a ceramic quiche dish, but you could use any cake pan, either springform or paper-lined. You want the pears to be ripe but not overripe.
Served with a cuppa, or as a dessert, with a dollop of creme fraiche or whipped cream, this recipe is a winner. Pears and ginger go very well together.
5 or 6 large ripe pears, peeled and cored
2½ cups self raising flour (300g)
180g butter, cut into cubes
1/3 cup sugar
1 large egg
2 or 3 tsp ground ginger (to taste)
½ tsp salt
½ cup chopped preserved (glacé) ginger To serve:
Creme fraiche or whipped cream
Preheat oven to 170°C and prepare the cake pan or dish.
Place flour, butter, sugar, ground ginger and salt in food processor. Process until mixture starts to stick together into clumps. Add the egg and chopped ginger and process just enough to form a soft dough. Scrape out onto the counter and divide into two balls – one of one third and the other of two thirds.
Using your fingers, break pieces off the two thirds ball and press them over the base and about 3cm up the sides of the cake pan. Cut the peeled pears into halves or quarters and arrange them over the pastry base. I cut four into halves and one into quarters, which I used to fill in the hole in the middle, but you might prefer to cut them all into quarters. I used 5 large pears altogether.
Crumble remaining dough over the pears so it looks like an apple crumble. Bake for 50-60 mins or until golden brown and cooked in the middle.
Serve warm or at room temperature with crème fraiche or whipped cream.
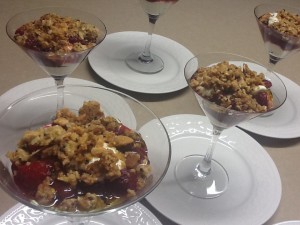
Adapted from a recipe by Yotam Ottolenghi, these Sweet and Salty Cheesecakes with Cherries and Crumble are delicious. The saltiness of the feta cheese and the final drizzle of olive oil gives this dessert the sophisticated Mediterranean flourish I have come to expect from recipes by this innovative chef.
The three components can be made in advance and the dessert put together at the last minute, making it perfect for entertaining. Leftovers will keep for several days in the fridge if they’re not polished off sooner by family members foraging for sustenance.
Instead of cherries you could use any fresh or poached fruit, such as sliced strawberries, poached rhubarb or peaches. For maximum impact serve in Martini or tall parfait glasses, although Ottolenghi just serves it scooped onto small flat plates.
Choose your best, fruity Extra Virgin olive oil to drizzle on top. You may be thinking “Olive oil, on a dessert?” Just give it a try.
Cream Cheese Mixture:
200g feta cheese
250g cream cheese (at room temp)
Grated rind and juice 1 large lemon
2-3 Tbs caster sugar, to taste
250ml thick cream (1 cup) Cherry Compote:
680g jar Morello cherries in syrup (see note below)
1 Tbs sugar
Juice 1 large lemon
4 whole star anise
3 Tbs Grand Marnier or Cointreau (optional)
1 rounded Tbs Arrowroot + 3 Tbs cold water Crumble:
125g unsalted butter, cut into cubes
1 cup Plain flour
1/3 cup brown sugar
1 cup slivered or flaked almonds
1 Tbs sesame seeds (preferably black ones)
Good pinch salt To serve:
A few fresh berries (optional)
Extra Virgin Olive oil
Place feta, cream cheese, sugar, lemon rind and juice in food processor and mix till smooth. In a small bowl, whip cream with electric beaters until soft peaks form. Scrape cream into food processor and mix for a few seconds, just enough to thoroughly combine with the cheese mixture, stopping to scrape down the sides. Scrape into a container with a lid and refrigerate till serving time.
Drain and reserve cherries. Place juice in a small saucepan with sugar, lemon juice and star anise. Simmer for 5-10 mins then strain and discard the star anise. Put back in pan with the cherries. Add combined arrowroot and water and cook, stirring, until thickened. Add liqueur, pour into a container with a lid and refrigerate till serving time.
Pre-heat oven to 180ºC. Place flour, butter and brown sugar in food processor and process until it starts to clump together. Add nuts, sesame seeds and salt and process briefly to combine. Line a biscuit tray with baking paper. Tip out the crumble and spread out evenly, breaking up the larger clumps. Bake for 10-20 minutes or until evenly golden brown. After 10 minutes move the crumble around with a fork, bringing the more cooked sides into the middle. Cool then store in a container with a lid.
To serve, place a dollop of the cream cheese mixture in 8 Martini glasses. Top with some of the cherries, a few fresh berries (optional) and lastly sprinkle with crumble. Drizzle with olive oil and serve immediately.
Serves 8-12
Note: I used a jar of cherries from Aldi, but in season you can use fresh cherries, stoned and cooked with a little more sugar, or frozen ones if you can find them. The fruit will probably make enough juice as it cooks, but if not add a dash of water. Arrowroot is sold in the baking section of most supermarkets.
Variation: instead of using cherries slice a couple of punnets of strawberries and put them in a bowl. Add sugar to taste and a splash of white balsamic vinegar and leave to macerate for an hour or so.
Serve this easy dessert, hot or cold, for a real coconut hit. Matthew doesn’t like coconut so I made it to take to my monthly lunch where we all speak French.
4 eggs
1 can condensed milk
1 can coconut cream
1 cup milk
250g desiccated or more coarsely shredded coconut To serve:
Fresh berries
Cream
Preheat oven to 170C. Place eggs in a large mixing bowl and thoroughly break up with a hand whisk. Slowly add the other ingredients. Lastly mix in the coconut. Grease a baking dish. Mine is a square 9″ (22cm) lasagne-type dish. Scrape the mixture into the baking dish and smooth the top.
Bake for 25 mins or until evenly risen and golden and a skewer inserted in the middle comes out clean. I cooked mine for 35 minutes and I think it was about 5 minutes too long. You want it to be set but nice and moist. I got 16 portions out of mine, but as you can see, they are quite small.
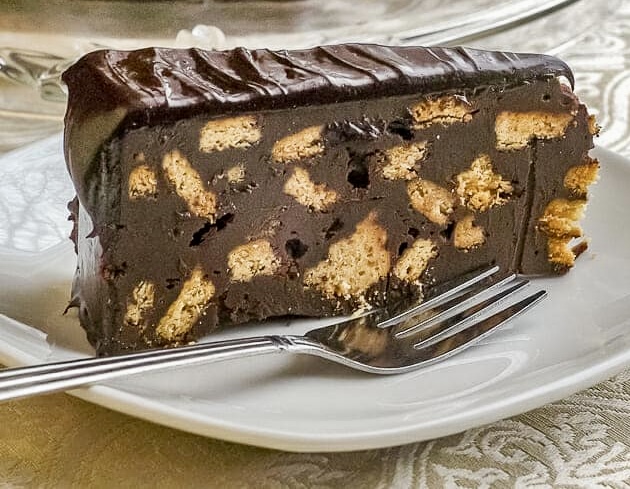
McGrady cooked for the royal family for fifteen years and said that the Queen liked to have a slice of this cake with a cup of tea every afternoon. “If there was any left when we moved from Buckingham Palace to Windsor Castle we took it with us, so she could finish it there”, he explained. “I use to travel on the train from London to Windsor Castle with the half-eaten cake in a tin on my knees.”
Make it in a six inch (15 cm) cake tin if you have one, so it’s nice and deep. For a larger tin you could double the recipe. If preferred you could use a loaf tin.
A cake that’s good enough for a Queen is definitely worth trying. We thought it was delicious.
Cake:
1 packet plain sweet biscuits such as Rich Tea or Marie (about 250g)
150g dark chocolate
150g butter at room temp
150g caster sugar
1 egg Chocolate Icing:
250g dark chocolate
Spray cake pan with oil and line with baking paper. A small six inch (15cm) pan will result in a deeper cake but you can use an eight inch (20cm) pan if you like. A tin with removable sides or a cake ring makes it easier to remove the cake.
Break the biscuits with your hands into pieces a bit larger than almonds and place them in a large mixing bowl. Don’t crush them completely. See photo for how big. Melt chocolate in a bowl over simmering water. In another bowl, beat butter and sugar with electric beaters until light and fluffy, then mix in the egg and lastly the melted chocolate. Scrape the chocolate mixture into the bowl containing the broken biscuits and mix well so that all the biscuit pieces are covered in chocolate.
Scrape into the cake tin, pressing down so that you have a flat top and there are no air pockets. A flat-bottomed glass is useful for pushing the mixture down. Cover with plastic wrap and refrigerate overnight.
Next day, remove the cake from the pan and remove the paper. Place it on a rack over a sheet of baking paper. For the icing, melt the chocolate in a bowl over simmering water. Slowly pour the the icing over the top and sides of the cake, using a spatula to smooth it out. Use most of the icing but leave a small amount. Allow the cake to set at room temperature.
Reheat the remaining chocolate icing (and any you can scrape up from below the cake rack) and put it into a piping bag. Pipe this over the cake, back and forth in a zig-zag pattern. When set, carefully remove the cake from the rack and place it onto a serving plate. Serve with a cup of tea and some whipped or thick pouring cream, if you’re feeling really decadent!
Serves 12
Note: if preferred, use a small amount (25g) of white or milk chocolate to do the zig-zag pattern on the cake, so you get more of a contrast.
Looking for a dessert to serve on New Year’s Eve or New Year’s Day that can be made ahead, doesn’t involve turning on the oven and uses seasonal fruit? This recipe meets all the criteria.
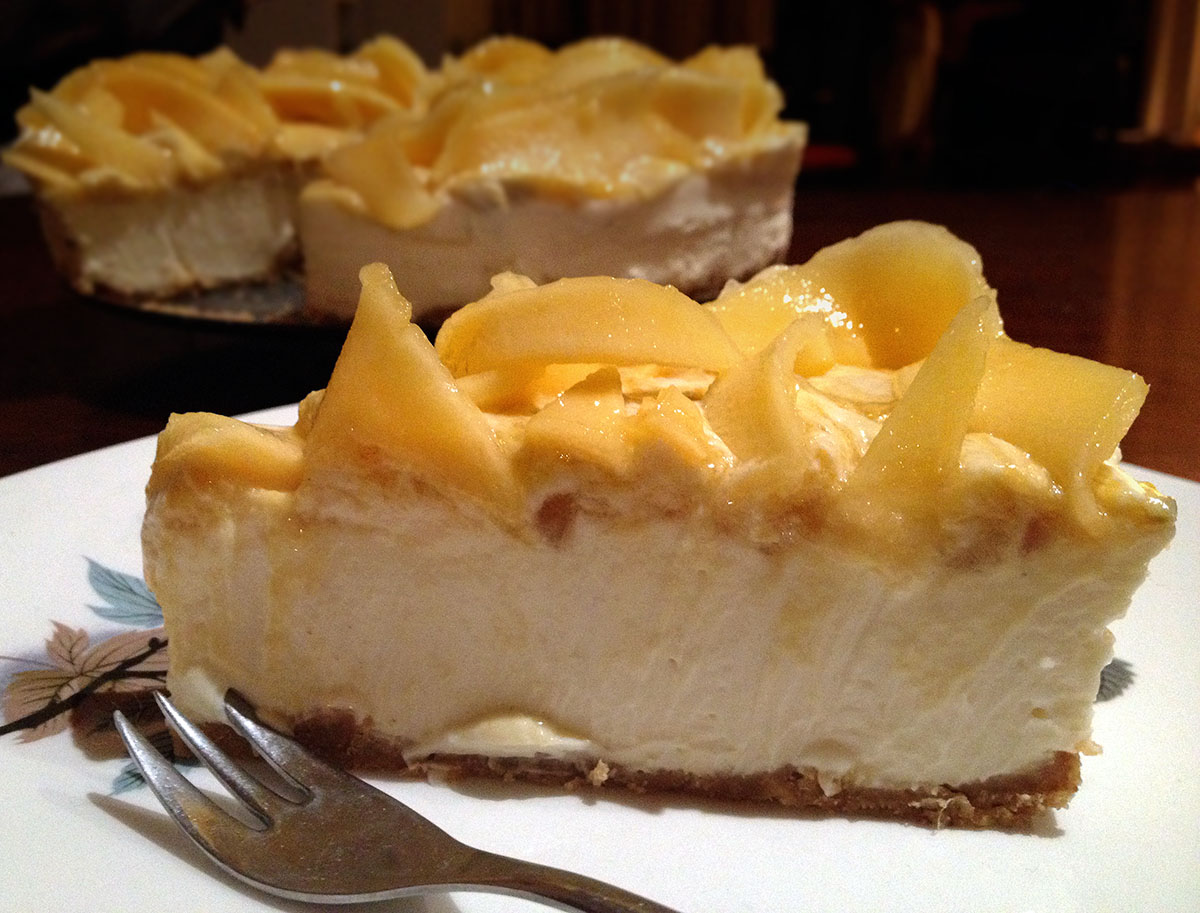
Mangoes are at their cheapest and best in Australia at this time of year. Choose ones which are not over-ripe as they’re easier to slice thinly and curve for the decoration. If you’re in the northern hemisphere the recipe can be adapted to use strawberries or perhaps tinned peaches instead of mangoes.
To enhance the flavour of the mango and provide colour contrast, serve each slice with some fresh passionfruit pulp spooned over (not shown in photo). Or maybe instead of passionfruit serve the cheesecake with some raspberry coulis spooned over.
200g fresh mango flesh, puréed in food processor ¼ cup glucose syrup (also known as Corn Syrup) 1¼ cups plain sweet biscuits made into crumbs in food processor 75g butter, melted 500g cream cheese at room temperature ¾ cup sugar 1 Tbs grated lemon rind 2 tsp gelatine dissolved in ¼ cup boiling water, cooled 220g white chocolate, melted and cooled 1 cup cream, softly whipped To serve:
2 mangoes extra, thinly sliced Pulp from 2 passionfruit (optional) Thick cream to serve
Place mango purée in a saucepan with glucose syrup. Cook, stirring over a medium heat for 15 minutes or until thickened and reduced by half. Set aside to cool.
Combine biscuit crumbs and butter and press evenly over the base of a 20-22 cm springform pan. In food processor or by hand beat cream cheese, sugar and lemon rind until smooth. Mix in gelatine mixture and melted chocolate, then fold in the whipped cream. Pour filling over biscuit base. Spoon over mango mixture and swirl through the white mixture using the tip of a knife, smoothing the top. Refrigerate 3 hours or overnight.
Serve decorated with fresh mango slices and, if liked, some passionfruit pulp. Serve thick pouring cream separately.
Serves 12
Variations: use peaches, apricots or berries instead of the mangoes. Pulp in the filling and sliced fruit or whole berries to decorate. For a Ginger Mango Cheesecake use ginger nut biscuits for the crust and mix 2-3 Tbs finely chopped crystallised ginger into the filling.
This recipe was given to me by one of my father’s first cousins from the Hutchinson family who live near Barnard Castle in the north of England. Big Mary was nicknamed to distinguish her from Little Mary, wife of one of her brothers, who was much shorter.
This dessert is one I serve for special occasions when I need a wow factor. It’s always a winner. If you make it over the holiday season please comment and post a photo.
The longer you leave the Bombe in the fridge after assembling it, the more the meringues will soften into a cake-like consistency. The recipe does have a lot of sugar in it, but a thin slice with a few unsweetened berries on the side really hits the spot.
4 large egg whites
250g brown sugar
2 tsp instant coffee, dissolved in 1 tsp water Filling: 125g caster sugar
2 Tbs water
2 Tbs water, extra
125g dark chocolate
600 ml (one pint) thick cream To finish: 300 ml (half a pint) thick cream, extra
Fresh berries to serve
Line 3 baking sheets with foil or non-stick baking paper and draw a 20 cm diameter circle on each. Set oven to 120°C. Whip egg whites until stiff. Gradually beat in brown sugar and continue beating until sugar has dissolved and meringue is stiff and shiny, then fold in the coffee mixture.
Divide meringue evenly amongst the three baking sheets, spreading it evenly into three 20cm discs of even thickness. Bake for 1 to 1½ hours or until crisp. If your oven heats unevenly, swap the tins around halfway through cooking time. A fan-forced oven helps avoid this. Turn oven off and leave until cold.
Filling: melt chocolate and cool. Whip cream until thick and divide in two. Heat sugar and water gently until dissolved. Increase heat and cook, without stirring, swirling pan from time to time, until you have a rich caramel. Add extra cold water, being careful to protect your arm from the steam. Swirl the pan to dissolve the caramel, then cool.
Gradually beat the cooled caramel into half the whipped cream. Fold the cooled melted chocolate into the other half. Peel the paper or foil off the meringues. Place one on a large flat plate, flat side down, with a couple of blobs of whipped cream on the plate to stop it from sliding around. Spread evenly with chocolate cream. Place another meringue on top and spread with caramel cream. Place remaining meringue on top and gently press down. Refrigerate for several hours.
An hour or two before guests arrive, whip extra cream and spread around the sides of the bombe, filling in the holes to create a smooth surface and spread the rest on top. Or, as in the photo, just spread cream on top. Decorate with berries. Refrigerate until serving time. Serve the bombe in thin slices.
Note: instead of making the caramel you can use instead one can or jar or cup of dulce de leche (also known as manjar) or Nestle Caramel Top ‘n Fill and fold that into half the whipped cream for the caramel layer.
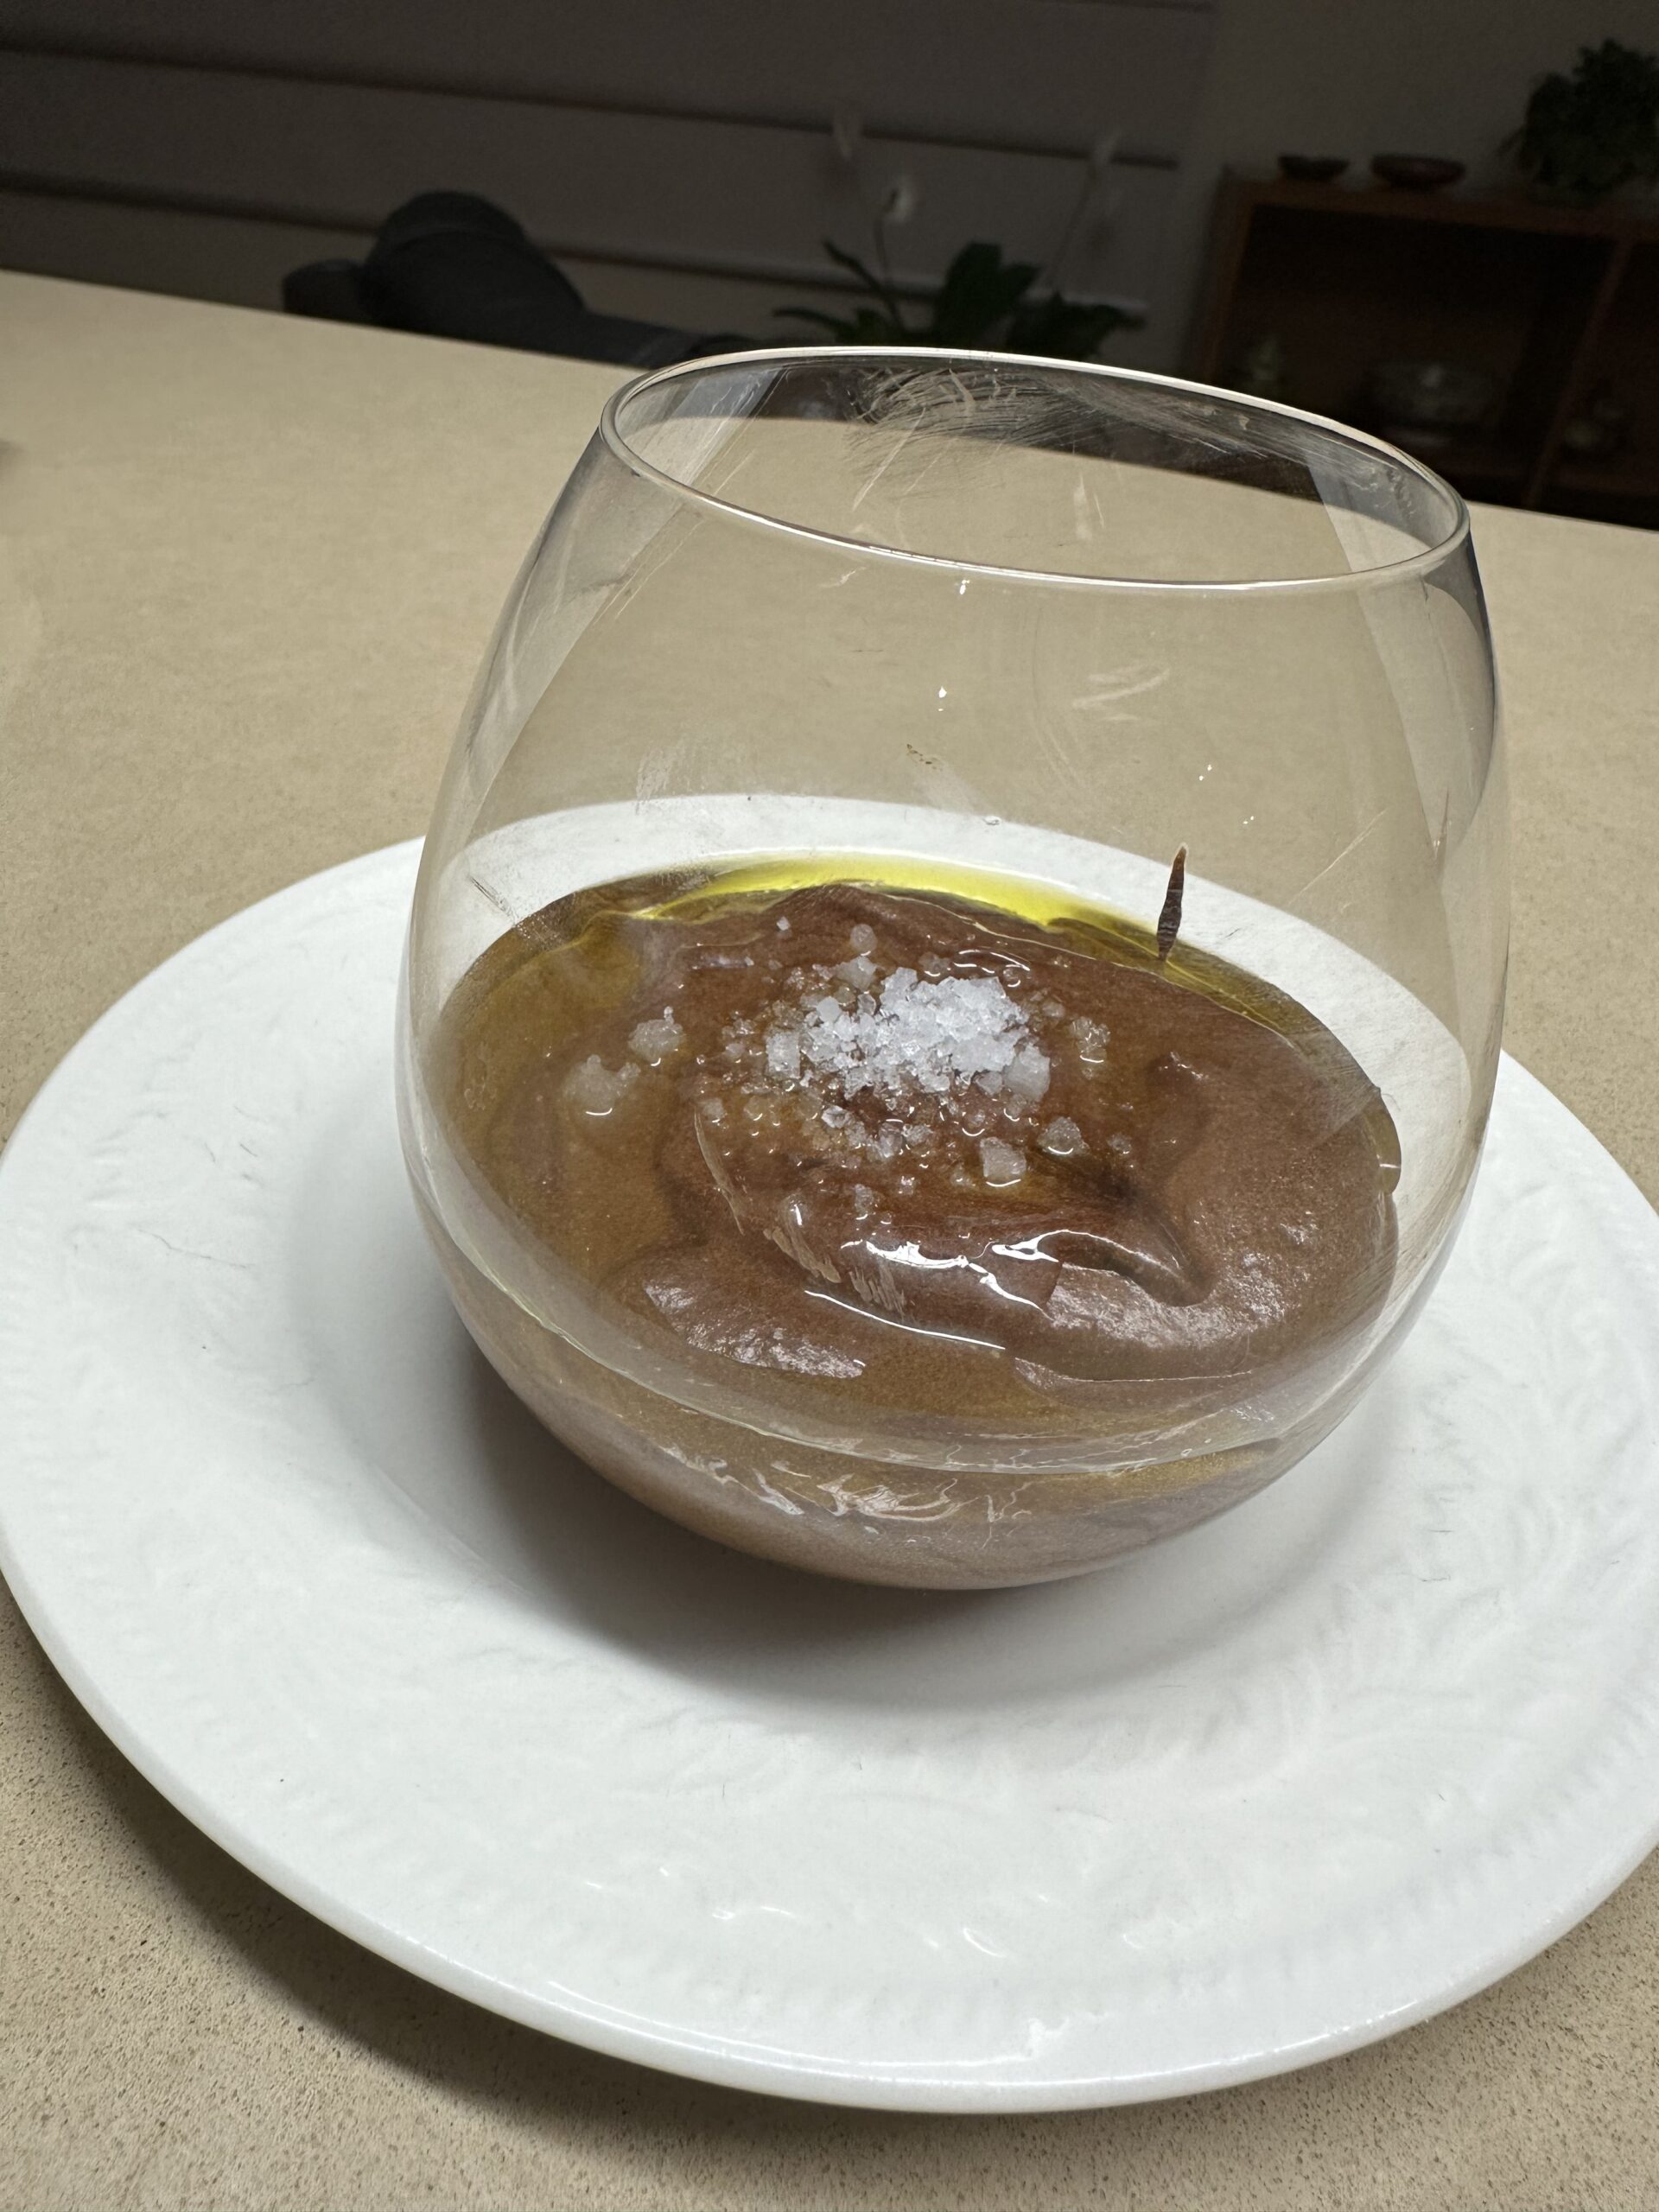
This recipe was given to me by my friend Jenny. It doesn’t contain any cream and is very chocolatey.
While travelling in Portugal recently we enjoyed a similar rich chocolate mousse which was garnished with extra virgin olive oil and sea salt flakes. It was delicious if you like that sort of sweet and salty combo. If not, serve the mousse with berries and thick cream.
250g dark chocolate
4 large eggs separated
2 Tbs butter
2 Tbs brandy or rum
To serve:
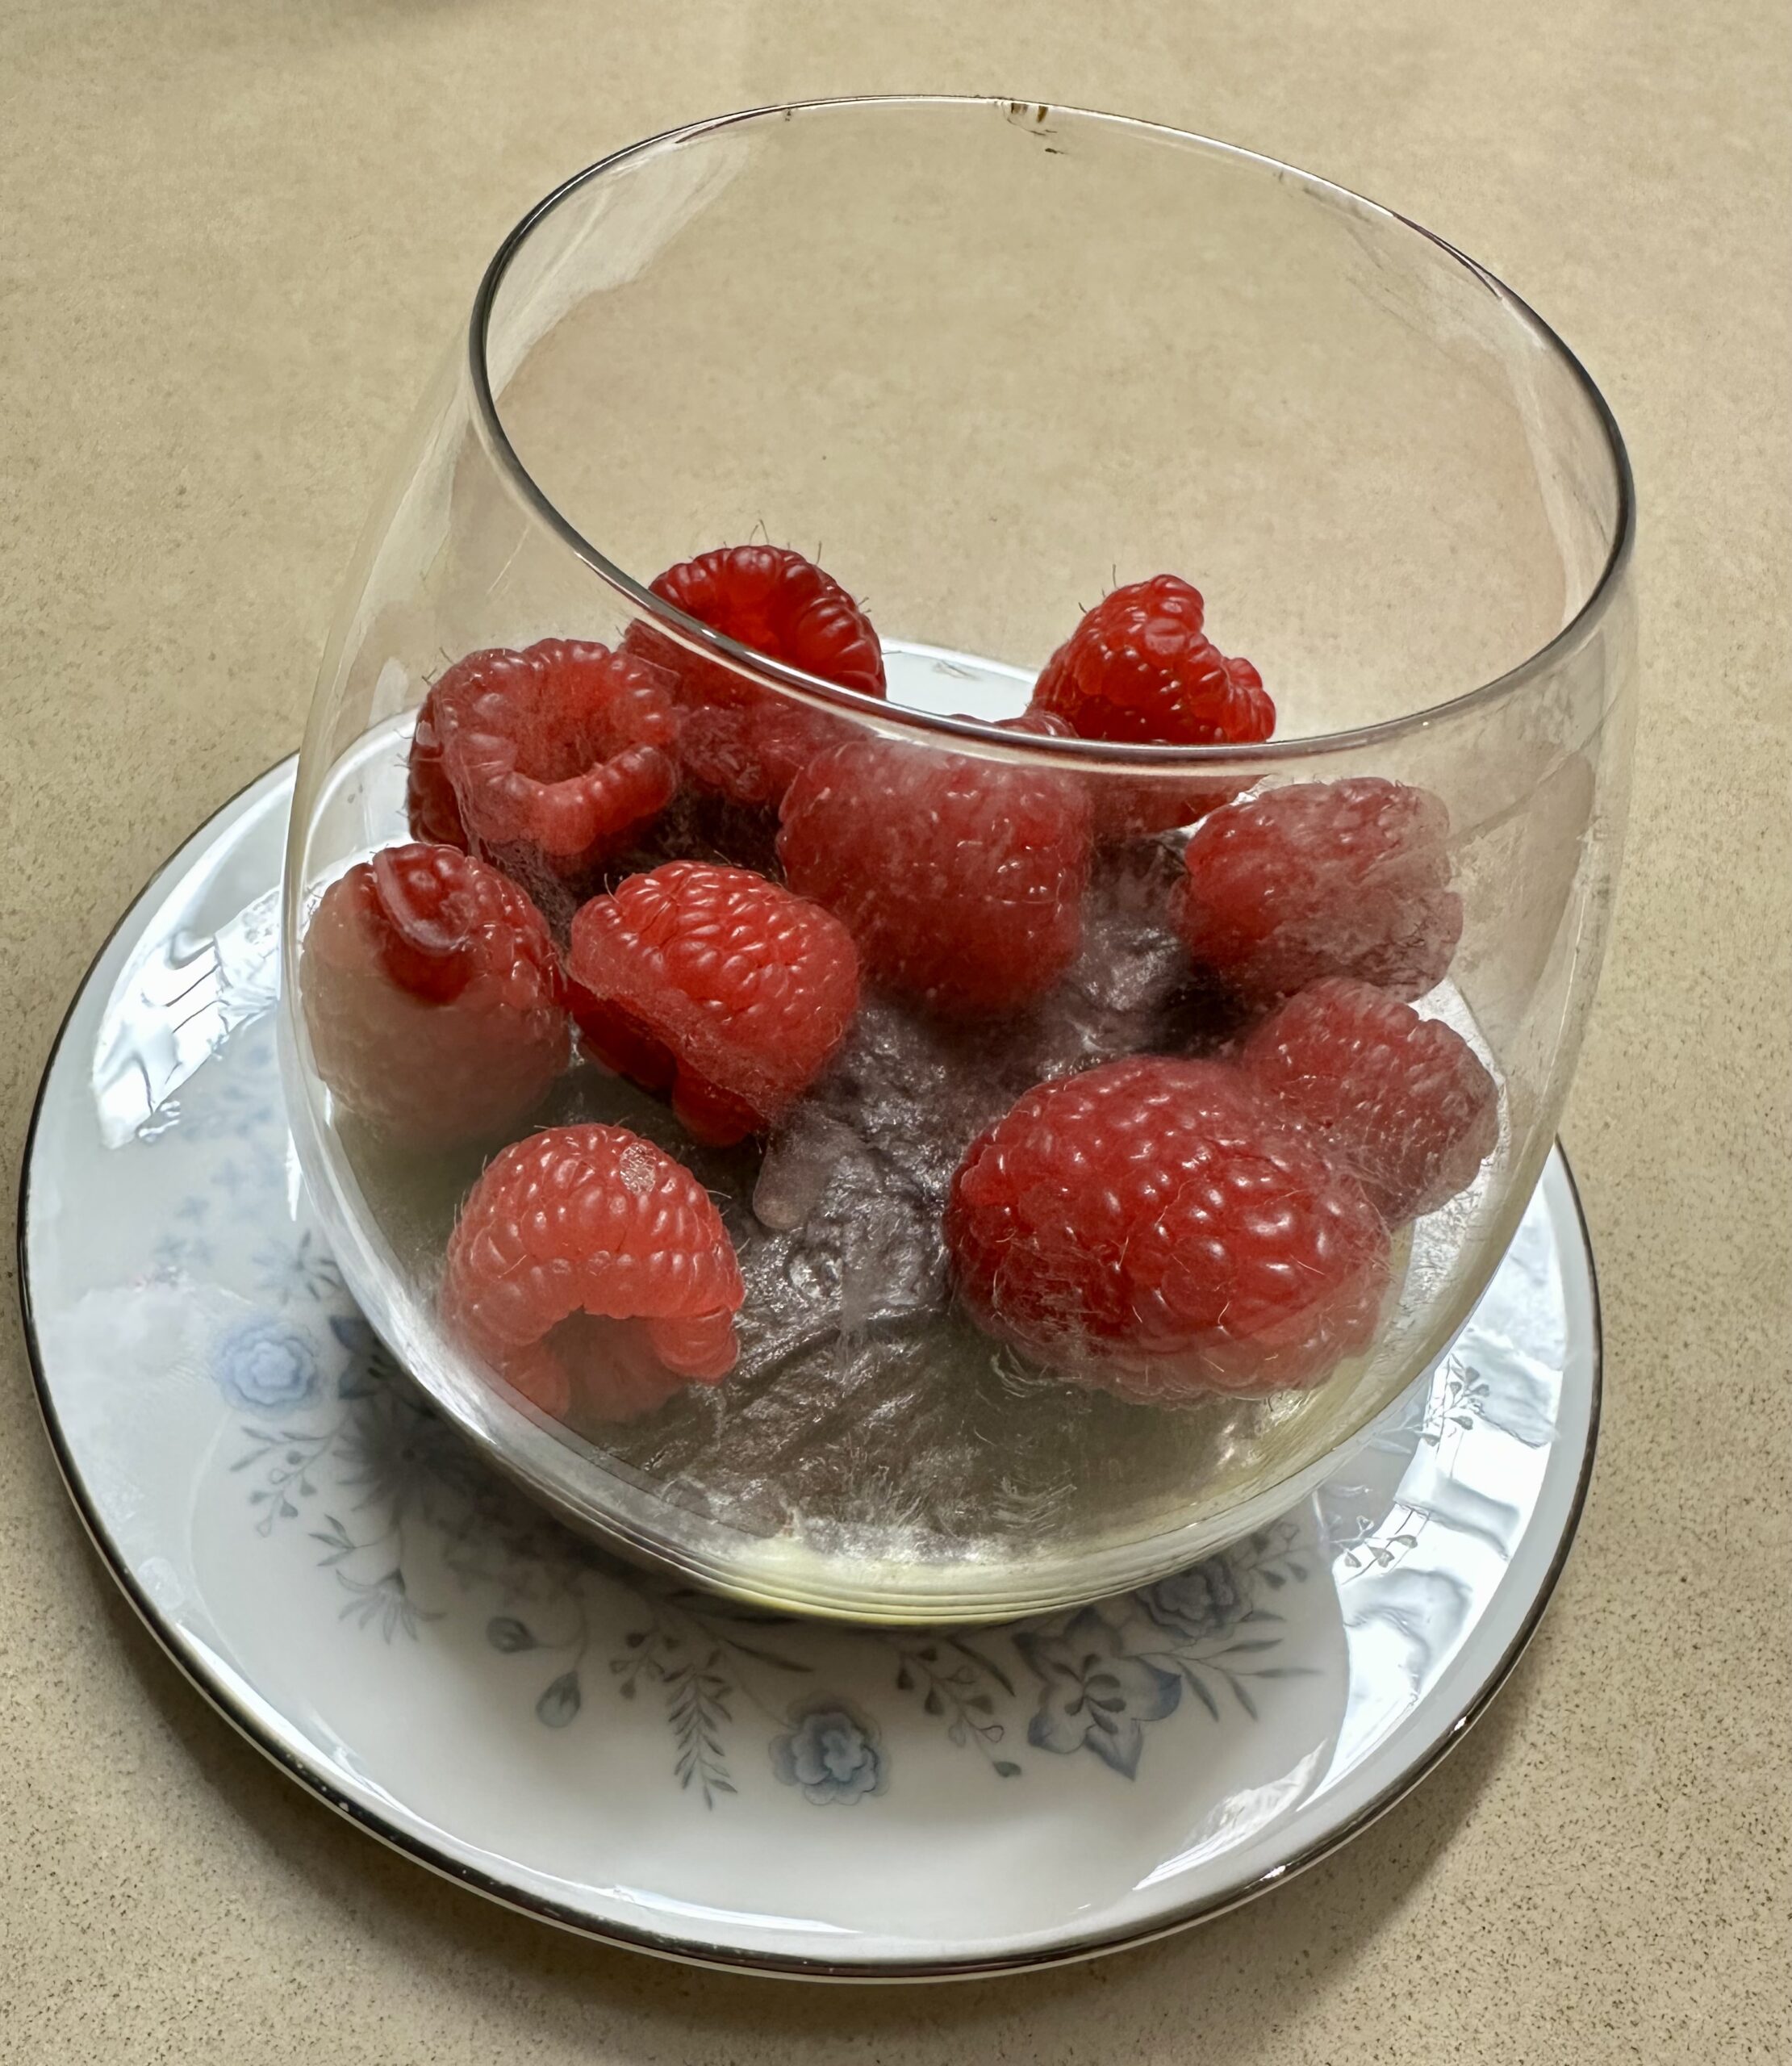
Thick cream and berries
or, Maldon sea salt
Extra virgin olive oil
Melt chocolate and butter in a large bowl over simmering water. Remove from heat. Mix in the egg yolks one by one, then the brandy or rum.
Whip egg whites till stiff then fold carefully into chocolate half at a time. Scrape into a nice glass serving bowl, or individual bowls. Chill.
Serve the mousse topped with a few flakes of salt and a drizzle of oil. Or with berries and thick cream.
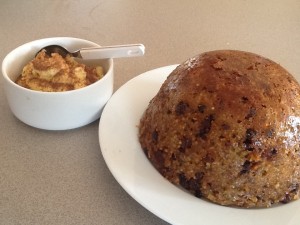
Sago Plum Pudding, an old-fashioned dessert made from simple ingredients, is one of my all-time favourites. I think its origins must be Antipodean as I never came across it when I was growing up in England. Some in our family see it as an excuse to eat Brandy Butter when it’s not Christmas. I’ve never been a big fan of Brandy Butter and prefer it with thick, unsweetened cream.
If you like, make individual half cup puddings rather than one large one – see Note below.
This recipe came from my mother-in-law.
¾ cup sago 2 cups milk 180g butter ½ cup sugar 2 cups sultanas or mixed dried fruit 2 cups breadcrumbs (made in food processor from day old bread) 2 eggs, beaten 2 tsp bicarbonate of soda Pinch of salt 2 tsp mixed spice To serve: Brandy Butter, thick cream or custard
Soak sago in milk overnight. Place butter in a mixing bowl and zap in the microwave to melt. Mix in remaining ingredients then scrape into a one litre pudding bowl, lightly buttered. Cover with a piece of buttered foil, buttered side down and place in a large saucepan on something to lift the bowl slightly. A metal trivet, old saucer or a small brick will do. Add boiling water to come halfway up bowl. Cover with the saucepan lid, bring to the boil and steam steadily for 3-3½ hours, adding more water as necessary. The top of the pudding will have an even dark brown colour when ready – lift foil from time to time to check. Stand for 5 minutes then turn out, cut into slices and serve with thick cream, Brandy Butter or custard.
Serves 8-10
Note: make individual puddings in 8-10 half cup ramekins, dariole moulds or Chinese teacups, lightly buttered, as shown in the second photo. Fill almost to the top as they don’t rise much. Place in a shallow ovenproof dish and add boiling water to come halfway up the cups. Cover the whole dish with a sheet of foil, buttered side down. Bake at 160°C for an hour to an hour and a half, or until evenly rich brown on top. Tip out and serve immediately or store covered in the fridge and reheat for about a minute in the microwave, covered in plastic wrap, then tip out.
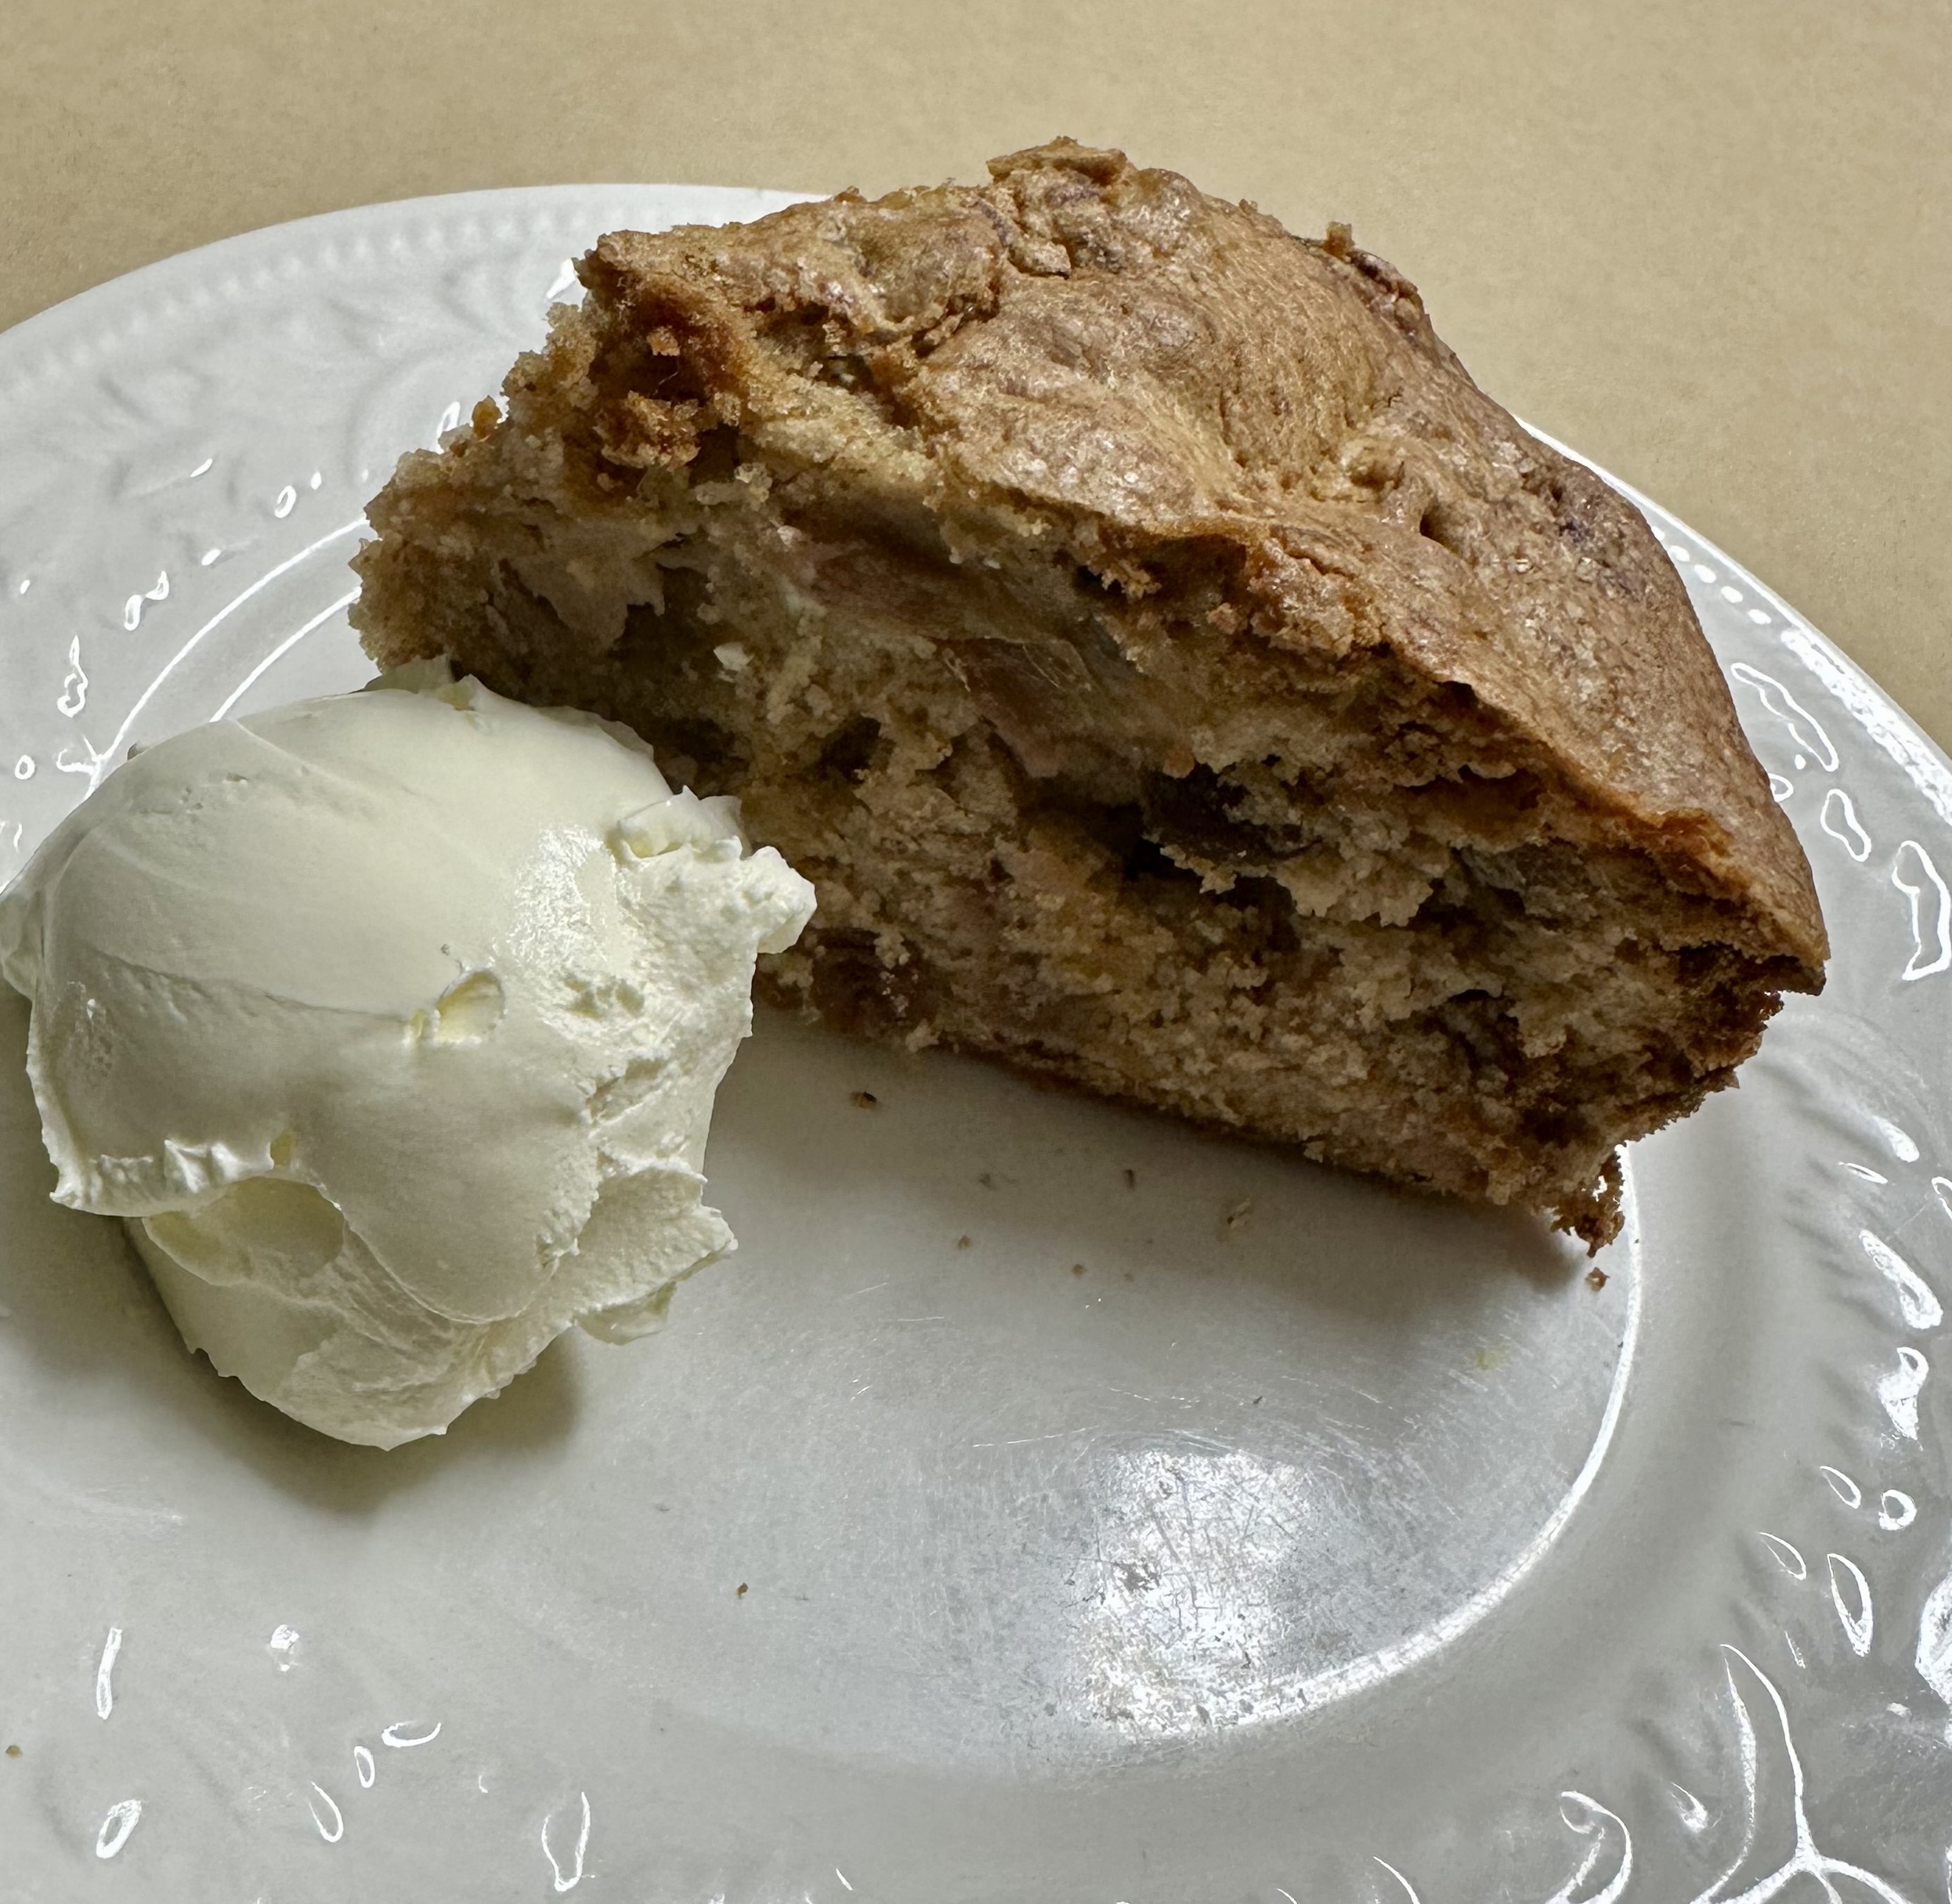
She has made it many times and had success with several variations, such as using pears poached in red wine – drained and cut into chunks – instead of the apples. When she made it for our French group lunch she used poached quinces instead of apples and it was delicious. So as I had some poached quinces in the freezer which needed using up that’s what I did. Feel free to try other combinations.
1 tea bag (English breakfast or similar)
3 Tbs boiling water
A generous half cup of raisins or sultanas
2 cups caster sugar
3 eggs
1 cup vegetable oil
2 tsp vanilla essence
300g plain flour (2 and 2/3 cups)
1½ tsp baking powder
½ tsp salt
1 tsp cinnamon
¼ tsp each cloves, nutmeg and mace
4-5 stalks of fresh rhubarb, cut into 2cm lengths
2 large apples, peeled, cored and sliced
1 cup walnuts or pecans, coarsely chopped To serve:
Rhubarb compote (optional)
Whipped cream, thick pouring cream or sour cream (shown in photo)
In a small bowl, pour boiling water over tea bag, press to release the flavour, then remove the tea bag. Add the raisins, mix to cover, then leave for half an hour. Drain raisins, discarding the liquid.
Meanwhile preheat oven to 160°C. Grease a 25cm springform pan and line with baking paper. Place eggs and sugar in an electric mixer and whisk until thick and pale. Add the oil and vanilla essence and mix well for a minute or two. Place a sieve over the bowl then measure the flour, salt and spices and add them to the mixture through the sieve. Fold in the rhubarb, apple and nuts. Make sure there are no pockets of flour. The mixture will be quite stiff.
Bake for an hour and 3/4 or until golden brown and firm on top. Ovens vary so start checking after an hour and a half. Cool in the tin for half an hour then remove. Store in an airtight tin when cold.
The cake should have a crunchy top and a chewy centre and improves after a day or two of storage.
Serve with rhubarb compote and cream as a dessert.
Serves 12
Variations: I didn’t have any mace so I added more cinnamon. Use poached pears or quinces in red wine instead of the apples.
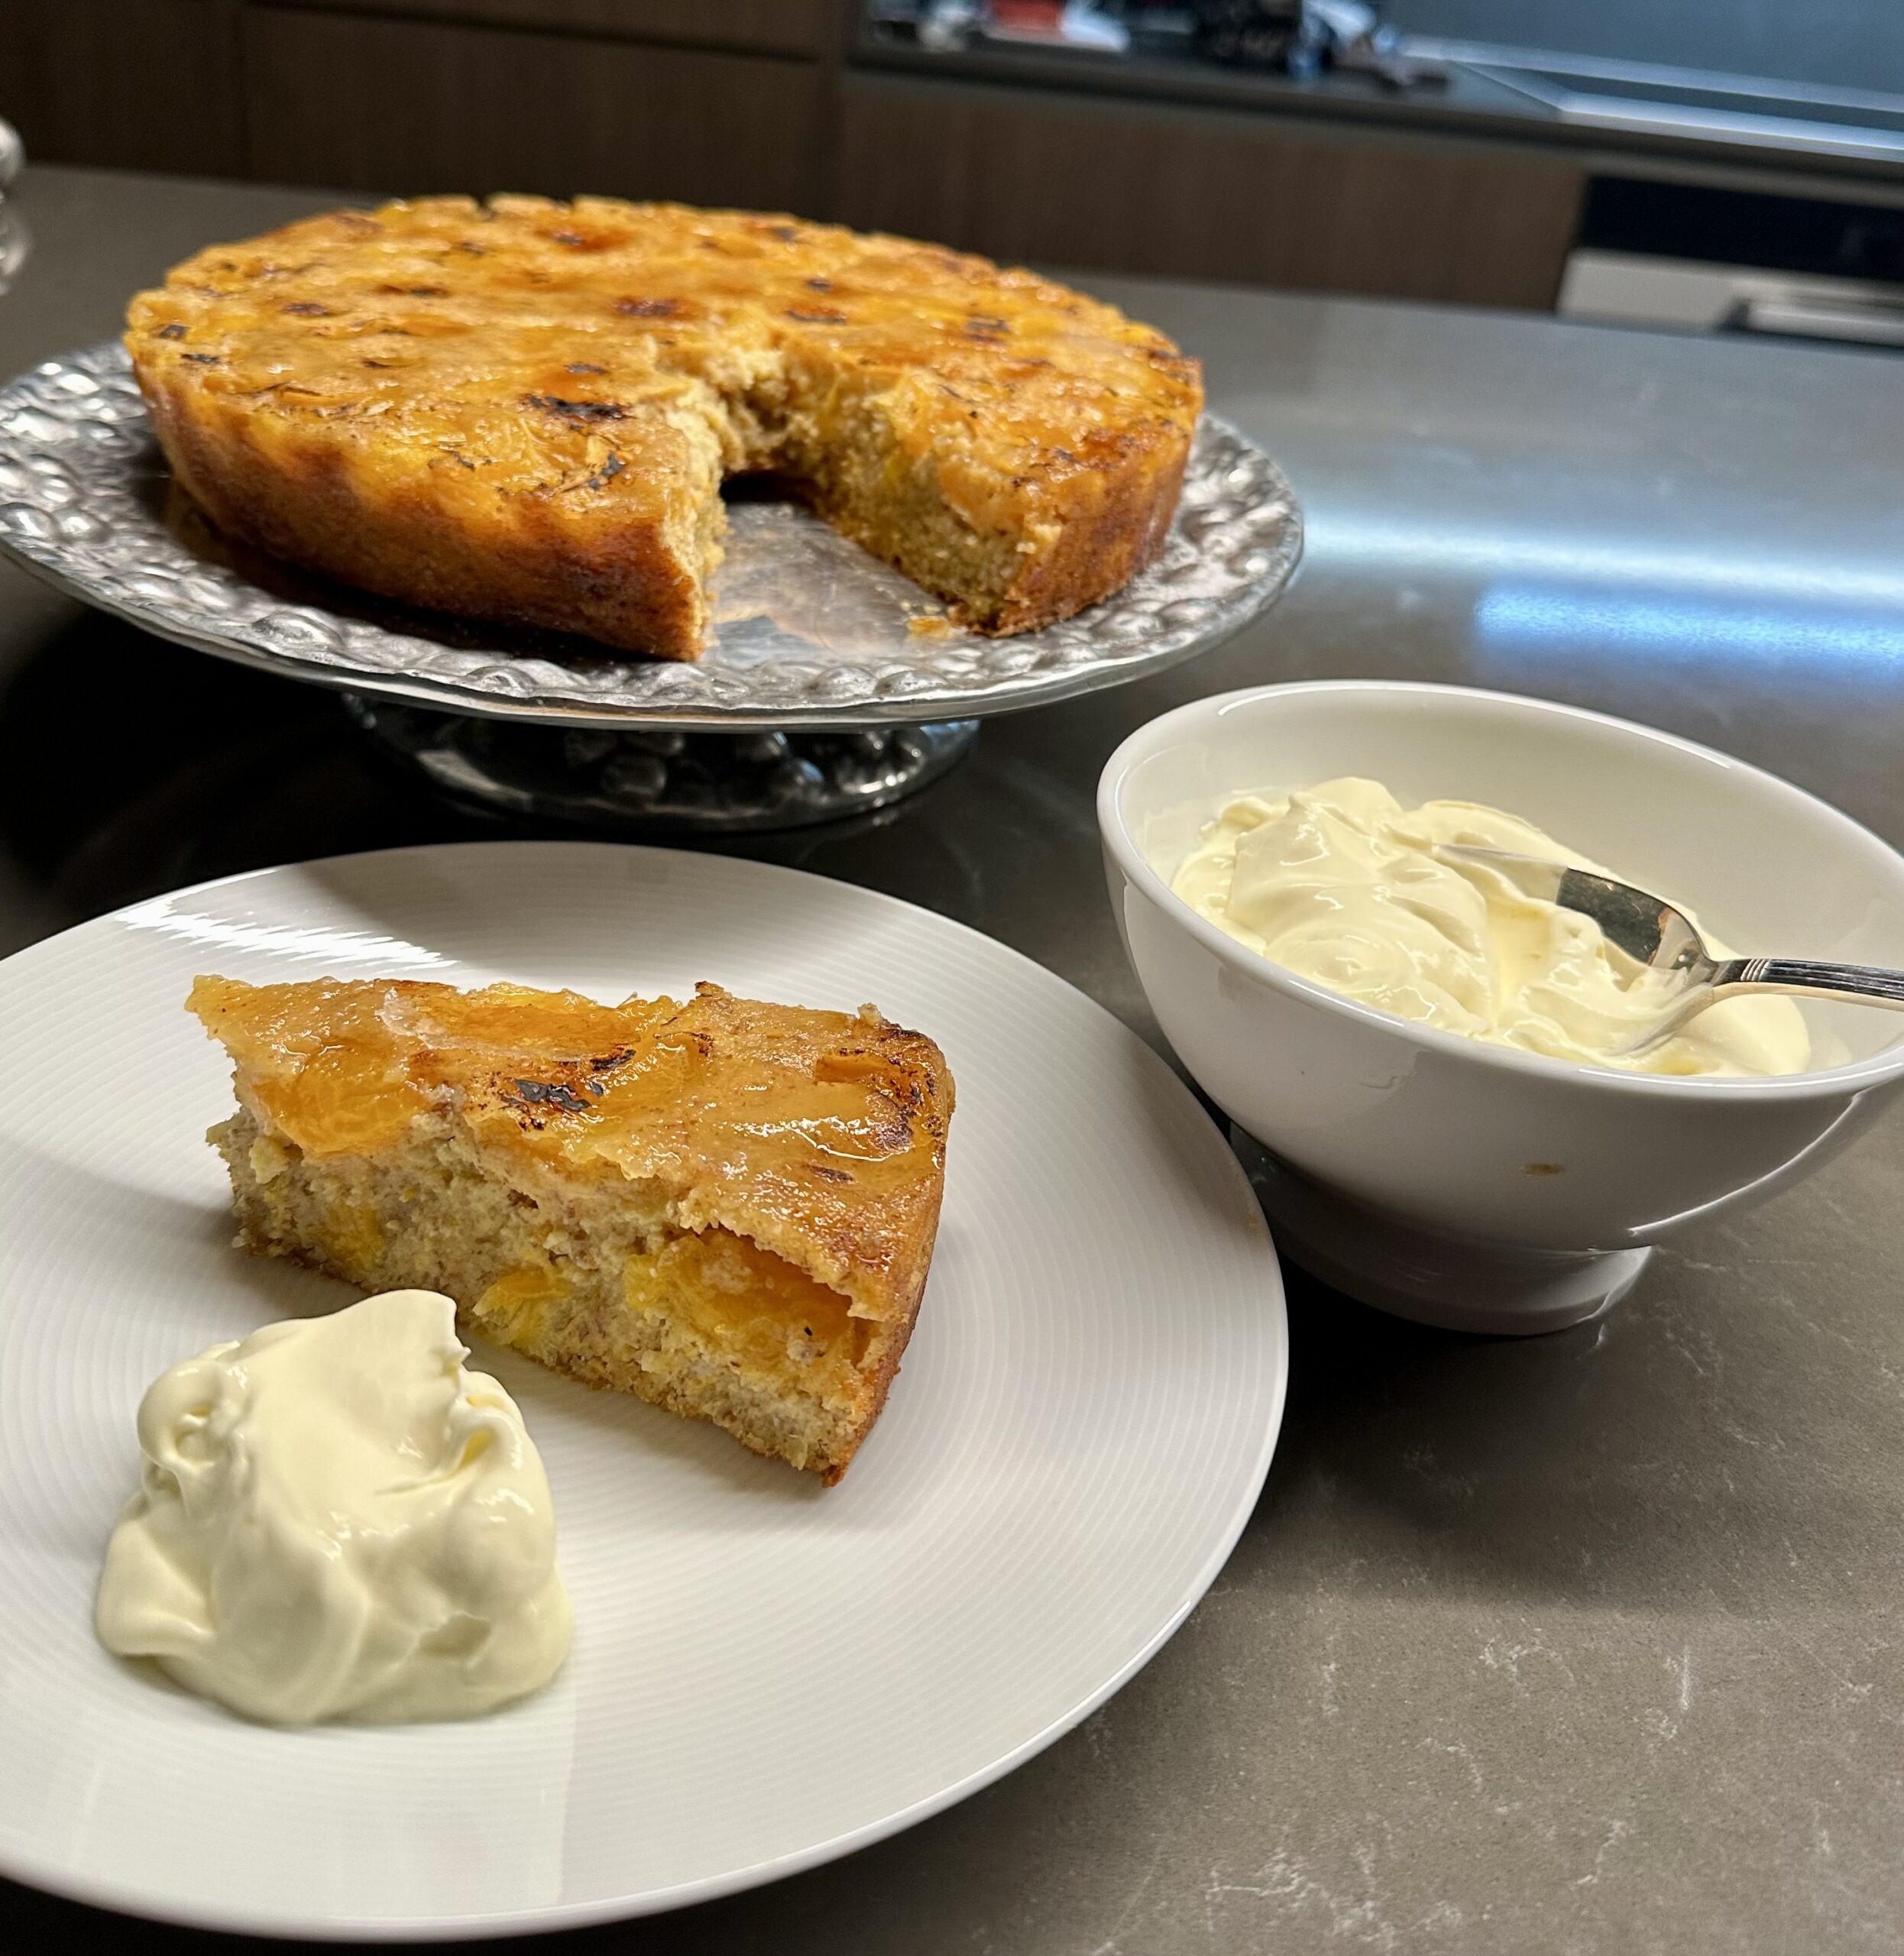
This week’s recipe for a gluten-free, dairy-free cake using mandarin oranges which are now in season makes a sumptuous crowd-pleasing dessert.
The upside-down mandarin idea came from a recipe on a website I subscribe to called Delicious. However, the cake mixture in that recipe included flour and I needed to make a gluten-free, dairy-free dessert to take to a dinner party.
So I used a different recipe for an orange cake which uses almond meal instead of flour, used mandarins instead of oranges and combined the two recipes into one. Best served on the day it’s made, this cake is delicious.
Topping:
8 mandarin oranges
2 Tbs runny honey Cake:
3 mandarin oranges
6 large eggs at room temp
1¼ cups sugar
1½ tsp baking powder
4 cups almond meal (bought or made in a food processor) To serve:
2 Tbs sugar
250ml mascarpone
½ cup thick cream
Topping: Grease and line a 22cm (9 inch) cake pan with baking paper. Drizzle the honey evenly over the bottom. Finely grate the peel from 4-5 of the mandarin oranges and keep for the cake. Peel the 8 mandarin oranges, discard the peel and arrange the segments in circles in one layer over the base of the cake tin.
Cake: Preheat oven to 160° C. Place the 4 mandarins in a saucepan, cover with water then bring to the boil and simmer for 20 minutes. Drain and cool.
Make almond meal in a food processor by processing shelled almonds until very fine. They can be blanched almonds or not. Measure 4 cups and keep any excess for another use. Place the cooled mandarins in food processor (no need to wash it after processing the almonds) and process for a minute or two. Add remaining ingredients, including the almond meal and the grated rind you reserved earlier.
Scrape into the cake pan. Bake for 60 minutes or until well-risen, golden brown, firm to the touch and a skewer inserted in the middle comes out clean. Cool thoroughly in the tin.
To serve: Carefully tip cake out of pan and remove paper. If liked, sprinkle 2 tablespoons of sugar over the mandarin segments which are now on the top of the cake and use a blowtorch to brown the top. Not essential but looks nice.
Mix mascarpone with cream and serve with the cake.

 Cream Cheese Mixture: