Rhubarb Crumbly Slice

Matthew said the rhubarb was going berserk and needed picking. All the other little desserts you’ve seen on here recently have been devoured and the fridge was looking bare. I thought I would concoct something with this delicious under-rated fruit from the garden and came up with this.  A cross between a crumble and a slice which can double up as a dessert or something sweet to go with a cup of tea for the next few days.

250g plain flour
250g butter
200g brown sugar
200g porridge oats (not the quick cook variety)
About 1 kg washed and trimmed rhubarb, cut into 2-3cm slices
1½ cups jam (any flavour will do)
3 tsp finely chopped fresh ginger (optional)

Preheat oven to 180°C.  Place flour and butter in food processor and process to fine crumbs.  Add sugar and oats and process briefly, just enough to mix.  Butter an oblong cake tin or roasting pan.  I used a roasting pan 28x34cm. Tip in about ¾ of the crumble mix and spread evenly. Top with the rhubarb, then drizzle over the jam, mixed with the ginger if using.  If jam is a bit stiff zap it briefly in the microwave. Cover with remaining crumbs then bake for 30-40 mins or until browned and bubbly. Cut into 16.

Keeps in the fridge, covered, for up to a week. Can be eaten cold as a cake/slice or hot as a dessert. If you just want to heat up one portion use the microwave.  However, if you want to reheat say half a dozen slices to serve as dessert with cream or vanilla ice cream, remove the required number of squares from the tin with a fish slice and reheat in a moderate oven for 10-15 mins on a sheet of baking paper.

Serves 16

Maggie Beer Inspired Pears

Everyone dreams of spending a few weeks in Paris. To live there for 4 years, as we did from 1999 to 2002, is nothing short of “jammy” as my dear Uncle Ed would have said.

Our apartment was on the 8th floor of the Australian Embassy complex with spectacular views of the Eiffel Tower. Australian architect Harry Seidler designed this interesting curved building in the 1970s to house the Embassy and staff.

We crammed a lot of food and culture into those four years. Visited the Louvre so many times I could have got a job as a guide, entertained more house guests than we knew we had friends, saw in the new millenium in style, ate our way through scores of Michelin stars, became addicted to champagne (before Paris I didn’t like it very much) and travelled extensively throughout France and the region. Life’s tough, but someone has to do it.

The French played a significant role in the European discovery of Australia and if things had gone differently we could all be speaking French. French navigator Nicolas Baudin first sailed to Australia in about 1793, but two consecutive cyclones prevented him doing any work and he had to take the ship to Bombay for repairs. In 1802 he returned to Encounter Bay, just off South Australia, where he met the British navigator Matthew Flinders who was also there to map the Australian coastline. They could have saved each other a lot of time if they had come to some arrangement – okay you work your way round from here east and I’ll head west and when we meet up we can swap notes, although it could have all been lost in translation.

To mark the bicentenary of this event the Australian and French governments released postage stamps and the Embassy threw a big party. Renowned South Australian cook Maggie Beer flew in to cook up a storm and when I heard that she needed someone to help in the kitchen I put up my hand. A number of South Australian ingredients were also flown in for the occasion, including a whole tuna which arrived in what looked like a small coffin. Nobody knew quite where to start with this beast, but fortunately we found a man on the fish stall at the Rue de Grenelle markets who said “Pas de problème” before cutting it into more manageable pieces.

Two days in the kitchen with Maggie was an unforgettable experience and great fun. We laughed a lot. We made delicious goat’s cheese and leek tartlets, individual champagne sabayons served in shot glasses and deep fried soft shelled crabs, all crispy and crunchy and served with an Asian dipping sauce. It was impossible for Maggie to make all the food for the party, so the Cordon Bleu cooking school made up the shortfall. Everyone learnt a lesson on how not to serve finger food to a large number of people. Don’t send all the waiters carrying food in through the same door. Inevitably guests standing close to this door did extremely well, while those further into the throng got lean pickings. As you can see from the programme it was a wonderful evening.

Flicking through an Australian Women’s Weekly magazine at the hairdresser’s the other day I came across a quick and easy recipe for pears by Maggie Beer. The recipe uses Maggie’s famous verjuice and I have a bottle in the pantry, so I made a mental note of the ingredients and made my interpretation of the dish last night.

4 large pears (Conference or similar elongated variety)
50g unsalted butter
50g sugar
⅓ cup verjuice

Wash and dry pears, but don’t peel or core.  Leave the stalks on for a nice rustic look.  Slice lengthwise about ½ to ¾ cm thick.  Heat butter in a large frying pan, add sugar and stir to dissolve.  Add pears in one layer.  If there are too many, do them in two lots.  Cook slices on both sides until lightly browned, remove then do the remaining slices.  Return all the pears to the pan.  Add verjuice and simmer for a few minutes, shaking the pan and carefully moving the slices around and turning them, to ensure even glazing.  Serve warm with cream or vanilla ice cream.

Serves 4-6

Apple and Blackberry Pie

My paternal grandmother was born in Scotland, just outside Edinburgh.  When she met my grandfather she was running the dairy in a stately home.  As kids my Dad was always telling us that his mother could make butter into the shape of swans.  My mother would roll her eyes and say if he wanted swans made of butter he’d better go back!

Jessie was a wonderful cook but she died when I was 12, a year after I started to take an interest in cooking, so she didn’t have time to teach me many tricks.  She kept chickens and sold the eggs, so after my grandfather died I used to go and help her to clean them and put them in boxes.  She taught me to make pastry, fruit pies, Yorkshire puddings and gravy.  And a rule I have never forgotten – always put a good pinch of salt into anything sweet (such as cakes) and a good pinch of sugar into anything savoury (such as gravy) because it brings out the flavours.  Jessie insisted that the success of a good gravy or white sauce depended on the way you held your mouth, pronounced “mooth”, with her soft Scottish brogue.  She was what you would call a dour Scot, so I never really knew when she was joking.

Greengrocer’s in the UK sell two kinds of apples – eating apples and cooking apples.  Here in Australia I have never seen cooking apples for sale commercially, except at an orchard outside Canberra in Pialligo, where they sell them for about 3 weeks in the short picking season which starts late January.  For the rest of the year we have to make do with Granny Smiths, which are really not the same.  The most popular cooking apple in England is the Bramley – a large lumpy fruit which makes a deliciously fluffy apple sauce to go with pork or a tangy apple pie.   About two years ago Jonathan Banks at the apple farm in Pialligo grafted a Bramley for us to plant on our rural property near Braidwood.  I can’t wait for it to bear fruit.

My first apple and blackberry pie was made under the watchful eye of Jessie.  When her three sons were growing up she said they could eat one whole pie each.   I thought this was a bit of an exaggeration, but my Dad confirmed it was true.   I don’t make fruit pies very often these days, but whenever I do I’m transported back to that cozy kitchen with its wood-fired Aga stove and Nana standing watching me, holding herself up on wooden crutches.  She was very tall, had undergone two unsuccessful hip operations and had a lot of difficulty getting her large frame from A to B.

The pastry I use for fruit pies is the one Jessie taught me.  It uses self-raising instead of plain flour and a mixture of lard and butter.  It’s not sweet, but it’s the way I like it, contrasting nicely with the filling.

Apple and Blackberry Pie

Filling:
1 kg cooking apples or Granny Smiths, peeled, cored and sliced
1/4 cup sugar, or to taste
1/4 cup water
2 cups blackberries (fresh or frozen, thawed)
Pastry:
250g self-raising flour
75g lard
75g butter
3-4 Tbs cold water
To glaze:
A little milk or a beaten egg
Grantulated sugar

Place apples, water and sugar in a large saucepan.  Cook for 10 minutes or so until softening.  As Granny Smiths tend to hold their shape more than cooking apples I usually break them up a bit at this stage with a potato masher.  Remove from heat and add the blackberries.

Preheat oven to 180°C.  Place flour, lard and butter in food processor.  Process to crumbs then add water gradually through the feed chute, with the motor running.  When mixture starts to form a ball stop adding water and stop the motor, tip out the pastry and form into a ball. Cut pastry in half.  Roll out one half on a floured surface into a circle slightly larger than a 25-30cm pie dish or dinner plate which is not too flat – mine is 28cm. Trim off excess. Fill with apple and blackberry mixture, leaving any excess juice behind.  Mop up any excess on the pastry edges with paper towels.  Roll out remaining pastry to cover the fruit, trim off excess then seal and crimp the edges.  Cut four holes in the pastry lid to allow steam to escape.  Brush surface with milk or beaten egg and sprinkle with granulated sugar.  Bake for 35-40 mins or until nicely browned.  Serve warm with cream or vanilla ice cream.  Keeps for several days in the fridge, then just reheat in the oven to serve.

Serves 12

Variation: use raspberries instead of blackberries or make the pie with just apples, in which case increase the quantity to about 1½ kg.

Note: It’s not a good idea to use your best dinner plates for fruit pies.  Use old ones or acquire a couple at a secondhand shop.

Lemon Meringue Pie

At 3pm on the first Tuesday of November Australia comes to a virtual standstill.  The Melbourne Cup, Australia’s major thoroughbred horse race, has been run since 1861.  Even people who never bet on horses place a bet in this race.  Lunches with sweepstakes are organised all over the country by those who can’t make it to the Flemington racecourse in Melbourne.  Ladies come dressed to kill, wearing their best hat, in order to create the right atmosphere.

Asked to bring a plate to a Melbourne Cup buffet lunch I decided to make an old English favourite, Lemon Meringue Pie.  As you can see, the lemon tree outside our kitchen window is laden with fruit.  Last year we picked all the lemons and put them in a second fridge we keep in the garage for drinks.   After a few weeks they started to go off, so this year we’ve decided to leave them on the tree and pick them as we need them.  Not sure if this will affect next season’s crop, but we’ll find out.

My ceramic quiche dish holds about a litre of filling, so this makes quite a large pie.  If you find you have too much filling,  put the excess into little glasses  to eat with a dollop of cream.


1 large fully-baked sweet shortcrust pastry shell
¾ cup caster sugar
¾ cup lemon juice
1 Tbs grated lemon rind
2 cups water
½ cup cornflour
3 eggs, separated
75g unsalted butter
½ cup caster sugar, extra

Keep the egg white from making the pastry and use it in the meringue.

Mix cornflour with some of the water to a smooth paste in a small bowl.  Heat lemon juice, sugar, remaining water and grated rind in a saucepan.  When boiling add cornflour mixture and stir until thickened with a wooden spatula.  Remove from heat and mix in egg yolks and lastly butter.  Cool a bit then push through a sieve to remove any bits of cooked egg white and spoon evenly into the pastry case.

With electric beaters whip the four egg whites (one left from making the pastry) with a pinch of salt until they hold soft peaks, then gradually add the extra sugar and continue whipping until you have a glossy meringue.  Pile onto the lemon filling, covering completely so there are no gaps.  Bake at 170°C for 10-15 minutes or until lightly browned.  Remove from the oven and cool.  Serve chilled.

Serves 10-12

Mango Semi-freddo with Macadamia Praline

Catherine drove from Newcastle to Canberra, to stay with us for a few days.  On the way she bought a tray of mangoes from a vendor by the side of the road.  James and Karen hosted a family BBQ on Sunday evening and I volunteered to bring dessert.  Catherine suggested we make a mango semi-freddo with praline, so we had a look at a couple of recipes online and a few more in my large collection of cookbooks and devised this between us.  A triangular tin bought in Paris about 10 years ago in a kitchen shop called E. Dehillerin made a perfect mold.  I could spend hours in that shop.  The mold is also a good shape for pâté and terrines.

Mango Semi-freddo with Macadamia Praline

2 large mangoes, flesh pureed in a food processor
4 eggs, separated
400ml cream
⅓ to ½ cup plus 2 Tbs caster sugar
1 tsp vanilla essence
½ cup caster sugar
Praline:
80-100g macadamia nuts, roughly chopped
⅓ cup caster sugar 

Make praline:  Place nuts in a small frying pan and stir for a minute or two over medium heat until lightly toasted. Tip out.  Add sugar to pan.  Heat and swirl until you have a nice caramel, then add nuts, mix through and tip out onto a piece of foil.  Leave to cool then break into pieces and blitz very briefly in food processor.  It should remain quite chunky.

Line a plastic or metal mold which holds 1.5 to 2L with plastic wrap, leaving excess hanging over.  Take out three large bowls.  Place egg yolks and sugar (⅓ to ½ cup according to taste) in one, cream in another and egg whites and a pinch of salt in the third.  With electric beaters, whip egg whites until soft peaks, then add remaining 2 Tbs sugar and whip till thick.  With the same beaters (no need to wash) whip egg yolks and sugar till pale and frothy and lastly the cream till thick.  Scrape cream and meringue into egg yolk mixture, add vanilla essence, then whip the whole lot together until well mixed.   Taste and if liked add a little more caster sugar.

Tip praline into mold to cover the bottom. Tip in about half the semi-freddo mixture, then drizzle with half the mango puree.  Use a knife to swirl the mango evenly through, then pour in remaining semi-freddo, drizzle with the rest of the mango puree and repeat the swirling.  If you have too much filling pour into small glasses and freeze individual ones.

Freeze for several hours or overnight.  Remove from freezer about 20 mins before serving.  Tip out onto a serving plate and cut into thick slices with a knife dipped in hot water.  You may need to hold a cloth rung out in hot water on the outside of the mold for a few seconds to loosen this dessert.

Serves 10-12

Note: this recipe contains raw eggs

Little Crumblies

When we were living in Paris fruit crumbles, which originated in England, appeared on almost every bistro menu.  Selling British grub to the French is no mean feat, so I always regard it as one of the UK’s biggest culinary successes.

When we were living in Chile in the 1990s we had a Mapuche Indian chef called Jacinto who could make just about anything into what he called a Crumbly.  But he hadn’t quite grasped the need for a Crumbly to be sweet, not savoury.  He once proudly served an apple crumbly which looked fantastic but which the kids refused to eat.  I was abstaining as I sometimes do at dessert time – otherwise I’d be roly-poly – so James said “Mum, you try it, it’s disgusting.”  Turns out Jacinto had put the usual layer of apples underneath, but had made the crumbly topping from some savoury sage and onion stuffing, left over from the Christmas turkey.  It was interesting, but it really didn’t go with vanilla ice cream.

If I have any left over stewed fruit, or a few apples which are looking a bit tired and need using, I make individual crumblies in small souffle dishes.  To make the stewed apples go further you can mix in a few frozen raspberries or blackberries.   I buy both by the kilo and always have them in the freezer. The crumblies in the photo are made from rhubarb from the garden, cooked briefly with a dash of water and sugar to taste.  Once cooked crumblies will keep in the fridge for several days, ready to be whipped out, zapped for a minute in the microwave and eaten with a dollop of cream, or just as they are.  They just hit the spot and are not large enough to be overly filling. People with larger appetites might prefer to use larger dishes.  If you haven’t got a kilo of fruit, just use what you have and adjust the topping accordingly – it’s basically 2 parts flour to 1 part each of butter and sugar.  Any leftover crumble topping can be stored in a jar with a lid in the fridge and used another time.

Fruit Crumbles
800g -1 kg sweetened stewed fruit
250g plain flour
185g butter
3-4 Tbs brown or white sugar, to taste
2 Tbs porridge oats or macadamia nuts (optional)

Preheat oven to 180°C.  Cook peeled and sliced apples (rhubarb, peaches or whatever you are using) with a little water and sugar to taste until half cooked, but looking like a compote.  They will continue to cook in the oven.  Don’t use too much water. It should be a thick compote. If using raspberries or blackberries add them now and don’t cook them.  Grease 10-12 small dishes and fill them about two thirds full with the fruit filling.

Place flour, butter (cut into chunks) and sugar in food processor.  Process with the pulse button until it forms crumbs. There should still be small bits of butter visible.  If using oats or nuts add them now and process very briefly.  Cover fruit with crumble, place dishes on a baking tray and bake for about 25 minutes or until browned and bubbling.  Serve now or cool and refrigerate, covered, then reheat in microwave for about a minute each.  Serve with cream or vanilla ice cream.  If preferred make crumble in one large dish.

Serves 10-12 if made in small dishes

Quick Raspberry Ice Cream with Raspberry Compote

Everyone is short of time.  So while I love to cook, I’m always looking for ways to produce delicious food in record time.  This ice cream recipe, which can be adapted and varied with different berries, is a real winner.  Whip it up a couple of hours before dinner and by the time you reach dessert time it will have firmed up enough to scoop.  You can use fresh raspberries instead of frozen, but the advantage of frozen berries is that it turns the rest of the ingredients into instant ice cream.  I have put 500-600g of raspberries so you know that if your supermarket sells them in half kilo bags you don’t need to buy two!

Quick Raspberry Ice Cream with Raspberry Compote

Ice Cream:
500-600g frozen raspberries
600ml thick Greek-style yoghurt
300ml cream
1 cup icing sugar, or to taste
Raspberry Compote: 
2-3 cups frozen raspberries
¼ cup sugar, or to taste

Place all ingredients for ice cream in food processor and process until mixed. Leave it a bit chunky with some bits of raspberries still visible. Place in freezer for an hour or two or until firm enough to scoop into balls with an ice cream scoop dipped into hot water.  If left in the freezer for longer you will need to remove it about 10 mins before serving so it’s not rock hard.  For the compote, mix raspberries with sugar and leave to thaw, stirring from time to time.  Serve chunky or if preferred, push through a sieve and serve as coulis.

Makes about 1.5 litres of ice cream

Passionfruit Tart

Passionfruit vines grow well in Canberra, especially on a protected sunny wall.  Last year we had a bumper crop of over 100, so I froze the pulp in ice cube trays.  It freezes beautifully and when thawed is hard to distinguish from fresh pulp.  Unfortunately our passionfruit vine has since died – apparently they only last a few years – so we have just planted another one.

Planning a dinner party I suddenly remembered the huge sack of passionfruit cubes I have in the freezer and decided to make Neil Perry’s passionfruit Tart.  Here is the recipe with a few slight adjustments of my own.

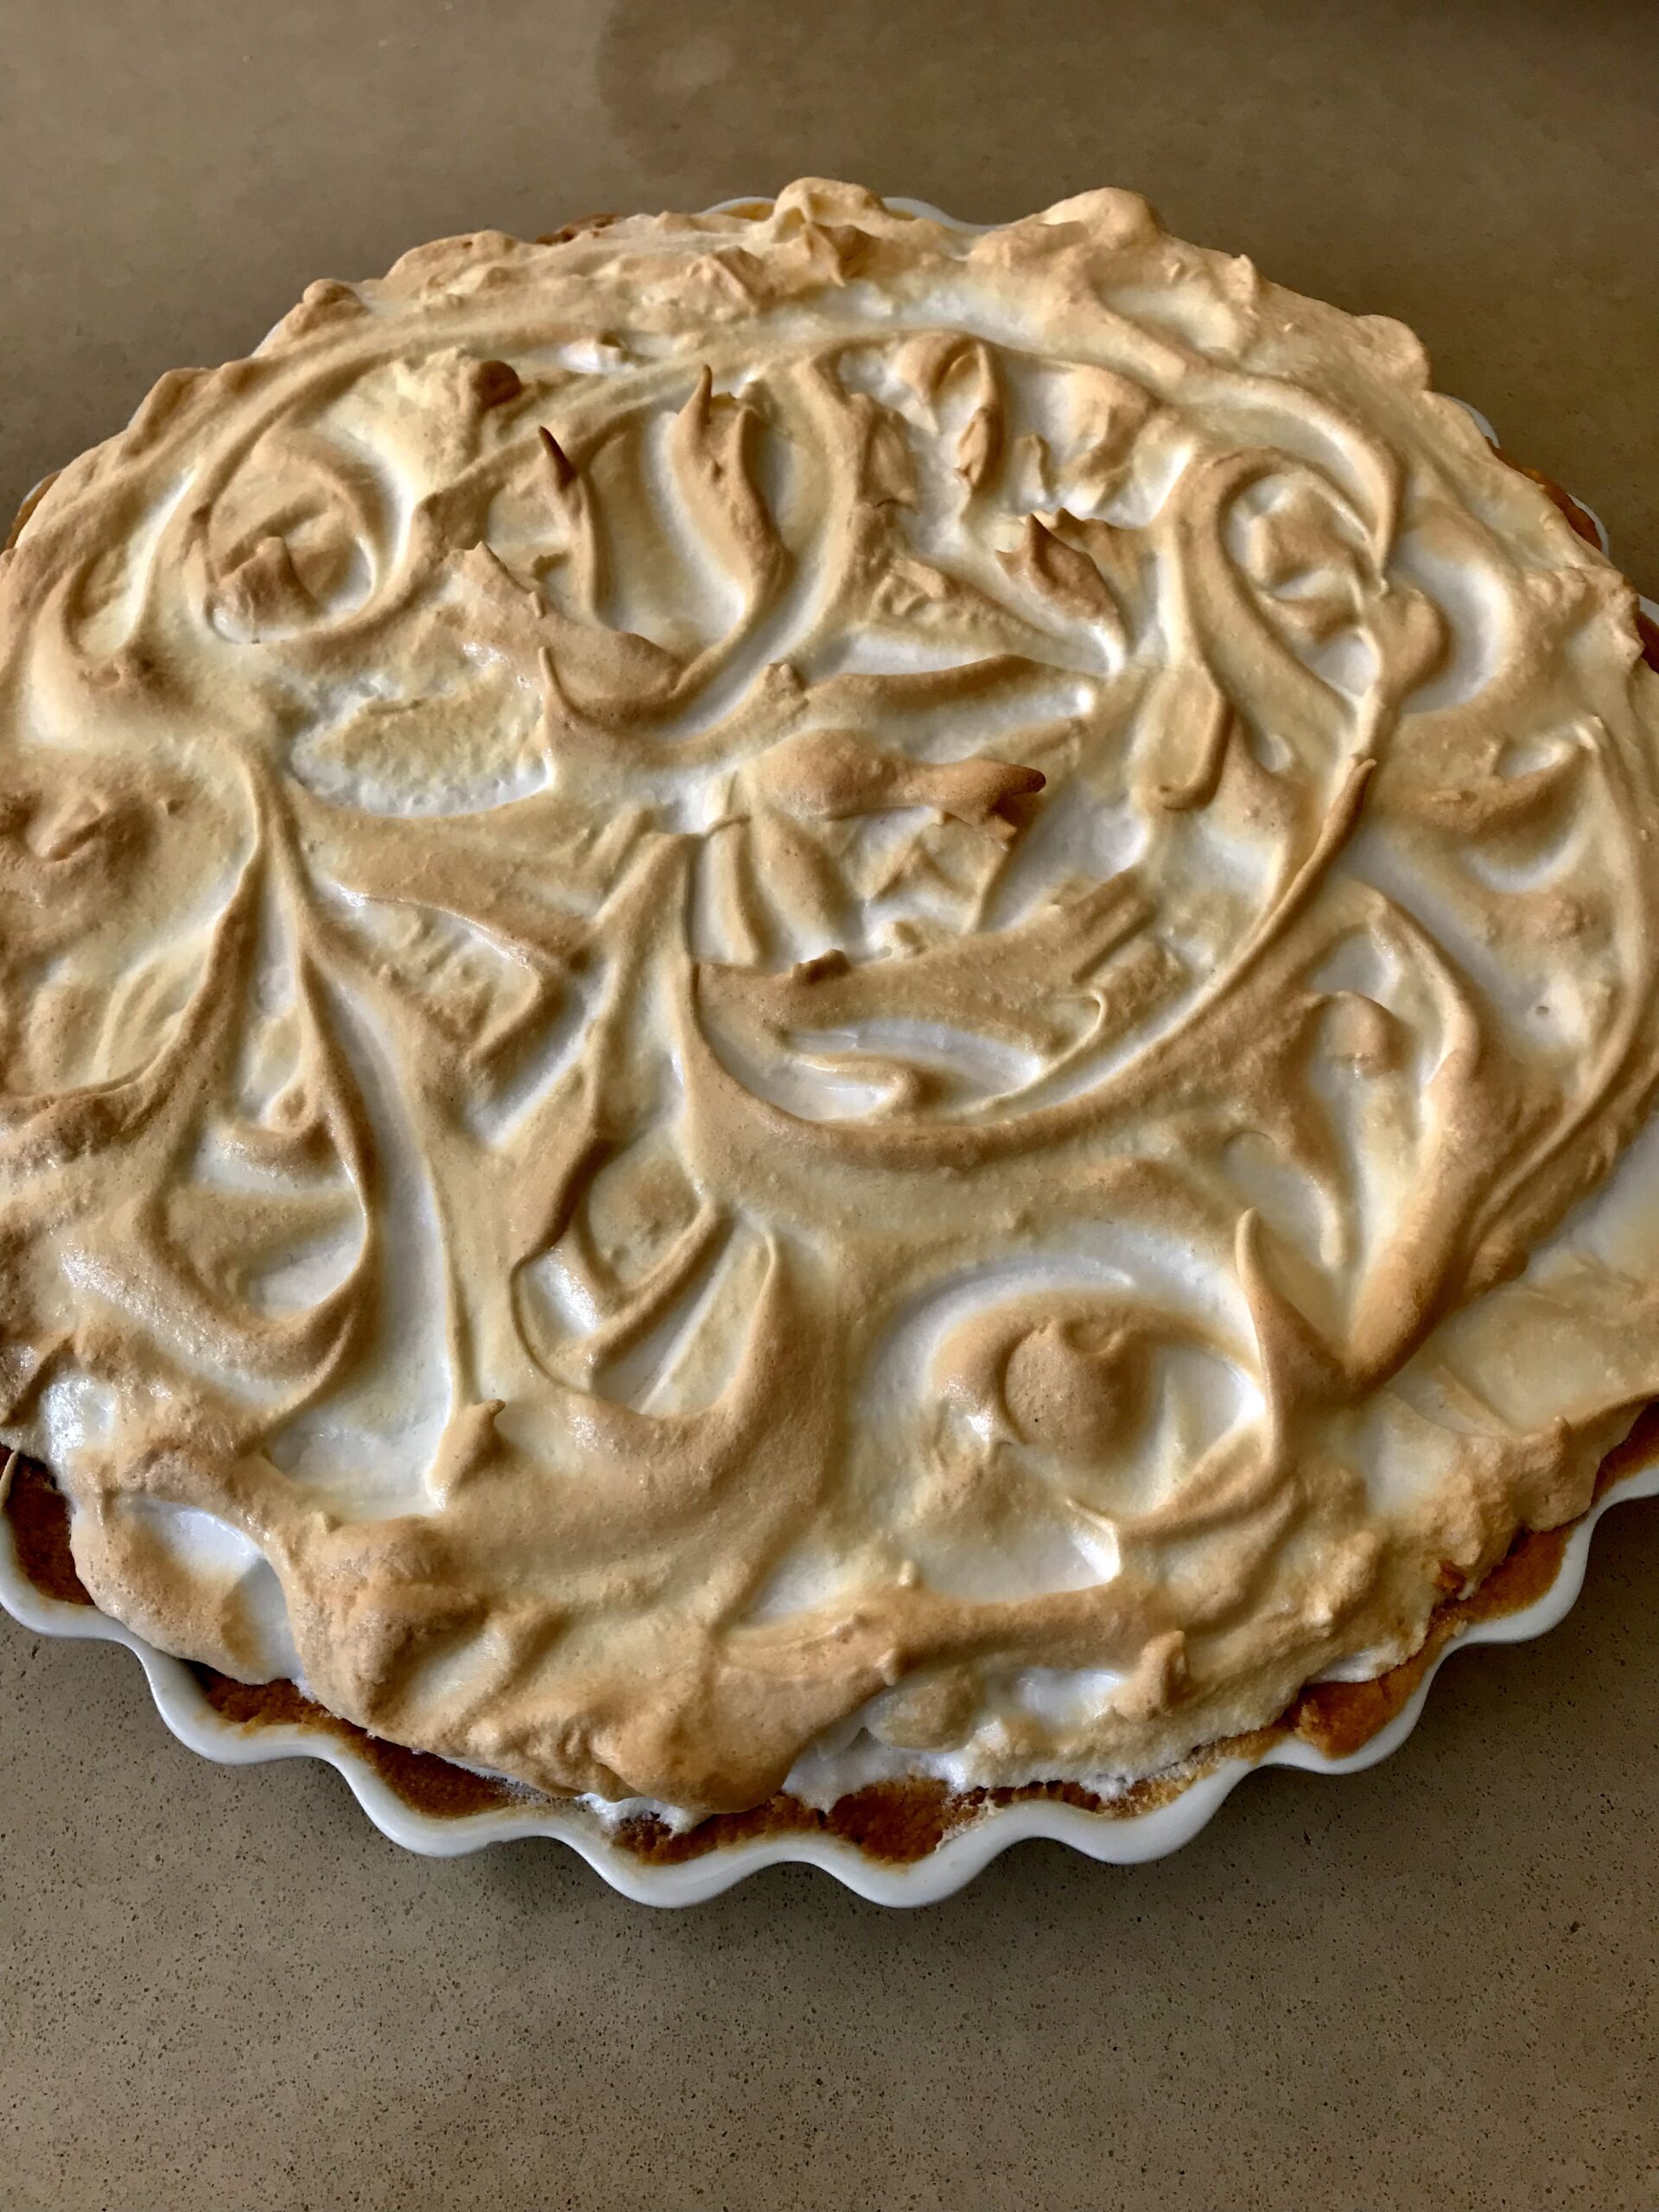
Sweet shortcrust pastry:
200g plain flour
80g icing sugar
125g unsalted butter, cut into pieces
3 egg yolks
Filling:
9 eggs
350g caster sugar
350ml strained passionfruit juice
300ml cream
To serve:
icing sugar
pouring cream (optional)
some of the passionfruit pulp

For pastry place flour, icing sugar and butter in food processor.  Process until fine crumbs, then add egg yolks and continue to process until mixture starts to form a ball.  Tip out, form into a ball, wrap in plastic wrap and refrigerate overnight or at least an hour.

For the filling, beat eggs with a hand whisk or fork – just to break them up thoroughly, not to gain any volume – then mix in remaining ingredients and refrigerate overnight. When you have strained the passionfruit pulp, if you find you don’t have quite enough juice you can add some lemon or lime juice to make up to 350ml.  Keep the pulp to decorate plates when serving.

Next day turn oven to 170°C.  Spray a 25cm metal flan tin with fluted edges and a removable base with vegetable oil.  A ceramic dish won’t achieve the same crispness in the pastry.  Make sure you thoroughly spray the fluted sides which will make it easier to remove.  Roll out pastry thinly and use to line the tin, making sure you don’t stretch it, otherwise it will shrink in the oven and leave you with lower sides than you wanted.  Refrigerate for half an hour then line with a piece of foil, pressing it gently to fit snugly into the pastry case.  Pour in something to weigh it down – you can buy special metal “beans” for this purpose, but I use a packet of popping corn which I keep in a jar to use over and over again.  Bake for about 15 minutes until the edges of the pastry are turning golden and the pastry has set, then remove foil and beans and bake for a further 10 minutes or so until golden all over.

Turn oven down to 160°C.  Carefully pour in the passionfruit filling.  This is easier to do with the tart in the oven, so it doesn’t spill when you put it back in.  Tart can be very full to just below the pastry edge.  Any excess filling can be poured into a couple of small ramekins and baked with the tart – they won’t take long.  Bake for 40 mins or until filling has set in the middle but is still very slightly wobbly when you move it. Remove from the oven and when cool refrigerate until serving time.

To serve, carefully remove the sides from the tin – you may need to use a thin knife to loosen the edges of the pastry first.  Using a sieve, shake icing sugar evenly over tart, then cut into portions and place on serving plates.  Decorate each plate with a drizzle of passionfruit pulp and pass the cream separately.

Serves 8-10

Variations: Lemon Tart or Lemon and Lime Tart – use 350ml strained lemon or lime juice or a mixture of the two instead of the passionfruit juice.

Coffee & Halva Ice Cream Cake with Hot Chocolate Sauce

This cake makes a great dessert or birthday cake to serve a crowd.  It can be made a few days ahead and is always popular.  The coffee and halva flavours might be a bit sophisticated for small children, although our two and a half year old granddaughter Natalia loves olives, artichokes, radicchio and rocket, so you can never tell.  The recipe is adaptable – instead of coffee you could add chocolate chips and instead of halva you could add crumbled honeycomb or violet crumble bars.  Use your imagination.

Halva is a dense, crumbly Middle Eastern sweet containing nuts – a bit like a cross between fudge and nougat.

The chocolate sauce uses ingredients everyone has in the pantry (so you don’t need to rush out and buy a bar of chocolate) and keeps for at least a week in the fridge.  If preferred you can make a sauce by heating a cup of cream to boiling point, then removing from the heat and adding about 200g chocolate (milk or dark), broken into squares.  Stir till dissolved.

Coffee and Halva Ice Cream Cake with Hot Chocolate Sauce

Meringues:
4 large egg whites at room temperature
pinch salt
250g caster sugar
½ cup slivered almonds (optional)
Coffee Ice Cream:
2 litres good quality vanilla icecream (bought or home-made)
2 Tbs instant coffee powder dissolved in 1 Tbs hot water
Halva Ice Cream:
2 x 300ml sour cream
1 tsp vanilla essence
¼ cup icing sugar
250g (approx) halva (from delis and specialty shops)
Chocolate Sauce:
½ cup sugar
¾ cup water
4 Tbs cocoa powder
2 Tbs golden syrup
1 Tbs butter
1 tsp vanilla essence
½ cup cream
To serve:
Cocoa powder

Meringues: Line two baking sheets with baking paper and turn oven to 150°C.  Draw a 20 cm diameter circle on each sheet of paper.  With an electric mixer whip egg whites with salt until they hold their shape, then gradually add the sugar, beating constantly, until you have a thick glossy meringue.  Spread meringue evenly onto the circles you have drawn, leaving a little space all around as they will expand in the oven and you want them to fit into a 20 cm tin.  If liked, sprinkle almonds over one then bake the meringues for about an hour until firm but pale in colour.  Turn off the oven and leave them to cool in there.

Coffee Ice Cream: Remove ice cream from the freezer and let it soften for about 10 minutes then tip into a large bowl and stir until smooth.  Thoroughly mix in coffee mixture, then put back into container and refreeze.  Halva Ice Cream: Mix sour cream with icing sugar, vanilla essence and roughly crumbled halva.  Tip into a plastic container with a lid and freeze.

Remove the two ice creams from the freezer about 10 minutes before assembling the cake.  Place the meringue layer without the nuts in the bottom of a 20 cm springform cake pan, bottom-lined with baking paper.  If too big, carefully trim off the edges with a sharp knife and keep testing, till it goes in.  Spread a layer of coffee ice cream over the meringue.  There will be more of this ice cream than the halva one, so you may decide not to use it all.  Sprinkle the meringue trimmings over the ice cream – unless you’ve already eaten them – then spread evenly with the halva ice cream.  Top with the other meringue, nut side up and trimmed to fit.  Press down gently.  Cover with plastic wrap and place in the freezer for up to 3-4 days.  Remove from freezer about 15 minutes before serving so it’s not rock hard.  Run a knife dipped in boiling water around the outside of the cake to enable you to remove sides from cake tin.  Dust top of cake with cocoa powder through a sieve.  Slice cake with a knife dipped in boiling water and serve with the sauce.

Sauce: Choose a large pan because this recipe will boil over if the pan is too small.  Place all ingredients except butter, vanilla essence and cream in pan.  Mix then simmer for 5 mins without stirring.  Cool for 10 mins then stir in butter and vanilla.  When almost cold mix in the cream.  Serve warm with ice cream.  Keeps for at least a week in the fridge – reheat in the microwave and allow to cool a bit.  If piping  hot it will be too runny.

Serves at least 12

Variation: if preferred divide meringue into three to make three thinner layers.  This allows you to put one between the two flavours of ice cream.

Raspberry Cake with Raspberry Coulis: leave the first layer of ice cream plain vanilla, leaving out the coffee.  For the second layer place the two packets of sour cream in food processor with 2 cups frozen raspberries, 300ml cream and icing sugar to taste.  Blitz enough to combine but leaving the raspberries a bit chunky.  Serve cake with Raspberry Coulis instead of Chocolate Sauce.

Salted Caramel Ice Cream Cake with Hot Chocolate Sauce: Instead of slivered almonds on one meringue layer, use skinned and lightly toasted hazelnuts, roughly chopped.  Instead of the coffee and halva ice cream layers, use three 470ml tubs of Connoisseur Murray River Salted Caramel Ice Cream with Chocolate Coated Hazelnuts.  Remove from the freezer to soften slightly then mix them in a bowl then spread over the first meringue layer.

Apple Strudel

Peek celebrations are all about the food and those in the know rarely turn down an invitation to one of our gatherings.  A Dutch friend once told me that when Dutch people have guests coming they clean the windows.  My mother arranges flowers everywhere, while others spend hours cleaning and dusting.  I cook and so do our three offspring.  If it’s a choice between doing a quick gallop round with the vacuum cleaner before people arrive, or whipping up some mayonnaise to go with the prawns, the mayo will win every time.

Last Saturday our son James organised an afternoon tea party to celebrate his wife Karen’s 40th and their second son Luke’s 3rd birthday.  There were about 20 adults and umpteen kids coming, so I offered to make a couple of apple strudels and some egg, mayonnaise and chive sandwiches which always go down well with kids of all ages. Home-made mayonnaise is the secret.  James made some delicious morsels, including sausage rolls and mini yorkshire puddings with smoked trout pate.

When I was growing up in England my mother only had two cookbooks.  One was published by the makers of Stork margarine and contained basic recipes for the cakes and pies a British housewife needed in her repertoire.  It was my Mum’s bible in the early days of her marriage and she gave me an updated version when I got married and moved to Australia.  I still have it somewhere amongst my many cookbooks.

The other was called International Cooking and it had a chapter from several European countries. When I was about twelve I made the Austrian Apple Strudel.  It was a huge success and I’ve been making it ever since.  You can use fillo pastry instead of making your own dough, but it’s not really hard to make. If you use fillo you will need about 10 sheets.

Dough: 

250g plain flour

2 egg yolks

pinch salt

2 Tbs oil

About 150ml tepid water

Filling:

750g peeled, cored and sliced apples (I like Granny Smiths)

50g currants

50g raisins

80g fresh breadcrumbs (just whizz some bread in processor)

1 tsp cinnamon

100g unsalted butter, melted

125g sugar

60g melted butter, extra, for frying crumbs

50g melted butter, extra, for brushing

Dough: Place all ingredients except water in food processor and mix, then add enough tepid water slowly through the top with the motor running, until it forms a ball. It should be soft but not sticky. Stop the motor when it has started to form a ball.  Gather all the bits together and knead for a few seconds with floury hands to make a smooth ball, then wrap in plastic wrap and put aside while you make the filling.

Filling: fry bread crumbs until golden brown in 60g butter, turning, till they look like toasted muesli. Mix with remaining ingredients. Sprinkle a little extra flour over a clean tea towel and roll dough out as large as possible without tearing using a rolling pin. Then continue to stretch gently with your hands until you have an oblong about the size of the tea towel and the length of your baking tray.  Spread with apple filling, leaving about 2.5 cm all round. If you like you can cut the slightly thicker edges off, but I like to fold them in onto the apples.  It makes the ends of the strudel a bit thick and doughy, but it ends up crunchy and for some people that’s their favourite bit!

Roll up using the tea towel to assist, with the long end underneath. Tuck the short ends under and pinch to seal. Place on a buttered baking sheet and brush with some of the extra butter. Bake 15-20 minutes at 200°C, then 20-30 minutes or so at 180°C, brushing from time to time with melted butter. When golden brown remove and cool for 10 mins, then carefully remove with spatulas to a cake rack. You will need two people with a spatula in each hand.  Serve warm or at room temperature, dusted with sifted icing sugar and accompanied by whipped cream.

Note: It’s nicer and more authentic using home made pastry. If using fillo pastry, stack 10 sheets, brushing each one liberally with melted, unsalted butter. Place filling along one long edge rather than spreading it all over. Roll up and proceed as above.