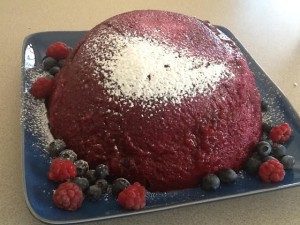
This is an old English recipe which was traditionally made in summer when the red berries are in season. Nowadays you can make it any time of the year with frozen fruit.
I made double the recipe in an 8 cup (two litre) bowl using a 1.5kg bag of mixed frozen berries from Costco. The mix consisted of blueberries, blackberries and raspberries. In England they would also have added a few blackcurrants, but unless you grow them yourself (as we do, but we’ve eaten them all this year!) they’re hard to find in Australia, even in season. It’s hard to say how much bread you will need – I used about two thirds of a loaf. There were just enough raspberries and blueberries in the garden to use as decoration.
 750g mixed red berries, thawed if frozen
Sliced homemade-style white bread
100-150g sugar
To serve:
Icing sugar
Thick cream or whipped cream
A few fresh berries
Remove crusts from bread and cut to fit bottom and sides of 4 cup pudding bowl. It’s like doing a jig-saw puzzle! Put fruit and sugar in a shallow pan, cover and cook gently for 5-10 mins, shaking occasionally. Cool a bit and adjust sugar.
 Using a slotted spoon, half fill basin with fruit, then a layer of bread, fill with remaining fruit and cover with bread. Spoon in enough juice to fill the basin. Use a knife around the edge of the bowl to make sure the juice goes down and colours all the bread. You will probably use it all. Place a small plate and a 1 kg weight on top and stand the bowl in a dish to catch juices. Refrigerate overnight.
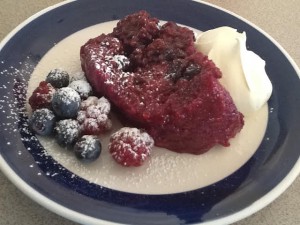
To serve, run a knife with a thin blade around the pudding to loosen it from the bowl. Invert onto a serving plate then shake and it should drop out. Dust with icing sugar and serve with thick cream or whipped cream and a few fresh berries.
Serves 6-8
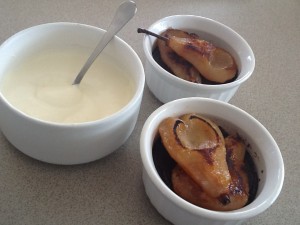
 Coffee ice cream:


 We all know that children need good role models. But do we ever stop growing up? I think adults also need older friends to look up to and think “That’s how I want to be when I’m that age”. Such friends are a rare commodity and to be treasured.