I began collecting recipes when I was at school. Some of the recipes in my large collection have been in my family for generations, others were passed on by friends and chefs around the world. Many have been adapted over the years to make them lighter or update their presentation. I’ve served them to royalty, PMs and other VIPs and there have been no complaints. I hope you are inspired to make some of them.
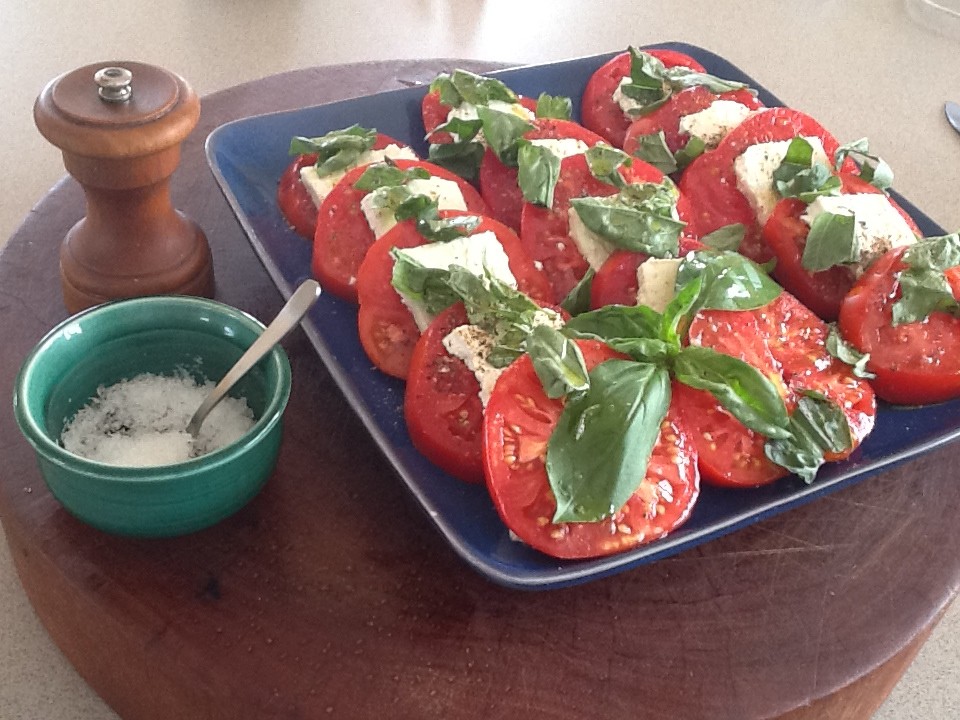
Caprese Salad is a very simple dish consisting of sliced tomatoes and fresh buffalo mozarella with fresh basil, olive oil and seasonings. It’s one of the best ways to enjoy perfect tomatoes in summer. In the photo I used Farmhouse-style cottage cheese from Costco instead of mozarella. But you could substitute any soft, mild-flavoured, sliceable cheese such as “queso fresco” (widely available in South America), goat’s cheese or a creamy feta. It won’t be an authentic Caprese Salad without the mozarella, but it will still taste good.
Drizzle with your best extra-virgin olive oil, then season with crunchy Maldon-style sea salt and freshly ground black pepper. A little balsamic vinegar or balsamic glaze (which is thicker) is a good addition. A loaf of fresh bread – preferably Italian – a bottle of wine and lunch is ready.
1 kg vine-ripened tomatoes
About 250g fresh buffalo mozarella (or substitute – see above)
Fresh basil
Extra-virgin olive oil
Maldon style salt flakes
Freshly ground black pepper
Balsamic vinegar or glaze (optional)
Cut tomatoes horizontally into thick slices, discarding both ends. Slice cheese. Arrange tomatoes and cheese on a shallow serving dish, as shown in photo. Sprinkle with torn up basil leaves, drizzle with oil and season with salt and pepper. Drizzle with some balsamic vinegar or glaze, or let people add this if they like at the table. Serve with crusty bread.
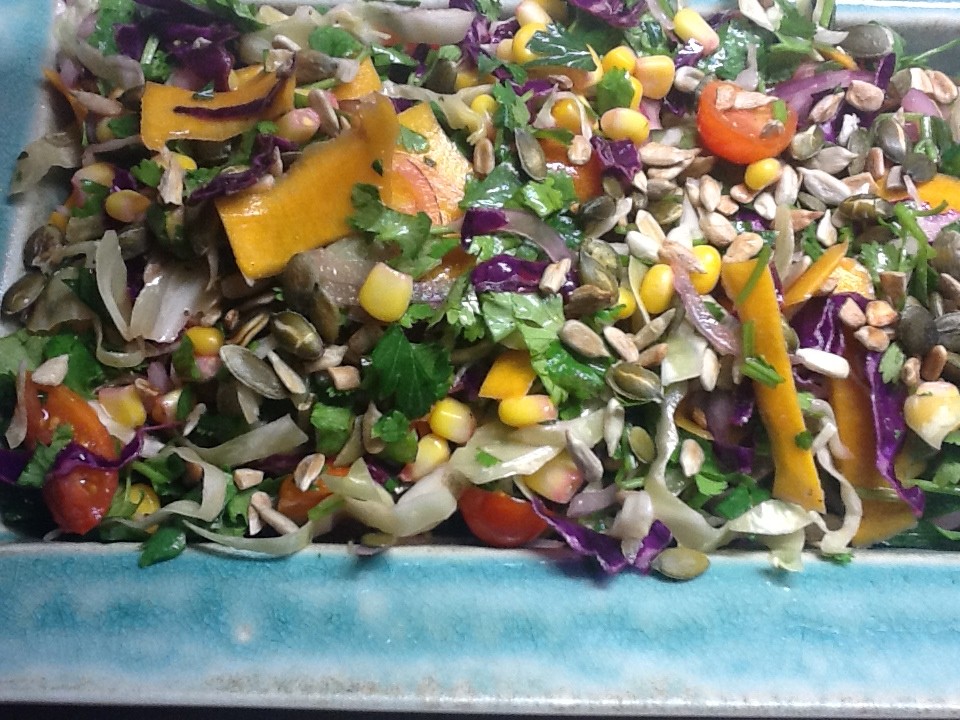
This version of coleslaw uses Mexican flavours and a light oil and lime juice dressing. Crunchy, colourful and bursting with vitamins, it goes well with burgers, steaks or any roast or barbecued meat or poultry.
2-3 cups finely shredded white cabbage
2-3 cups finely shredded red cabbage
1 cup raw pumpkin curls (made with a vegetable peeler)
1 cup raw corn kernels, cut off the cob (see note)
1 cup flat-leaf parsley, roughly chopped
1 cup fresh coriander leaves, roughly chopped
1 small red chilli, seeded and finely chopped
1 small or ½ medium red onion, halved and finely sliced
1 punnet cherry tomatoes, halved Dressing:
½ cup extra virgin olive oil
Juice of 1 lime or ½ large lemon
Salt and freshly ground black pepper, to taste
1 tsp honey Topping:
2 Tbs pumpkin seeds
2 Tbs sunflower seeds
Place all ingredients for salad in a bowl. Place all ingredients for dressing in a jar and shake. Toast pumpkin and sunflower seeds by stirring in a dry pan over moderate heat for 2-3 minutes. Mix coleslaw with dressing and top with toasted seeds.
Serves 4-6
Note: or substitute frozen corn, blanched for a minute in hot water, or drained canned corn.
Variations: use carrot curls instead of pumpkin; add thinly sliced red capsicum (pepper) and/or zucchini or cucumber, cut into julienne sticks.
When we were living in Paris our daughter Catherine was studying for an Arts-Law degree at the Australian National University in Canberra. She rang one day and said “Hey Mum, I’ve been thinking, when again am I going to have the chance to learn French with free accommodation in Paris?” Always a good negotiator it seems she had it all worked out. Within a month Catherine joined us in our apartment on the 8th floor of the Embassy building in the 15th arrondissement, having arranged to take a semester off uni.
A few days later the Ambassador’s butler Thierry rang. He had heard our daughter was in Paris and wondered if she would like to work at a cocktail party. We found a suitable black skirt and a white blouse and off she went to their apartment on the top floor of the building adjacent to ours.
Matthew and I were attending the party and when we arrived Catherine was busy handing out canapés to the guests. Having worked in several Canberra establishments, including Tilleys in Lyneham, she looked quite at ease. We were chatting in a small group, which included the Ambassador, when Catherine came past again with some delicious hot canapés. As Matthew reached out to take one she whipped the tray away, adding in a stern voice “You’ve had two already!”
The Ambassador was mortified and apologised profusely to Matthew. He said he had never seen this waitress before and she would never be hired again. When we explained who she was we all had a good laugh. The reason she was keeping a close eye on what we ate was because we had been on a diet for a week in an attempt to lose a couple of kilos. Daughters take their duties very seriously.
After a three week intensive course at the Alliance Française Catherine landed a job in a restaurant called Ze Kitchen Gallerie in the Latin quarter. I thought they would give her an easy job filling water glasses and bread baskets, but she was thrown in at the deep end with ten tables to serve each night. She survived and lived to tell the tale – in French!
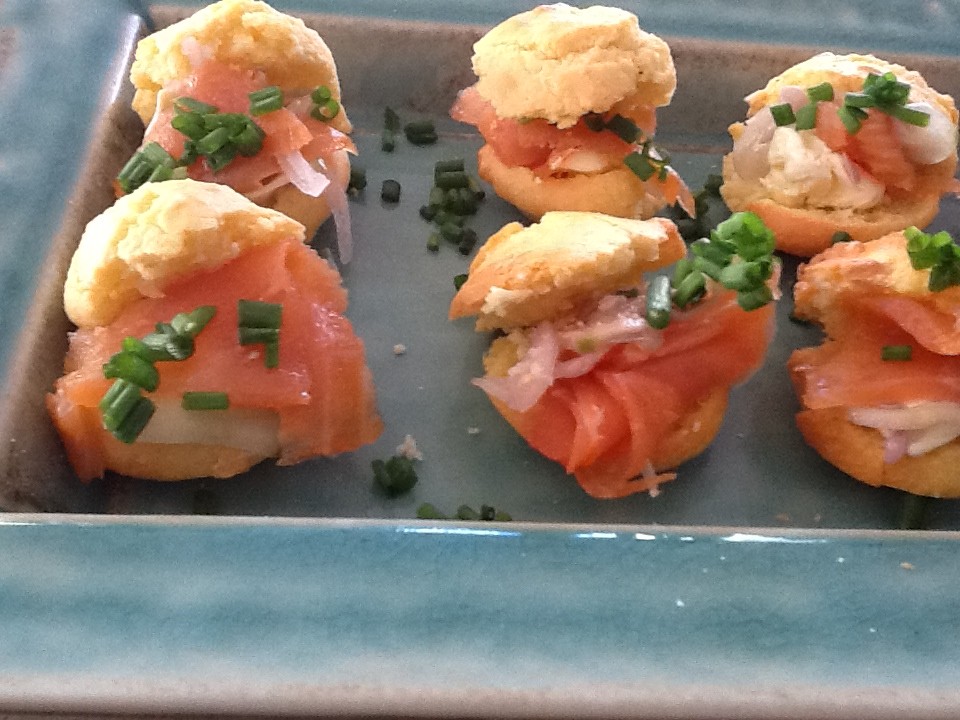
If you need something quick to make when friends pop round for a drink, these savoury muffins take no time at all and are delicious filled with smoked salmon or gravlax. Best eaten the day they are made.
1 cup self-raising flour, sifted
½ tsp baking powder
½ cup polenta
1 tsp salt
1 Tbs sugar
1 egg
1 Tbs olive oil
¾ cup milk To serve:
250g cream cheese at room temperature
1 Tbs lemon juice or lime juice
2 Tbs snipped chives or chopped dill
6-9 slices smoked salmon or gravlax
Pickled cucumber with red onion (see below)
Preheat oven to 180°C. Mix all ingredients for muffins and use to fill mini-muffin trays. I used silicone ones which don’t need greasing. Amount per muffin will depend on the size of the trays. Mine hold about a heaped teaspoon of batter. Bake for 10-15 mins or until golden. Cool.
Mix cream cheese with snipped chives or dill and lemon juice. Cut muffins in half and spread about half a teaspoon of cream cheese on the bottom half, then a small piece of smoked salmon or gravlax and some pickled cucumber and onion, drained and patted dry with paper towel. Spread a little more cream cheese on the lids and stick back onto the muffins. If preferred leave out the pickled cucumber and onion altogether, or substitute a slice of commercial gherkin or a couple of capers. Arrange on a serving tray and garnish with a few more herbs. Best eaten fresh on the day they are made.
Makes about 30
Pickled Cucumber and Onion
Thinly slice one or two Lebanese cucumbers or half a Telegraph cucumber and layer in a jar with a small, thinly sliced red or white onion. Add enough vinegar and water to cover – about half of each – about a tablespoon of sugar and half to one teaspoon of salt. Shake then marinate for several hours before using. Keeps in the fridge for up to a week.
It was a perfect summer afternoon in Canberra, with clear blue skies and a light breeze. About 30 ladies sat in the garden of the New Zealand High Commission chatting and enjoying a delicious afternoon tea. We had gathered to say goodbye to a couple of very good Kiwi friends.
A beautiful young kookaburra sat on a low branch of a nearby tree, calmly watching proceedings. I’m not an expert on native birds, but apparently our feathered friend was female, so she probably thought she was invited. We later discovered that she was waiting for our hostess to feed her some minced beef, which she did just before the last guests departed.
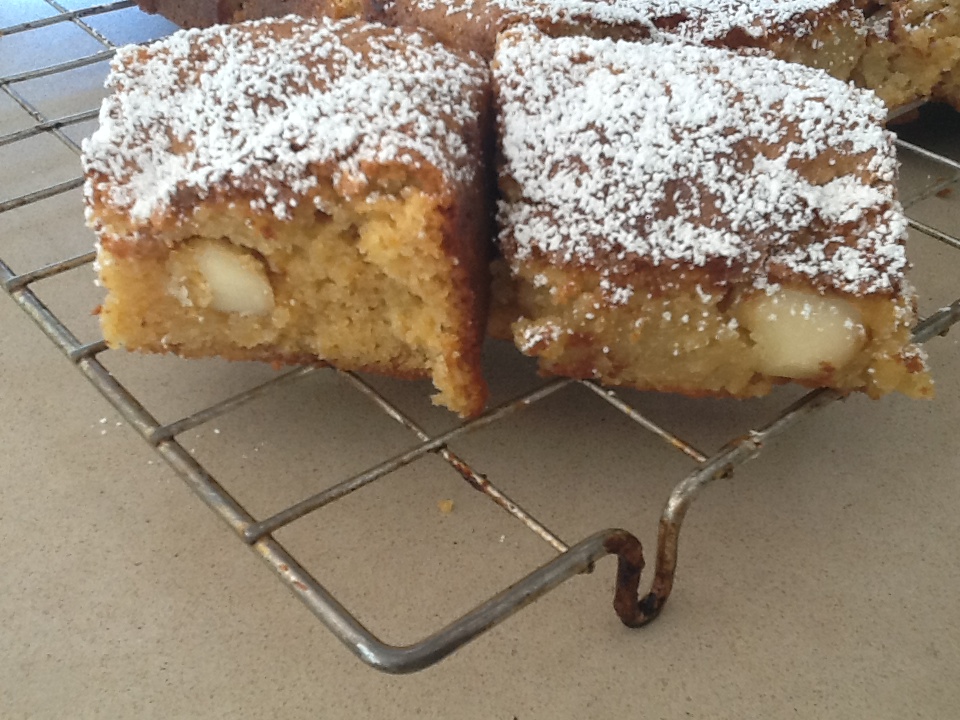
Afternoon tea used to be a standard affair. Now it’s a real treat. The party began at 2pm so I decided to skip lunch and was glad I had done so. When everything looks so delicious it’s tempting to try everything. I didn’t, quite, but I did try quite a few things. My favourite cakes were the White Chocolate and Macadamia Blondies which had come from the Kiwi Kitchen in Fyshwick.
I decided to try and replicate them and spent half an hour reading through various Brownie and Blondie recipes on Google. A Blondie by the way is a Brownie, without the ingredients which make it dark. I was pretty sure one of the ingredients was condensed milk, but couldn’t find any recipes for Blondies using that ingredient. I did, however, find one for Brownies which used it. So here is the result of combining three recipes. Not quite the same as the original version, but close. A delicious cake which will appeal to the sweet tooth brigade. Serve as a cake or warm as a dessert, with vanilla ice cream or whipped cream.
150g unsalted butter
1 can condensed milk
½ cup brown sugar, firmly packed
1 tsp vanilla essence
2 eggs, lightly beaten
2 cups self-raising flour, sifted
1 cup white chocolate chips/melts
1 cup macadamia nuts, coarsely chopped
Preheat oven to 180ºC. Line a 9″ (22cm) square cake tin with baking paper. Place butter in a large mixing bowl and melt in the microwave. Add remaining ingredients one by one, in the order they are listed. A good way to crush the nuts without making them too fine is to press each one with the back of a large knife, the way you crush garlic. When thoroughly mixed, scrape mixture into the tin and smooth the top. Bake for 25-30 mins. The top should be golden brown, but the middle of the cake should still be quite soft when you take it out. It will firm up when cold.
Cool then cut into squares and dust with icing sugar.
Makes 20-25 squares
Note: anyone with an allergy to nuts could use oats instead of macadamias.
David and Amy brought a delicious glazed ham to our Christmas celebrations. When we finished it I froze the bone and today, in early March when the weather is much cooler, I’m using it in a good old-fashioned Pea and Ham soup. Growing up under the influence of my mother’s “war mentality” makes it hard for me to throw away anything which could be turned into a meal.
This soup will “warm the cockles of your heart”. Having typed that I thought “what a strange expression” and decided to look it up.
One site which explains such expressions says: Something that warms the cockles of one’s heart induces a glow of pleasure, sympathy, affection, or some such similar emotion. What gets warmed is the innermost part of one’s being. The Oxford Dictionary simply says it means to give one a comforting feeling of contentment.
There are all sorts of theories as to the origins of this saying, the most popular being that the ventricles of the heart are shaped like cockles, a popular shellfish when I was growing up in England. We used to buy them doused with malt vinegar at seaside resorts on the south coast, such as Margate and Ramsgate. It took an hour to get there by train, but in summer we often went to the coast for two weeks and stayed in a bungalow or caravan in Leysdown or Seasalter.
As kids we thought a trip to the seaside was heaven. There was candy floss and pink and white striped sticks of candy which was called rock – an appropriate name as you just about broke your teeth eating it. And there were amusement parks, where you could scare yourself to death on the roller coaster or win a hideous pink teddy bear on the shooting range. The water was always freezing but we swam anyway and came home with sand stuck to everything. Happy days.
I was never very fond of cockles or whelks (sea snails) preferring the juicy pink shrimps also sold on the seafood stalls. An even smaller shellfish called a winkle had a tiny body which had to be removed from its shell with a pin – a tedious task, which is probably why I didn’t like them. My mother loved them. Sometimes we took some home and she ate them for tea, with brown bread and butter.
I am pleased that the “war mentality” gene has been passed on to our three offspring and their partners who also run households with my mother’s motto “waste not want not.”
1 cup yellow split peas
1 ham bone (see note below)
About 2 litres chicken stock, preferably home made
1 cup chopped carrots
1 cup chopped onion
1 cup chopped celery
1 clove garlic crushed
1 tsp dried thyme or 1 Tbs fresh
1 bay leaf
Salt and freshly ground black pepper, to taste
Fresh parsley, coriander or thyme
Wash peas and soak overnight or for several hours in cold water, then drain. Put peas and stock in large pan with ham bone and simmer 2 hrs with a lid. Add vegetables, herbs and simmer for half an hour. Remove ham bone and cut off any meat. Cut it into small pieces and put it back into the soup. Add more water if soup has become too thick and check seasoning. Reheat soup and serve topped with chopped fresh herbs and some crusty bread.
Serves 6-8
Note: if you don’t have a ham bone, most supermarkets sell ham hocks or meaty bacon bones which can be used instead.
Once or twice a fortnight we like to have a vegetarian dinner. Matthew has always been a big fan of barley and I recently bought some quinoa, so I thought I would make a vegetarian dish combining these two grains. The result was delicious.
Quinoa (pronounced kin-wah) originated in the Andean regions of Ecuador, Bolivia, Colombia and Peru, where it has been an important staple for 3-4000 years. It’s a grain-like crop, but not a member of the grass family, being more closely related to beets and spinach. The recent popularity of quinoa is due to the fact that it’s gluten-free and easy to digest. It’s also high in protein (14%), magnesium, iron and calcium. There has been some controversy of late over the high price the locals are having to pay for quinoa in South America, the price having gone through the roof due to increased exports.
I know that some of my readers don’t eat meat, so this is one for you.
¾ cup quinoa
¾ cup barley
1/3 cup red wine vinegar
½ cup pine nuts or coarsely chopped cashew nuts, lightly toasted
Chopped fresh parsley or coriander Pumpkin mix:
5-600g butternut pumpkin, peeled and cut into 2-3cm cubes
1/3 cup olive oil
1 clove garlic, crushed
2 Tbs fresh thyme or 2 tsp dried
½ tsp each cumin, coriander, cayenne pepper
1 tsp salt Mushroom mix:
500g mixed mushrooms (see note below)
2 Tbs fresh thyme or 2 tsp dried
2 cloves garlic, chopped
Salt and freshly ground black pepper to taste
½ cup olive oil
Cook quinoa and barley separately in boiling salted water to cover. The barley will take about 40 mins and the quinoa about 10. Add more boiling water as necessary so they don’t boil dry. Don’t overcook – they should both be “al dente”. Rinse and thoroughly drain the grains and place in a bowl.
While grains cook preheat oven to 180C. Mix pumpkin with remaining ingredients. Line an oven tray with baking paper and spread pumpkin mixture over it. Bake for 30 mins at 180 or until cooked and edges start darkening. Clean mushrooms if necessary, tear or cut up and mix with remaining ingredients. Line another oven tray with baking paper and spread mushroom mixture over it. Bake for 8-10 mins on the shelf under the pumpkin.
Add pumpkin and mushroom mixtures, including any oil and juices, to the cooked grains. Add vinegar, mix gently and check to see if it needs more salt and pepper. Tip into a serving dish or individual bowls. Serve lukewarm or cold, garnished with the toasted nuts and chopped herbs.
Serves 4-6
Note: for the mushroom mix I used 150g of Shimeji, 100g of Enoki (both torn apart) and 250g of button mushrooms (wiped and thickly sliced) – all from Woolworths supermarket. If you can’t find fancy mushrooms use all button mushrooms.
From Paris a rural drive incorporating a few villages, a château and a good lunch is a delightful way to spend a Sunday in early summer. Or any time of year for that matter. Our friends Lynne and Brian were visiting from Australia and staying with us at the Embassy complex. We booked a table for lunch at La Vanne Rouge in Montigny-sur-Loing, about an hour’s drive from Paris. After a pleasant drive via the Château de Fontainebleau we arrived in the small village of Montigny-sur-Loing. Lynne, Brian and I went to find the restaurant while Matthew parked the car.
The restaurant appeared to be set up for summer in the courtyard, accessed through high timber double gates. There didn’t appear to be any other way in. The gates were locked so I rang the bell and we waited. After a few minutes I rang again. No response. Through the keyhole I could just make out a few tables, but I couldn’t see any staff in order to draw their attention. We had been waiting for more than 10 minutes when Matthew arrived to find me jumping up and down in an effort to be seen by someone inside. I rang the bell again, this time long and hard.
Suddenly the gate was opened by a tiny elderly lady dressed in black, her hair pulled back into a severe bun. Madame looked us over and demanded to know what we wanted. I explained that we had booked a table for one o’clock and apologised for being 15 minutes late, adding by way of explanation that we had been waiting for more than 10 minutes and had rung the bell several times. “That’s impossible. There’s no need to tell lies” she barked back at me. Then in the same cross tone she shouted across the courtyard to a young waiter “Did you take a booking for these people at one?” Fortunately he confirmed that he had. We were getting pretty hungry by this stage and finding somewhere to have a good Sunday lunch in France without a booking is virtually impossible. We know, we’ve tried.
“Follow me” said our unfriendly hostess. And so we did, feeling like four naughty school children. “Sit here” she said, pointing to a table with nothing on it. Madame proceeded to set the table, plonking everything down noisily and glaring at us all the time. “Is this normal?” whispered Lynne, as we sat in silence like stunned rabbits while Madame finished the table. “Um not really, but it does seem to happen more in France than in Australia” I replied when Madame was out of earshot.
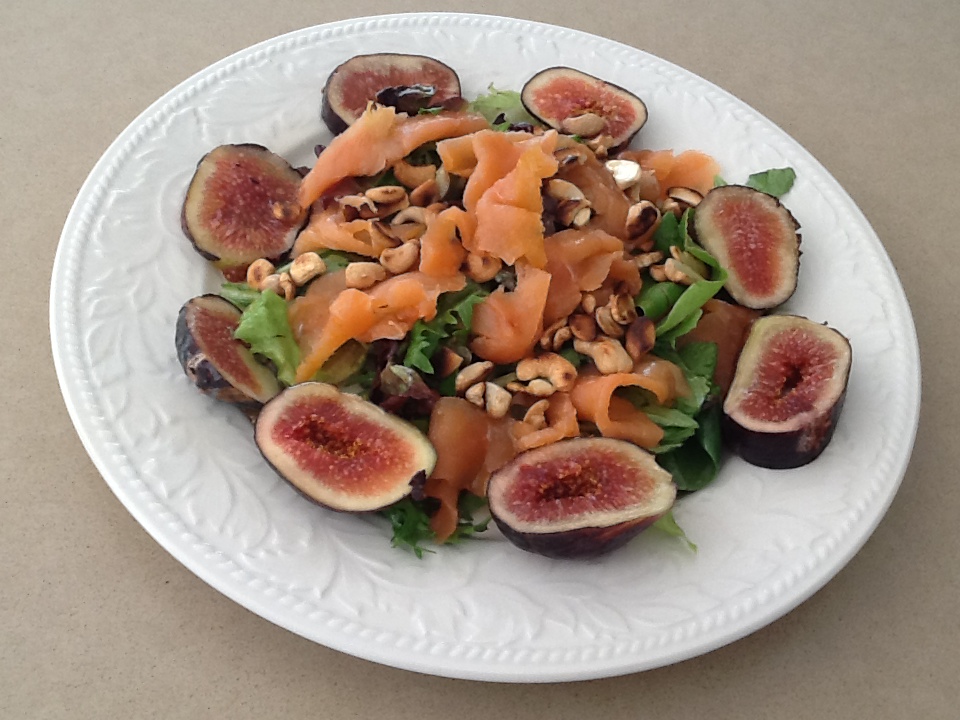
The meal arrived and it was excellent. My starter of figs with smoked salmon was so delicious I have been making my own version ever since. Whoever would have thought that figs go so beautifully with smoked salmon? Their chef had made the smoked salmon into a nest in the middle and cut some of the figs into small dice to scatter around the plate. And their salad leaves were very small delicate mesclun, so it all looked very snazzy. My version as you can see is far less glamorous, but not bad for a quick lunch.
Once the food arrived we relaxed and started to enjoy ourselves. As we were eating, Madame’s three-legged dog appeared and I made a fuss of him. That was it, her attitude changed completely and we were friends for life.
4 cups small mixed salad leaves
Walnut oil
White balsamic vinegar
4 fresh figs, sliced
6 slices smoked salmon, cut into ribbons
1/3 cup pine nuts (see note below), lightly toasted
Dress salad leaves with a little oil and vinegar then arrange on two plates. Arrange smoked salmon and figs over the salad, sprinkle with the toasted pine nuts and drizzle with a little more walnut oil.
Serves 2
Note: Having made a whole heap of pesto last weekend I had run out of pine nuts so I used chopped cashews which were okay but not quite as good. If you haven’t got walnut oil use olive oil.
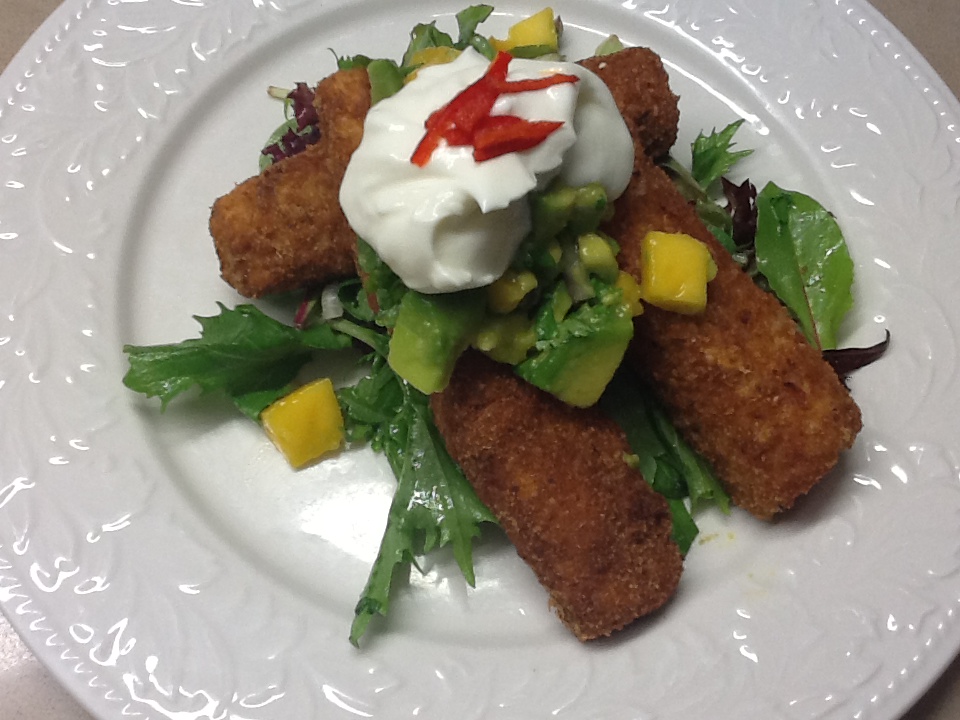
This recipe appeared in Delicious magazine as a filling for tortillas. We found it was nicer without the tortillas. The fish sticks are rather like fish fingers for grown ups. The recipe is easy to halve and if you don’t have a deep fat fryer you can cook the fish in the oven or in a frying pan.
500-600g firm white fish fillets (I used Hoki)
1/3 cup plain flour
1 tsp cumin
1 tsp paprika, preferably smoked
salt and freshly ground black pepper
2 eggs
About 2 cups packaged dry breadcrumbs
Vegetable oil for frying
4 cups mixed small salad leaves
Salad dressing
Thick Greek yoghurt (optional)
A few slivers of fresh chilli Salsa:
1 avocado, diced
1 mango, diced
½ red onion, finely chopped
¼ cup chopped fresh coriander
Juice of 1 lime or ½ lemon
salt to taste
Make salsa by mixing all ingredients together. Cut fish into strips 1-2cm wide and 8cm long. You should have about 12 which is 3 per serving. Place flour, cumin, paprika and seasoning in one bowl, beaten eggs in another and breadcrumbs in a third. Coat fish in flour, then beaten egg, then breadcrumbs, patting on firmly. Chill for 15 minutes. Either cook the fish in deep fat oil in 2-3 batches for 4-5 mins or till cooked and crispy, then drain on paper towels. Or place on a baking sheet lined with baking paper, spray both sides with oil and bake in a hot oven at 200°C for 10-12 mins or until crisp and browned. Or pan fry. The ones in the photo were deep fried and got a little bit too brown.
Mix salad with a little dressing and divide between four plates. Arrange fish pieces on top, then spoon over some salsa. If liked garnish with a dollop of yoghurt and a few slivers of fresh chilli.
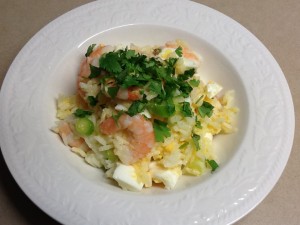
Kedgeree was a popular Anglo-Indian breakfast dish in Victorian England, introduced by army officer’s wives returning from India. The main ingredients are rice, fish and eggs. Some versions add curry paste and other ingredients, but when we were growing up my mother made a very simple kedgeree which I still make.
Before I married I lived in a little bed-sit in Geneva which only had two hotplates and no oven. I could get home from work, absolutely starving and have a bowl of kedgeree ready in 20 minutes.
Filling and satisfying, for me it’s pure comfort food. It’s easy to eat with a fork in front of the TV with a glass of chilled white wine. The perfect dish for a quiet evening at home when you don’t want to spend much time cooking and don’t feel like anything heavy or spicy. You can use smoked fish or canned salmon or tuna instead of the prawns. But for me the prawns really make the dish, so I always keep some handy in the freezer.
The second kedgeree recipe uses the same basic ingredients of rice, fish and eggs, but is more complicated and spicy. Equally nice, just totally different.
1 cup long-grain rice (such as basmati or jasmine)
2-3 eggs
250-300g peeled cooked prawns
2 spring onions, thinly sliced
25g butter, cut into small pieces
salt and freshly ground black pepper to taste
chopped fresh parsley or coriander
Put the rice on to boil and the eggs on to hard boil. I have been known to throw them all in the same pan, for speed! When cooked drain rice thoroughly and place in a warm serving bowl. Add butter and stir till melted. Then add the eggs, peeled and roughly cut up, the spring onions, prawns and season to taste. Serve immediately sprinkled with chopped herbs.
Serves 2
Asian Kedgeree
1 cup long grain rice (such as basmati or jasmine), cooked
1 Tbs vegetable oil
2 spring onions, thinly sliced
1-2 tsp grated ginger
½ small red chilli, seeded and finely chopped
1 tsp brown sugar
100g smoked trout, flaked
½ cup canned corn, drained
About 1 Tbs fish sauce – to taste Scrambled egg topping:
1 Tbs vegetable oil
2-4 tsp curry paste or powder, to taste
2 tsp brown sugar
½ small red chilli, finely chopped
2-3 tsp tamarind paste, to taste
2-3 tsp fish sauce, to taste
2 eggs, beaten To serve:
1 small Lebanese cucumber, peeled and cut into ribbons (discard seeds)
2 Tbs cashew nuts or peanuts, lightly toasted and roughly chopped
Chopped fresh coriander and lime wedges
Make scrambled eggs first. Heat oil in a small frying pan and cook curry paste for a minute, stirring. Add sugar, chilli and tamarind paste and cook for 1-2 mins. Add egg and cook until lightly scrambled. Lastly add fish sauce to taste and remove from heat.
Heat oil in a large frying pan and cook spring onions, ginger, garlic and chilli stirring for 1-2 mins. Add rice, sugar, trout and corn. Cook for 1-2 mins or until heated through then add fish sauce to taste. Divide kedgeree between two serving bowls, top with the scrambled egg and garnish with cucumber, nuts, lime wedges and coriander.
Serves 2
Variations: use frozen corn or peas instead of canned corn. Cook in boiling water for a few minutes then drain. Use smoked salmon, canned salmon or tuna instead of the smoked trout.
Note: if you can’t find tamarind paste add a good squeeze of lemon or lime juice instead.
Major and Mrs H.W. Staples and their five children – Patrick, Edwin, Margaret, Daphne and Joan outside their home, Dragona, shortly after their arrival in Malta in January 1939.
My grandfather, Herbert William Staples, was posted to Malta from the UK in January 1939 with the Royal Engineers. When War broke out later that year he was offered the chance to leave with his wife and five children, aged between 10 and 14. But leaving by ship was risky, with many being bombed and sunk, so they opted to stay. My mother Margaret was almost 10 at the time and spent the next 6 years on the island with her younger twin sisters Joan and Daphne and two older brothers, Patrick and Edwin. At the end of the War she received a medal for never having missed a day of school, despite periods of heavy bombing when she had to get there via air raid shelters.
More bombs fell on this little island of just 121 square miles than fell on London during the Blitz. The Germans wanted to capture it for strategic reasons, due to its proximity to Axis shipping lanes. But they didn’t succeed and at the end of the War Malta was awarded the George Cross for bravery.
Feeding a family of seven was a constant challenge for my Irish grandmother Hilda Mary. Strict rationing allowed just one slice of bread per person per day. My mother remembers her brothers asking if they could have another slice and my grandmother giving them hers, half each. Nana Staples was skin and bone at the end of the War, but she made up for it afterwards! There were no cattle on the island, which meant no dairy industry. Sometimes the Quartermaster would issue a few cans of food to each British family. My mother still likes tinned peaches served with evaporated milk, for nostalgic reasons. While onions and tomatoes were easy to grow and Mediterranean fruit such as figs, grapes and pomegranates were plentiful in season, food-wise life was tough.
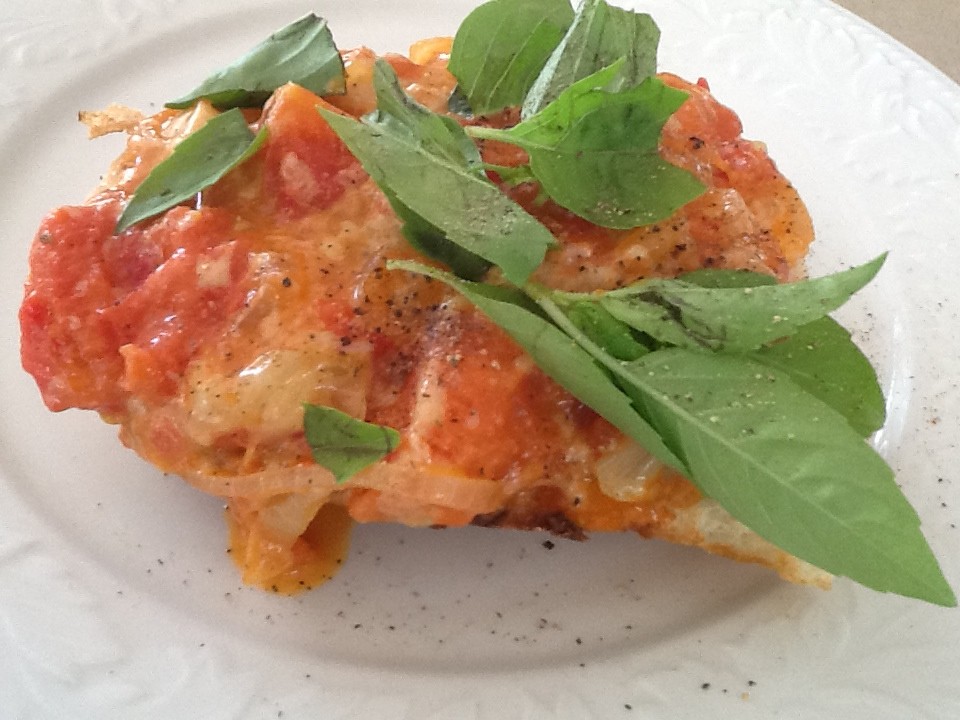
My Uncle Pat was a very good diver and could hold his breath for a long time. One day he heard that a ship had been sunk in the bay so he dived down and inside the wreck he found a whole cheddar cheese, weighing about 10 kilos. He wrapped it in his towel and staggered home, triumphant. My grandmother was thrilled and as she had tomatoes and onions in the garden she invented Staples Special with what she had available.
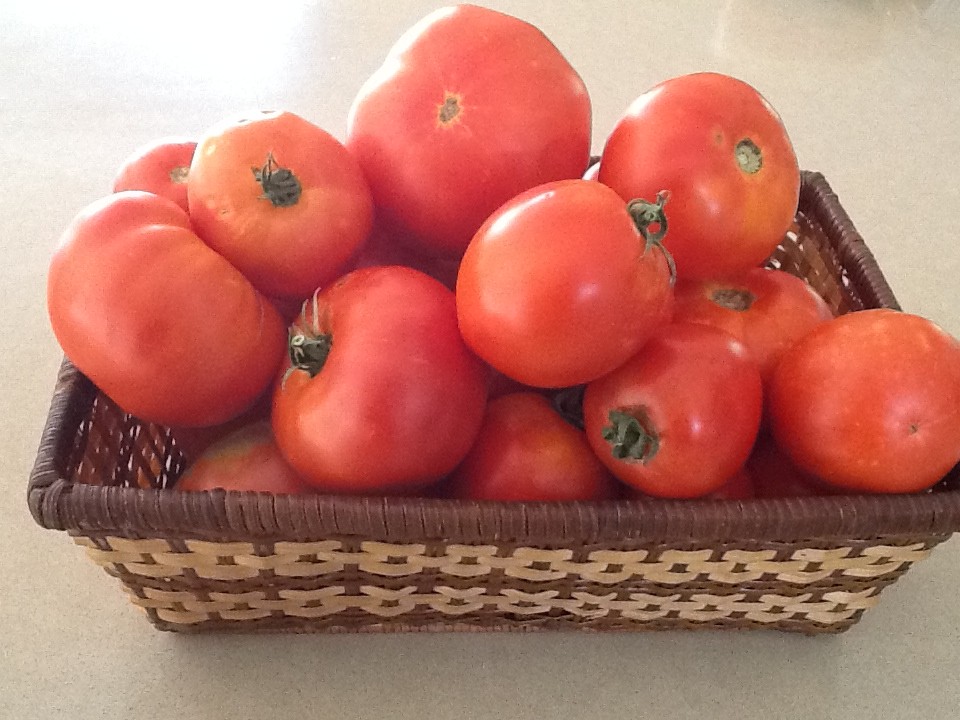
Fortunately I’ve never known what it is to go hungry or be unable to buy enough food for my family. But I still make Staples Special because it’s so delicious and makes a perfect Saturday lunch or Sunday evening supper. It’s important to use vine-ripened tomatoes from the garden or local market. Those tasteless ones you buy in supermarkets during winter just won’t work in this recipe. The same goes for the toast – the better the bread, the better the toast.
My Dad was a nurseryman and for many years his main crop was tomatoes, grown under glass in Kent, in south-east England. All my tomato-growing knowledge came from him and I think he would be proud of this year’s crop from our Canberra garden. To be honest Matthew does all the work, but I do cook the produce. One cardinal rule I learnt from my Dad and that’s never, ever store tomatoes in the fridge.
1 large onion, halved and sliced
2 Tbs olive oil
500-600g ripe tomatoes, skinned and roughly chopped
1 tsp sugar
salt and freshly ground black pepper to taste
3 cups grated cheddar cheese
6 large slices buttered toast (Turkish bread is nice)
Basil leaves, torn up (optional)
Heat oil in a large frying pan and cook onion, stirring, over moderate heat, until soft but not brown. Add tomatoes and continue to cook for a few minutes, stirring. Tomatoes should be semi-cooked and still chunky. Add sugar and season to taste. Add cheese and when just melted serve on toast garnished with basil.