Chef Gogh’s Mango with Sticky Rice & Coconut Milk

A couple of years ago we spent a week at the Sarojin in Khao Lak, an hour and a half north of Phuket in Thailand, on our way back from a holiday in Europe. We had such a great time that this year we went back.

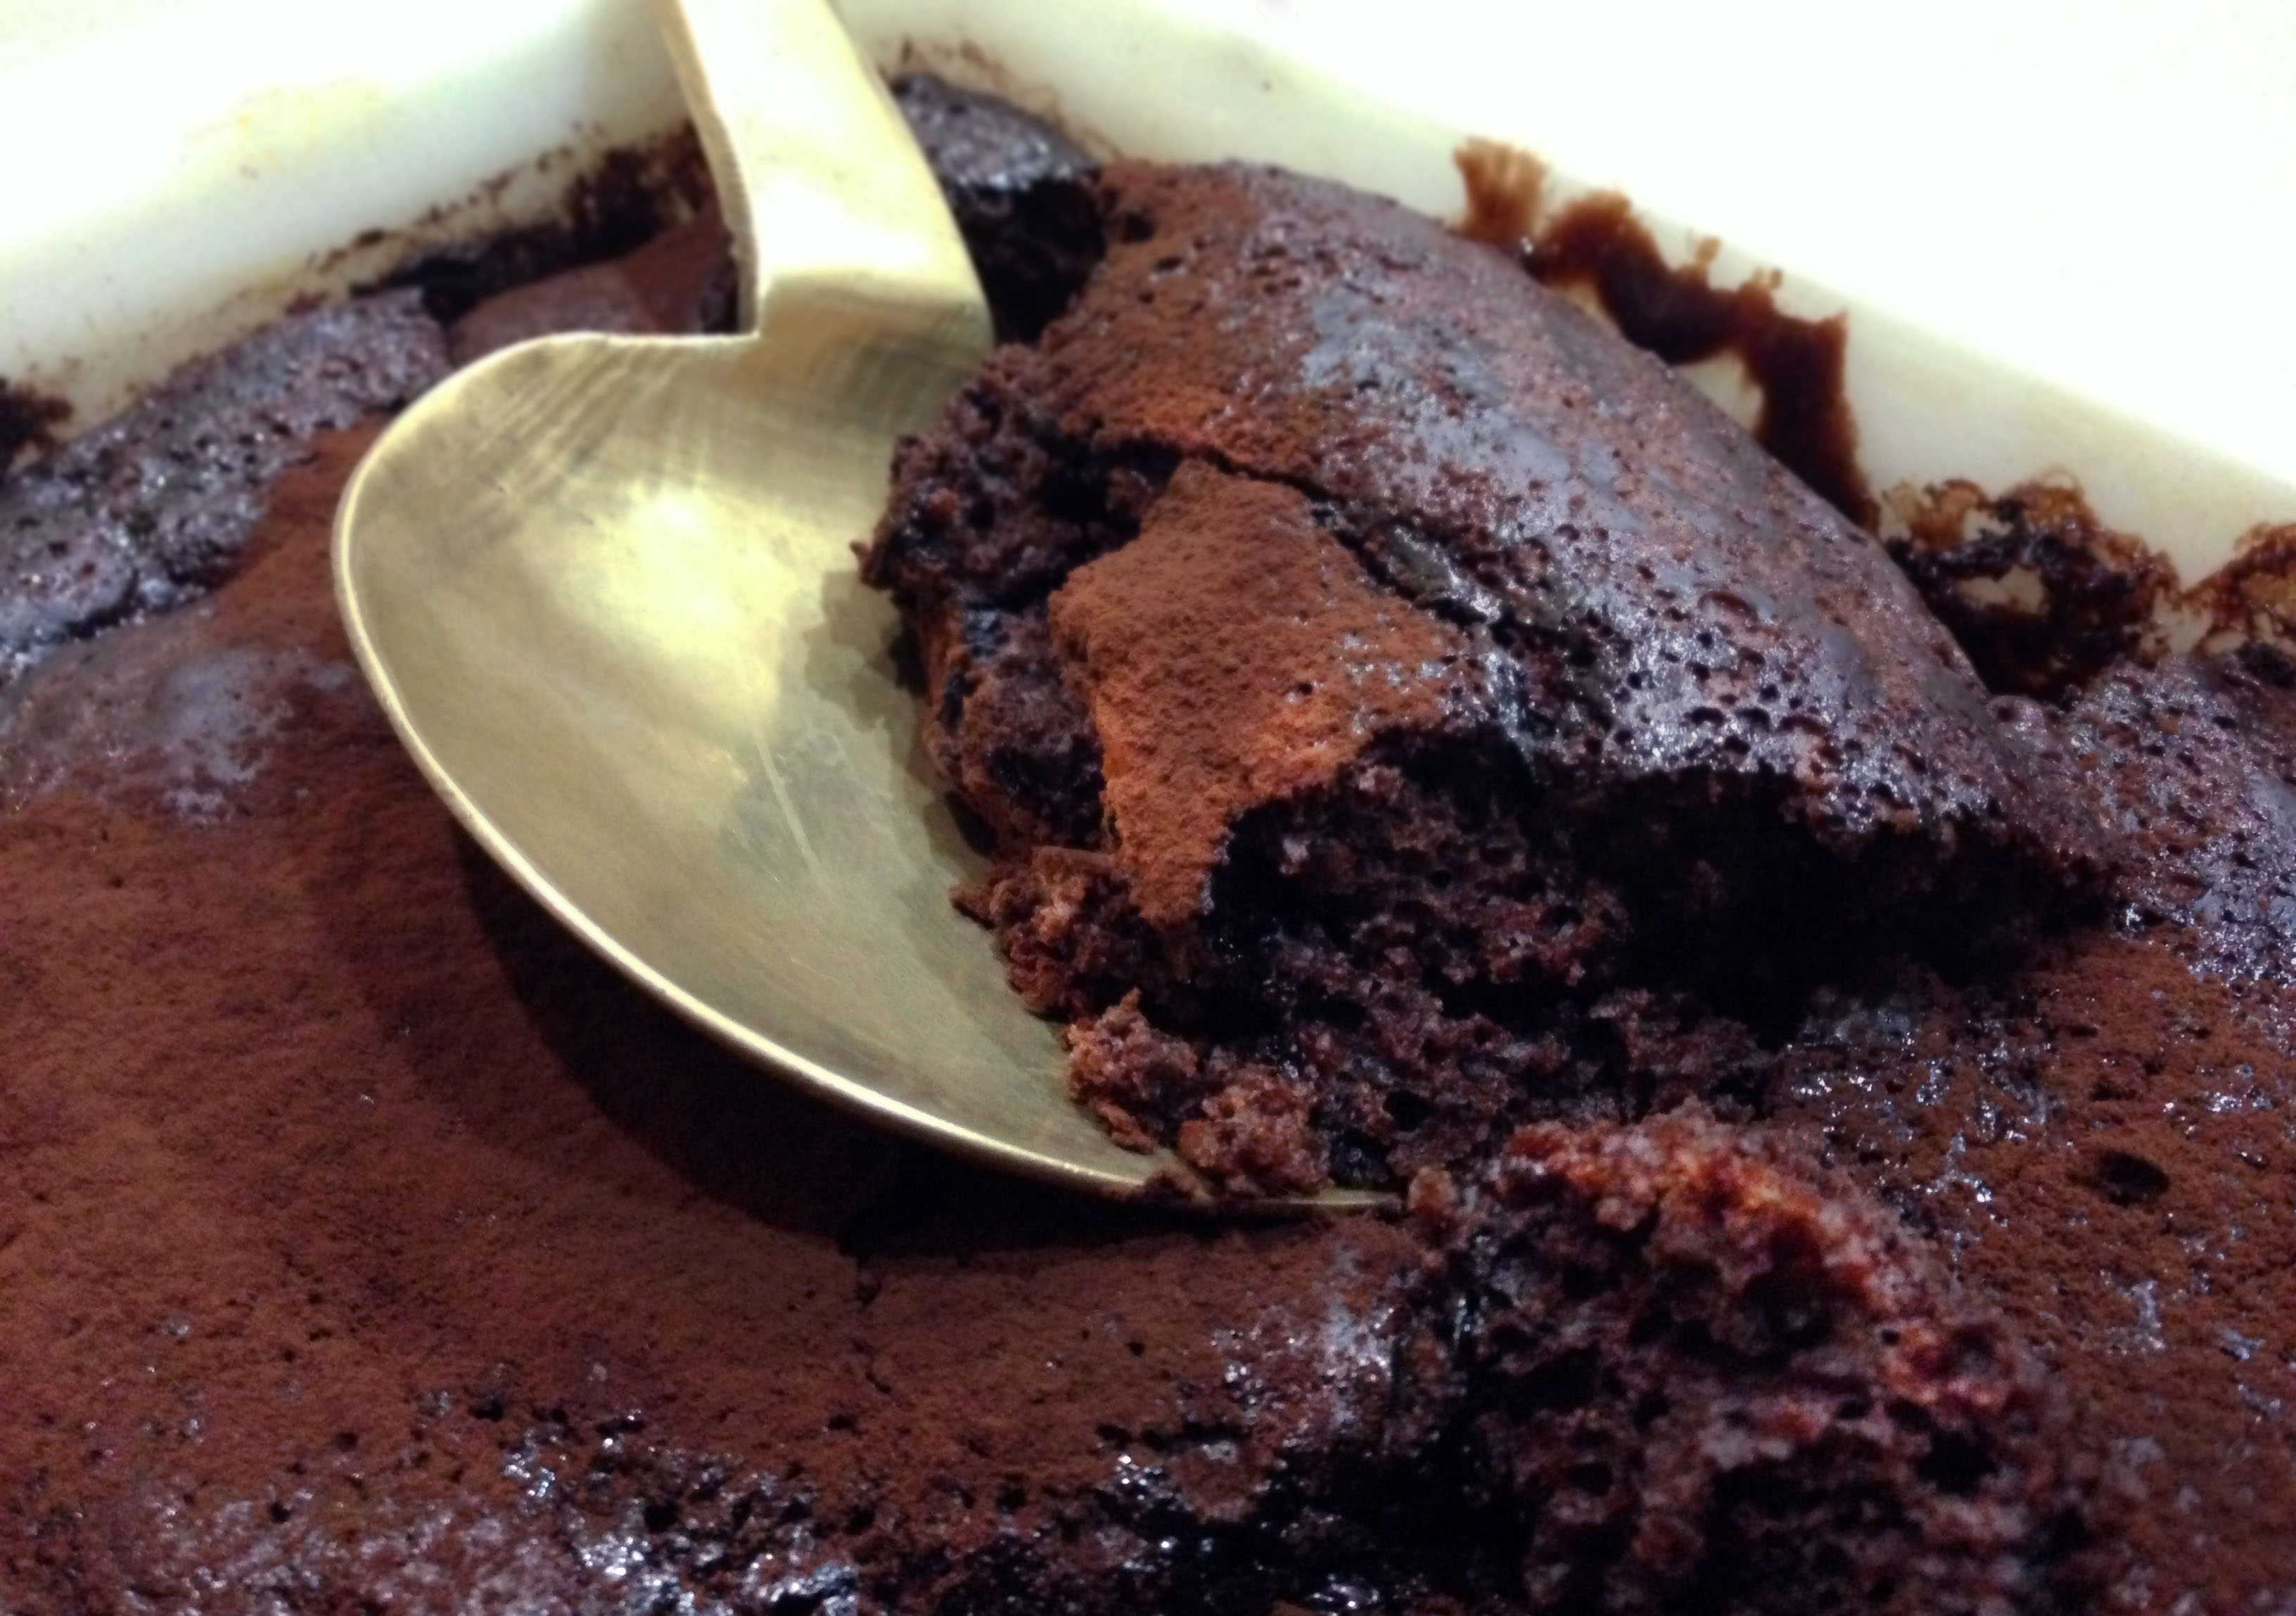
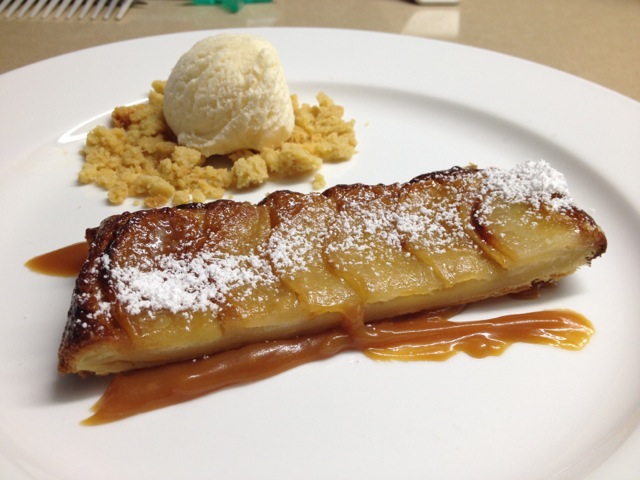
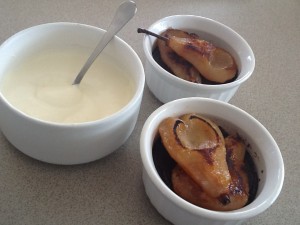
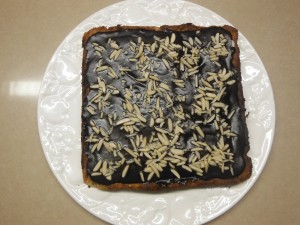
Since our first visit to the Sarojin Chef Gogh has been a subscriber to Café Cat. Sometimes he makes one of my desserts, turning it into a five star masterpiece and sends me a photo.

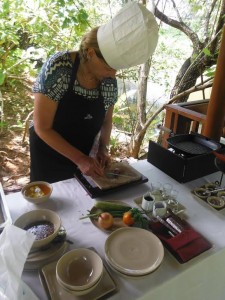
This time it was Gogh’s turn to teach me some Thai recipes. He arranged a private cooking class where I learnt how to remove the bones from a whole snapper, while leaving it intact, so you can’t tell.  Here you can see me working under close supervision from Gogh, looking very professional with a hat they lent me.

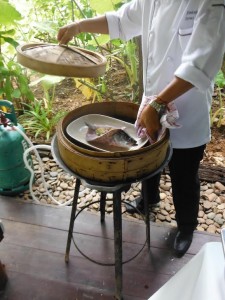
I’m not going to include the fish recipe here because removing all the bones without cutting the skin is too hard to explain in writing – you need to watch someone do it, then do it yourself straight away. I made lots of notes and hope I can do it on my own, when the time comes! You need a whole ungutted fish and unless you catch your own they’re hard to find in Australia.

Sous-chef  Steamer

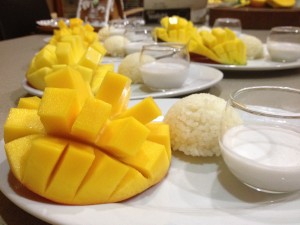
Mango with Sticky Rice and Coconut Milk is my favourite Thai dessert. It’s often too sweet for my taste but Gogh’s version combines the natural sweetness of the mango with slightly sweet sticky rice and a salty coconut sauce. It’s sublime, so I ordered it for breakfast most mornings while we were staying at the Sarojin. I have slightly adjusted his recipe to use a rice cooker. If preferred, steam the rice in the traditional Thai way, then mix in the coconut milk and sugar when it’s cooked. The Sarojin serves the sticky rice in a cone made from a banana leaf. I used an ice cream scoop instead.

Chef Gogh's Mango with Sticky Rice & Coconut Milk1 cup glutinous (sticky) rice
1-2 Tbs sugar, to taste
1 can coconut cream or milk (400ml), not shaken
salt to taste
2 ripe mangoes
Lightly toasted sesame seeds

Place rice in a bowl, cover with cold water and leave to soak for several hours or overnight. Drain in a sieve then place in a rice cooker with 1 cup water. Open coconut cream or milk – cream is better as it’s thicker, but milk will do. Using a spoon, remove about 1 cup (250ml) from the top of the can – the thicker part – and reserve till serving time. Add what’s left in the tin to the rice cooker with sugar and about ½ tsp salt. Mix well, then switch on rice cooker. When rice is cooked switch off the machine and leave till cool, then cover and keep in the fridge.

To serve, cut the four cheeks from the two mangoes. Score flesh into diagonal squares, then bend back the skin as shown in photo. Arrange mango halves on four serving plates. Mix reserved coconut cream with salt to taste then divide between 4 small individual dishes or small glasses and place next to the mango. Using a lightly-oiled ice cream scoop place a scoop of sticky rice on each plate and garnish with the sesame seeds. There will be rice left over. If preferred serve rice in individual dishes and spoon some of the coconut cream on top, then sprinkle with the sesame seeds. You can also serve it all in one dish, with the cubed or sliced mango on top.

Serves 4

Cappuccino Puddings with Coffee Ice Cream

These puddings are quick and easy and all the preparation can be done in advance. Make them in coffee cups or small ramekins and keep them for up to 24 hours in the fridge, covered, until you’re ready to cook them.

The puddings aren’t very sweet but the ice cream is, making a nice contrast. If you can’t be bothered making the ice cream, just serve the puddings with cream. The recipe serves six if you use smaller cups and is easy to double.

Unfortunately the ice cream started to melt before I took the photo, so it looks even more like a cappuccino!

unnamedCoffee ice cream:
300ml thick cream
½ of a 395g can condensed milk
2 Tbs instant coffee mixed with 1 Tbs boiling water
Puddings:
125g unsalted butter
200g dark chocolate, broken into squares
1 Tbs instant coffee mixed with 1 Tbs boiling water (see note)
4 eggs
2 Tbs plain flour

For the ice cream, whip cream with electric beaters until soft peaks form, then whip in the condensed milk and the coffee until thoroughly combined. Scrape into a plastic container with a lid and freeze for several hours or overnight.

For the puddings, lightly oil 4 to 6 coffee cups or small ramekins. Melt butter in microwave. Add chocolate and stir till dissolved, then mix in coffee mixture. Thoroughly beat eggs with a fork, then mix into chocolate mixture with flour. Divide between the coffee cups and refrigerate, covered, until serving time.

Preheat oven to 200°C. Bake puddings for 10-11 minutes until nicely risen. They will still be soft inside. Serve with a scoop of coffee ice cream on top.

Serves 4-6

Note: if preferred leave the coffee out of the puddings and just put it in the ice cream.

Churros

Many moons ago I was in Spain for the first time on a school exchange when my host family took me to an establishment which served churros and nothing else. The queue of people waiting to be seated went out the door and halfway up the block. Always a promising sign.

We eventually sat down to a huge plate of warm crispy churros rolled in cinnamon sugar which was placed in the middle of the table. We each had a mug of very thick hot chocolate to dip the churros into. And I mean thick – you could almost stand your spoon up in it! I was hooked.

Like eclairs and profiteroles, churros are made from choux pastry, but instead of cooking them in the oven they’re fried in hot oil, like doughnuts. I have a special gadget for pushing the dough through, but a piping bag with a large star nozzle works just as well.

Instead of a mug of thick hot chocolate serve the churros with a simple dipping sauce made from cream and chocolate. For a more grown up combination try them with salted caramel sauce. Either way they are delicious.

Churros

1 cup milk
75g unsalted butter
¾ cup sugar
1¾ cups plain flour, sifted
1 tsp baking powder
2 eggs, beaten
Vegetable oil for frying
sugar and cinnamon for rolling
Chocolate sauce:
1 cup thick cream
125g chocolate (milk or dark)
Salted Caramel Sauce:
½ cup sugar
½ cup cream
60g butter
½ tsp salt

In a non-stick saucepan heat milk, butter and sugar until boiling point is reached. Remove from the heat and add the flour and baking powder, all in one go. Beat well with a wooden spoon until lump-free and mixture leaves the sides of the pan clean. Return to the heat and cook, stirring for 2 mins. Remove from heat and add the beaten eggs gradually, beating well after each addition. Cool.

Heat oil in a large deep frying pan or deep fat fryer. It should be at least 4cm deep. Place some of the mixture in a piping bag with a star nozzle or in a special churros gadget. When oil is hot pipe in the churros a few at a time, using a knife to cut them off when they are 10-15cm long. Cook, turning once, till golden on both sides, then remove from oil and toss in a mixture of sugar and cinnamon. Serve warm with chocolate or salted caramel sauce.

Chocolate Sauce: heat cream until boiling point is reached then remove from heat. Add chocolate broken into squares and stir until melted. Cool a bit and serve warm.

Salted Caramel Sauce: melt sugar in a small heavy-based pan until melted and dark caramel colour, swirling the pan from time to time. Add cream and butter and mix until smooth. Cool a bit and serve warm. Can be reheated.

Serves 6-8

Chocolate-Espresso Self-Saucing Pudding

Every grandma worth her salt has a chocolate self-saucing pudding in her repertoire. They’re a cinch to make and because of the unique way the ingredients are assembled a delicious sauce forms under the pudding as it cooks.

Adding a couple of shots of espresso turns this into a more sophisticated dessert for coffee lovers. Adjust the amount of coffee to suit your taste or leave it out altogether and just use 2 cups (500ml) of boiling water. Kids will prefer it without the coffee.

Chocolate Espresso Self-Saucing Pudding

1 cup self-raising flour
½ cup caster sugar
¼ cup cocoa powder
60g unsalted butter, melted
½ cup milk
½ tsp vanilla essence
1 egg
Topping:
½ cup caster sugar
¼ cup cocoa powder
1 cup boiling water and 1 cup hot coffee (2 shots)
To serve:
Cocoa for dusting
Thick cream or vanilla ice cream

Preheat oven to 180ºC and butter a 1.5L capacity ovenproof dish such as a lasagne dish. Sift flour, sugar and cocoa into a bowl and mix. Mix melted butter with milk and vanilla and beat in the egg with a fork. Mix thoroughly into flour mixture then tip into pudding dish and spread evenly. Mix sugar and cocoa for topping and sprinkle evenly over the pudding. Mix boiling water and coffee and carefully pour evenly over the top. Bake for 30 mins or until the top is firm.

Use a sieve to lightly dust the top of the pudding with cocoa powder. Serve with cream or vanilla ice cream.

Serves 6-8

Variations: use brown sugar instead of caster sugar. Add some chocolate chips and/or chopped walnuts.

Valli’s Amazing Lemon Tart

With every renewed subscription to Delicious magazine last month you got a free copy of their 300 page cook book “Love to Cook” by the magazine’s food editor, Valli Little. It normally sells for $40 so I was very pleased with myself.

It’s full of quick, easy and delicious recipes and I couldn’t wait to get stuck into them. Last Sunday we had guests for lunch so I made the Slow Roast Lamb with Chilli Mint Sauce. As an accompaniment I followed Valli’s suggestion and served her  “Best Crunchy Potatoes” and Nigella Lawson’s Baby Eggplants with Picked Red Onions, which appeared on Café Cat in January.  Lamb and eggplants always go well together and the potatoes were to die for. Cut into cubes, parboil for 2 minutes, drain thoroughly, then mix with a tablespoonful of flour, salt and pepper, then spread out on a cookie/biscuit tin lined with baking paper. Drizzle with melted duck fat or some oil and bake for 40 mins in hot oven.

Valli’s Lazy Lemon Tart was the perfect way to end the meal. It’s not the first recipe I’ve come across where you throw a whole lemon or orange in the blender – I have a very successful orange cake which uses a whole orange. You would think the pith would make it bitter, but it doesn’t. I decided to re-name this tart and call it amazing, because it really is.

Valli's Amazing Lemon TartSweet shortcrust pastry:
1½ cups plain flour
125g chilled unsalted butter, chopped
1/3 cup icing sugar
1 tsp vanilla essence
1 egg yolk
Filling:
1 very large lemon, seeds removed, quartered (or use 2 small ones)
1¼ cups caster sugar
100g unsalted butter, at room temp
1 tsp vanilla essence
4 large eggs
¼ cup thick cream or sour cream
To serve:
Icing sugar and thick cream

Grease a loose-bottomed metal 23cm tart pan. Preheat oven to 180ºC.

Make pastry: place all ingredients except egg yolk in food processor and process until it resembles fine breadcrumbs, then add egg yolk and continue to process until it forms a ball. Tip out, gather into a ball, wrap in plastic wrap and chill 30 mins. Roll out thinly and line the tart tin. After trimming the pastry off level with the edge of the pan, go round and squeeze the pastry so it goes up above the edge a bit. This should compensate for any shrinkage in the oven. Line with baking paper and fill with rice, corn or pastry weights. If you have time refrigerate pastry for 15 mins. Bake 8 mins, remove paper and weights, then bake for 3 mins more until dry and crisp. Any leftover pastry can be used to make some jam tarts or similar.

Place lemon, sugar, butter, vanilla and eggs in a blender and blend until smooth. A blender is better than a food processor as it makes the mixture smoother. Add cream and pulse quickly to combine. Pour into tart shell – filling should come to the very top of the pastry shell. Bake 30 mins or until just set. Cool tart in pan, dust with sifted icing sugar. Serve at room temp with thick cream.

Serves 8

Matt Moran’s Pear Tart with Caramel Sauce

Make this tart when you have a spare couple of hours and you’re feeling creative. It’s a bit more time-consuming than most of the recipes which appear on this blog but not difficult. You may think it has a lot of sugar and it does. But there’s a lot less than the original version of the recipe, because I cut down on the amount of caramel sauce and crumble. The crumble is optional.

Matt Moran's Pear Tart with Caramel Sauce

Caramel sauce:
¾ cup caster sugar
½ cup cream
60g unsalted butter, diced
Tart:
150-175g puff pastry (see note below)
100g marzipan
1 egg white
½ tsp vanilla essence
½ tsp flour
2-3 pears, peeled, quartered and cored
1 Tbs melted butter
1 Tbs caster sugar
Crumble:
½ cup plain flour
3 Tbs sugar
1/3 cup butter, melted
1 tsp ground ginger
To serve:
Vanilla ice cream – home-made or bought

Caramel sauce: place sugar in non-stick heavy pan and heat, swirling pan from time to time, until rich golden brown. Remove from heat and whisk in butter, then cream, until smooth, then cool. If you have a large piece of caramel which refuses to dissolve, put the sauce back on the heat for a minute or two and stir until it dissolves.

Tart: Pre-heat oven to 200ºC. Line a biscuit tray with baking paper and lay the pastry rectangle on top. It should be about 5mm thick and measure about 14-15 cm by 25-26cm. Place marzipan, egg white, vanilla and the ½ tsp flour in food processor and mix till smooth. Spread this evenly over the pastry, then cover with the thinly sliced pears. You may prefer to select only the best and larger slices of pear and eat the rest.

Brush with the 1 Tbs melted butter and sprinkle with the 1 Tbs caster sugar. Bake 15 mins. Remove from oven and drizzle with some of the caramel sauce (see below). Place a piece of baking paper on top, then another biscuit tin and flip the tart, so the pears are on the bottom. Put back in the oven with pears on the bottom for another 15 mins or until pears are nicely caramelised. Remove to a cutting board. If making ahead, leave tart on the paper-lined tray so you can put it back in the oven for a few minutes and serve it warm.

Crumble: While tart is cooking place all ingredients for crumble in food processor and mix until combined and starting to stick together. Tip onto a biscuit tin lined with baking paper and spread out. Bake for about 15 mins or until golden brown. Once or twice during cooking time break up the larger lumps and mix the crumble so it browns evenly.

To serve: Place a zig-zag drizzle of caramel sauce to one side on six serving plates. With a very sharp knife, cut tart vertically into two, then cut each half into three, so you have six slices each measuring about 14 by 4.5cm. Arrange a slice of tart on top of the caramel sauce. On the other side of the plate arrange a heaped tablespoonful of crumble and top with a quenelle of vanilla ice cream.

Serves 6

Notes: Carême is the best brand of puff pastry in Australia. More expensive but worth it. Available from some IGA supermarkets. Each packet contains 375g of ready rolled pastry. I cut it in half and used one half – stuck the rest back in the freezer for another time. I ended up with a rectangle about 14x26cm.

Variation: use apples instead of pears. If you don’t like marzipan just omit that layer.

Chocolate Puddings with Ginger Pears

This decadent recipe appeared in the latest issue of Gourmet Traveller. I’ve increased the quantities to serve six, left the sugar out of the the chocolate puddings because I think they’re sweet enough without and made a couple of other slight adjustments. The recipe said to serve the puddings at room temperature, but we preferred them chilled.

Chocolate Puddings with Ginger Pears

Pears:
6 ripe but not over-ripe pears
1 cup Stone’s Green Ginger Wine (see note below)
2 cups water
1 cup sugar
Puddings:
250g dark (70%) chocolate, broken into squares
180g unsalted butter, cut into chunks
2 eggs
2/3 cup cream
2 Tbs crystallised ginger, finely chopped
To serve:
Whipped cream, pouring cream or crème fraîche (see note below)

Place ginger wine, water and sugar in a medium-sized frying pan and bring to the boil, stirring to dissolve the sugar. Peel and halve pears, leaving stems on one half and removing cores with a melon-baller. Place pears in frying pan, cover with a lid and simmer for about an hour, turning them over from time to time. Drain pears and refrigerate, covered until serving time. Keep the poaching liquid.

Preheat oven to 170°C. Place butter and chocolate in a medium sized bowl. Zap in the microwave for 1-2 mins or until melted, stopping to stir halfway. With a balloon whisk, thoroughly mix in the eggs and then the cream. Lastly mix in the ginger. Divide mixture between six 1 cup ramekins and bake for 6-8 minutes. Cool and refrigerate for up to 36 hours, covered.

Drain pears and dry on paper towels. Place cut side down in a medium sized non-stick frying pan. Turn on the heat and cook until pears are slightly glazed just on the one side, then remove carefully from pan. Add any accumulated juices from pears to the poaching liquid. It should have cooled to quite a thick caramel sauce, but if it’s still a bit thin pour it into the pan after removing the pears and cook until reduced and thickened a bit. Cool to room temperature.

Top each chocolate pudding with two pear halves, glazed side up, drizzle with a little caramel sauce and serve with whipped cream, pouring cream or crème fraîche.

Serves 6

Notes: If you can’t find ginger wine, heat 1 cup of white wine with 2 Tbs finely chopped fresh ginger in a saucepan. Simmer for 5 mins then strain.

Make your own crème fraîche by mixing half thick Greek yoghurt with half thickened cream. If liked mix in a teaspoon of icing sugar and a few drops of vanilla essence.

Narrabri Cheesecake

This a perfect last minute dessert as it only takes 10 minutes to make and about an hour to set. The recipe came from Matthew’s bachelor survival cook book, so it goes back a long way. There’s actually no cheese in the recipe, but if you make it in a spring-form pan it looks like a cheesecake.

I often make it in half cup glasses as shown in the photo. Put them all in a round quiche dish or similar and cover with plastic wrap (or a shower cap which I find very useful in the kitchen!) and they will last several days in the fridge.  Instead of the crunchy topping, top with a few fresh berries. Or both.

Narrabri Cheesecake

200g plain sweet biscuits (I used Ginger Nuts)
125g butter, melted
1 can condensed milk
Grated rind 4 large lemons
½ cup lemon juice
300ml cream, whipped
Fresh raspberries, blueberries or strawberries (optional)

Whiz biscuits in food processor until you have crumbs. Melt butter in a medium sized bowl in microwave. Add biscuit crumbs and mix well, then divide between about 16 half cup glasses or ramekins. Save about 4 Tbs of crumbs for the topping, unless you are going to decorate with just berries. Alternatively press crumbs over the base of a 20cm spring-form pan.

In a clean bowl, thoroughly mix condensed milk, lemon juice and rind, then fold in the whipped cream. Divide filling among the glasses or spread into spring-form pan. Refrigerate for at least an hour and serve decorated with the remaining crumbs or some berries, or both. If making in a spring-form pan it’s best to refrigerate for several hours or overnight so it cuts nicely.

Serves 16

Note: other versions of this no-bake cheesecake use 250g cream cheese instead of the cream. In this case mix the cream cheese (at room temp) with the condensed milk, lemon juice and rind in a food processor and omit the whipped cream.

Mazurek

Our Polish friend Peter was coming for dinner so I decided to make something for dessert which would remind him of his homeland. After searching online I came across Mazurek, a nutty cake, not quite as dense as shortbread, covered with chocolate icing and nuts.

There are as many recipes for Mazurek as I’ve had hot dinners, so having found a version for which I had the ingredients – essential when you don’t want to go shopping – I adjusted it slightly and came up with this.

Peter explained that Mazurek is traditionally served at Easter so my timing was perfect. He hadn’t tasted one for many years and was delighted to take home the leftovers.

Serve for afternoon tea or as dessert, with a dollop of cream. Scrumptious.

250g butter at room temperature
½ cup sugarDSCF0579
1 egg
1½ cups almond meal (see note below)
1 cup plain flour
pinch salt
¼ tsp almond essence
¼ cup cream or sour cream
Chocolate Icing:
½ cup dark chocolate chips or chocolate squares
1 Tbs corn (glucose) syrup
2 Tbs cream
2 Tbs butter
To decorate:
¼ cup flaked or slivered blanched almonds

Preheat oven to 200ºC. Grease a 9″ (22cm) square cake pan and line with non-stick baking paper. In a food processor or with electric beaters mix butter and sugar until light and fluffy. Add egg, salt and almond essence and mix well. Add flour and almond meal and mix well. Scrape into cake pan and spread out evenly. Bake for 20 mins or until light golden – don’t overcook or cake will be dry. Cool completely in tin.

Remove cake and place on a flat serving plate. Place chocolate, corn/glucose syrup, cream and butter in a small bowl over simmering water and when melted stir till smooth. Cool a little then spread icing over cake and decorate with almonds.

Serves about 16

Note: make your own almond meal by blitzing blanched or unblanched almonds in food processor until fine.

Variations: use hazelnuts, walnuts or pecans instead of almonds.


Raspberry Trifle

When I was growing up in England a trifle was always served for special occasions – birthdays, high days and holidays and if we were entertaining special guests. If someone served trifle you knew you were getting the right royal treatment. The basic combination was always sponge fingers, a splash of sherry, fruit, raspberry jelly made from a packet, custard – the instant Bird’s Eye variety – and whipped cream.

Many years ago my friend Daphne served a real raspberry jelly and I was blown away. Made from sieved raspberries, sugar and gelatine, it was nothing like the packet variety. So when I make a trifle these days I make real raspberry jelly and crème anglaise, instead of the fake custard of my youth. If you’re in a hurry use a couple of packet of bought raspberry jelly – see the notes.

You can use fresh or frozen raspberries to make the jelly.  I usually use frozen berries as they’re cheaper and available all year round. You just need a few fresh ones to garnish – which in this photo came from our garden – and I added a few strawberries to add a touch of green. I prefer not to add sherry, as my mother always did, as I don’t want anything to detract from the intense raspberry flavour of the jelly.

Funny how the French call custard crème anglaise, when many Brits grew up on the packet variety as I did. British housewives got used to using Bird’s Eye custard powder during WW2, when eggs were rationed and hard to come by. In my recipe for crème anglaise I use whole eggs rather than just the yolks, so I add some cornflour because you want the custard to be nice and thick.

The end result is even more delicious than my childhood memories. Suffice it to say that Matthew, who was put off British desserts such as custard, rice pudding and tapioca as a result of spending several years at boarding school in England, comes back for second helpings.

Raspberry and Peach Trifle

Base:
8 lady finger (Savoiardi) sponges
1 large can peach halves or slices in natural juice
or 4 large fresh peaches or nectarines, peeled and halved
Jelly:
1 kg raspberries, fresh or frozen
3-4 Tbs sugar, or to taste
2 Tbs powdered gelatine
Crème Anglaise:
1 cup cream (250 ml)
2 cups milk (500 ml)
2 to 4 Tbs sugar, to taste (I use 1 Tbs)
2 tsp vanilla essence
4 eggs
3 Tbs cornflour
To finish:
250 ml whipping cream
Fresh raspberries to garnish (+ a few strawberries if liked)

Start the trifle the day before serving.

Base: Arrange lady fingers in the bottom of a glass dish – see note below. They might fit better in your dish if you cut them in halves. Arrange the peaches over the sponge. I used peach halves and arranged them around the edge of the dish standing up, with the cut faces against the glass. If using fresh peaches they need to be very ripe and peeled.

Jelly: Thaw raspberries if frozen. Push them through a sieve, discarding any pulp which won’t go through. Add enough water to the raspberry juice/puree to make up to 800 ml and sweeten to taste. Sprinkle gelatine over half a cup of water then zap in the microwave to dissolve. Mix gelatine mixture into raspberry mixture, then pour gently over the peaches and sponge fingers. The sponge fingers will float to the top, but keep pushing them under so they soak up the jelly. Refrigerate until set.

Crème anglaise: In a non-stick saucepan heat cream, milk, sugar and vanilla essence until almost boiling. Beat eggs and cornflour with a balloon whisk in a bowl, then pour in the hot cream mixture and whisk to combine. Pour back into the saucepan and continue to cook, stirring constantly with a wooden spatular which has a flat base, until the custard has thickened and will coat the back of the spatular. Be careful as you don’t want scrambled eggs. Cool a bit then carefully pour over the raspberry jelly. Cover and chill overnight.

To finish: Whip cream until thick – it should double in volume – then carefully dollop over the top of the trifle. Decorate with fresh berries.

Serves 8-10

Variations: use strawberries instead of raspberries in the jelly.

Instead of making the raspberry jelly you could place the fruit on top of the sponge layer (300g raspberries will be enough) then make up 2 packets of bought raspberry jelly and pour that over. Use fresh or frozen raspberries or strawberries and some canned or fresh peach halves, or leave out the peaches altogether and just use berries.

Note: the dish I used in the photo was a bit small. A larger one with a wider mouth would have made the trifle less deep and easier to serve. It was a bit difficult to get to the bottom layer, but we managed!