We all need a few desserts in our repertoire which can be made in a jiffy.
The secret is to have a few basic ingredients on hand. For the Blueberry Parfait, for example, you need some Lemon Curd in the fridge and a packet of bought meringues (which keep for ages) in the pantry. Just add berries and cream to your shopping list, or nip down to the corner shop.
When I served this dessert recently and said “Would anyone like any more?” everyone said “Yes please”, so I had to re-load all the glasses!
In Australia you can buy a whole pavlova in a box and I used chunks of that instead of meringues because it’s softer and more marshmallowy. But either will do.
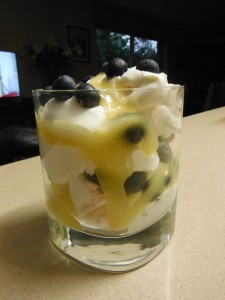 Blueberry Parfaits – in tall parfait glasses or tumblers place a dollop of whipped cream or thick Greek yoghurt, a dollop of Lemon Curd (preferably home-made), some crumbled meringue, more cream or yoghurt, then a few fresh blueberries. Repeat layers and serve immediately.
- Mocha Mousse – dissolve 2 tsp instant coffee in 2 Tbs hot water. Mix into 1 cup Nutella chocolate spread. Whip 1 cup cream in another bowl and fold in. Lightly toast ½ cup skinned hazelnuts or almonds and chop coarsely. Break 8 sponge fingers into 6 to 8 small wine or Martini glasses. Drizzle with some Kahlúa or Bailey’s Irish Cream, top with half the chocolate mixture, half the nuts, then repeat. Dust tops with sieved cocoa. Chill before serving.
- Chocolate Bread and Butter Pudding – keep some brioche or croissants in the freezer to make this in one large dish or individual ones.
- Blancmange – mix 6 slightly rounded tablespoons cornflour with 1 Tbs sugar and a little cold milk. Bring 1 litre milk and ½ cup cream to the boil then add the cornflour mixture and 1-2 tsp vanilla essence, stirring till thick. Pour into coffee cups which have been rinsed out with cold water. Refrigerate till set. To serve dip quickly in hot water and tip onto serving plates. Meanwhile thaw half a kilo of frozen raspberries with some sugar (to taste) and serve this compote with the blancmanges with some thick cream.
- Mangoes with Ginger Wine – peel and slice 4 mangoes and place in serving dish. Heat ¼ cup Stone’s Ginger Wine with 2 Tbs finely chopped glacé ginger until hot, then pour over mangoes. Chill before serving.
- Baked Apples – Use a large biscuit cutter to cut 4 circles from 4 slices of bread. Place in a buttered shallow baking dish, top each circle with a whole unpeeled apple, cored. Mix equal quantities melted butter, dried fruit/nuts and brown sugar – a couple of Tbs of each. Add juice and grated rind of an orange then use mixture to stuff the apples. Bake for an hour at 160ºC, basting often. Serve hot with vanilla ice cream or cream. The bread goes all crunchy and delicious.
- Moroccan Fruit Salad – in a small saucepan heat the rind and grated juice of an orange with ¼ cup brandy or rum, ¼ cup honey, ½ cup water and a broken cinnamon stick. Pour over 4-6 cups mixed dried fruit such as sultanas, apricots and sliced figs and leave to macerate for several hours or overnight. Serve with toasted pine nuts and Labneh.
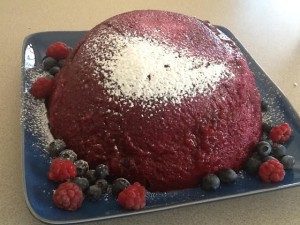 750g mixed red berries, thawed if frozen
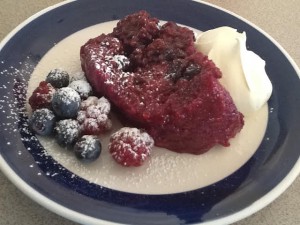 Using a slotted spoon, half fill basin with fruit, then a layer of bread, fill with remaining fruit and cover with bread. Spoon in enough juice to fill the basin. Use a knife around the edge of the bowl to make sure the juice goes down and colours all the bread. You will probably use it all. Place a small plate and a 1 kg weight on top and stand the bowl in a dish to catch juices. Refrigerate overnight.
 4 chicken breasts