Spicy Eggplant and Tomato Soup

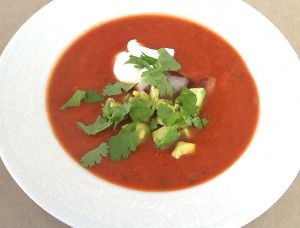
This soup is quick, easy and satisfying. I invented it one day when I had a friend coming for lunch and one lonely eggplant sitting in the fridge. I just stuck it in the oven and let it cook while I did something else. The final mixing and reheating takes less than 10 minutes.

While the subtle flavour of the eggplant is somewhat overpowered by the tomato, it does provide a nice texture. And the peanut butter, garlic and chilli add an Asian touch to the flavour combination.  I’ve made the recipe with both crunchy and smooth peanut butter and while they’re both nice I prefer the creamier result you get with the smooth variety. But If you’ve only got crunchy I wouldn’t go out and buy a jar specially.

Spicy Eggplant and Tomato Soup1 large eggplant
1 clove garlic, crushed
1 500g jar tomato sauce for pasta (see note)
1 jar of water (and maybe a bit more)
1 tsp sugar
1 chicken or vegetable stock cube
3 Tbs peanut butter
1 small red chilli, seeded and chopped
Salt and freshly ground black pepper to taste
To serve:
sour cream or thick Greek yoghurt
fresh coriander
fresh bread or toast

Preheat oven to 180ºC. Pierce eggplant a couple of times with a knife, so it doesn’t explode in the oven. Place in the oven for 30-40 minutes, or until it feels soft when you squeeze it. Halve eggplant and scrape out the flesh into a food processor, discarding skin.

Add remaining ingredients and process until smooth. Tip into a saucepan and heat to boiling point. Check seasoning and add a bit more water if necessary to make desired consistency. This will depend on how big your eggplant was.

Ladle into soup bowls and top each serving with a dollop of sour cream or yoghurt and chopped coriander. Serve with fresh Turkish or sourdough bread or toast.

Serves 4

Note: Most pasta sauces weigh about 500g. I used about two thirds of a 700g jar of Woolworths Home Brand Chunky Pasta Sauce.

Beetroot and Fennel Salad

Raw vegetables are full of nutrients and very good for you. But unadorned they look and taste a bit like rabbit food. It’s the dressing that makes all the difference.

I’ve always been a big fan of beetroot. I grew up in the UK where supermarkets and green grocers sold beetroot cooked and ready to use. My mother used to slice it and dress it with dark malt vinegar, a dash of water and a teaspoon of sugar. This was standard fare in England when I was growing up. My Dad loved it but my mother and I preferred to rescue a few slices before she added the vinegar.

When an exchange student came over from France she didn’t realise that the beetroot was not intended to be polished off in one sitting. It was an accompaniment, like a pickle or chutney, which made an appearance several times a week until it was all gone. Martine looked around the table and said “This salad is delicious. If nobody else wants any more I will finish it.” And with that she tipped the remaining half kilo or so onto her plate. I will never forget the look on my Dad’s face.

I no longer make Mum’s beetroot and vinegar mix and I’ve never liked tinned beetroot. Roasting is a better way to bring out the distinct earthy flavour which is the main appeal for me. I often mix beetroot cubes, which have been roasted in olive oil, with rocket, goat’s cheese or feta, some toasted walnuts and a dash of salad dressing to moisten.

This salad uses raw beetroot and fennel and is very moreish. Using the large 5mm grating disc on my Magimix for the beetroot and the thin slicing blade for the fennel and onion, the veggies are ready in no time.

This salad dressing is my standard, basic, everyday dressing. It’s the one I make up in a one litre jar (with 3 times the recipe) and always have in the fridge. I don’t use it for everything, but it’s great to have on hand when you’re in a hurry and certainly much nicer than anything you can buy. If preferred, leave out the honey or use just a tiny amount or a teaspoon of sugar. Don’t crush the garlic because it will soon overpower the dressing – just leave the cloves whole or sliced in two.

Beetroot and Fennel Salad3-4 beetroot, peeled and coarsely grated
2 fennel heads, trimmed and very thinly sliced
½ to 1 red onion, very thinly sliced
Basic Salad Dressing – see below
1 cup frozen peas (optional)

Mix beetroot, fennel and onion with enough dressing to moisten. Taste to see if it needs a dash more salt. Place peas in a sieve and run under the hot tap to thaw, then sprinkle over the salad. The peas are optional but add a nice colour contrast. Once mixed through, the beetroot with turn them red.

Serves 4-6

Basic Salad Dressing: in an empty screw top jar place 1 cup of vegetable oil (I use Canola), ¼ cup cider vinegar, 1 Tbs Dijon mustard, 1 Tbs honey (or to taste), ½ tsp salt, freshly ground black pepper and 1-2 cloves garlic, peeled and halved. Shake well. Keeps in the fridge for at least a month.

Carrot Cake

This is Matthew’s favourite cake and he complained that I didn’t make it very often. The reason is that it’s rather a big cake so I only made it when we had guests, then he would finish it off over the following week.

To keep him happy I now make half the recipe in a large loaf tin which takes about 45 minutes to cook rather than an hour. The quantities for half the recipe are in brackets.

The carrots and cream cheese make this a moist cake which will keep in a tin with a lid for up to a week, refrigerated in warm weather.

Carrot Cake4 eggs (2)
1¾ cups sugar (just over ¾)
1½ cups vegetable oil (¾)
2 cups self-raising flour (1)
2 tsp bicarbonate of soda (1)
2 tsp cinnamon (1)
1 tsp salt (½)
½ tsp ground cloves (optional) (¼)
1 cup chopped walnuts (or ½ cup walnuts and ½ cup raisins) (½ total)
400g coarsely grated carrots (about 4-5 big carrots) (200g)
Icing:
250g cream cheese at room temperature (not the spreadable kind) (125g)
1-2 cups icing sugar, sifted (¾ to 1 cup)
1 tsp vanilla essence (½)
25 walnut or pecan nut halves

Preheat oven to 180ºC. Peel carrots then grate in food processor if you have a grating attachment or by hand. With electric beaters, beat eggs and sugar until thick and creamy and tripled in volume. Gradually beat in oil, fold in sifted dry ingredients, then walnuts (raisins) and carrots. Pour into a 25 cm (9”) square tin, greased and bottom-lined with greaseproof paper, and smooth the top. You can use a round tin if preferred, but I like the way a square cake can be cut into lots of small servings.

Bake for an hour in the middle of the oven, or till a skewer inserted in the middle comes out clean. Cool 10-15 minutes in the tin then turn out, cool thoroughly and remove paper. Ice the top only and decorate with 25 walnut halves, 5 down one side and 5 down the other, then fill in the gaps like a chess board. Cut cake into 25 squares. Keeps for several days in a tin.

Icing: Place cream cheese, icing sugar and vanilla in food processor and mix until light and fluffy, stopping once to scrape down the sides. Don’t over-mix or it will go thin and runny. If preferred mix the icing by hand. If using a softer, spreadable cream cheese definitely mix by hand.

Cuts into 25 squares

Pear & Avocado Salad with Blue Cheese Dressing & Caramelised Walnuts

A perfectly ripe pear and an avocado sitting next to each other in the fruit bowl provided the inspiration for this healthy week-end lunch. I’ve always liked the sweetness fresh fruit adds to an otherwise savoury salad. You can use any type of blue cheese and pecans instead of walnuts.

Two Pear Salad with Blue Cheese Dressing & Caramelised Walnuts2 baby cos lettuce hearts
1 large ripe pear
1 ripe avocado
2 tsp oil
About 20 walnut halves
2 tsp honey
Dressing:
½ cup vegetable oil of your choice
Juice of ½ lemon or lime
¼ cup cream or sour cream
2-3 Tbs blue cheese
Freshly ground black pepper
To serve:
Finely chopped parsley or chervil

Arrange lettuce on two plates. Peel and halve pear and remove core with a melon baller, arrange on plate. Peel avocado, remove stone, cut each half into slices but not quite to the narrow end, then fan out on the plate. Heat oil and cook walnuts for a minute or two, stirring. Add honey and continue to cook and stir until sticky and glazed then turn off the heat – be careful, they burn easily. Place all ingredients for dressing in food processor and process until smooth. Start with 2 Tbs cheese, then taste and see if it needs more. Drizzle some of the dressing over the salads, sprinkle with walnut halves and herbs.

Serves 2

Gâteau de Crêpes Florentine

Most recipes on this blog are fairly quick and easy. Gâteau de Crêpes Florentine is a bit more time-consuming, so allow an hour to an hour and a half for preparation, plus cooking time. It can however be prepared ahead if you’re serving it to guests.

I used to make this in one large pancake stack and serve it cut into wedges. I decided to modernise it by making individual ones to serve for brunch. Making individual ones is a bit more fiddly than one big one, but using frozen spinach instead of fresh speeds things up.

If you make individual gateaux you will be left with a lot of crepe off-cuts, which can be used to make a quick dessert. Use scissors to snip them into more uniform pieces then  mix them with some apple slices, pile into a baking dish, sprinkle with sugar, dot with butter and bake in a hot oven for about 25 minutes.

IMG_2460

Crêpes:
2 cups cold water
1 cup cold milk
3 eggs
½ tsp salt
2 cups sifted plain flour
5 Tbs oil
Filling:
100g plain flour
70g butter
2 cups milk
salt, pepper and nutmeg
2 bunches spinach (or 2 x 250g packets frozen)
250g grated Parmesan cheese
To serve:
1 carton sour cream
½ cup chopped parsley
Salt to taste

Blend crepe ingredients in blender or food processor until smooth. Cover and refrigerate for 2 hours or overnight. Add 1-2 tablespoons of extra water, to ensure the batter is nice and thin, then make 24-28 thin crêpes in a non-stick omelette or crepe pan. No need to grease the pan. Use 1½-2 Tbs batter for each crepe, swirling the pan to cover the whole area. Stack them one on top of the other on a plate. If you’re making individual ones, use a larger non-stick pan so the crêpes are big enough to cut three circles using a stacking ring.

For the filling, wash, cook, drain and chop spinach or use two well-drained packets of frozen spinach. Make a white sauce with butter, flour and milk. Add seasonings and spinach. Sauce should be thick.

For one large gateau, place one crepe on lightly buttered ovenproof plate. Spread with thin layer of spinach sauce and sprinkle generously with grated Parmesan. Continue, ending with a crepe. Cover with foil and leave in the fridge. To serve, heat for about 45 mins at 180°C, remove foil and cut into wedges, like a cake. Serve with the parsley sauce.

For individual gateaux, grease individual stacking rings and arrange on baking paper, on a baking tray. Doing three crepes at a time, cut circles using one stacking ring. So from 3 crepes you will get 9 circles. Place one in each ring, then spread some spinach sauce over, sprinkle with grated parmesan and continue until you reach the top, ending with a plain circle of crepe. You will need 5-6 circles per serving. You can either use up all the crepes and filling or just make six or so and keep the rest for another use.

Sauce: Mix and chill. Add salt just before serving.

Serves 10-12 as a starter or light lunch.

Campari and Orange Jelly with Labneh and Oranges

Looking for inspiration for a family brunch I remembered my friend Karen telling me about a Campari and orange jelly she made recently from New Food, by Jill Dupleix, published in 1994. I’m not very good at culling cook books as I often find something in an old one which I can adapt or revamp. Amongst my collection I also had a copy of that book.

I made one and a half times the original recipe and, instead of using individual moulds,  poured it into a rectangular dish, then cut it into cubes when set. I didn’t have quite enough orange juice so I added the juice of a lime. Served in Martini glasses, layered with labneh and orange segments the jelly cubes looked quite snazzy. A delicious and very refreshing brunch starter, which could also be served as dessert.

Campari and Orange Jelly with Labneh and Oranges

3 cups freshly squeezed orange juice
½ cup Campari
¾ cup water
6 tsp powdered gelatine
2 Tbs caster sugar, to taste
To serve:
Labneh
Icing sugar, to taste
Orange flower water, to taste (optional)
2 oranges, cut into segments
Mint sprigs (optional)

You will need to make the labneh the day before.

Mix orange juice with Campari. Place water in a small bowl and mix in gelatine and sugar.  Zap in the microwave for 30 seconds or to dissolve the gelatine, then add to the orange juice. Tip into a small rectangular dish and leave in the fridge to set for several  hours or overnight.

Mix labneh with icing sugar and a few drops of orange flower water to taste. With a sharp knife, cut jelly into cubes and layer in Martini glasses with the labneh and orange segments. If liked, garnish with a sprig of mint.

Serves 6

Cauliflower & Stilton Soup with Pesto

On a cold wintery day a bowl of steaming soup hits the spot. I’m not a great fan of blue cheese, eaten on its own, but I do like the more subtle flavour you get when you use it in a soup or salad dressing.

We were recently served a soup like this (without the pesto) at a cocktail party at the Press Club, in small espresso cups. I suspect they added at least 2 cups of cream, which was delicious and okay in such small servings, but not what you want to indulge in for lunch.

Cauliflower & Stilton Soup with Pesto

50g butter
1 onion, finely diced
1 cauliflower, trimmed and cut into pieces (stalks are fine too)
4 cups chicken or vegetable stock, preferably home-made
1 cup cream
100g Stilton, or another blue cheese
Milk
Salt and freshly ground black pepper
To serve:
Pesto

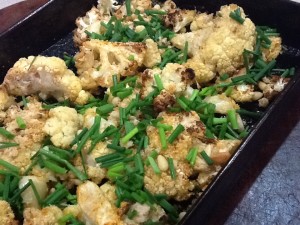
Melt butter in a large heavy-based saucepan and cook onion over moderate heat, stirring oven, until soft and translucent. Add cauliflower and stock and simmer for 20 mins or until cauliflower is tender. Cool a bit then blend until smooth in a blender, adding the cream, the blue cheese and some milk to keep things moving. Tip back into the saucepan, adding enough extra milk to achieve desired consistency. Season to taste. Reheat and served topped with a swirl of pesto.

Serves 6

Moroccan Cauliflower Salad with Yoghurt Dressing

We’re very fond of Moroccan flavours so this recipe caught my eye when it appeared in the latest Delicious magazine. It comes from Mojo, Luke Mangan’s new wine bar in Danks Street in Sydney, which serves “sharing plates” to go with the wine.

Serve it on its own or with grilled lamb cutlets or my Moroccan lamb. As we’re in the middle of winter I served it slightly warm and it was fantastic – definitely a keeper.

Moroccan Cauliflower Salad with Yoghurt Dressing1 whole cauliflower
400g can chickpeas, rinsed and drained
1/3 cup olive oil plus extra to serve
2 Tbs Ras el Hanout Spice Mix (bought or make your own, see below)
½ bunch coriander, leaves picked off
½ bunch Continental parsley, leaves picked off
1/3 cup port
1/3 cup currants
2 Tbs white wine
2 pinches saffron strands
2/3 cup thick Greek-style yoghurt
Juice ½ lemon, or to taste
½ tsp Dijon mustard
1/3 cup pine nuts, lightly toasted

Preheat oven to 200ºC. Trim cauliflower removing green leaves and stem. Slice cauliflower into 1cm slices from top to bottom – some will fall off as florets. Place in a roasting pan with chickpeas, oil and spices. Toss with your fingers to coat everything thoroughly. Bake 20-25 mins or until tender and golden. Cool a bit then mix with the herbs.

Meanwhile heat port in a pan or microwave. Add currants and leave to soak for 10 mins or until plump, then drain. The recipe says to discard the port, but why not drink it? Heat wine in a pan or microwave, add saffron and stand 15 mins, then strain into a bowl, discarding saffron. Add yogurt, mustard and lemon juice to taste and mix well.

Divide yoghurt dressing between 4-6 serving plates in a puddle in the middle. Top with cauliflower mixture, garnish with currants and pine nuts and drizzle with extra oil. Alternatively serve in one large serving bowl, drizzled with the dressing.

Serves 4-6

Ras el Hanout Spice Mix
3 Tbs black peppercorns
2 tsp powdered ginger
2 tsp cumin seeds or powder
2 tsp coriander seeds or powder
2 tsp nutmeg
1 tsp paprika
1 tsp cardamom
2 tsp turmeric
1 tsp chilli flakes or powder
¼ tsp cloves
2 tsp coarse salt

Grind the whole spices and salt to a powder in a spice mill or mortar and pestle. Add the powdered spices and mix well. Keep in a jar with a lid. Best used within a couple of months.

Roasted Vegies with Hummus

My daughter Catherine invented this delicious vegetarian recipe when she only had some beetroot, a leek and an avocado as inspiration. It’s at times like this when some of the best dishes are created. Remember the TV programme Ready, Steady Cook where participating cooks were handed a bag of ingredients and had to whip up a meal with no recipe, or even time to plan?

This recipe is flexible because you can use any vegetables you have on hand. I didn’t have any leeks so used a big onion and instead of potatoes I added carrots. I also used a creamy Danish feta rather than goat’s cheese and pecan nuts instead of walnuts.

Roasted Vegies with HummusHummus – homemade or bought
1 avocado
3 small beetroot
2 carrots
1 red capsicum (pepper)
4 cloves garlic, peeled
1 onion or 1 leek, or both
Olive oil
Salt and freshly ground black pepper
2 Tbs coriander leaves
50 goat’s cheese or feta
2-3 Tbs walnut or pecan halves, toasted
Balsamic glaze or a fruity finishing vinegar (I used apricot, Catherine used cherry)

Preheat oven to 200ºC. Cut vegetables into even-sized chunks or sticks, mix with a good slug of olive oil, salt and pepper and spread out in a single layer on a baking tray lined with baking paper. Bake for 30 mins or until tender and starting to brown at the edges, turning them about halfway through. Remove from the oven and let them cool a bit. Spread about 3 Tbs hummus on two large serving plates. Arrange half an avocado, sliced, on each plate on the edge of the humus, as shown in photo. Pile the roasted vegetables on top, then garnish with the coriander, the crumbled cheese and the toasted walnuts or pecans. Drizzle with the vinegar.

Serves 2

Home-made Pizza

A proper Italian pizza has a thin, crispy crust and minimal topping. Nothing remotely like the thick, soggy versions sold in many fast food chains. The Associazione Verace Pizza Napoletana says that when cooked a pizza base should be no more than 4mm thick at the centre, though it will be thicker around the edges. And they should know, they invented them.

Home-made pizzaWhen our kids were growing up pizza featured regularly on the menu. The pizza delivery motorbikes never came to our house because my view is that anything home-made is better than the bought version, not to mention cheaper. At the time our offspring thought they were deprived, but now they have their own families and also make their own.

For a larger group make 3-4 times the recipe and form the dough into balls. Have the toppings ready in small dishes and let people choose their own. With a salad and a bottle or two of vino you’re all set for a casual meal which appeals to all ages.

Home-made pizza15g fresh yeast or 7g dry yeast
1 tsp sugar
½ tsp salt
2 cups plain flour (preferably 00)
1 Tbs olive oil
½ to ¾ cup warm water

Mix ½ cup warm water with yeast and sugar. Leave for 10 minutes. Sift flour and salt into a bowl, add oregano, oil and yeast mixture. Mix well, adding more warm water until you have a firm, not sticky, dough. If preferred make in a food processor or in a mixer with a dough hook.

Turn dough onto a floured surface and knead for a couple of minutes until smooth and springy. Form into a ball, place in a lightly oiled bowl and turn to coat with oil. Cover and leave at room temperature for an hour, or until doubled in size. Alternatively, cover and refrigerate overnight to prove more slowly.

Preheat oven to its highest temperature. If using, put pizza stone in the oven to get really hot. Knead dough lightly and form into a ball (or two balls) and leave, covered with a tea towel for about 20 mins or until doubled in size.

To assemble pizzas place a ball of dough on a lightly oiled pizza pan and press out to size using oiled fingers, working from the middle out. If using a pre-heated pizza stone, or a wood-fired pizza oven, press dough out into a large round on a well-floured pizza paddle.

Home-made pizzaArrange toppings on pizza – be sparing – less is more. Slide onto stone if using one and bake for about 5 minutes or until golden and crispy. Time will vary depending on your oven. Our outdoor wood-fired oven shown in the photo heats up to over 400°C, so pizzas only take about 3 minutes. In an ordinary oven they can take up to 12 minutes. Keep an eye on it.

Makes one very large or two medium photopizzas

Topping suggestions:

  • Tomato sugo (sold in jars to go with pasta) with thinly sliced mushroom, sliced pepperoni or chorizo and grated mozarella
  • Pesto with sliced fresh buffalo mozarella and sliced fresh tomatoes
  • Pesto, peeled prawns, grated mozarella and pine nuts
  • Additional toppings: stoned olives, anchovies, sun-dried tomatoes, caramelized onions, extra oil, fresh herbs