Chef Gogh’s Mango with Sticky Rice & Coconut Milk

A couple of years ago we spent a week at the Sarojin in Khao Lak, an hour and a half north of Phuket in Thailand, on our way back from a holiday in Europe. We had such a great time that this year we went back.

Since our first visit to the Sarojin Chef Gogh has been a subscriber to Café Cat. Sometimes he makes one of my desserts, turning it into a five star masterpiece and sends me a photo.

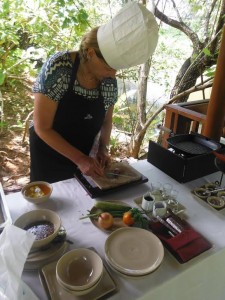
This time it was Gogh’s turn to teach me some Thai recipes. He arranged a private cooking class where I learnt how to remove the bones from a whole snapper, while leaving it intact, so you can’t tell.  Here you can see me working under close supervision from Gogh, looking very professional with a hat they lent me.

I’m not going to include the fish recipe here because removing all the bones without cutting the skin is too hard to explain in writing – you need to watch someone do it, then do it yourself straight away. I made lots of notes and hope I can do it on my own, when the time comes! You need a whole ungutted fish and unless you catch your own they’re hard to find in Australia.

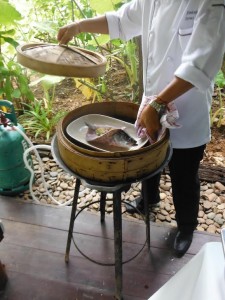
Sous-chef  Steamer

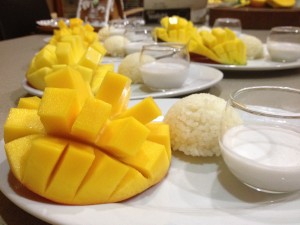
Mango with Sticky Rice and Coconut Milk is my favourite Thai dessert. It’s often too sweet for my taste but Gogh’s version combines the natural sweetness of the mango with slightly sweet sticky rice and a salty coconut sauce. It’s sublime, so I ordered it for breakfast most mornings while we were staying at the Sarojin. I have slightly adjusted his recipe to use a rice cooker. If preferred, steam the rice in the traditional Thai way, then mix in the coconut milk and sugar when it’s cooked. The Sarojin serves the sticky rice in a cone made from a banana leaf. I used an ice cream scoop instead.

Chef Gogh's Mango with Sticky Rice & Coconut Milk1 cup glutinous (sticky) rice
1-2 Tbs sugar, to taste
1 can coconut cream or milk (400ml), not shaken
salt to taste
2 ripe mangoes
Lightly toasted sesame seeds

Place rice in a bowl, cover with cold water and leave to soak for several hours or overnight. Drain in a sieve then place in a rice cooker with 1 cup water. Open coconut cream or milk – cream is better as it’s thicker, but milk will do. Using a spoon, remove about 1 cup (250ml) from the top of the can – the thicker part – and reserve till serving time. Add what’s left in the tin to the rice cooker with sugar and about ½ tsp salt. Mix well, then switch on rice cooker. When rice is cooked switch off the machine and leave till cool, then cover and keep in the fridge.

To serve, cut the four cheeks from the two mangoes. Score flesh into diagonal squares, then bend back the skin as shown in photo. Arrange mango halves on four serving plates. Mix reserved coconut cream with salt to taste then divide between 4 small individual dishes or small glasses and place next to the mango. Using a lightly-oiled ice cream scoop place a scoop of sticky rice on each plate and garnish with the sesame seeds. There will be rice left over. If preferred serve rice in individual dishes and spoon some of the coconut cream on top, then sprinkle with the sesame seeds. You can also serve it all in one dish, with the cubed or sliced mango on top.

Serves 4

Spanish Eggs with Jamon

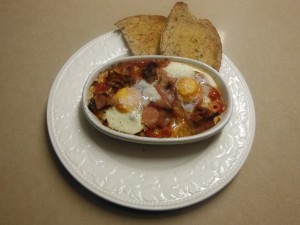
The Parlour Wine Room in New Acton Canberra has a great lunch menu at the moment where you can choose a main course from a selection of about half a dozen options for just $16, including a glass of wine or beer. I chose Spanish Eggs and it really hit the spot. The servings were quite large – I think there were 3 or 4 eggs per serve – so I have cut back a bit in my version. If you’re hungry this recipe will serve two rather than four.

Jamon is the Spanish word for ham and usually refers to dry-cured hams. Substitute Italian prosciutto or German black forest ham. I used the latter from Aldi.

Spanish Eggs with Jamon1 large onion, peeled, halved and sliced
4 red capsicums, seeds removed and sliced into strips
¼ cup olive oil
Salt, pepper and a pinch of sugar
8 eggs
8 slices Spanish jamon (prosciutto or black forest ham)
4 slices sourdough bread, toasted and buttered
Maldon sea salt and freshly ground black pepper

Heat oil in a frying pan and add the onions. Fry gently until softened then add the capsicum strips. Continue to fry gently for 15-20 minutes, stirring often. Add half a cup of water and continue to cook until the liquid has evaporated and the mixture is soft. Can be pepared to this stage and kept in the fridge until needed.

Preheat oven to 180ºC. Divide onion and capsicum among four individual oven-proof shallow dishes. Break two eggs into each dish and top with the ham, cut with scissors into pieces about 2-3 cm long.

Bake for about 8 minutes, or until eggs are set and ham is crispy. Season with salt and pepper. For a low carb meal skip the toast!

Serve with buttered sourdough toast on the side.

Serves 4

Sweet Potato Rosti with Fried Eggs

Sunday’s a good day for a leisurely cooked breakfast and about 3 weeks ago I decided to make this sweet potato rosti which I had seen in the free brochure published monthly by Coles supermarket and available at the check out.

Sweet potato, bacon, onion and thyme – preferably fresh – is a winning flavour combination, but I had to make this four times before I got it right. The first time I made one large rosti, as per the recipe, but the outsides started to burn before the middle was properly cooked. Second time I made individual rostis, like fritters, but they had a tendency to fall apart. Third time I added an egg and a bit of flour to the mixture and again made small fritters, but the flavour wasn’t the same.

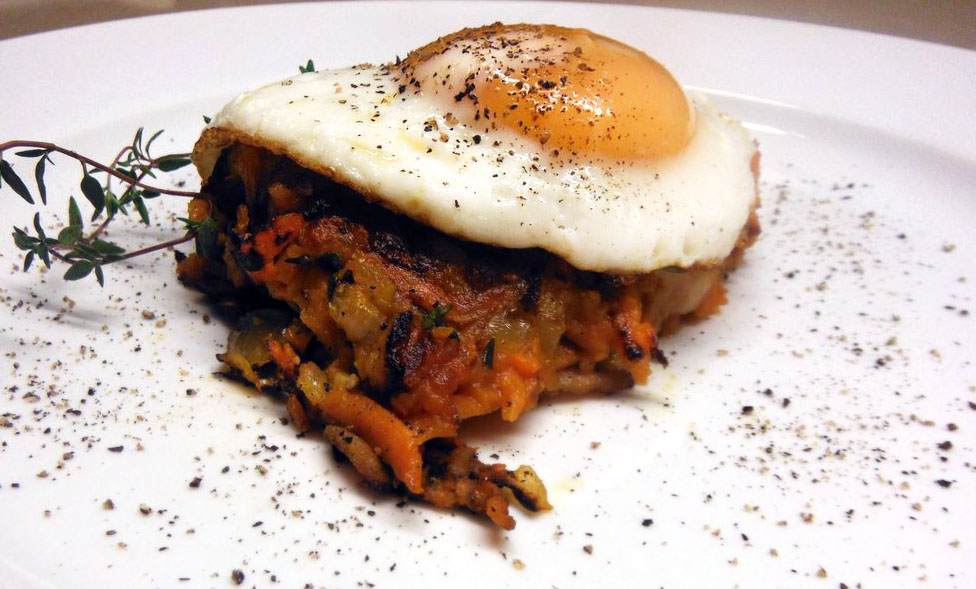
The original recipe said to microwave the whole sweet potato for five minutes before grating it, but this overcooked the outside while leaving the inside raw. So on my fourth and final attempt, instead of microwaving the sweet potato I stir fried the mixture and then made it into one large rosti. This worked well and here’s my version of the recipe!

To make a more substantial meal serve rosti on a slice of buttered toast, with a green salad on the side.

Sweet Potato Rosti with Fried Eggs

1 large sweet potato (about 800g)
100g bacon, diced
1 brown onion, finely diced
3 tsp finely chopped fresh thyme (or use dried)
1 tsp salt
Freshly ground black pepper
4 eggs
Olive oil

Peel and grate the sweet potato into a bowl. A food processor with a coarse grating disc makes this a breeze. Alternatively use the coarsest side of a hand grater. Mix in bacon, onion, thyme, salt and pepper.

Heat a little olive oil in a medium sized non-stick frying pan. Add sweet potato mixture and stir fry for 5-10 minutes, or until the mixture has softened. Heat a little oil in a smaller omelette pan about 20 cm in diameter. Pack sweet potato mixture into the pan and smooth the surface, pressing down with a spatula. Cook over medium heat for 5-10 minutes or until golden underneath. Loosen around the edges, then place a plate on top and invert the pan so the rosti ends up on the plate. Slide back into pan, adding a bit more oil if necessary. Cook for 5-10 minutes on the other side.

Meanwhile in another pan, fry the eggs sunny side up, or however you like them.

Cut rosti into 4 and arrange on individual serving plates. Top each serving with a fried egg.

Serves 4

Gâteau de Crêpes Florentine

Most recipes on this blog are fairly quick and easy. Gâteau de Crêpes Florentine is a bit more time-consuming, so allow an hour to an hour and a half for preparation, plus cooking time. It can however be prepared ahead if you’re serving it to guests.

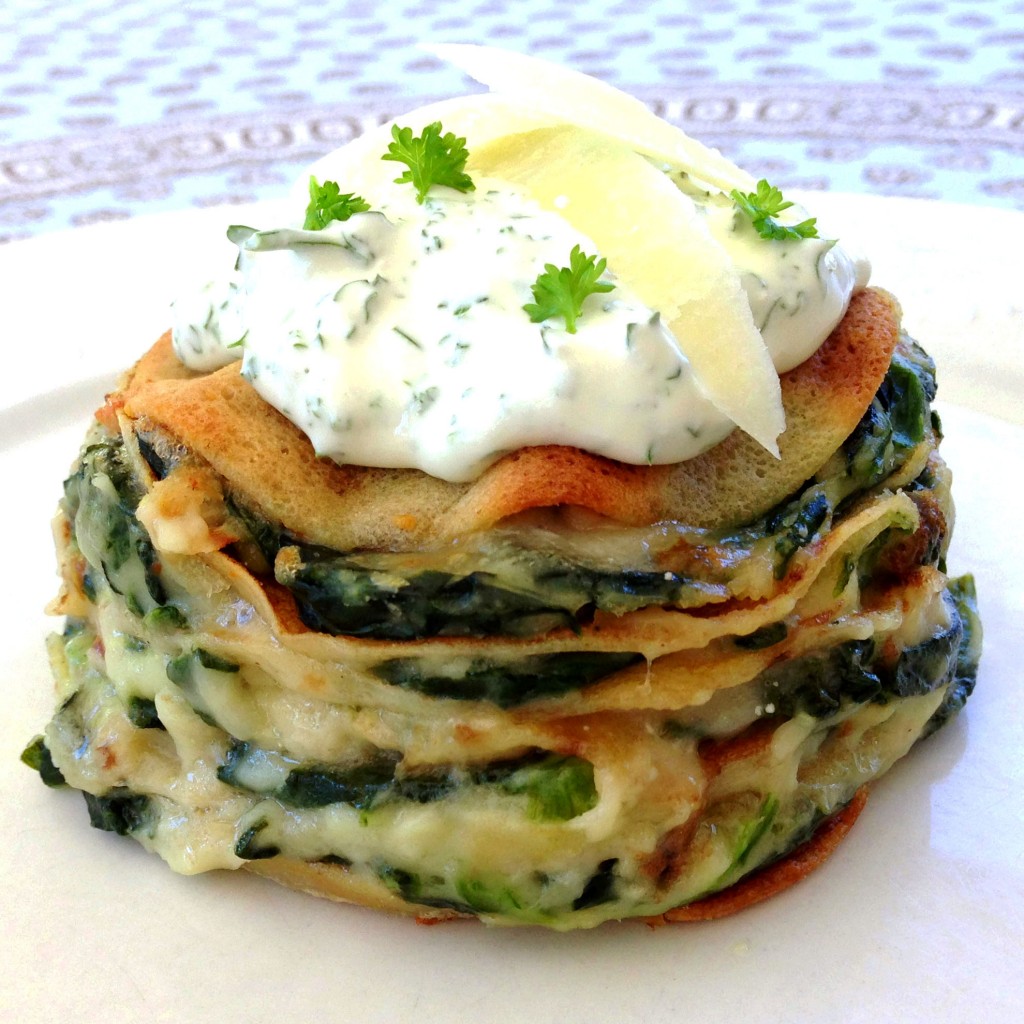
I used to make this in one large pancake stack and serve it cut into wedges. I decided to modernise it by making individual ones to serve for brunch. Making individual ones is a bit more fiddly than one big one, but using frozen spinach instead of fresh speeds things up.

If you make individual gateaux you will be left with a lot of crepe off-cuts, which can be used to make a quick dessert. Use scissors to snip them into more uniform pieces then  mix them with some apple slices, pile into a baking dish, sprinkle with sugar, dot with butter and bake in a hot oven for about 25 minutes.

IMG_2460

Crêpes:
2 cups cold water
1 cup cold milk
3 eggs
½ tsp salt
2 cups sifted plain flour
5 Tbs oil
Filling:
100g plain flour
70g butter
2 cups milk
salt, pepper and nutmeg
2 bunches spinach (or 2 x 250g packets frozen)
250g grated Parmesan cheese
To serve:
1 carton sour cream
½ cup chopped parsley
Salt to taste

Blend crepe ingredients in blender or food processor until smooth. Cover and refrigerate for 2 hours or overnight. Add 1-2 tablespoons of extra water, to ensure the batter is nice and thin, then make 24-28 thin crêpes in a non-stick omelette or crepe pan. No need to grease the pan. Use 1½-2 Tbs batter for each crepe, swirling the pan to cover the whole area. Stack them one on top of the other on a plate. If you’re making individual ones, use a larger non-stick pan so the crêpes are big enough to cut three circles using a stacking ring.

For the filling, wash, cook, drain and chop spinach or use two well-drained packets of frozen spinach. Make a white sauce with butter, flour and milk. Add seasonings and spinach. Sauce should be thick.

For one large gateau, place one crepe on lightly buttered ovenproof plate. Spread with thin layer of spinach sauce and sprinkle generously with grated Parmesan. Continue, ending with a crepe. Cover with foil and leave in the fridge. To serve, heat for about 45 mins at 180°C, remove foil and cut into wedges, like a cake. Serve with the parsley sauce.

For individual gateaux, grease individual stacking rings and arrange on baking paper, on a baking tray. Doing three crepes at a time, cut circles using one stacking ring. So from 3 crepes you will get 9 circles. Place one in each ring, then spread some spinach sauce over, sprinkle with grated parmesan and continue until you reach the top, ending with a plain circle of crepe. You will need 5-6 circles per serving. You can either use up all the crepes and filling or just make six or so and keep the rest for another use.

Sauce: Mix and chill. Add salt just before serving.

Serves 10-12 as a starter or light lunch.

Campari and Orange Jelly with Labneh and Oranges

Looking for inspiration for a family brunch I remembered my friend Karen telling me about a Campari and orange jelly she made recently from New Food, by Jill Dupleix, published in 1994. I’m not very good at culling cook books as I often find something in an old one which I can adapt or revamp. Amongst my collection I also had a copy of that book.

I made one and a half times the original recipe and, instead of using individual moulds,  poured it into a rectangular dish, then cut it into cubes when set. I didn’t have quite enough orange juice so I added the juice of a lime. Served in Martini glasses, layered with labneh and orange segments the jelly cubes looked quite snazzy. A delicious and very refreshing brunch starter, which could also be served as dessert.

Campari and Orange Jelly with Labneh and Oranges

3 cups freshly squeezed orange juice
½ cup Campari
¾ cup water
6 tsp powdered gelatine
2 Tbs caster sugar, to taste
To serve:
Labneh
Icing sugar, to taste
Orange flower water, to taste (optional)
2 oranges, cut into segments
Mint sprigs (optional)

You will need to make the labneh the day before.

Mix orange juice with Campari. Place water in a small bowl and mix in gelatine and sugar.  Zap in the microwave for 30 seconds or to dissolve the gelatine, then add to the orange juice. Tip into a small rectangular dish and leave in the fridge to set for several  hours or overnight.

Mix labneh with icing sugar and a few drops of orange flower water to taste. With a sharp knife, cut jelly into cubes and layer in Martini glasses with the labneh and orange segments. If liked, garnish with a sprig of mint.

Serves 6

Bircher Muesli

In about 1900 a Swiss doctor named Maximilian Bircher-Benner developed a healthy, easily-digested dish for the patients in his hospital.

Bircher Muesli soon became a light evening meal or breakfast dish throughout Switzerland and northern Germany. In the latter half of the 20th century muesli spread to the rest of the Western world and became a commercial product.

Bircher Muesli makes a nice change from the toasted granola-style ones you buy or make yourself. You can always add some crunch via the toppings.

Bircher Muesli1 cup porridge oats (not the quick-cook variety)
1 cup plain yoghurt
½ cup milk
2 eating apples, cored and grated, including skin
Toppings:
Extra milk
Sliced banana
Fresh berries
Plain yoghurt
Honey to drizzle
Dried fruit, nuts, coconut

Mix oats with yoghurt, milk and grated apples. Cover and refrigerate overnight. Serve with extra milk and a selection of toppings. Keeps in the fridge for two days.

Note:  I like the fact that this muesli is all ready to serve in the morning, when I have less time to spare for things like grating. However, if preferred, soak oats with yoghurt and milk and add grated apple when serving. Some recipes use fruit juice instead of milk, but I prefer milk.

Ricotta Hot Cakes with Honeycomb Butter

Bill Granger owns three busy cafes in Sydney where he has made his name serving fantastic breakfasts and brunches. We went to the one in Surrey Hills on Sunday a couple of weeks back. You can’t book and by the time we arrived it was nearly 10.30 so there was quite a queue. We were told the wait would be 20-30 minutes, which unfortunately ended up being fifty.

Fortunately the meal was worth waiting for. I chose the Gravlax which was good, but not as good as the Ricotta Hot Cakes with Honeycomb Butter, ordered by one of our party, who generously gave me a taste. I’m sure you know the feeling when you realise you should have ordered what someone else is having!

Bill’s recipe was easy to find online. It says it serves 6 to 8, but it’s not something I would make if I had to serve that many people for breakfast. Let them eat toast! I halved the recipe which made a filling breakfast for two. By making the hot cakes a bit smaller, or serving two per person instead of three, we could have served a third person.

The Honeycomb Butter is delicious, but if you want to serve the hot cakes for breakfast you need to make it the day before as it needs to chill for a couple of hours. If you don’t have time for that just spoon it into a small bowl and serve it in dollops. Or forget about the Honeycomb Butter and just drizzle them with honey. At Bill’s they serve maple syrup on the side, for those who want to add more sweetness, but I don’t think you need it.

To serve the hot cakes as a dessert, make them half the size so you end up with 12 little cakes which will serve 4. They would also be delicious with stewed rhubarb or indeed any fruit – cooked or fresh – that you have available.

Ricotta Hot Cakes with Honeycomb Butter

¾ cup ricotta cheese
1/3 cup milk
2 eggs, separated
½ cup plain flour
½ tsp baking powder
pinch salt
butter for frying
fresh strawberries, halved or sliced banana
icing sugar for dusting
Honeycomb Butter:
125g unsalted butter at room temperature
50g Honeycomb or a Crunchie Bar
1 Tbs honey

Remove chocolate from Crunchie bar with a sharp knife and discard (or eat!). Place all ingredients in food processor and blend until smooth. Shape into a log on plastic wrap, roll up, seal and refrigerate for 2 hours or overnight.

Mix ricotta, milk and egg yolks in bowl. Add sifted flour, baking powder and salt. Whip egg whites in another bowl until stiff peaks. With a metal spoon, fold thoroughly into batter in two batches. Lightly grease a large non-stick frying pan with butter. Make three hotcakes using about 2 heaped tablespoons of batter for each. Cook over medium-high heat for 2 minutes or until golden on the underside. Turn and cook on the other side. Transfer to a warm plate while you make three more, adding a little more butter to the pan.

Serve hotcakes with halved strawberries or thickly sliced banana and a slice of honeycomb butter. If you don’t have time to make the Honeycomb butter just serve drizzled with honey instead. Dust with icing sugar.

Makes 6 large hot cakes which serves 2-3

Note: if you can’t find ricotta you could use cottage cheese, whizzed in the food processor to remove lumps. South American readers could use queso fresco.

Rio Palace Waffles

Many moons ago when we were holidaying in Brazil our kids decided that the Rio Palace Hotel in Rio de Janeiro made the best waffles. I asked the chef for the recipe and somehow managed to write it down. Communication was hampered by the fact that he only spoke Portuguese and while I do speak Spanish, it’s similar but not quite the same!

His recipe started off with a dozen eggs and would have made enough waffles to feed an army, so I divided it by six. It wasn’t long before the kids had weekend waffle making down to a fine art, doubling the recipe if they had friends staying … and sometimes even when they didn’t. I was always amazed at how many they could demolish.

They’re great for breakfast with honey or maple syrup.  For dessert try them with quartered strawberries sweetened with a little sugar and a dash of white balsamic vinegar, caramel sauce and whipped cream, as shown in the photo. The kids never bothered, but if you have time separate the eggs and fold in the lightly whipped whites at the end, by hand, which makes the waffles even lighter. You can use milk instead of cream and water, but the results are crunchier with cream.

Rio Palace Waffles2 tablespoons melted butter
2 eggs
200g or 1¾ cups plain flour, sifted
½ cup cream
½ teaspoon baking powder
½ teaspoon salt
2 teaspoons sugar or honey
½ to ¾ cup water

Using electric beaters or a food processor mix all the ingredients for the waffles, adding enough water to make a thick batter. Preheat an electric waffle iron, butter it and cook the waffles according to the manufacturer’s instructions.

Serves 8 for dessert (3 pieces each) or 2 hungry kids for breakfast