Dream Bars

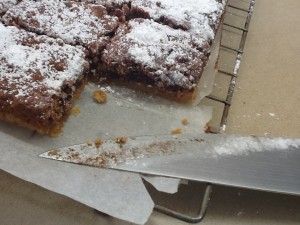
This recipe first appeared in the Australian Women’s Weekly Big Book of Beautiful Biscuits when it was published in 1982. I’ve been making it ever since and it’s always popular.

The original recipe uses 2 cups fruit mince (mincemeat) but I use a cup of dried fruit and a cup of jam instead. It’s great for using up all those bits of jam and marmalade at the bottom of jars – something my family say I’m famous for. It’s always a great achievement when you can find things in the fridge which need using up and turn them into something finger lickin’ good.

When I returned to take the photo someone, who shall remain nameless and blamed the dog, had already eaten a piece.

photo

Base:
180g butter at room temp
2/3 cup brown sugar, lightly packed
2 cups plain flour
Topping:
4 eggs
1 cup brown sugar, firmly packed
2 tsp vanilla essence
2 Tbs Plain flour
1 tsp Baking Powder
3 cups dessicated coconut
1 cup jam (any flavour)
1 cup dried fruit

Preheat oven to 180°C. Process butter and sugar in food processor until creamy. Add sifted flour and mix until you have crumbs which are starting to stick together. Press mixture into a greased Swiss Roll tin or slice tin (mine is 35x25cm) lined with baking paper. It doesn’t have to look very smooth but it does need to be evenly spread to cover the base. Bake for 10 mins or until golden.

Process eggs, sugar and vanilla in food processor. Add coconut, jam and fruit and process just enough to mix. Spread topping over the cooked base, bake for 25-30 mins or until firm and golden brown. Cool, dust with sifted icing sugar and cut into squares.

Variation: Frangipane Bars: make the base as above. When cooked, spread with about a cup or so of raspberry jam or lemon curd. For the filling mix 125g butter, softened, with 1 cup caster sugar in food processor until light and fluffy. Add 4 eggs, ¼ cup plain flour, 3 cups almond meal (or another ground nut) and a tsp of vanilla or almond essence. Spread evenly over the base, sprinkle with flaked almonds and bake for 25-30 mins or until firm and golden brown.

Rum and Raisin Cake

When we were growing up my brother, sister and I spent many happy summer holidays on a dairy farm on the moors of County Durham in the far north of England, not far from Barnard Castle. Hill House was run by my Dad’s Uncle Hector and Auntie Vina, their youngest son Ian and his wife Mary. Sometimes we went with my parents, other times we travelled the 300 miles on our own by train and Mary would meet us in Darlington. Ian’s brothers and sisters all had farms and we spent time with all of the rellies. Dent Gate farm had a stream with trout in it. If we were patient we could catch them by tickling them. Don’t believe me? Well neither does Matthew, but it’s true!

Cakes were a staple part of a farmer’s diet back then. They were served with morning tea at eleven and afternoon tea was a proper sit down affair back then. On Sundays they really went to town. The first time I saw the table groaning under the weight of a huge selection of cakes, sweet pastries, cold meats, chutneys, jellies, trifles and fruit salad, I couldn’t believe my eyes. Down south where I came from we were lucky if we had one home-made cake to choose from!

One day a week was set aside for baking in the temperamental wood-fired Aga stove. You couldn’t adjust the temperature and had to cook according to how hot the oven was that day. On windy days the oven would be hot and we would make blackberry and apple pies, using wild blackberries we had collected ourselves. If there was no wind the oven would be cooler and we made fruit cakes.

When I won first prize for a two egg sponge in the Butterknowle annual show I was tickled pink – but it was all thanks to Auntie Vina’s foolproof recipe. She had a huge influence on my love of cooking, teaching me all the basic skills and recipes for cakes and pastries. This Rum and Raisin cake is adapted from one of her recipes. I’ve added the cottage cheese and a bit more rum.

I never let the lack of an ingredient stop me making something, so you will see I’ve listed some substitutions below.

Ian and Mary have retired and in the family tradition Hill House is now being run by their son Jonathon and his wife Fay. It’s no longer a dairy farm as they lost all their cattle in the Foot and Mouth outbreak of 2001 and had to start over again.
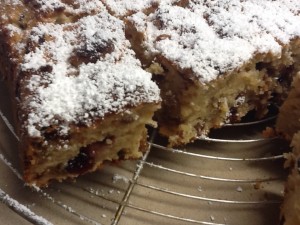
Rum and Raisin Cake1½ cups raisins
½ cup dark rum
125g butter, at room temp
1 cup brown sugar, firmly packed
3 eggs
1/3 cup milk
300g cottage cheese or ricotta
¾ cup ground almonds
1¼ cups self-raising flour, sifted
Icing sugar

Soak raisins in rum several hours or overnight. Preheat oven to 170°C. Line a cake tin with baking paper. I used a 22cm (9″) square tin, but a round one will do. In food processor or in a bowl with electric beaters mix butter and sugar until creamy. Add eggs, milk and cottage cheese and mix well, stopping to scrape down the sides halfway. Add ground almonds and self-raising flour. Stop and scrape down, add raisins and rum and mix just enough to incorporate as you don’t want to chop the raisins. Scrape into tin and smooth the top. Bake for 40-60 mins or until evenly browned, firm to touch and a skewer inserted in the middle comes out clean. Cool then tip out, remove paper, dust with icing sugar and cut into squares or rectangles to serve.

Makes about 20 pieces

Note: you can make your own ground nuts in the food processor.

Substitutions: brandy instead of rum, sultanas or other dried fruit instead of raisins, white sugar instead of brown, ground hazelnuts or walnuts instead of almonds.
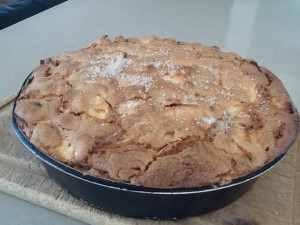
White Chocolate & Macadamia Blondies

It was a perfect summer afternoon in Canberra, with clear blue skies and a light breeze. About 30 ladies sat in the garden of the New Zealand High Commission chatting and enjoying a delicious afternoon tea. We had gathered to say goodbye to a couple of very good Kiwi friends.

A beautiful young kookaburra sat on a low branch of a nearby tree, calmly watching proceedings. I’m not an expert on native birds, but apparently our feathered friend was female, so she probably thought she was invited. We later discovered that she was waiting for our hostess to feed her some minced beef, which she did just before the last guests departed.

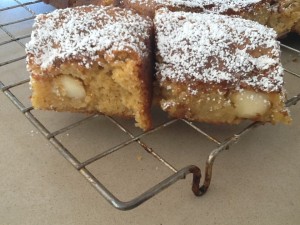
Afternoon tea used to be a standard affair. Now it’s a real treat. The party began at 2pm so I decided to skip lunch and was glad I had done so. When everything looks so delicious it’s tempting to try everything. I didn’t, quite, but I did try quite a few things. My favourite cakes were the White Chocolate and Macadamia Blondies which had come from the Kiwi Kitchen in Fyshwick.

I decided to try and replicate them and spent half an hour reading through various Brownie and Blondie recipes on Google. A Blondie by the way is a Brownie, without the ingredients which make it dark. I was pretty sure one of the ingredients was condensed milk, but couldn’t find any recipes for Blondies using that ingredient. I did, however, find one for Brownies which used it. So here is the result of combining three recipes. Not quite the same as the original version, but close. A delicious cake which will appeal to the sweet tooth brigade. Serve as a cake or warm as a dessert, with vanilla ice cream or whipped cream.

White Chocolate & Macadamia Blondies

150g unsalted butter
1 can condensed milk
½ cup brown sugar, firmly packed
1 tsp vanilla essence
2 eggs, lightly beaten
2 cups self-raising flour, sifted
1 cup white chocolate chips/melts
1 cup macadamia nuts, coarsely chopped

Preheat oven to 180ºC. Line a 9″ (22cm) square cake tin with baking paper. Place butter in a large mixing bowl and melt in the microwave. Add remaining ingredients one by one, in the order they are listed. A good way to crush the nuts without making them too fine is to press each one with the back of a large knife, the way you crush garlic. When thoroughly mixed, scrape mixture into the tin and smooth the top. Bake for 25-30 mins. The top should be golden brown, but the middle of the cake should still be quite soft when you take it out. It will firm up when cold.

Cool then cut into squares and dust with icing sugar.

Makes 20-25 squares

Note: anyone with an allergy to nuts could use oats instead of macadamias.

Iced Ginger Cake

I decided to invent a ginger version of everyone’s favourite carrot cake – the one with the cream cheese icing – and came up with this. Using three different types of this versatile tubor – fresh, powdered and crystallised – this cake gives ginger addicts a serious overdose.

Ginger Cake250g butter at room temperature
¾ cup brown sugar
1 Tbs black treacle (or substitute Golden Syrup)
3 Tbs grated fresh ginger
1½ Tbs powdered ginger
3 eggs
2 cups self-raising flour
1 cup plain yoghurt or buttermilk
Icing:
1 x 250g Philadelphia style cream cheese, at room temperature
250g icing sugar (about 2 cups) sifted
1 tsp vanilla essence
Crystallized ginger to decorate

Preheat oven to 170°C. Grease and line a 20-22cm (8-9″) square cake tin with baking paper. Place first five ingredients in food processor and mix well. Add eggs and when incorporated add flour and yoghurt or buttermilk. Stop to scrape down the sides then mix a bit more. Scrape into tin and smooth the top with a knife. Bake for 30-40 mins or until well-risen and a skewer inserted in the middle comes out clean. Cool in the tin. When cold tip out and ice the bottom which gives you a nice flat surface. Decorate with slivers of crystallized ginger – I just used one per square, but you could use more! Cut into squares and store in a container with a lid. Keeps for a day or two outside the fridge in cooler weather, but in summer it’s best to refrigerate.

Icing: beat cream cheese and vanilla with icing sugar, either by hand or in food processor, using the pulse button, until light and fluffy. Don’t over-beat or the icing will go runny.

Makes 16 generous squares

Lemon Drizzle Cake

Google has links to lots of recipes for Lemon Drizzle Cake. My version contains sour cream so it’s very moist and will keep in a tin for up to a week. If preferred omit the final lemon icing and serve instead dusted with sifted icing sugar. It’s really deliciously lemony and makes a nice dessert served with pouring cream and strawberries.

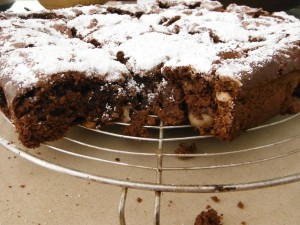
I found a long narrow loaf tin in a second-hand store recently and decided to use it for this cake.  It was a bit small for the amount of cake batter, so as it rose the cake tumbled over the edges and I had to trim some off in order to remove it from the tin. It also stuck to the sides of the pan – as you can see from the photo. Now I know why the previous owner got rid of it!

The lemon icing is optional.

Syrup:
Juice from 1½ large lemons
¾ cup icing sugar
Cake:
125g butter (preferably unsalted) at room temp
1 cup caster sugar
2 large eggs
Grated zest from 2 lemons
pinch salt (not needed if you use salted butter)
1½ cups self-raising flour, sifted
1 cup sour cream or crème fraîche
⅓ cup milk
Icing: (optional)
Juice from ½ large lemon
¾ cup icing sugar

Preheat oven to 170°C.  Grease a loaf tin or 20cm round cake tin and line the bottom with baking paper. Grate zest from the lemons then juice them. Syrup: Heat lemon juice and icing sugar in  a small saucepan, stirring until dissolved.

Cake: Place butter and caster sugar in a food processor or electric mixer and process until light and fluffy. Add eggs one at a time and when thoroughly incorporated add flour, sour cream, milk and the lemon zest.  Stop motor to scrape down the sides, then process for a few seconds more. Scrape batter into cake tin and smooth the top. Bake for 50-60 mins or until well-risen and golden brown and a skewer inserted into the middle comes out clean.

When cake comes out of the oven leave it in the tin.  While it’s hot gently make holes all over the cake right through to the bottom with a skewer.  Spoon the warm lemon syrup over slowly, allowing it to soak in.

When cake is completely cold remove from tin to a cake rack. Icing: Place lemon juice and icing sugar in a small bowl and mix until smooth. Spoon over the cake in a drizzly pattern.

Rhubarb Crumbly Slice

Matthew said the rhubarb was going berserk and needed picking. All the other little desserts you’ve seen on here recently have been devoured and the fridge was looking bare. I thought I would concoct something with this delicious under-rated fruit from the garden and came up with this.  A cross between a crumble and a slice which can double up as a dessert or something sweet to go with a cup of tea for the next few days.

250g plain flour
250g butter
200g brown sugar
200g porridge oats (not the quick cook variety)
About 1 kg washed and trimmed rhubarb, cut into 2-3cm slices
1½ cups jam (any flavour will do)
3 tsp finely chopped fresh ginger (optional)

Preheat oven to 180°C.  Place flour and butter in food processor and process to fine crumbs.  Add sugar and oats and process briefly, just enough to mix.  Butter an oblong cake tin or roasting pan.  I used a roasting pan 28x34cm. Tip in about ¾ of the crumble mix and spread evenly. Top with the rhubarb, then drizzle over the jam, mixed with the ginger if using.  If jam is a bit stiff zap it briefly in the microwave. Cover with remaining crumbs then bake for 30-40 mins or until browned and bubbly. Cut into 16.

Keeps in the fridge, covered, for up to a week. Can be eaten cold as a cake/slice or hot as a dessert. If you just want to heat up one portion use the microwave.  However, if you want to reheat say half a dozen slices to serve as dessert with cream or vanilla ice cream, remove the required number of squares from the tin with a fish slice and reheat in a moderate oven for 10-15 mins on a sheet of baking paper.

Serves 16

Coffee & Halva Ice Cream Cake with Hot Chocolate Sauce

This cake makes a great dessert or birthday cake to serve a crowd.  It can be made a few days ahead and is always popular.  The coffee and halva flavours might be a bit sophisticated for small children, although our two and a half year old granddaughter Natalia loves olives, artichokes, radicchio and rocket, so you can never tell.  The recipe is adaptable – instead of coffee you could add chocolate chips and instead of halva you could add crumbled honeycomb or violet crumble bars.  Use your imagination.

Halva is a dense, crumbly Middle Eastern sweet containing nuts – a bit like a cross between fudge and nougat.

The chocolate sauce uses ingredients everyone has in the pantry (so you don’t need to rush out and buy a bar of chocolate) and keeps for at least a week in the fridge.  If preferred you can make a sauce by heating a cup of cream to boiling point, then removing from the heat and adding about 200g chocolate (milk or dark), broken into squares.  Stir till dissolved.

Coffee and Halva Ice Cream Cake with Hot Chocolate Sauce

Meringues:
4 large egg whites at room temperature
pinch salt
250g caster sugar
½ cup slivered almonds (optional)
Coffee Ice Cream:
2 litres good quality vanilla icecream (bought or home-made)
2 Tbs instant coffee powder dissolved in 1 Tbs hot water
Halva Ice Cream:
2 x 300ml sour cream
1 tsp vanilla essence
¼ cup icing sugar
250g (approx) halva (from delis and specialty shops)
Chocolate Sauce:
½ cup sugar
¾ cup water
4 Tbs cocoa powder
2 Tbs golden syrup
1 Tbs butter
1 tsp vanilla essence
½ cup cream
To serve:
Cocoa powder

Meringues: Line two baking sheets with baking paper and turn oven to 150°C.  Draw a 20 cm diameter circle on each sheet of paper.  With an electric mixer whip egg whites with salt until they hold their shape, then gradually add the sugar, beating constantly, until you have a thick glossy meringue.  Spread meringue evenly onto the circles you have drawn, leaving a little space all around as they will expand in the oven and you want them to fit into a 20 cm tin.  If liked, sprinkle almonds over one then bake the meringues for about an hour until firm but pale in colour.  Turn off the oven and leave them to cool in there.

Coffee Ice Cream: Remove ice cream from the freezer and let it soften for about 10 minutes then tip into a large bowl and stir until smooth.  Thoroughly mix in coffee mixture, then put back into container and refreeze.  Halva Ice Cream: Mix sour cream with icing sugar, vanilla essence and roughly crumbled halva.  Tip into a plastic container with a lid and freeze.

Remove the two ice creams from the freezer about 10 minutes before assembling the cake.  Place the meringue layer without the nuts in the bottom of a 20 cm springform cake pan, bottom-lined with baking paper.  If too big, carefully trim off the edges with a sharp knife and keep testing, till it goes in.  Spread a layer of coffee ice cream over the meringue.  There will be more of this ice cream than the halva one, so you may decide not to use it all.  Sprinkle the meringue trimmings over the ice cream – unless you’ve already eaten them – then spread evenly with the halva ice cream.  Top with the other meringue, nut side up and trimmed to fit.  Press down gently.  Cover with plastic wrap and place in the freezer for up to 3-4 days.  Remove from freezer about 15 minutes before serving so it’s not rock hard.  Run a knife dipped in boiling water around the outside of the cake to enable you to remove sides from cake tin.  Dust top of cake with cocoa powder through a sieve.  Slice cake with a knife dipped in boiling water and serve with the sauce.

Sauce: Choose a large pan because this recipe will boil over if the pan is too small.  Place all ingredients except butter, vanilla essence and cream in pan.  Mix then simmer for 5 mins without stirring.  Cool for 10 mins then stir in butter and vanilla.  When almost cold mix in the cream.  Serve warm with ice cream.  Keeps for at least a week in the fridge – reheat in the microwave and allow to cool a bit.  If piping  hot it will be too runny.

Serves at least 12

Variation: if preferred divide meringue into three to make three thinner layers.  This allows you to put one between the two flavours of ice cream.

Raspberry Cake with Raspberry Coulis: leave the first layer of ice cream plain vanilla, leaving out the coffee.  For the second layer place the two packets of sour cream in food processor with 2 cups frozen raspberries, 300ml cream and icing sugar to taste.  Blitz enough to combine but leaving the raspberries a bit chunky.  Serve cake with Raspberry Coulis instead of Chocolate Sauce.

Salted Caramel Ice Cream Cake with Hot Chocolate Sauce: Instead of slivered almonds on one meringue layer, use skinned and lightly toasted hazelnuts, roughly chopped.  Instead of the coffee and halva ice cream layers, use three 470ml tubs of Connoisseur Murray River Salted Caramel Ice Cream with Chocolate Coated Hazelnuts.  Remove from the freezer to soften slightly then mix them in a bowl then spread over the first meringue layer.

Date and Walnut Loaf

We’ve been on a bit of a weight loss campaign and have managed to lose a few kilos.  A good enough reason, don’t you think, to celebrate and make a yummy cake? Date and Walnut Loaf is an old family recipe from the days when a slice of cake with afternoon tea was mandatory.  I have lots of cake recipes but this is one of about ten favourites that I’ve made many times.  If allowed to do so it will keep for at least a week in a tin.

Date and Walnut Loaf

375g stoned dates, cut into chunky pieces
100g butter, cut into small pieces
1 cup boiling water
1 tsp bicarbonate of soda
1 egg, beaten
¼ cup honey
2 cups plain flour, sifted
1 tsp baking powder
1 tsp vanilla essence
pinch salt
1 cup coarsely chopped walnuts

Heat oven to 170°C.  Place dates in a bowl and add boiling water, butter and bicarb.  Stir until butter has dissolved then add egg, honey, flour, baking powder, vanilla essence, salt and walnuts and mix well.  Tip into a large greased loaf tin or a 15cm square tin, bottom lined with baking paper.  Bake for 35-45 minutes or until well-risen and evenly browned and a skewer inserted in the middle comes out clean.  All ovens are different and if over-cooked the cake will be dry.  When cool store in an airtight tin and keep for a day before using – if you can resist!  If you want to be really decadent, serve buttered.

Chocolate and Orange Gateau

Friends hosted a New Year’s Eve party where everyone brought a plate.  I’ve heard lots of funny stories about new Australians not understanding this concept and turning up with just a plate.  Indeed my Greek teacher Michael Kazan told me that when he first arrived in Canberra from Athens and someone asked him to bring a plate, he thought to himself that if his hosts didn’t have enough plates, they probably didn’t have enough cutlery or glasses either.  So he took those as well.

As my contribution to the New Year’s party I took an Orange, Almond and Chocolate Dessert Cake – another recipe from the December edition of Delicious magazine.  I’ve renamed it Chocolate and Orange Gateau and made my own chocolate-covered orange slices rather than buying them.  My fan-forced oven is too hot at 180C for some cakes, especially ones which require longer cooking, so I set it at just under 170C which worked perfectly.

Chocolate and Orange Gateau

Chocolate-covered orange slices:
2 oranges
2 cups water
3/4 cup sugar
150g dark chocolate
Cake:
2 oranges
150g dark chocolate
5 eggs
400g caster sugar
350ml sunflower or canola oil (just under 1 1/2 cups)
1 cup almond meal
1/4 cup cocoa powder
2 1/2 cups plain flour
1 1/2 tsp baking powder
1/4 cup orange liqueur
Ganache:
1 cup thickened cream
350g dark chocolate broken into squares
To serve:
Whipped cream (optional)

For the chocolate-covered orange slices, cut oranges into 1/4 inch slices, discarding the ends which have no flesh in them.  Heat sugar and water in a large frying pan, stirring until sugar dissolves.  Add orange slices, then simmer for 30-40 minutes, turning them from time to time, until the syrup thickens and disappears.  You will need to pay attention towards the end so they don’t stick or burn.  Remove orange slices with tongs to a cake cooling rack.  You can either leave them as whole slices or cut them in half.  They are best made the day before or several hours before serving so they have time to dry out a bit.  When they are dry enough, melt chocolate and dip half the orange slices into the chocolate, then leave to set on baking paper.

For the cake, place oranges in a large saucepan, cover with water, bring to the boil then simmer for about 30 minutes or until tender when pierced with a knife.  Drain and process to a smooth puree in a food processor, then cool.  Preheat oven to 170C.  Grease and line a 24cm spring form cake pan with baking paper.  Place chocolate in a bowl over simmering water (don’t let bowl touch water) to melt, then cool a bit.

In a large mixing bowl whisk eggs, sugar and oil then gradually mix in the orange puree, almond meal and melted chocolate.  Add flour, baking powder and cocoa through a sieve and fold in thoroughly by hand. Pour into cake pan and bake for an hour and 15 minutes or until a skewer inserted in the centre comes out clean.  Cover top loosely with foil if it’s browning too quickly.  Cool for 10 minutes in pan, then invert onto a wire rack.  Drizzle with liqueur then cool completely.

For ganache heat cream to boiling point in a saucepan, then add chocolate, turn off the heat and stir until smooth.  Allow to stand at room temperature until thick enough to spread over the cake, stirring from time to time.  Spread ganache over top and sides of cooled cake with a palette knife and decorate with chocolate-covered orange slices.  If liked serve with whipped cream.

Serves 16

Note: if you don’t have any almond meal you can make your own by blitzing some blanched almonds in the food processor.  If you don’t have any almonds you can substitute walnuts or even pine nuts.  You could substitute self-raising flour for the plain flour and baking powder.