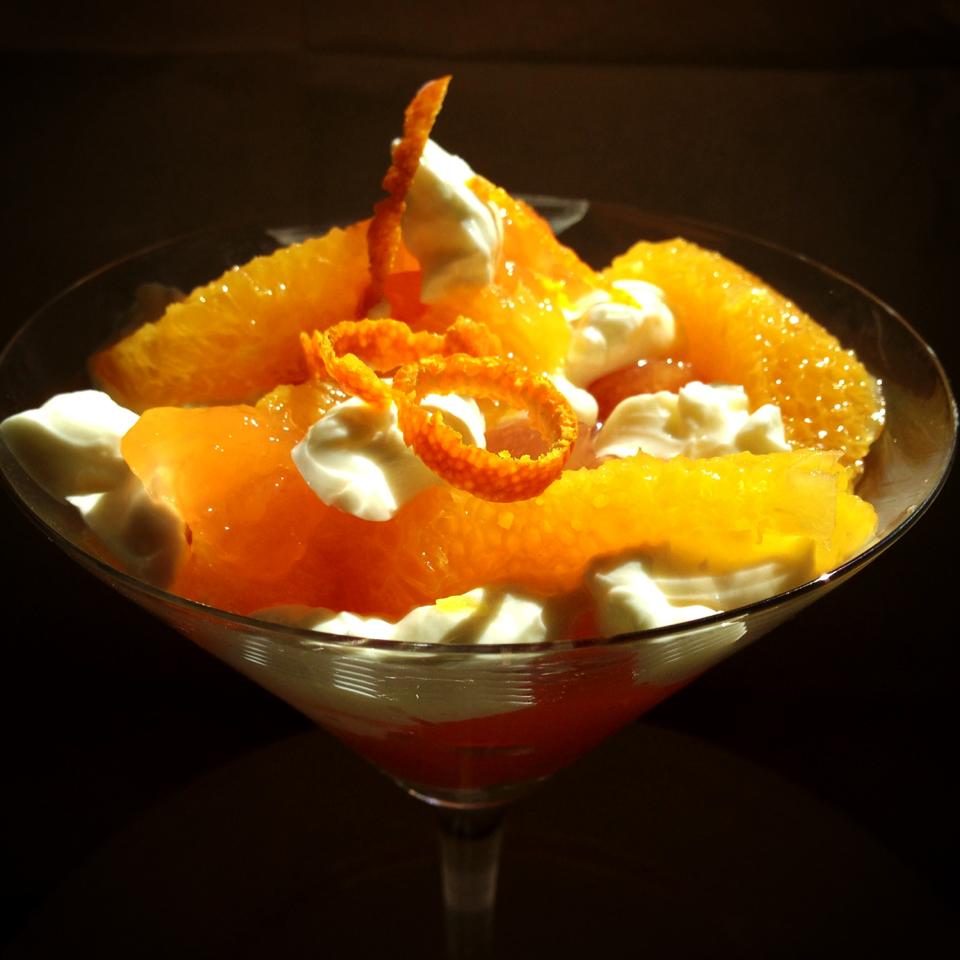
Ginger Crème Brulée with Quince Compote

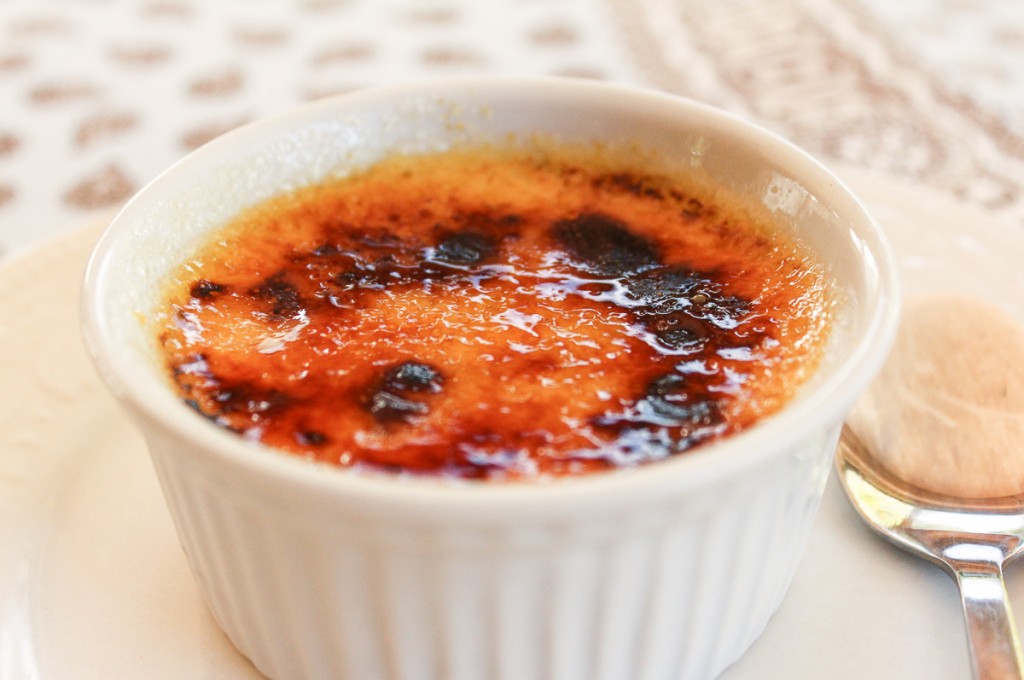
There’s a new restaurant in Braddon called Eighty Six which everyone is raving about. I haven’t been yet but my son James has already been twice (it’s only been open about a month!) and says the food is delicious. He especially enjoyed the Ginger Crème Brulée with Quince Chutney, so as quinces are in season I decided to have a go at making it, based on his detailed description! It was delicious.

I’m looking forward to going to Eighty Six to try the original and see how it compares. Using raw sugar on top is a tip from Heston Blumenthal — he says it caramelises more quickly than refined white sugar. But if you don’t have any just use white sugar.

Ginger Crème Brulée with Quince Compote

When coring the quinces, core generously to make sure you remove all the fibrous bits in that area. Serve any leftover compote with labneh.

Quince Compote:
6 quinces, peeled cored and cut into 1 cm cubes
⅓ cup honey
½ cup orange juice
1 Tbs grated fresh ginger
5 star anise
1 cinnamon stick
6 cloves
Crème Brulée:
600ml thick cream
6 egg yolks
3 Tbs caster sugar
1 vanilla pod or 1 tsp vanilla essence
2 Tbs grated or finely chopped fresh ginger
To serve:
Raw sugar

Compote: Preheat oven to 150°C. Place the star anise, cinnamon and cloves in a small piece of muslin or a handkerchief and tie into a bundle. Place in a heavy iron casserole dish with remaining ingredients. Stir then cover and bake for one and a half to two hours, or until quince is tender, reddish in colour and juices are thickened. Stir regularly and add a dash more juice if it’s getting too dry. When compote is ready it should be like a thick compote, jam or chutney but the pieces of fruit will still be whole. Discard the spices in the bag. Cool then store in the fridge where it will keep for up to a week. It can also be frozen to use when quince are no longer in season.

Crème Brulée: Preheat oven to 140°C. Place 8 small ramekins in a roasting pan or dish and boil the kettle. Place a heaped teaspoon of compote in the bottom of each ramekin and spread it out. Heat cream, vanilla (pod and seeds scraped off or essence) and ginger until boiling point. Meanwhile beat egg yolks and sugar until light and airy. Mix a little of the hot cream into the egg yolk mixture, then pour it all back into the cream and stir quickly to combine. Turn off heat and leave to macerate for 5 minutes. Pour through a sieve into a jug, then fill ramekins almost to the top. You may have enough to fill 9 depending on the size of your dishes.

Add boiling water to come about a third of the way up the sides of the ramekins then bake for 20 mins, or until set but still be a bit wobbly. Ovens vary. Remove from oven, remove ramekins immediately from water bath and cool. Refrigerate, covered for several hours or overnight.

To serve: Spread 2 teaspoons of raw sugar over each custard. Using a cook’s blow torch, caramelize the sugar until it melts and turns golden brown. Some restaurants in France serve them straight after torching the tops, so you have the contrast of warm and crunchy with cold. If you like your brulées very cold put them back in the fridge for 30 minutes before serving. After 45 minutes the crunchy top will start to go soggy so don’t leave them too long.

Serves 8

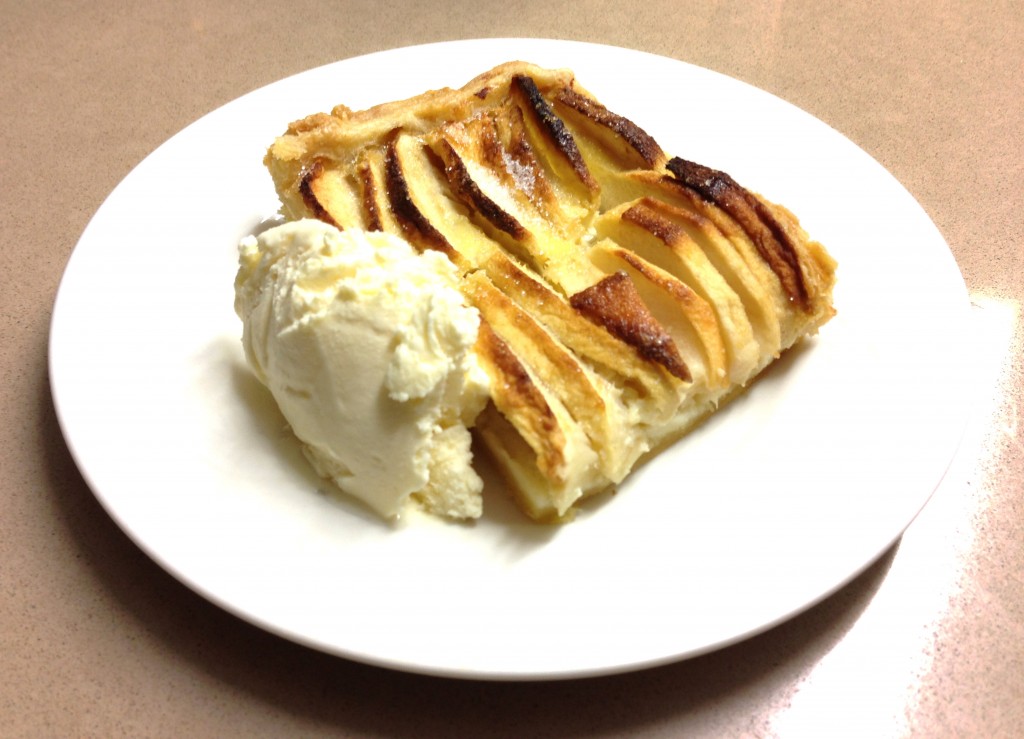
Apple Tart Rue de Vermont

When I worked for the British Mission to the UN in Geneva, located on the 5th floor of a large building on the Rue de Vermont, there was a patisserie at street level. By mid-morning irresistible smells came wafting up through the office window, so someone was dispatched to buy a few slices of apple tart, still warm from the oven, to keep us going till lunch time. Those were the days when I could do that on a regular basis, without it going straight to my hips!

Before I left Switzerland I asked the owner if she would part with the recipe and she was happy to do so. Puff pastry is a bit of a pain to make, so I usually buy it. That is until I discovered Nigella Lawson’s food processor version which is a cinch to make and of course much nicer. Actually any pastry will do and you may prefer to use shortcrust pastry, bought or home-made.

Apple Tart Rue de Vermont

Nigella’s Food Processor Puff Pastry

2 cups plain flour
Good pinch of salt
250g butter, cut into ½ cm slices
2 tsp lemon juice
4-5 Tbs cold water

Filling:
1 kg eating apples, peeled and sliced
2 eggs
2 Tbs plain flour or almond meal
½ cup milk (or half milk and half cream)
2 Tbs sugar
2 Tbs unsalted butter
Extra sugar

Pastry: place flour, salt and butter in food processor. Pulse until butter has been cut into small pieces but is still visible. With the motor running add the lemon juice and enough water for the pastry to start to stick together, then stop immediately. Don’t process for long because you want to keep the pieces of butter intact.

Tip out the sticky crumbs and with floured hands form them into a neat rectangle about 15 cm long and about half as wide. Wrap in plastic wrap and refrigerate 30 mins. Remove from fridge and roll pastry until the long side is twice as long. Fold one end into the middle and the other end over it to the edge, like an envelope. Turn pastry so the open ends are at the bottom and top, then roll again into a long rectangle. Repeat the folding and rolling twice, but the last time don’t do the final rolling – leave it with the open ends. Wrap in plastic wrap and refrigerate several hours or up to three days. Can be frozen.

Preheat oven to 180°C. Remove pastry from fridge and, unless you’re working on a hot summer’s day, let it stand for a short while, so it’s not rock hard. Roll out on a floured surface and use to line a rectangular metal Swiss roll or slice tin, trimming off any excess. Mine is 35x25cm. Arrange rows of overlapping apple slices over the base. Be generous – the pie should be very full with the apple slices standing almost upright.

In a small bowl with a fork or balloon whisk, mix egg with flour (or almond meal) and sugar, then gradually mix in milk/cream. Brush over the apples to moisten them, then pour the rest over. Tilt tin to ensure it reaches the corners, then dot the apples with very small pieces of butter and sprinkle lightly with extra sugar. Bake for about an hour or until well browned, almost burnt in places, to give it that authentic European patisserie look. If liked shake over some extra sugar and serve warm, just as it is, or with cream or ice cream, or both!

Serves 12

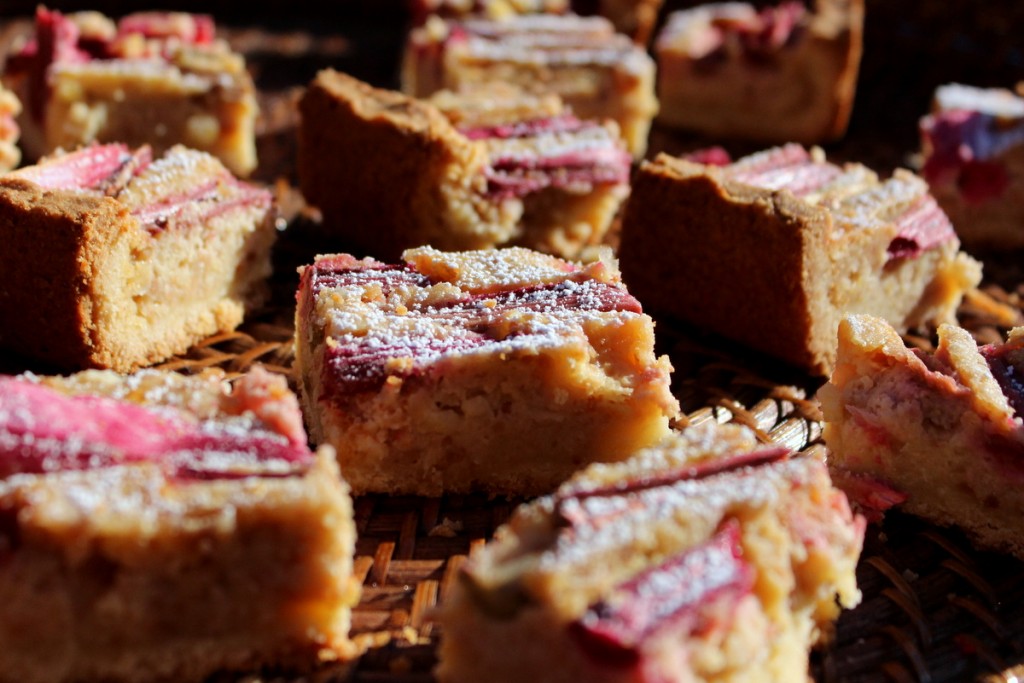
Dominique’s Lemon Tart with Rhubarb

When we were living in Paris I was a member of a Franco-Australian group which met once a month. We took it in turns to host the meeting which took the form of afternoon tea, with an hour speaking in English followed by an hour speaking in French. When it was her turn to host the group Dominique made this very unusual Lemon Tart. The crust is quite thick but it’s like a delicious shortbread that blends in with the filling, so it doesn’t seem to matter.

The recipe fills a normal 20-25cm (8-10 inch) round pie dish. In the photo I have used a rectangular meat-roasting pan (26x33cm) and increased all the ingredients by about a quarter. I wanted something to cut into squares to serve a large crowd. I have put those quantities, for a bigger pie, in brackets. The original recipe was sprinkled with flaked almonds, but I used rhubarb instead because it needed using up!

Dominique's Lemon Tart with Rhubarb

Pastry:
200g marzipan (at room temp) (250g)
200g butter (at room temp) (250g)
2 cups plain flour (2½ cups)
Filling:
100g ground almonds (125g)
3 large eggs (4)
1 cup sugar (1¼ cups)
1 large lemon (2 smaller ones)
pinch salt
1 Tbs flour (1 heaped Tbs)
1 cup cream or sour cream (1¼ cups)
50g flaked almonds (80g)

Pastry: Preheat oven to 170°C. Process marzipan and butter in the food processor until well combined, then add the flour and process till it starts to stick together. Tip the sticky crumbs into a tart tin or large quiche dish. Using fingertips, press pastry all over the bottom and up the sides to form the crust.

Filling: No need to wash the food processor to make the filling. If almonds are not already ground, put them in the food processor first and process till fine. Cut the lemon into quarters, remove the stalk and pips then add to the food processor with the sugar, eggs, cream, flour and salt.Mix until fairly smooth.Pour into the pastry case and sprinkle the flaked almonds all over the top. Bake for 40-60 minutes until deep golden brown. If the edges start to get too brown, cover them with a collar of foil. Serve with cream as a dessert or for afternoon tea, dusted with icing sugar.

Serves 8-10

Note: This tart is nicer if you let it get slightly over-cooked so the edges become crunchy.

Variation: omit flaked almonds and top pie with a bunch of rhubarb, washed, trimmed and cut into 6-cm lengths.

Instant Pavlova

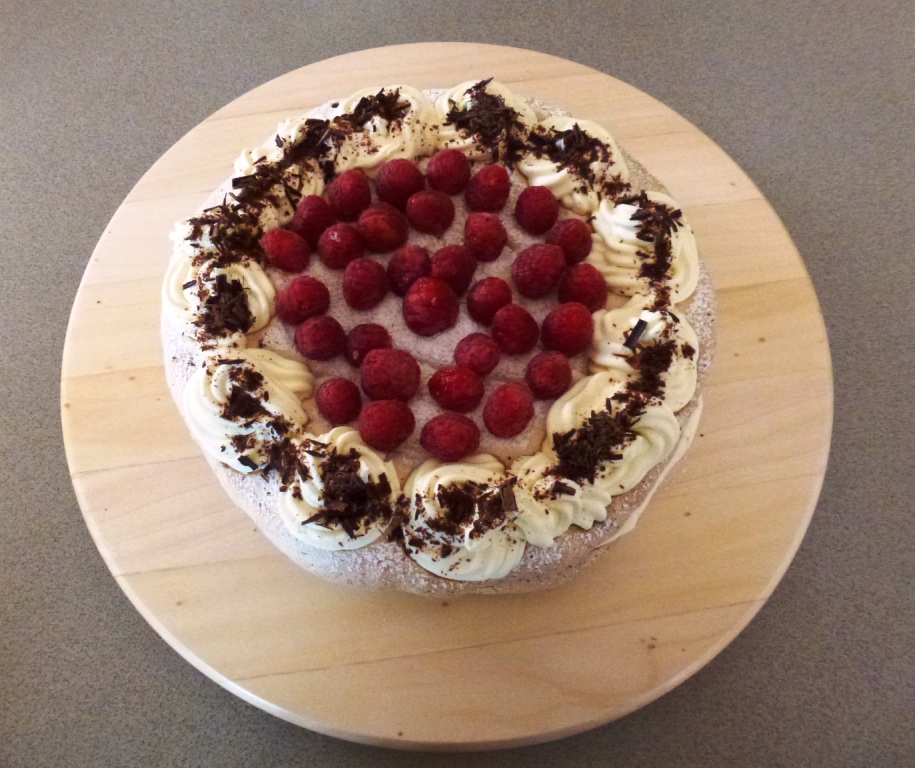
We were staying with our daughter and son-in-law in Newcastle last year when they hosted an Australia Day party for about 30 friends plus kids. We ran out of time to make the desserts and bought a couple of pavlovas from Woolworths supermarket. I always make my own and was quite impressed with these bought ones which were moist and marshmallowy in the middle and crunchy on the outside. Not as good as a home-made one, which has more crunchy bits, but not bad. Once you’ve added the whipped cream and fresh berries they’re pretty good as an instant dessert.

When I was shopping for the Easter weekend Woolies had their large pavlovas, which they say serve 20, for half the normal price. So I bought one. Then I started to wonder how to make it look more home-made.

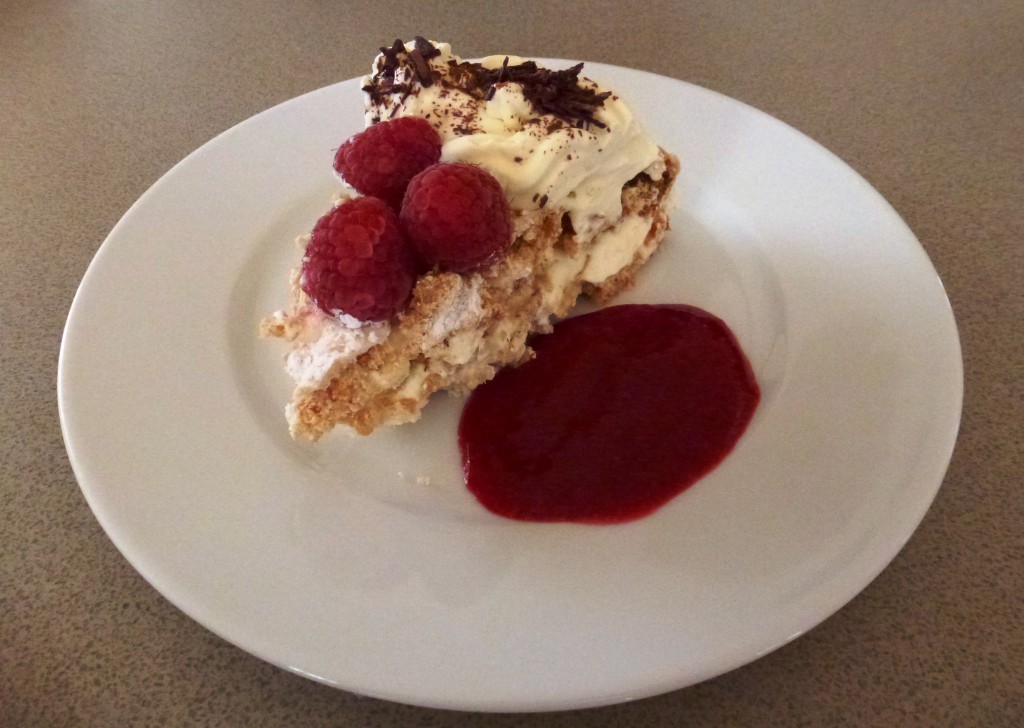
The answer is to use a stacking ring and cut circles from the pavlova. Top with the cream and fruit and voilà – an elegant dessert in no time at all. If you don’t use it all, the rest of the pavlova will keep for several days, so you can cut more circles and serve it again. If you think the pavlova circles are too big, cut them in half horizontally, then you will get twice as many smaller servings.

If you don’t have stacking rings you can make one by cutting the top and bottom off an empty metal can with a suitable diameter. If it’s deep enough top the pavlova with the cream and fruit before removing the ring, as I did for this photo, which results in a neater finish.

I doubt if anywhere other than Australia and New Zealand sells pavlovas in their supermarkets, so I’m afraid this blog post won’t help people living in other parts of the world!

Instant Pavlova1 bought pavlova
Cream, whipped until thick
Fresh berries or passion fruit pulp

Spray the inside of a stacking ring lightly with some vegetable oil, to make removal easier, then cut circles from the pavlova. If the ring is deep enough, top with cream and fruit, if not do it afterwards. If liked drizzle some raspberry coulis around the plate.

After Eight Parfaits

These little frozen parfaits in shot glasses are perfect to serve after a heavy meal, when no-one feels like eating a large or heavy dessert. I’ve had this recipe for over 20 years. Sometimes I forget about it and don’t make them for a few years, but whenever I do they go down well.

A bottle of mint oil lasts for years. I’ve had mine so long I can’t remember where I bought it. In Canberra you can buy it at The Essential Ingredient in Kingston.

After Eight Parfaits1 cup water
2 Tbs sugar
200g good quality dark chocolate, broken into squares
4 egg yolks
2-3 drops mint oil or essence, to taste
1 Tbs brandy (optional)
250ml cream
Mint chocolates to decorate

Boil sugar and water for 3 minutes. Process in food processor with dark chocolate until smooth. Press down on food processor so it doesn’t splash out. Add egg yolks and blend 15 secs. Add mint essence, brandy and cream and blend 10 secs. Pour into a jug then into 8-10 shot glasses and freeze overnight or until firm.

To serve, decorate each parfait with a mint chocolate. In the photo I used a mint chocolate bar which was green in the middle, roughly chopped. Alternatively use a fresh mint leaf. Remove from freezer 20-30 minutes before serving, so they are not rock hard.

Serves 8-10

Note: you can make this without a food processor. Just add chocolate to sugar syrup, stir to dissolve, then mix in remaining ingredients.

Bailey’s Tiramisu with Berries

Tiramisu is an Italian dessert consisting of sponge fingers (lady fingers or Savoiardi), egg yolks, mascarpone and a liqueur or fortified wine, traditionally Marsala. There are countless variations on this theme. This version uses egg whites instead of yolks, honey instead of sugar and Bailey’s Irish Cream instead of Marsala.

Bailey's Tiramisu with Berries2 Tbs instant coffee powder & ½ cup boiling water
Or ½ cup strong espresso coffee
2 Tbs Bailey’s Irish cream liqueur
8 Savoiardi sponge fingers
250g mascarpone, at room temp
1 Tbs runny honey
2 Tbs Bailey’s Irish cream liqueur, extra
2 egg whites
Cocoa powder for dusting
Fresh berries to serve

Mix coffee with boiling water and stir to dissolve. Add Baileys. Break each sponge finger into three and add to coffee mixture, stirring to coat. Place 4 pieces of sponge finger in each of six Martini glasses. Divide any remaining coffee mixture among the glasses, pushing down to squash the sponge fingers a bit. Place mascarpone in a mixing bowl. Add honey then Baileys and mix well. In another bowl whip egg whites till soft peaks with electric beaters. Mix into mascarpone, then divide mixture among the six glasses. Chill several hours. Dust with cocoa through a sieve. Serve with berries on the side.

Serves 6

Italian Mince Pies with Panna Cotta & Berry Compote

When I’m looking for inspiration I browse through old cook books. I have quite a few, including some by Robert Carrier.

Born in the USA in 1923, Carrier’s success came in England, where he worked for most of his life as a chef, restaurateur and food writer. The Jamie Oliver of the 70s and 80s, Carrier tried to persuade the British public there was more to life than meat and three veg. He retired to France where he died in 2006.

Carrier said he acquired the recipe for Mezzorgiorno (which I have shortened to “Italian”) Mince Pies served with Panna Cotta and Berry Compote from The Don Camillo restaurant in Provence. It may seem like a complicated recipe, but most of the work is done by the food processor and you can spread it over three days. Make the pastry and filling for the pies on day one. Next day make the panna cottas, the compote and the pies. Refrigerate them covered, but uncooked. On the third day brush with egg and bake an hour or so before serving.

The pastry is not easy to roll out and you may find yourself using quite a bit of flour to stop it from sticking, especially on a hot day. Unfortunately too much flour makes pastry tough, so if you’re having difficulty try rolling it out between two sheets of baking paper. You could always substitute home-made or bought shortcrust or puff pastry.

Mr Carrier said to cut the pastry into 8cm squares, but I found this made the pies too big – 6 to 7cm is a better size. The original filling included brown sugar in addition to the honey, but the mixture is sweet enough with all that dried fruit and chocolate, so I left it out.

Panna cotta – which means cooked cream – is delicious served with just the compote. And the pies are nice served on their own as a change to traditional mince pies at Christmas. But all put together they make an unusual dessert.

Italian Mince Pies

Italian Mince Pies with Panna Cotta & Berry CompotePastry:
½ cup caster sugar
150g unsalted butter at room temp
1 Tbs cinnamon
grated rind (zest) 1 lemon
3 eggs
2¾ cups (350g) plain flour
Filling:
125g good quality dark chocolate
150g dates, pitted
250g dried figs, stems removed (or substitute raisins)
3 Tbs honey
3 Tbs Marsala or port
100g pine nuts, toasted
Grated rind (zest) 1 lemon or orange
½ cup dried sour cherries (I substituted cranberries)
1 egg, beaten
Icing sugar for dusting

Pastry: Place sugar, butter, cinnamon and lemon rind in food processor and process until creamed. Add eggs and when mixed add flour. Process until dough comes together in a ball. Tip out, form into a flat disc, wrap in plastic wrap and refrigerate for 2 hours or up to 3 days. Can be frozen for several weeks.

Filling: Break chocolate into squares, then pulse in food processor until coarsely chopped. Tip into a bowl. Place dates, figs, honey and Marsala or port in food processor and pulse until coarsely chopped.  Add to the bowl with remaining ingredients except egg and icing sugar and mix well. Store in a covered container in the fridge. Keeps several weeks.

Assembly: Preheat oven to 170°C. Roll pastry thinly on floured surface and cut into 6 or 7cm squares. You should have enough to make 35-40, but it’s best to make only as many as you can eat on the same day.  Also it’s easier to work with about a quarter of the dough at a time. Place one rounded teaspoon of filling on one side of each square, brush 2 sides with egg and fold over to form a triangle enclosing the filling, pinching well to seal.

Place pies in the cups of lightly oiled muffin trays, which is what gives them their interesting curved shape. If you don’t have muffin trays use flat baking trays.  Brush with egg and bake for 15 minutes or until golden brown. Don’t overcook or they will be dry. Dust with icing sugar and serve warm.

Pies are best eaten the day they are made, still warm from the oven, so it’s best to make just the right amount and store leftover pastry and filling for another time. While leftover cooked pies can be reheated next day, they are not as nice as on day one.

Vanilla Pana Cottas

4 Tbs water
3 tsp powdered gelatine
750ml cream
250ml milk
4-5 Tbs caster sugar, to taste
Seeds scraped from 1 vanilla bean or 1 tsp vanilla essence

Place water in a small bowl, sprinkle gelatine on top then zap in microwave to dissolve. Heat cream, milk, vanilla and sugar in a saucepan to boiling point, stirring to dissolve sugar. Add gelatine, mix well, cool a bit then divide among 10 half cup moulds. Refrigerate, covered, overnight. To serve, tip briefly in hot water, run a thin knife around the edge and tip out. Serve with Berry Compote and one or two Italian Mince Pies.

Serves 10

Berry Compote

750g – 1 kg fresh or frozen berries (one or more of the following: raspberries, strawberries, blueberries, stoned cherries)
1 Tbs lemon juice
¼ cup cherry brandy, Kirsch or other liqueur (optional)
¼ cup sugar, or to taste

Slice or halve strawberries. Place all ingredients in a bowl and allow to macerate for several hours or overnight, stirring from time to time.

Serves 10

Ricotta Hot Cakes with Honeycomb Butter

Bill Granger owns three busy cafes in Sydney where he has made his name serving fantastic breakfasts and brunches. We went to the one in Surrey Hills on Sunday a couple of weeks back. You can’t book and by the time we arrived it was nearly 10.30 so there was quite a queue. We were told the wait would be 20-30 minutes, which unfortunately ended up being fifty.

Fortunately the meal was worth waiting for. I chose the Gravlax which was good, but not as good as the Ricotta Hot Cakes with Honeycomb Butter, ordered by one of our party, who generously gave me a taste. I’m sure you know the feeling when you realise you should have ordered what someone else is having!

Bill’s recipe was easy to find online. It says it serves 6 to 8, but it’s not something I would make if I had to serve that many people for breakfast. Let them eat toast! I halved the recipe which made a filling breakfast for two. By making the hot cakes a bit smaller, or serving two per person instead of three, we could have served a third person.

The Honeycomb Butter is delicious, but if you want to serve the hot cakes for breakfast you need to make it the day before as it needs to chill for a couple of hours. If you don’t have time for that just spoon it into a small bowl and serve it in dollops. Or forget about the Honeycomb Butter and just drizzle them with honey. At Bill’s they serve maple syrup on the side, for those who want to add more sweetness, but I don’t think you need it.

To serve the hot cakes as a dessert, make them half the size so you end up with 12 little cakes which will serve 4. They would also be delicious with stewed rhubarb or indeed any fruit – cooked or fresh – that you have available.

Ricotta Hot Cakes with Honeycomb Butter

¾ cup ricotta cheese
1/3 cup milk
2 eggs, separated
½ cup plain flour
½ tsp baking powder
pinch salt
butter for frying
fresh strawberries, halved or sliced banana
icing sugar for dusting
Honeycomb Butter:
125g unsalted butter at room temperature
50g Honeycomb or a Crunchie Bar
1 Tbs honey

Remove chocolate from Crunchie bar with a sharp knife and discard (or eat!). Place all ingredients in food processor and blend until smooth. Shape into a log on plastic wrap, roll up, seal and refrigerate for 2 hours or overnight.

Mix ricotta, milk and egg yolks in bowl. Add sifted flour, baking powder and salt. Whip egg whites in another bowl until stiff peaks. With a metal spoon, fold thoroughly into batter in two batches. Lightly grease a large non-stick frying pan with butter. Make three hotcakes using about 2 heaped tablespoons of batter for each. Cook over medium-high heat for 2 minutes or until golden on the underside. Turn and cook on the other side. Transfer to a warm plate while you make three more, adding a little more butter to the pan.

Serve hotcakes with halved strawberries or thickly sliced banana and a slice of honeycomb butter. If you don’t have time to make the Honeycomb butter just serve drizzled with honey instead. Dust with icing sugar.

Makes 6 large hot cakes which serves 2-3

Note: if you can’t find ricotta you could use cottage cheese, whizzed in the food processor to remove lumps. South American readers could use queso fresco.

Rio Palace Waffles

Many moons ago when we were holidaying in Brazil our kids decided that the Rio Palace Hotel in Rio de Janeiro made the best waffles. I asked the chef for the recipe and somehow managed to write it down. Communication was hampered by the fact that he only spoke Portuguese and while I do speak Spanish, it’s similar but not quite the same!

His recipe started off with a dozen eggs and would have made enough waffles to feed an army, so I divided it by six. It wasn’t long before the kids had weekend waffle making down to a fine art, doubling the recipe if they had friends staying … and sometimes even when they didn’t. I was always amazed at how many they could demolish.

They’re great for breakfast with honey or maple syrup.  For dessert try them with quartered strawberries sweetened with a little sugar and a dash of white balsamic vinegar, caramel sauce and whipped cream, as shown in the photo. The kids never bothered, but if you have time separate the eggs and fold in the lightly whipped whites at the end, by hand, which makes the waffles even lighter. You can use milk instead of cream and water, but the results are crunchier with cream.

Rio Palace Waffles2 tablespoons melted butter
2 eggs
200g or 1¾ cups plain flour, sifted
½ cup cream
½ teaspoon baking powder
½ teaspoon salt
2 teaspoons sugar or honey
½ to ¾ cup water

Using electric beaters or a food processor mix all the ingredients for the waffles, adding enough water to make a thick batter. Preheat an electric waffle iron, butter it and cook the waffles according to the manufacturer’s instructions.

Serves 8 for dessert (3 pieces each) or 2 hungry kids for breakfast

Sago Plum Pudding

Sago Plum Pudding, an old-fashioned dessert made from simple ingredients, is one of my all-time favourites. I think its origins must be Antipodean as I never came across it when I was growing up in England. Some in our family see it as an excuse to eat Brandy Butter when it’s not Christmas. I’ve never been a big fan of Brandy Butter and prefer it with thick, unsweetened cream.

I like to make individual half cup puddings rather than one large one. They keep in the fridge for several days and are quicker to cook than steaming one large pudding. I love being able to whip one out of the fridge, zap it in the microwave and demolish it whenever the mood takes me, which is quite often when I know they are there! This recipe came from my mother-in-law.photo

Sago Plum Pudding¾ cup sago
2 cups milk
180g butter
½ cup sugar
2 cups sultanas or mixed dried fruit
2 cups breadcrumbs (made in food processor from day old bread)
2 eggs, beaten
2 tsp bicarbonate of soda
Pinch of salt
2 tsp mixed spice
To serve:
Brandy Butter, thick cream or custard

Soak sago in milk overnight. Place butter in a mixing bowl and zap in the microwave to melt. Mix in remaining ingredients then scrape into a one litre pudding bowl, lightly buttered. Cover with a piece of buttered foil, buttered side down and place in a large saucepan on something to lift the bowl slightly. A metal trivet, old saucer or a small brick will do. Add boiling water to come halfway up bowl. Cover with the saucepan lid, bring to the boil and steam steadily for 3-3½ hours, adding more water as necessary. The top of the pudding will have an even dark brown colour when ready – lift foil from time to time to check. Stand for 5 minutes then turn out, cut into slices and serve with thick cream, Brandy Butter or custard.

Serves 8-10

Note: make individual puddings in 8-10 half cup ramekins, dariole moulds or Chinese teacups, lightly buttered, as shown in the second photo. Fill almost to the top as they don’t rise much. Place in a shallow ovenproof dish and add boiling water to come halfway up the cups. Cover the whole dish with a sheet of foil, buttered side down. Bake at 160°C for an hour to an hour and a half, or until evenly rich brown on top. Tip out and serve immediately or store covered in the fridge and reheat for about a minute in the microwave, covered in plastic wrap, then tip out.