Peanut Butter Balls

If I make a recipe and Matthew says he really likes it I never make it again. Well that’s his story, which is a real exaggeration. When he tells people this sob story I usually roll my eyes.

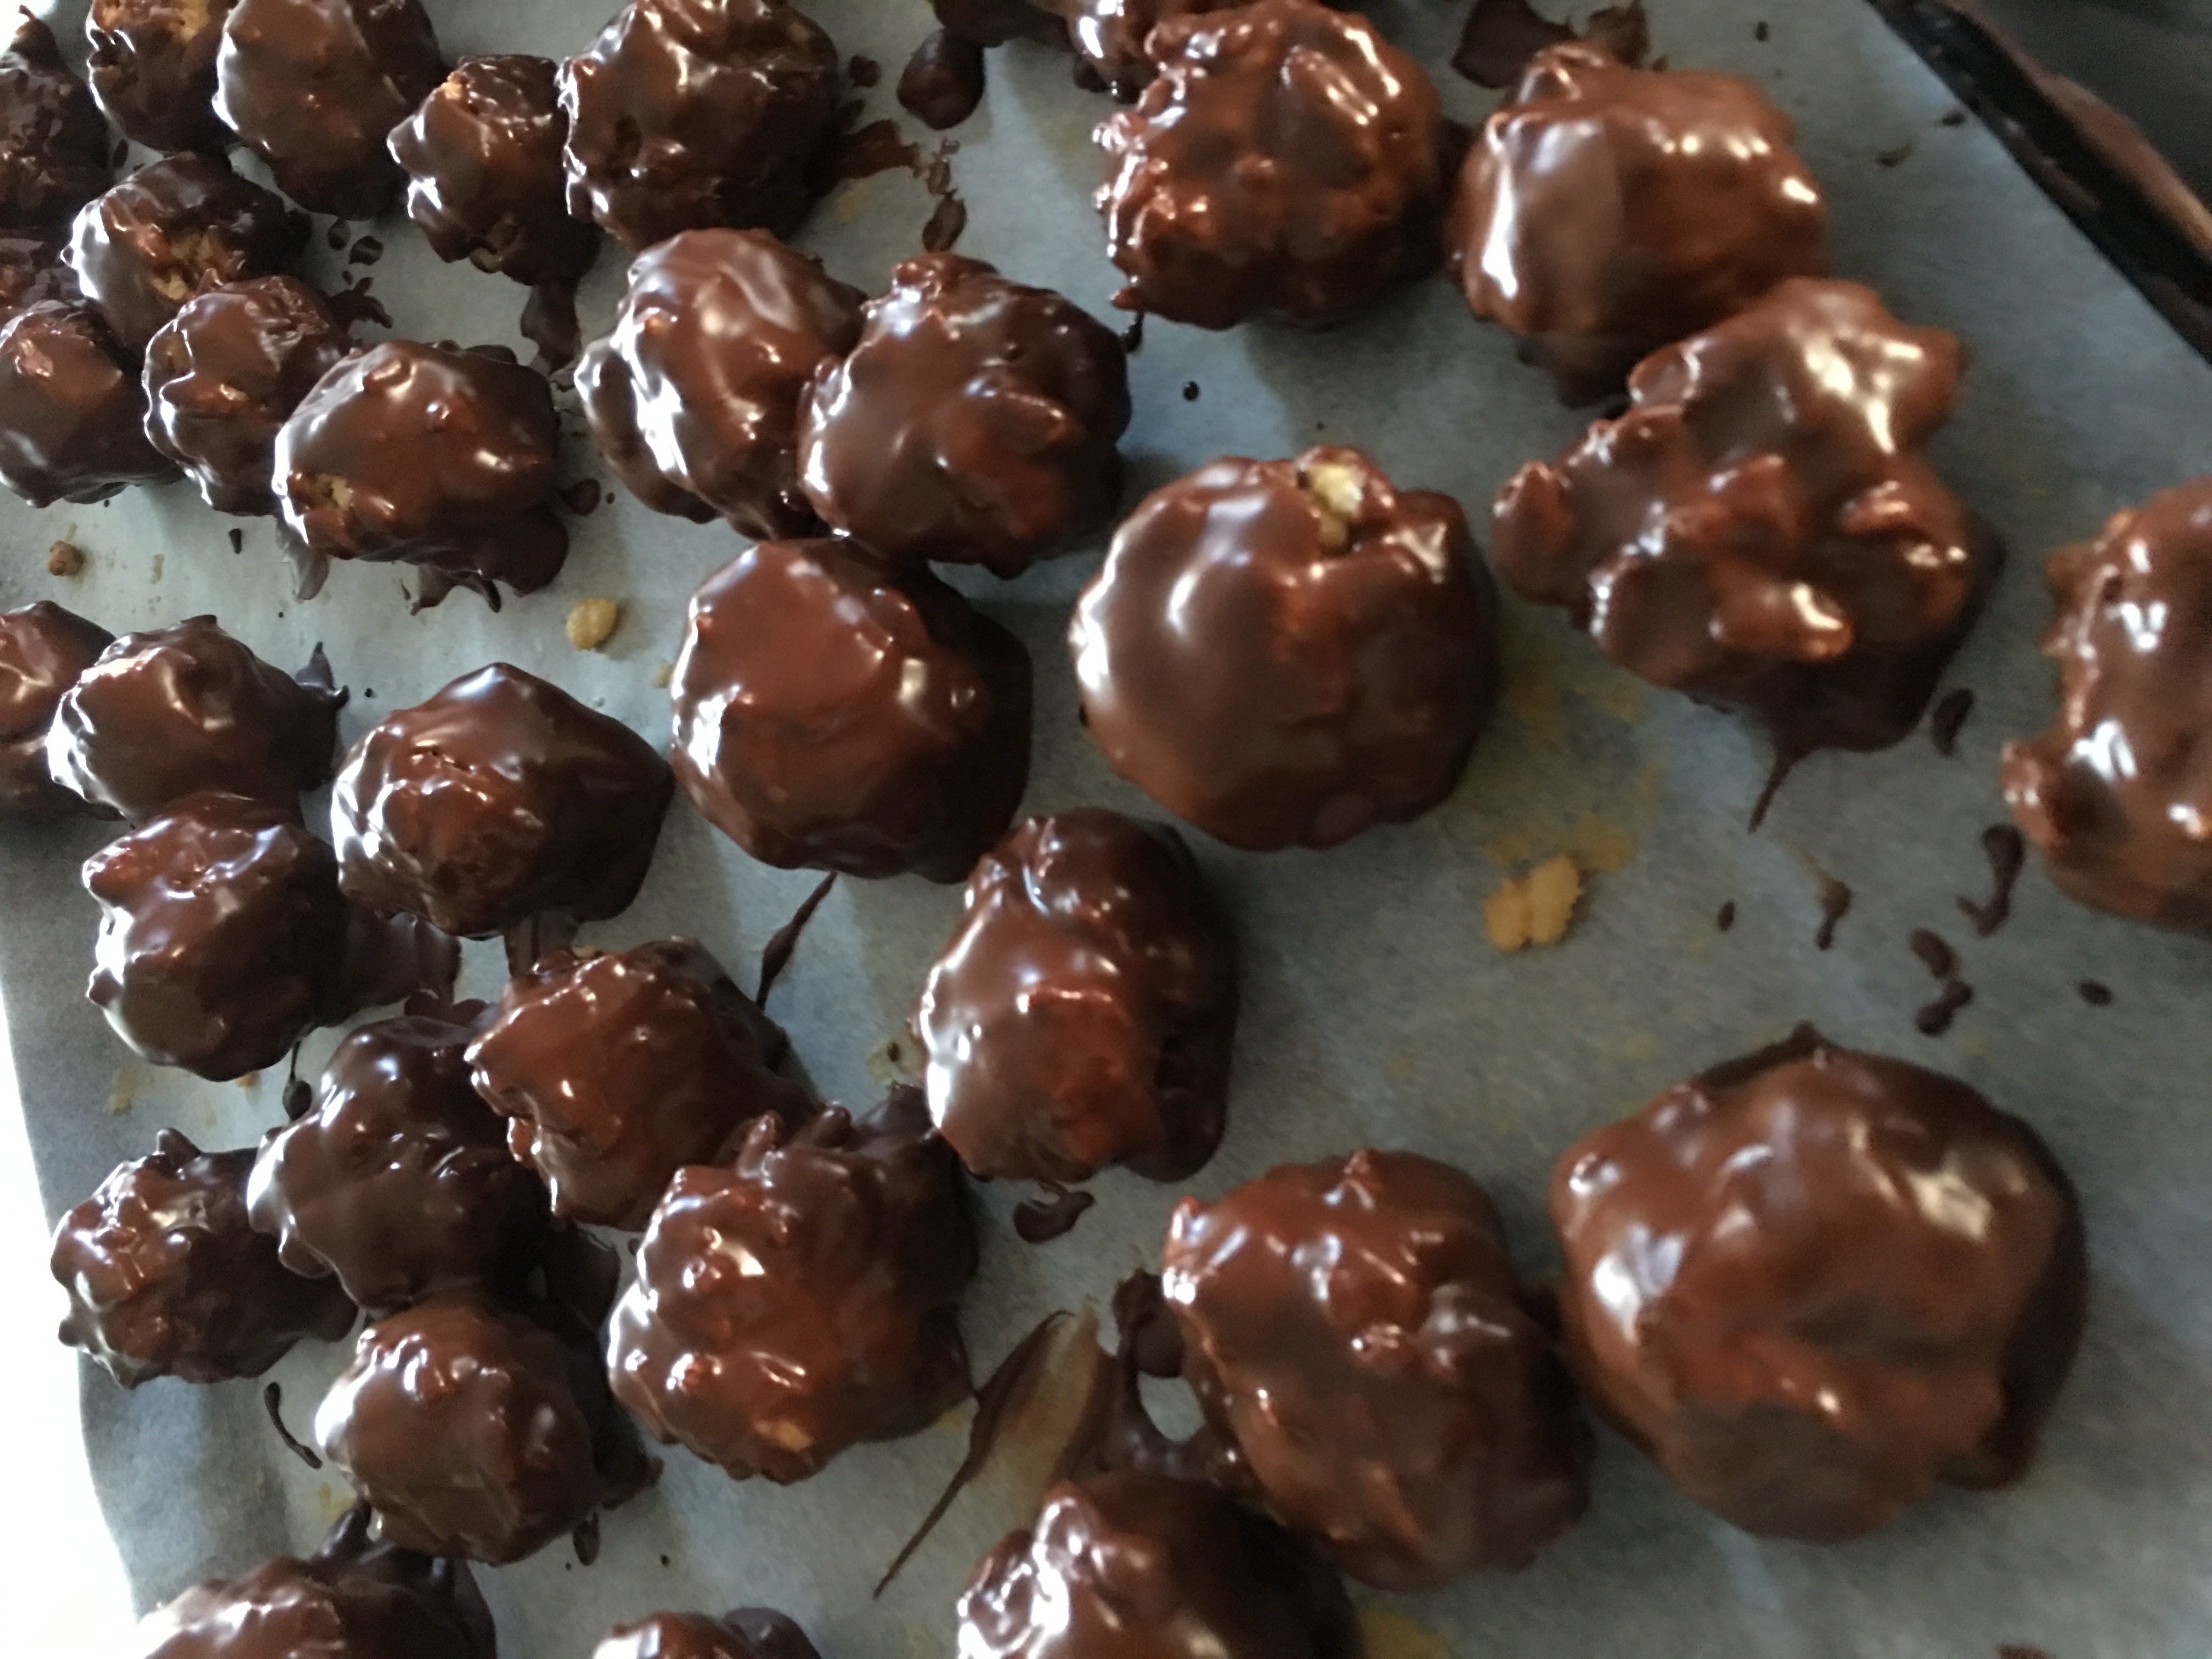
One of his absolute favourites is Peanut Butter Balls, which taste a bit like the American chocolates by Reece’s, called Peanut Butter Cups. If Matthew had his way I would make them every week, but they’re fiddly and time-consuming. Not the initial mixing, but the coating in melted chocolate. And they all disappear in no time flat.

Once I made them a few days before friends came around for dinner. I was planning to serve them with coffee, but guess what, they had all disappeared. So the next time I sneakily put them in the freezer, but that didn’t work either. Matthew found them and informed me smugly that peanut butter balls thaw nicely in the time it takes to boil the kettle.

So to put a smile on his face I made a batch for him to share with our son-in-law on Father’s Day next Sunday.


1 cup smooth peanut butter
125g butter
3 cups Rice Bubbles (Rice Krispies)
1 cup icing sugar, sifted
300g dark or milk chocolate, or half and half
A small piece of Copha (or coconut oil) the size of a large walnut

Place peanut butter and butter in a bowl, cover then zap in the microwave for a minute or two to melt. Mix in rice bubbles and icing sugar then refrigerate for an hour or until firm. Line a baking tray or two with baking paper. Scoop out heaped teaspoonsful and arrange on the trays. Refrigerate again until firm, then use your hands to squeeze them into nice round balls. Put back in the fridge while you prepare the chocolate.

Place chocolate squares in a bowl with the Copha or coconut oil over a pan of simmering water. When melted and smooth remove chocolate from the heat and take the balls out of the fridge. Coat each one in chocolate using two forks and leave to set on the paper-lined trays. Work quickly otherwise they will start to fall apart. Find somewhere to hide them in the fridge!

Makes about 50


The Perfect Quiche

A friend I’ve known for ages who is a very good cook told me the other day that she can’t make pastry, so I’ve offered to invite her round one day for a quick demo. Pastry was one of the first things I learnt from my paternal grandmother, when I was about 11, although being Scottish she didn’t teach me to make a quiche.

Quiches can be made with a variety of fillings, but the best known is Quiche Lorraine, made with bacon, eggs and cream. It’s definitely the most popular in our house, closely followed by Onion Quiche.  Quiche Lorraine originates in Alsace-Lorraine. My French friend Sigrid, who comes from that region of France, says that a true Quiche Lorraine doesn’t have any cheese in it, but I always add a bit.

Quiches can be frozen at any stage of the preparation. You can freeze the uncooked pastry, the uncooked quiche shell or the partly cooked quiche shell, with or without the uncooked filling poured in. While you can freeze a fully cooked quiche, I prefer to freeze them at the point where the filling has just been poured into the partly-baked pastry case. Place the quiche in the freezer until it has frozen completely. Then wrap it in a plastic bag to stop the filling from sticking to the bag which would happen if you wrapped it before it had frozen.

When needed, put the quiche straight from the freezer into the oven and allow about 25% longer cooking time. Use a dish which can go straight from the freezer to the oven – most dishes are fine and you can of course make quiches in metal pans rather than ceramic.

Alternatively you can make lots of mini quiches for drinks parties, lunch boxes or picnics. Follow this recipe for Mini Leek Quiches and if preferred use a different filling such as the Lorraine or Onion fillings below. With mini quiches it’s not necessary to bake the pastry cases blind before filling them and rather than putting the grated cheese on top, which is a bit fiddly, mix it into the rest of the filling.

If you make two batches of the shortcrust pastry recipe below and divide it into 3 equal balls it will be just enough to make three large quiches. I usually do that and use one ball and freeze two for another time, wrapped in plastic wrap. If you only make one batch of pastry you will have enough for one large quiche with some leftover. Use this to make some little tart cases. Cook them completely while empty, then fill with Lemon Curd or Raspberry Jam.

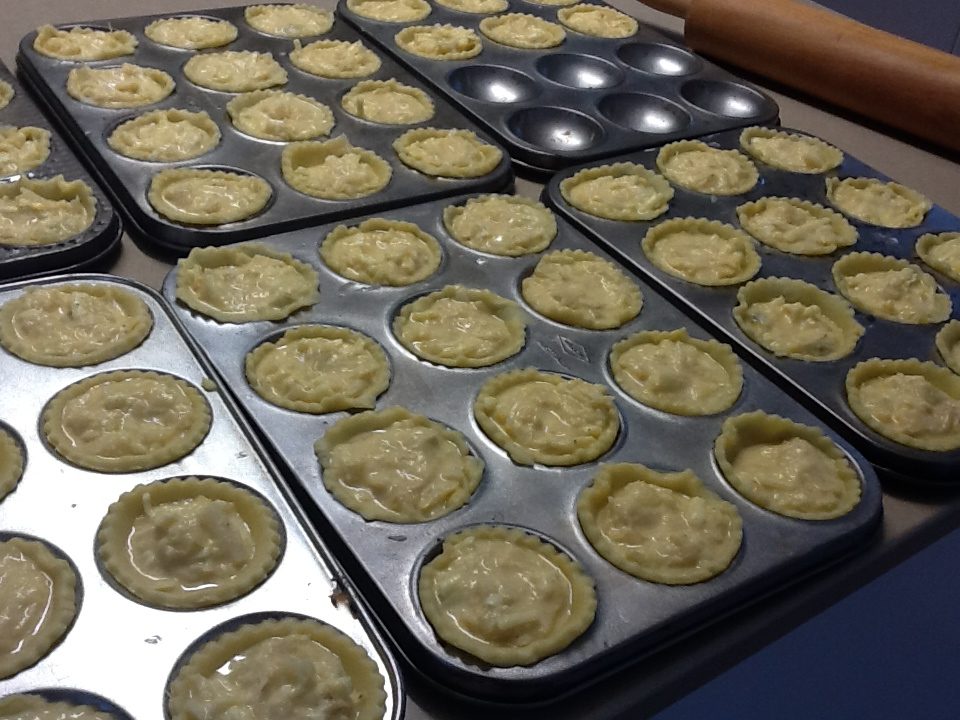
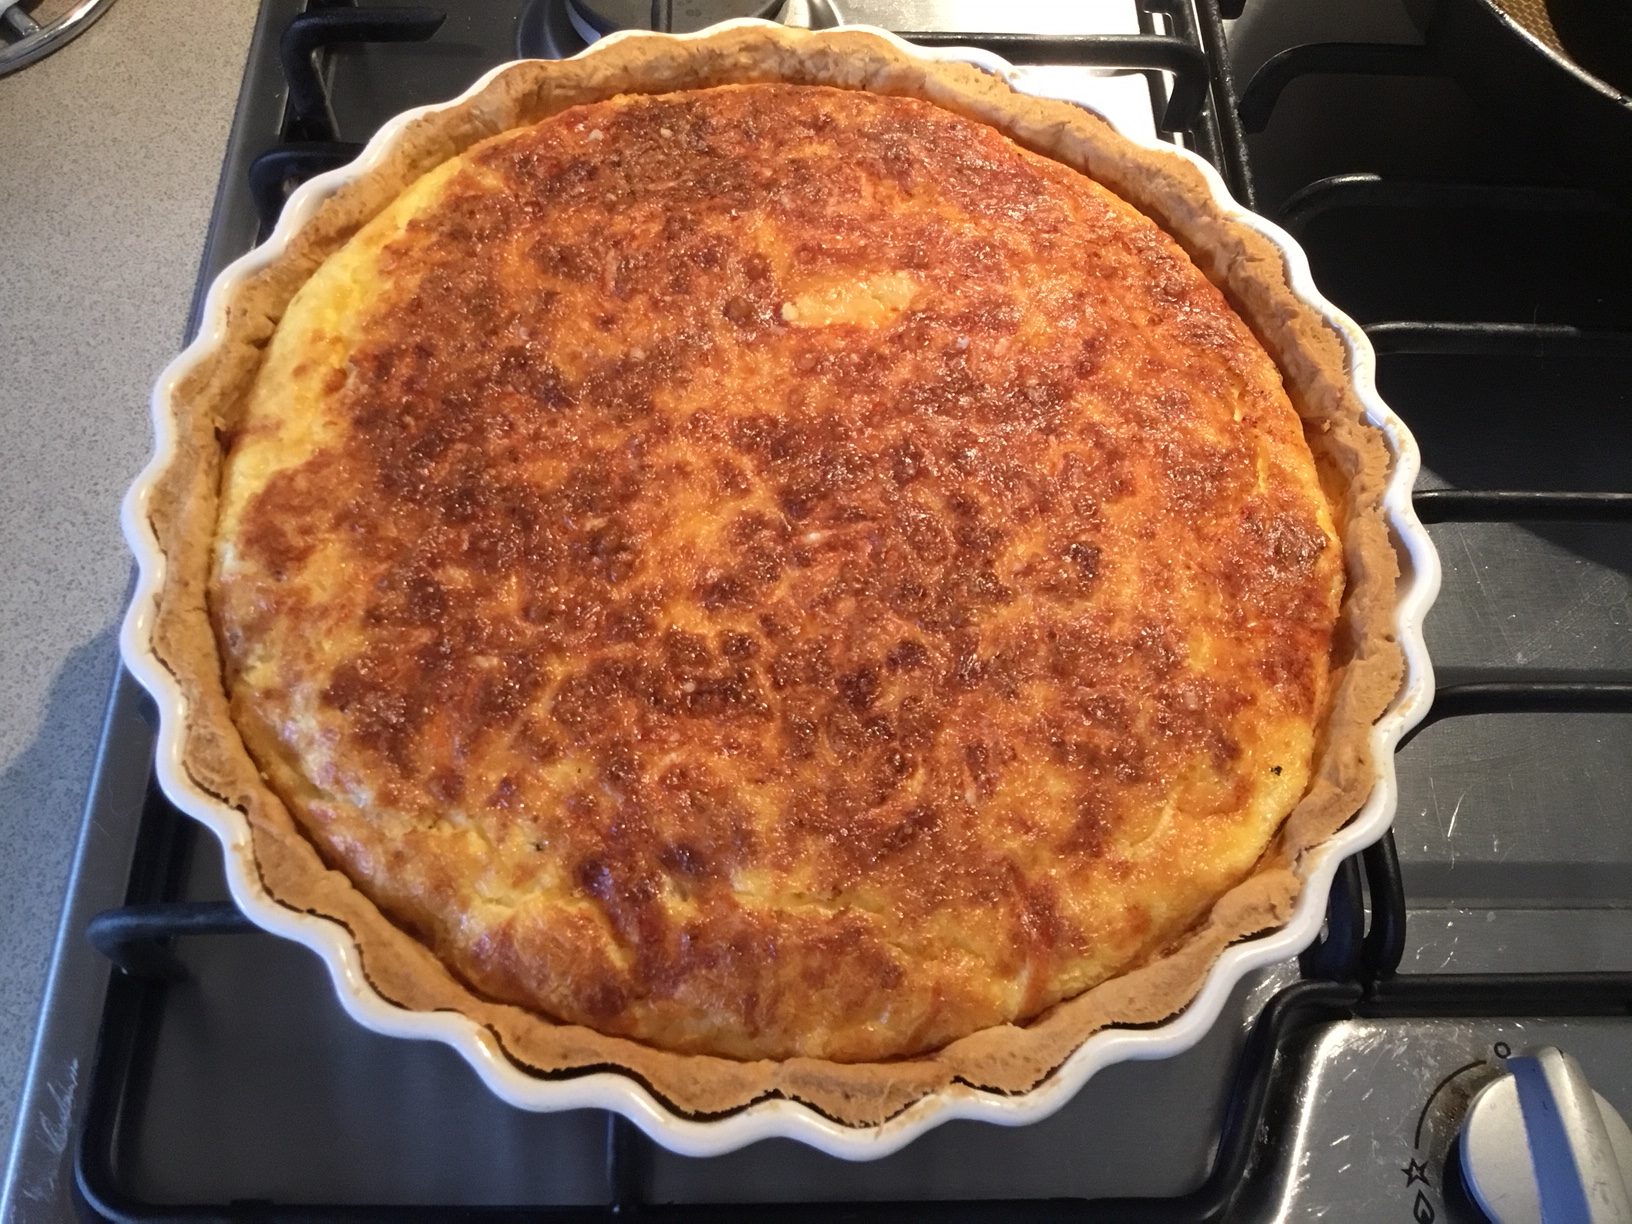
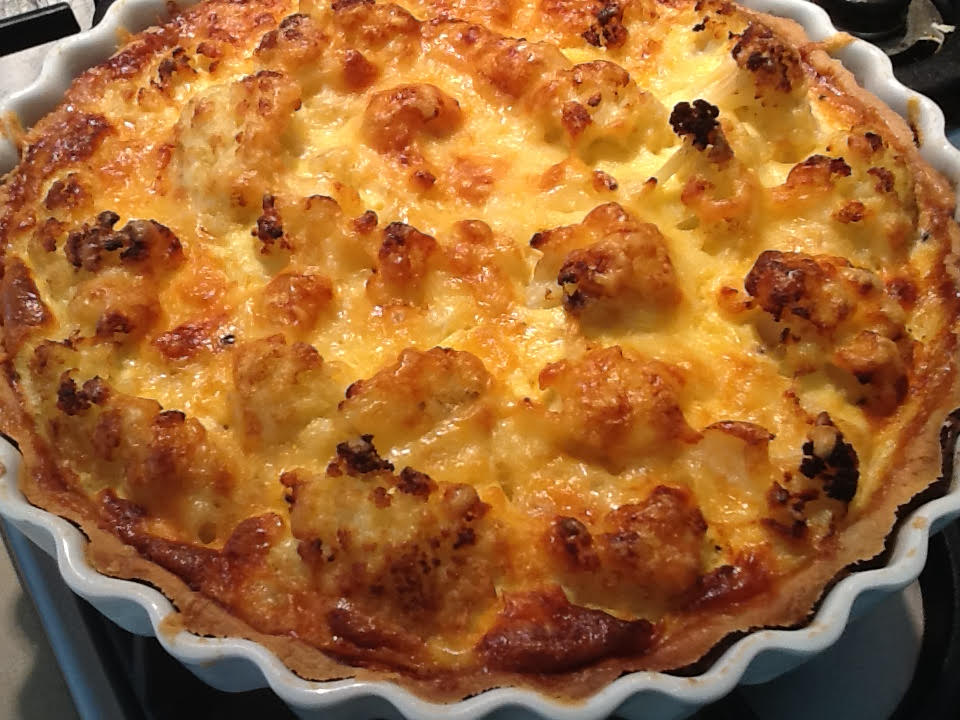
The following three recipes each fill a quiche dish 25cm in diameter and 3.5 cm deep. Serve warm or at room temperature, not piping hot. The first photo shows mini Onion Quiches ready to go into the oven, the second is a Quiche Lorraine and the third is a Cauliflower Cheese and Bacon Quiche.

With large quiches baking the pastry case blind – before you add the filling – is the secret to avoiding a soggy bottom!
 

Quiche Lorraine
1 batch of shortcrust pastry
4 eggs
1½ cups cream
½ cup milk
Salt and freshly ground black pepper to taste
200g lardons (chunky bits of bacon cut from smoked speck)
60g grated cheese, traditionally Gruyere or Emmental but Cheddar will do

Preheat oven to 180°C. Roll out pastry and line quiche dish then bake it blind. To bake blind, line the pastry case with a piece of aluminium foil, pressing it down to fit, then tip in something to weigh it down and stop the pastry from rising in the middle. I use corn kernels which I keep in a jar and use over and over again. Dried beans or rice will also do the trick.

Bake quiche shell for 5-10 mins, then remove the foil and corn and bake it for a few more minutes until pale golden brown.

Heat a smidgen of oil in a non-stick frying pan. Add lardons and cook until golden then drain and sprinkle over the partly cooked quiche shell. Don’t overcook or they will shrivel up to nothing. Beat eggs with cream and milk, season to taste and pour in. Can be frozen at this stage.

Sprinkle with grated cheese and bake for about 45 minutes or until puffed and golden brown. Serve cold or at room temperature.

Serves 6-8
Onion Quiche
1 batch of shortcrust pastry
1 kg onions, thinly sliced
50g butter
1 Tbs olive oil
1 Tbs flour
2 eggs
¾ cup cream
1 tsp salt
¼ tsp nutmeg
Freshly ground black pepper
60g grated cheese, preferably Gruyere or Emmental

Preheat oven to 180°C. Roll out pastry and line quiche dish then bake it blind. To bake blind line the pastry case with a piece of aluminium foil, pressing it down to fit, then tip in something to weigh it down and stop the pastry from rising in the middle. I use dried corn kernels which I keep in a jar and use over and over again. Dried beans or rice will also do the trick.

Bake the quiche shell for 5-10 mins, then remove the foil and corn and bake it for a few more minutes until very pale golden in colour.

Meanwhile for the filling heat butter and oil in a large frying pan, add onions and cook very gently for about 45 minutes, or until tender and pale golden, stirring regularly. Add flour and cook, stirring, for 1-2 minutes, then cool.

In a mixing bowl beat eggs with cream, add the cooled onions, salt, nutmeg and black pepper to taste and pour into pastry case. Can be frozen at this stage.

Sprinkle with grated cheese and bake for 45 minutes or until puffed and golden brown. Serve warm or at room temperature.

Serves 6-8

Cauliflower Cheese and Bacon Quiche
1 batch of shortcrust pastry
1 small cauliflower or half a very big one
1 Tbs olive oil
1 medium onion, finely chopped
100g bacon, chopped
300ml thick cream
3 eggs
180g grated cheddar cheese
Salt and freshly ground black pepper to taste

Preheat oven to 180°C. Roll out pastry and line quiche dish then bake it blind. To bake blind line the pastry case with a piece of aluminium foil, pressing it down to fit, then tip in something to weigh it down and stop the pastry from rising in the middle. I use dried corn kernels which I keep in a jar and use over and over again. Dried beans or rice will also do the trick.

Bake the quiche shell for 5-10 mins, then remove the foil and corn and bake it for a few more minutes until very pale golden in colour.  For the filling, cut the cauliflower into large florets and cook in boiling salted water for about 5 mins or until just tender. Drain well. Heat olive oil in a non-stick pan and cook the onion and bacon for 3 mins or until onion is soft and bacon starts to brown. Spread into the partly baked pastry shell and arrange the cauliflower over the top. Beat eggs with cream and season to taste. Pour into the quiche and top with the grated cheese. Bake for 35-45 mins or until nicely browned all over.

Serves 6-8
Tips:

  1. To avoid ending up with tough pastry don’t over-roll it,  treat it gently – not like bread dough – and don’t use too much flour.
  2. A problem some people encounter with quiche shells is that it looks fine until it’s been baked blind. You take it out of the oven only to find that it has shrunk down at the sides so there’s nowhere to put the filling! The way to avoid this is as follows. When rolling out the pastry to line the quiche dish, make sure you don’t put it in when it’s just been stretched because it will ping back again as it cooks. Lift the pastry each time you’ve rolled it, so it can relax. Make sure the pastry goes right to the edges of the dish, then up the sides, then fold it back down again, so the sides are double thickness. Then go round with fingers and thumb, squeezing the sides so they are not quite so thick, but still slightly thicker than the base. Then go round with a sharp knife and, cutting away from you, cut off the excess pastry. Another way to avoid shrinkage is to put the dish into the fridge for a while after you’ve lined it with pastry. This may sound like a long-winded explanation, but it’s much easier to show someone than to explain in writing.
 

Little Piggy Rolls

Sausage rolls have been in my repertoire for donkey’s years and there’s already a recipe on this blog.They are always popular and freeze well either uncooked or almost cooked which is what I do, so they just need a brief heating through before serving.

The food blog Belly Rumbles by Sara McCleary featured a recipe recently for decorating sausage rolls to look like little pigs. As four of our grandkids were coming to stay I thought it would be fun to make them some Little Piggy Rolls. Belly Rumbles uses the filling below which has bacon and cheese added. Use this or the traditional filling on my previous blog, which just uses pork mince.

5 sheets ready-rolled puff pastry (each 25cmx25cm)
1 egg beaten with 1 Tbs water, to glaze
Filling:
500g pork mince
1 small onion, very finely chopped
3 rashers bacon, finely chopped
125g grated or finely diced cheddar cheese
2 tsp Worcestershire sauce
2 eggs
2 Tbs chopped Parsley
1 Tbs tomato sauce (ketchup)

Mix all ingredients for filling then follow the method on my previous blog for Sausage Rolls. I used 4 and a half sheets of puff pastry, cut the four whole sheets in half and made 4 sausage rolls from each of the 9 halves. Total 36.

I decorated 16 as Little Piggies and 20 with sesame seeds (as per traditional recipe). I used the remaining half sheet of pastry to make the features. Usually I would get 12 sausage rolls per sheet of pastry, but I wanted them a bit bigger for the Piggies.

To decorate the Little Piggies you will need enough extra pastry for the ears, snouts and tails and whole black peppercorns for the eyes.

When the sausage rolls are ready to go in the oven, arrange them on oven trays lined with paper, putting the join/seam underneath so you can’t see it. Use extra pastry to cut out ovals for the snouts, triangles for the ears and long strips for the curly tails. I didn’t have an oval cutter so I used the small round lid from a bottle of vanilla essence, then stretched them a bit to make them oval.

Brush the sausage rolls with egg wash, then arrange the snouts, ears and tails in place, as shown in photo. Use peppercorns for the eyes and the pointy end of a chopstick to make the nostrils. Brush features with egg wash.

Cook sausage rolls according to previous recipe. Serve warm. Can be frozen raw or almost cooked, then just heated through before serving.

Makes about 36

Reuben Sandwich

Fermented food is really good for maintaining healthy gut bacteria.

I have just made my first batch of sauerkraut and as it’s an integral ingredient in the famous American Reuben Sandwich I decided it was a good way to try it.  The origins of this sandwich are not entirely clear, but according to one version, a man called Reuben Kulakofsky ordered a corned beef and sauerkraut sandwich in a hotel in Omaha USA in 1928. A young chef by the name of Bernard Schimmel came up with the rest. So I guess it should have been called a Schimmel sandwich!

If you don’t have Thousand Island dressing and can’t be bothered to make it, mix two parts mayonnaise with one part tomato ketchup and add a dash of Tabasco or Worcestershire Sauce to give it a bit of bite. The photo shows two sandwich halves stacked one on top of the other.

Corned Beef (or Pastrami), sliced
Swiss cheese, sliced
Light Rye Bread, sliced
Sauerkraut, rinsed and well drained (bought or home-made)
Thousand Island Dressing, bought or home-made (see below)
Butter
To serve:
Dill pickles
Radishes
Potato crisps/chips

Make sandwiches using rye bread spread with Thousand Island Dressing, filled with generous amounts of corned beef or pastrami, Swiss cheese and sauerkraut, then topped with a second slice of bread.

Butter the outsides of both slices of bread and cook in a sandwich press until nicely toasted. You can also cook them in a frying pan, with a weight to flatten them down a bit, but a sandwich press is the best solution and a worthwhile investment if you’re a fan of toasted sandwiches.

Cut the sandwiches in half and garnish with dill pickles, radishes and potato crisps.

Thousand Island Dressing
1 cup mayonnaise
½ cup tomato ketchup
1 slice onion
1 slice red or green capsicum
A few celery leaves or half a stick
¼ tsp salt
1 Tbs parsley
1 hard boiled egg
¼ cup fruit chutney or pickle relish
few drops Tabasco

Place mayonnaise, ketchup and onion in food processor and mix till smooth. Add remaining ingredients and pulse briefly so you end up with a slightly chunky dressing. Keep refrigerated and use within 5 days.

Makes about 2 cups

Pork and Prawn Wontons

I was inspired to make these tasty little morsels after watching a cooking show on TV where one of the contestants made fried wontons.

I  came up with this recipe by combining ingredients from two I found online. It made 26 so I served half one night, fried and half two nights later, steamed. The fried ones were nicer but the steamed ones were probably healthier. I’ve included a photo of both. Wonton wrappers are available in many supermarkets and all Asian grocery stores.

200g pork mince (or pork/veal mince)
100g peeled cooked or raw prawn meat, chopped
2 cloves garlic, crushed
1 tsp grated fresh ginger
1 Tbs hoisin or oyster sauce
½ tsp Chinese five spice
2 spring onions, finely chopped
Salt and pepper to taste
1 egg white
1 packet wonton wrappers (you will need 24-26)
Vegetable oil for frying
To serve:
Sweet chilli sauce
Snipped chives or sliced spring onions

Mix the mince, prawn meat, garlic, ginger, hoisin or oyster sauce, five spice and spring onions and season. Place a heaped teaspoon of filling on each wonton wrapper. Using your finger put a little egg white along two adjacent edges, then seal the wonton into a triangle. Bring two edges together and overlap then press to seal, as shown in photo.

You can fry the wontons in a deep fat fryer or in a wok where you will need the oil to be a minimum of 5cm deep. Or they can be steamed. If frying cook, a few at a time, for 1-2 mins or until cooked through and golden. Drain on paper towel. If steaming they will take 5-6 minutes. Serve with sweet chilli sauce for dipping and garnish with the snipped chives and a vegetable salad.

Makes 24-26

Salmon, Prawn and Avocado Sushi

In the past 10 years or so sushi have taken off around the world, providing a healthy fast food solution for people who are fed up with burgers, fried chicken, pizza and tacos.

We’ve eaten sushi in all sorts of unlikely places. The most unusual place was Quito, capital of Ecuador, where we found a fabulous sushi restaurant through Trip Advisor called Shibumi. The owner/chef is a local who learnt to make sushi while living in Denmark. He also learnt Danish, married a Dane and had a son. The son is now grown up, the owner got divorced and moved back home to open the restaurant with his son.  We sat at the bar right in front of where they were making the sushi and as you can see we got the full story. There’s only enough room for 8 diners in this “hole in the wall” so it’s very intimate.

Our daughter Catherine and her husband went to a sushi restaurant some years ago and sat next to the open kitchen where they were able to watch the sushi-maker doing his thing. In fact I think they went back three nights in a row. In our family, when it comes to food, we like to be where the action is.

Catherine and Sacha are now the family sushi experts and I have to admit that I didn’t roll the ones in the photos. But having watched how it’s done I feel confident to have a go next time. A sushi mat is not essential but makes the rolling easier.

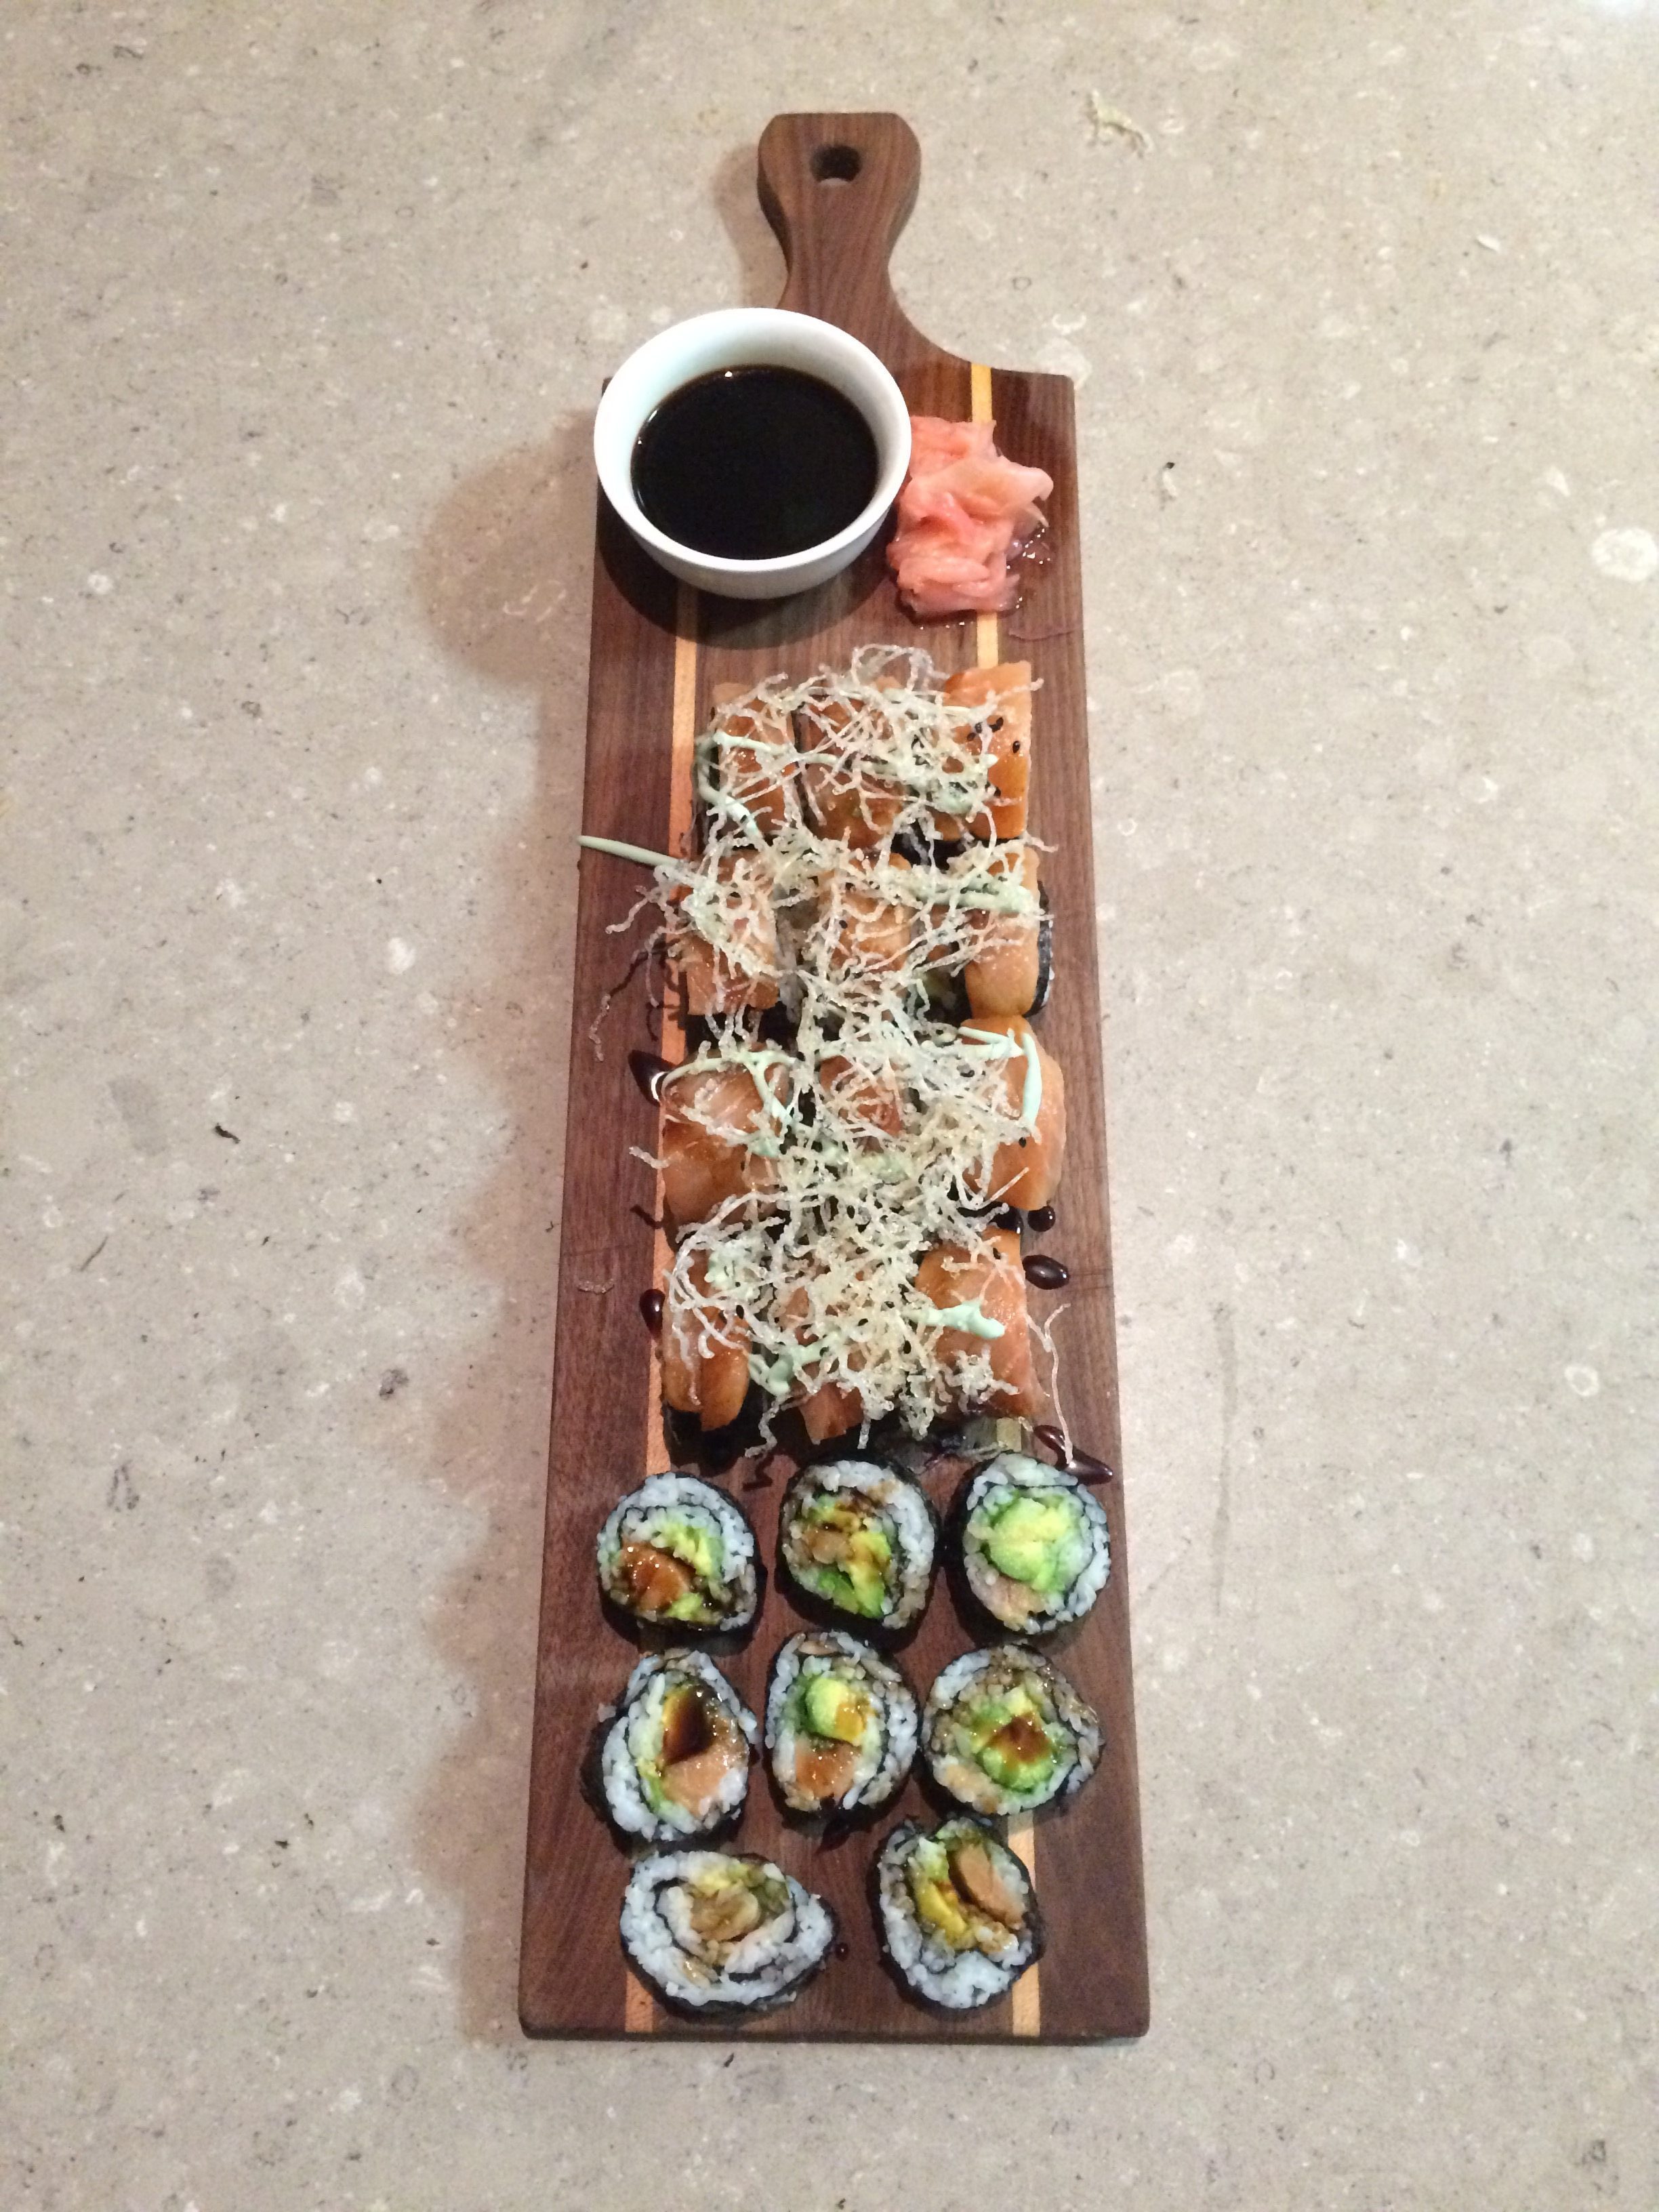
There are some excellent Japanese restaurants in Bangkok and while passing through recently we ordered these delicious sushi, garnished with crispy fried vermicelli. I made a note of what was in them – as I do when I’m travelling – and we re-created them on a recent trip to Newcastle to see Catherine & Co.

In Bangkok the sushi had an additional garnish of salmon caviar which was delicious, but we didn’t have any when we made the ones in the photos.

1 cup Sushi rice
1½ cups water
2-3 Tbs rice vinegar, to taste
5 sheets of Nori (seaweed)
1 salmon fillet (180-200g)
10 cooked prawns, halved lengthwise
1 large avocado, halved then cut into thin slices
To serve:
Japanese sweet soy sauce (it’s thicker than normal soy sauce)
Pickled ginger
Wasabi paste
1 cup rice vermicelli noodles
Oil to fry vermicelli

Place rice in a sieve and rinse thoroughly with cold water from the tap, until water runs clear. Place rice in a saucepan with the 1½ cups of water. Bring to the boil then cover and simmer on as low a heat as possible, until rice is cooked but still has a bit of bite. This takes about 10 mins and water will have all been absorbed.

Tip rice out into a shallow bowl and spread it out so it cools quickly and doesn’t continue to cook. After about 10 mins mix in the rice vinegar and allow it to cool completely.

Prepare prawns and the avocado. Slice salmon into thin slices downwards, discarding skin. Lay first sheet of nori on a sushi mat (if available – you can do it without) and spread about a fifth of the rice over. Rice should not be in a thick layer, there should be some small gaps. Arrange about a fifth of the avocado and four prawn halves in a row across one side of the nori sheet, then roll up tightly into a cylinder. Repeat with remaining nori sheets, rice, avocado and prawns.

Heat 2-3 cm of oil in a small frying pan and deep fry the vermicelli noodles until crispy. Drain on paper towels.

To serve, slice sushi into 2cm slices and arrange on a serving dish on their sides. Place a slice of salmon on each one and garnish with crispy fried vermicelli. If you don’t have enough salmon pieces to do them all, arrange the ones without salmon, cut side down, as shown in the photo. Drizzle a little soy sauce here and there then put some in a small dish and, if liked, mix in a little wasabi paste.  Arrange a small pile of pickled ginger near the soy sauce. Serve as finger food or with chopsticks.

Serves 4 as an aperitif or finger food

Note: if you can’t find them in your local supermarket, nori sheets, sushi rice, wasabi, pickled ginger, rice vermicelli noodles, Japanese soy sauce and rice wine vinegar are sold in Asian specialty shops.

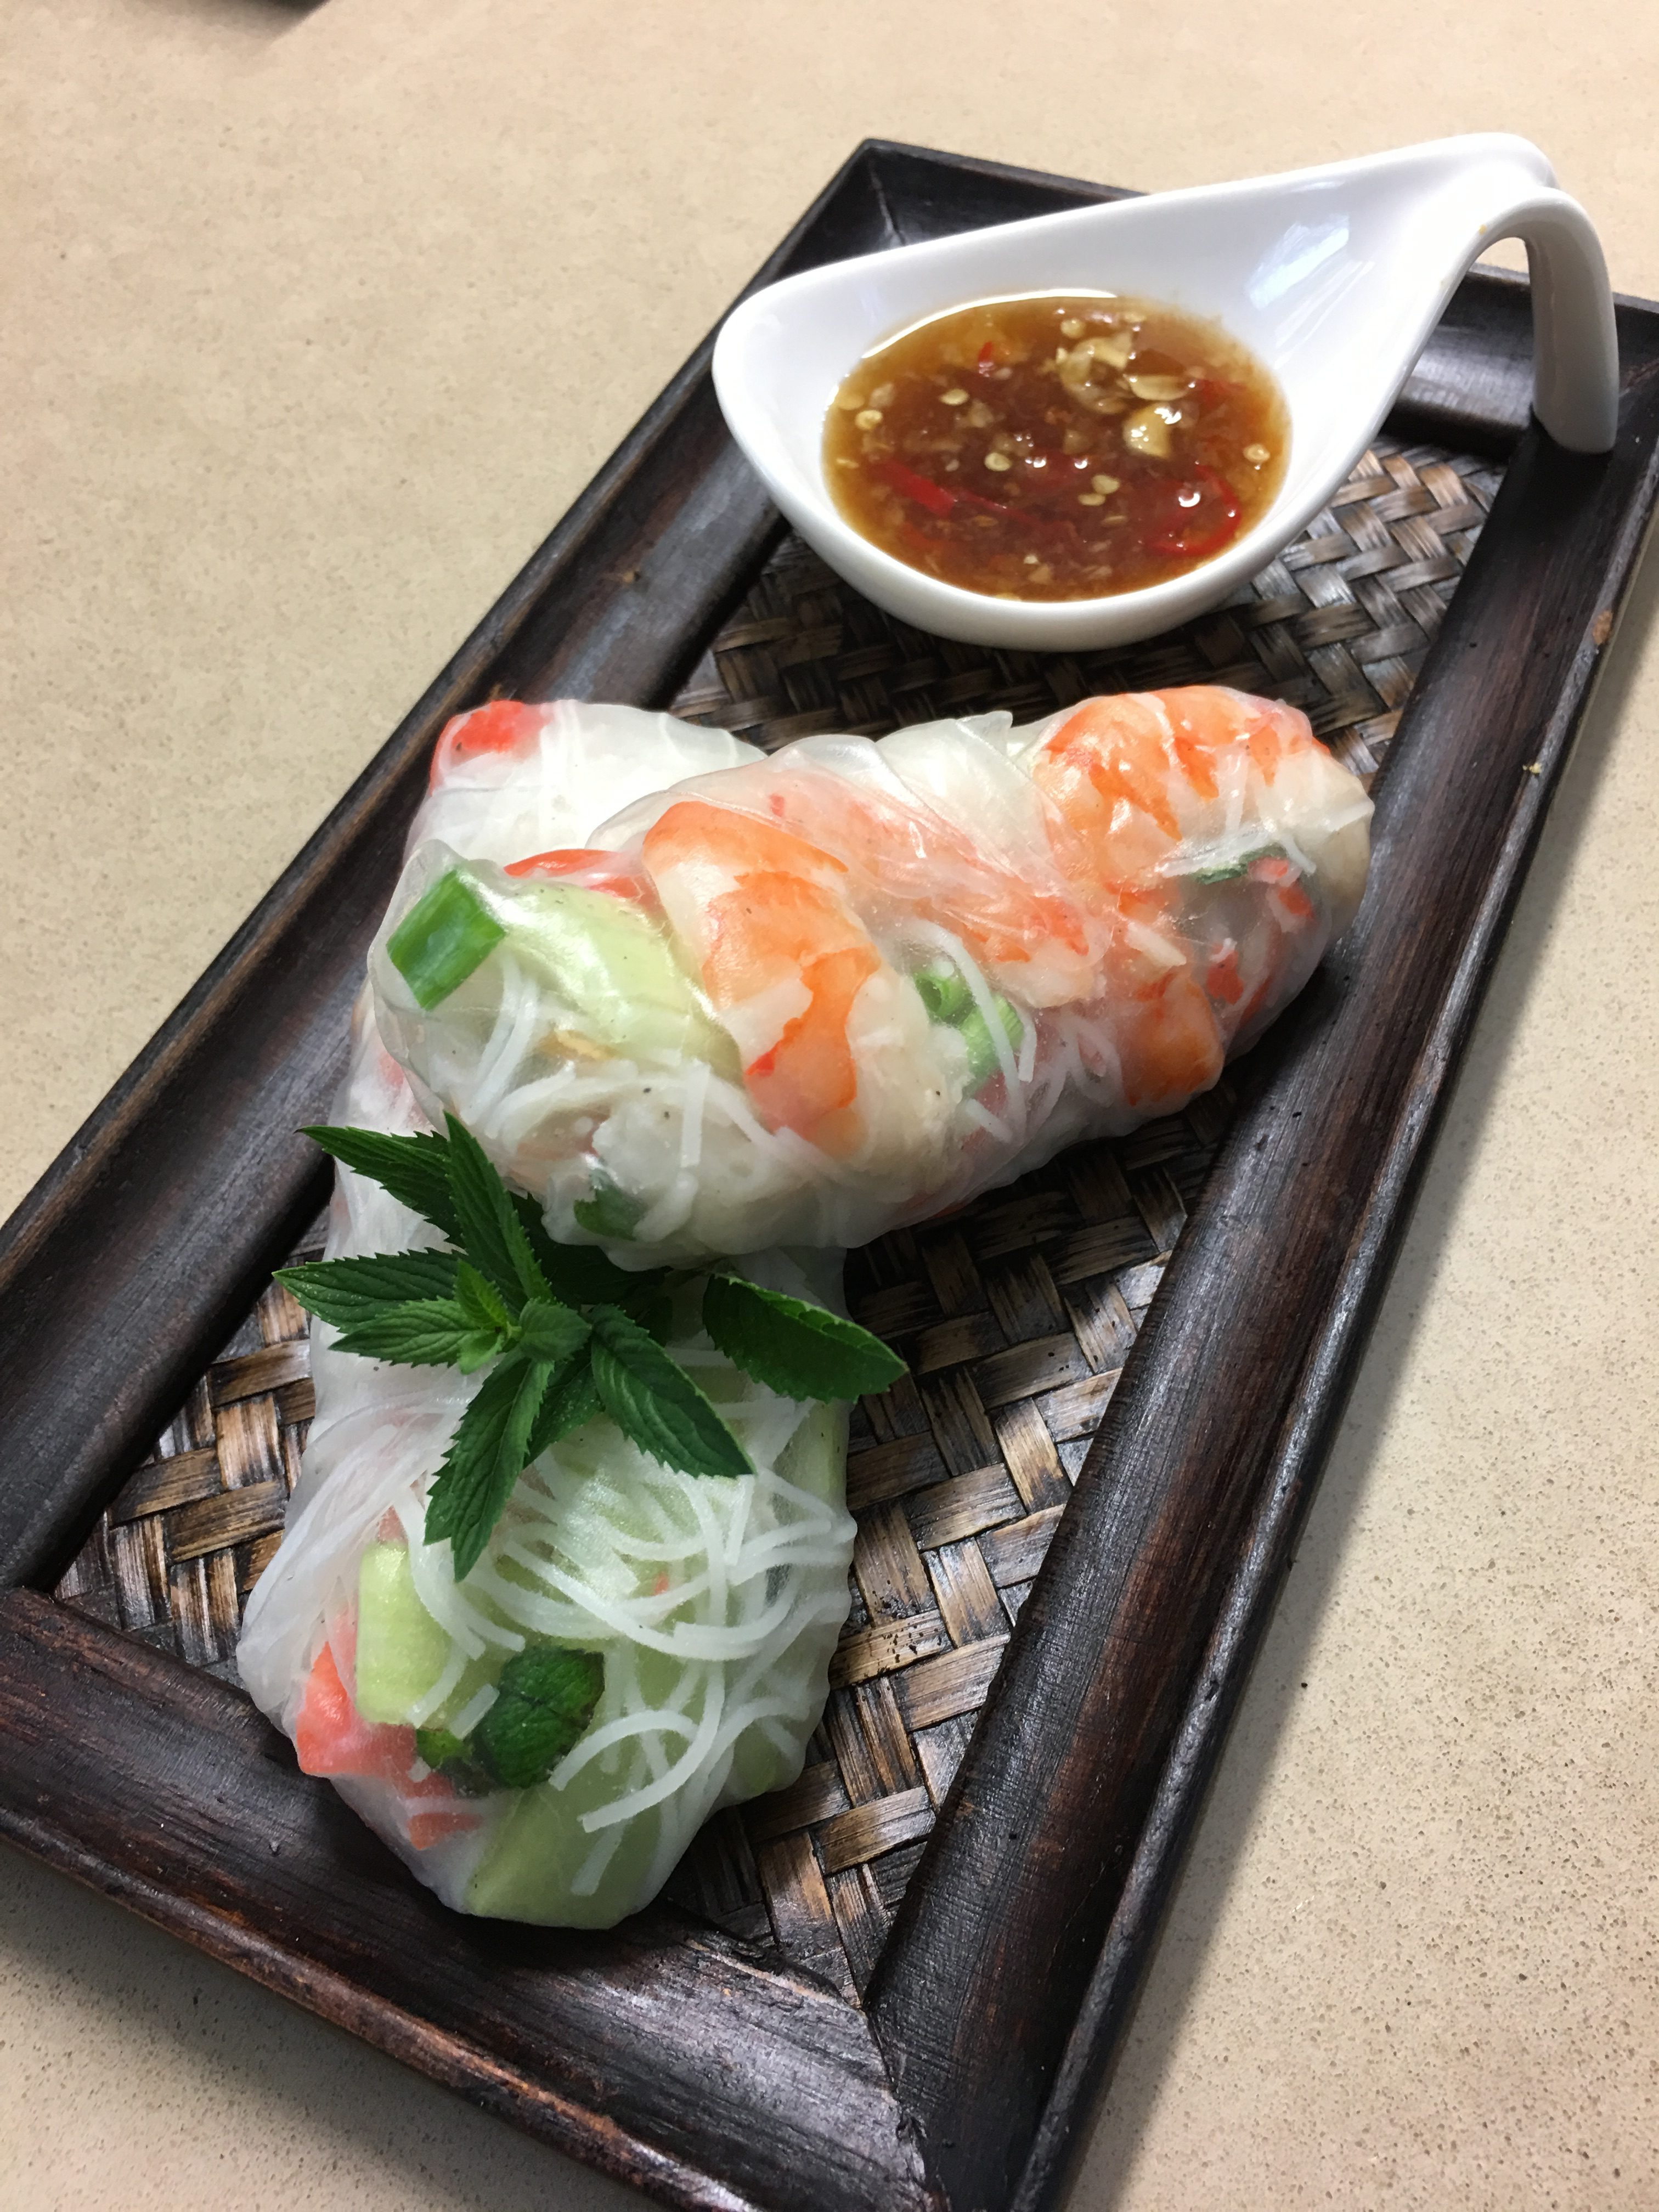
Vietnamese Rice Paper Rolls

These rice paper rolls make a refreshing aperitif or light dinner.  There’s no cooking involved making them the perfect choice for a hot summer’s evening when everyone is feeling lazy, even the cook.

The rolls can be made up to three hours ahead and kept in the fridge, covered with plastic wrap, so they don’t dry out. Vary the ingredients according to what you have on hand.

100g vermicelli noodles
350g cooked prawns, cut in halves horizontally
½ cup each coarsely chopped coriander and Vietnamese or ordinary mint
1 Lebanese cucumber or half a telegraph cucumber, cut into matchsticks
2 spring onions, thinly sliced
Salt and freshly ground pepper, to taste
10 rice paper wrappers (approx)
Dipping Sauce:
1 clove garlic, peeled
30g palm sugar or brown sugar
4 Tbs lime or lemon juice
3 Tbs fish sauce
1 small red chilli, thinly sliced
To garnish:
Vietnamese mint or ordinary mint

Place vermicelli in a bowl and pour over boiling water to cover. Stand for 2-4 minutes or until tender, then drain well. Use scissors to roughly cut the vermicelli into shorter lengths then place them in a bowl with the prawns, mint, cucumber and spring onion. Season to taste.

For the dipping sauce, pound garlic and sugar to a paste in a mortar and pestle then mix in the remaining ingredients. If preferred, instead of making the dipping sauce serve the rolls with store bought Thai Sweet Chilli Sauce.

Fill a bowl with hot water. Working with one rice wrapper at a time, submerge in water to soften for about 20 seconds, then place on a damp tea towel. Spoon some of the prawn filling down the centre, fold in the ends, then roll up tightly to form a cylinder. Place on a tray lined with non-stick baking paper and cover with a damp tea towel. When you have made them all serve immediately or cover with plastic wrap and refrigerate until serving time, up to 3 hours.

Serve 2 or 3 rolls per person, with the dipping sauce and mint.

Makes about 10 rolls

Note: rice paper wrappers are sold in most supermarkets and Asian grocery stores.

Bruschetta with Ricotta & Roasted Grapes with Rosemary

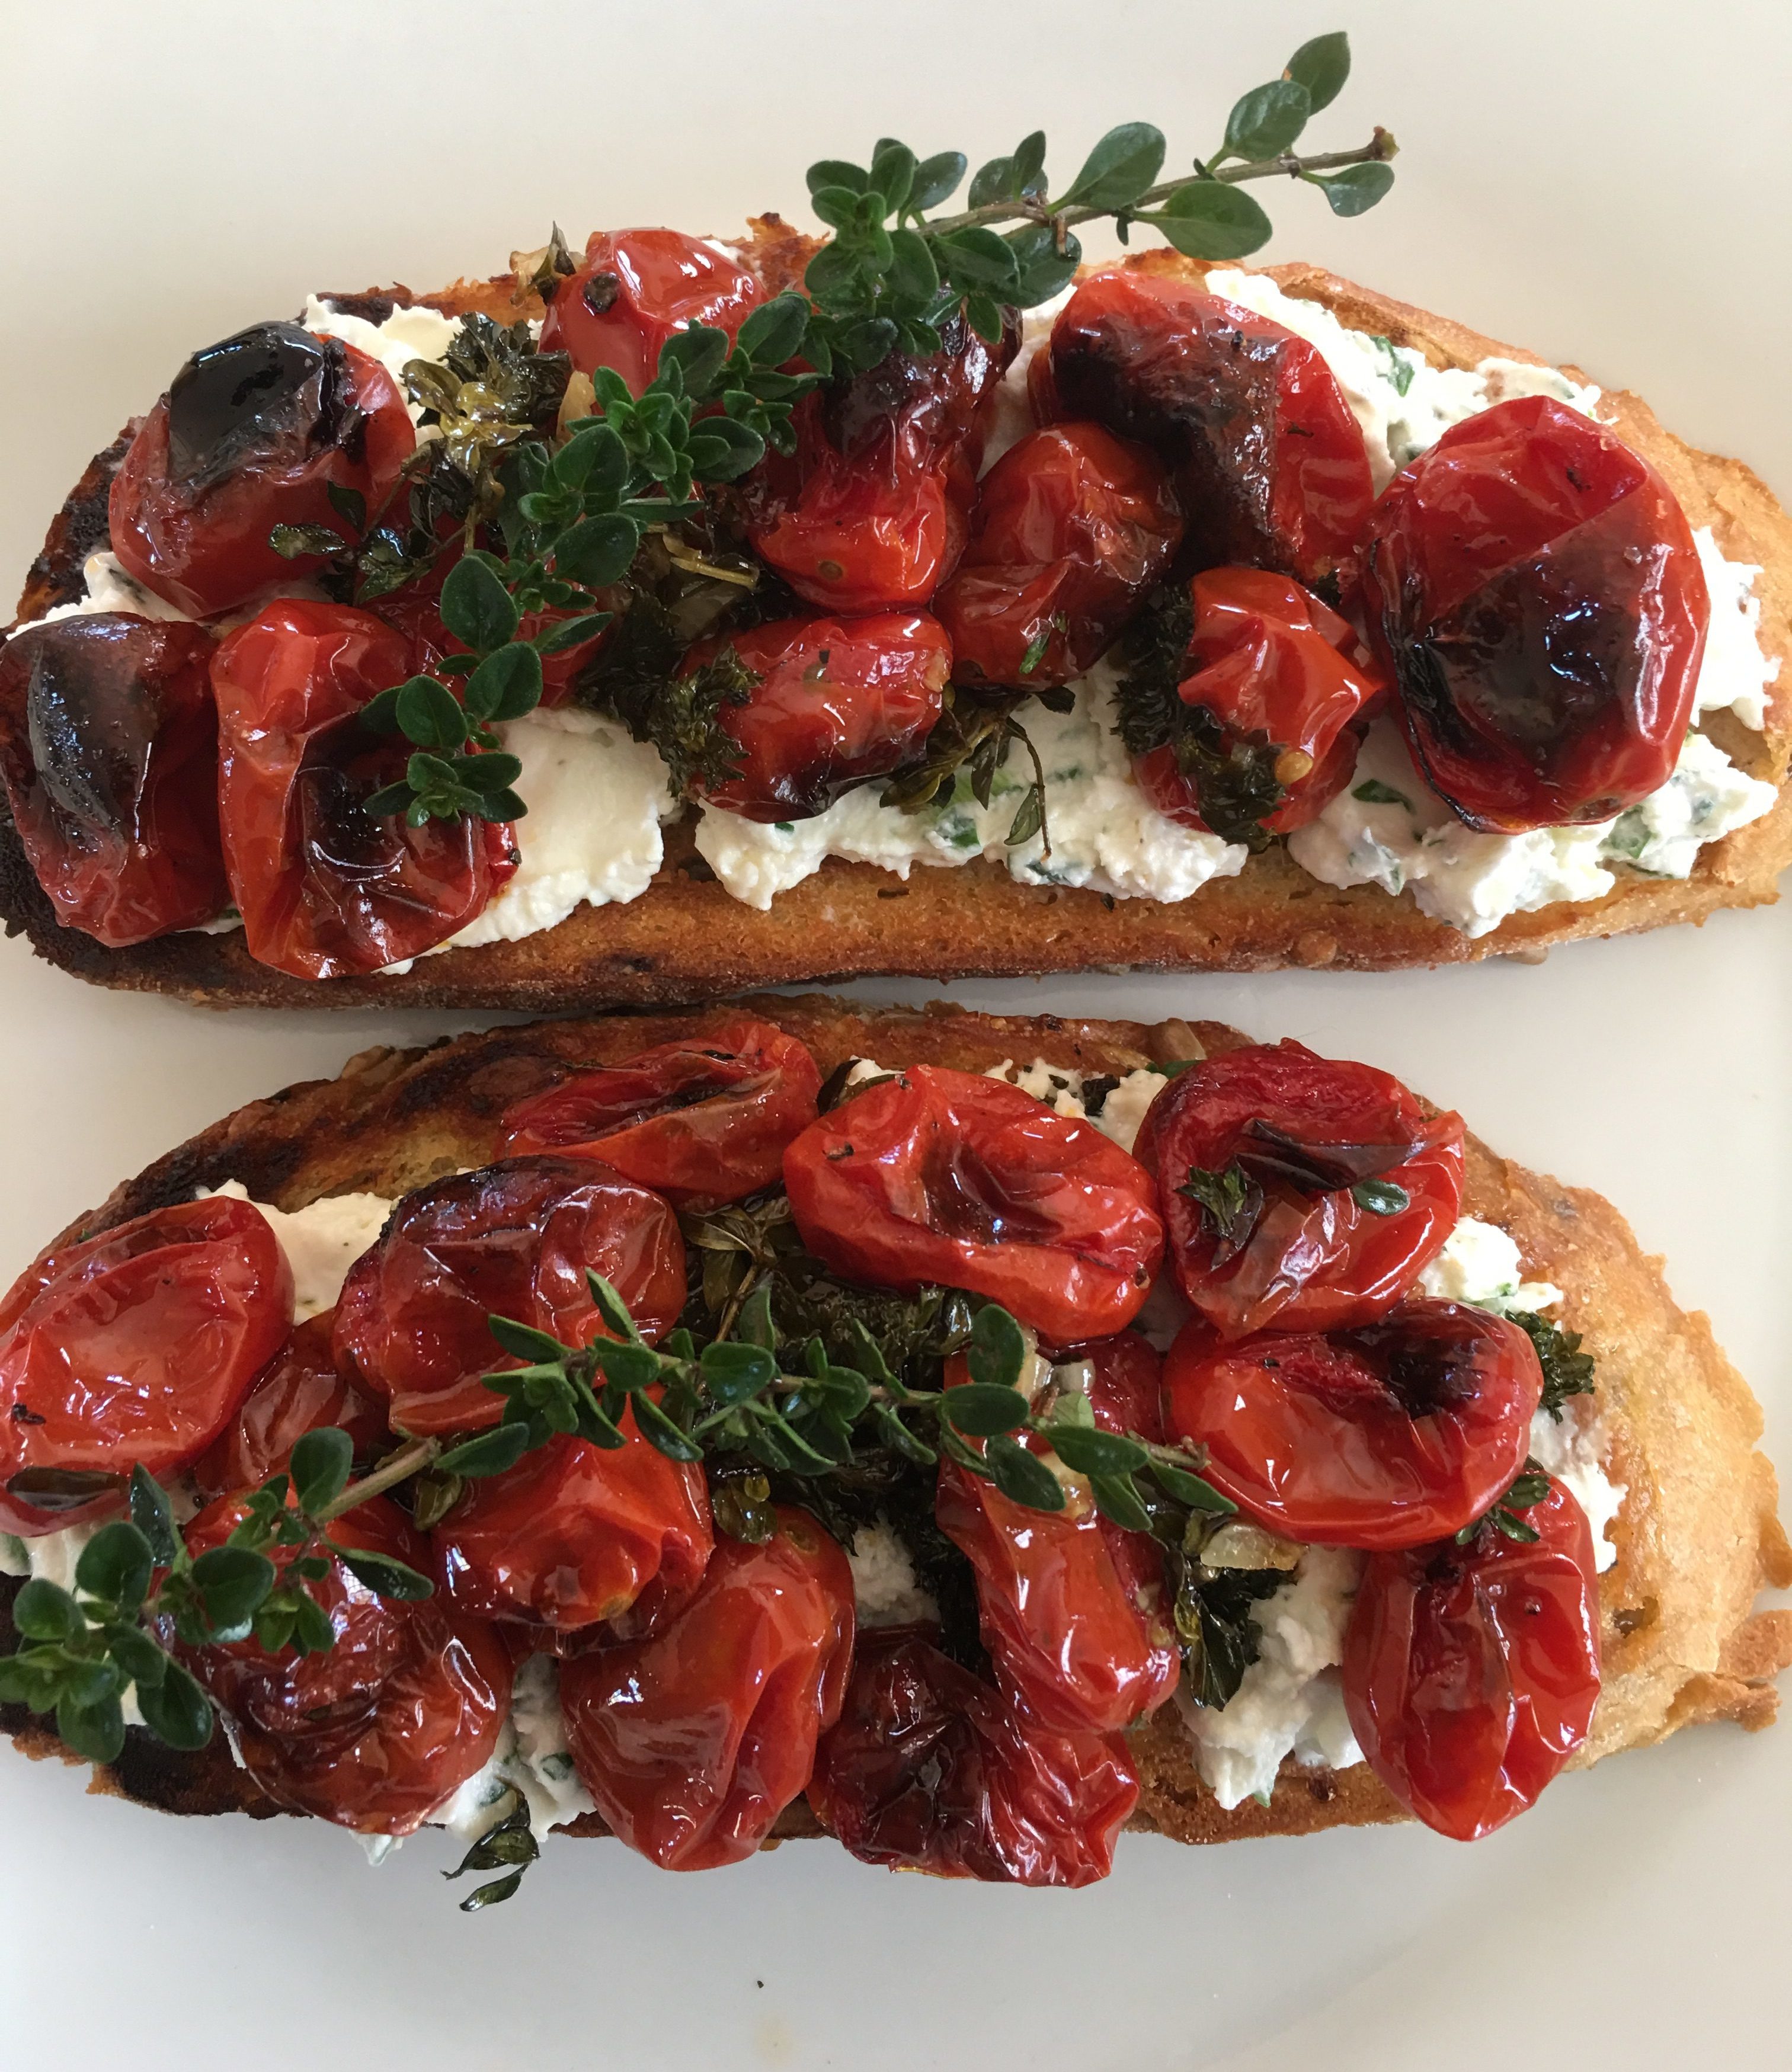
This recipe is from Silvia’s Italian table, a cooking programme currently showing on the ABC. I substituted ricotta cheese for the home-made curd cheese and balsamic glaze for the vino cotto. The result was absolutely delicious.

Make up a double or triple batch of the grapes and serve over the holiday season with cold ham, turkey or duck.

img_1355

4 cups seedless grapes (red, black or green or a mixture)
2 Tbs olive oil
1 Tbs vino cotto or balsamic glaze
Salt and freshly ground pepper, to taste
2 Tbs fresh rosemary, pulled off the stems
1 cup ricotta cheese
1-2 Tbs cream if necessary
Toasted baguette slices or rolls (I used English muffins)

Pre-heat oven to 180°C. Line a baking tray with foil or baking paper. Remove grapes from stems and spread onto baking sheet. Drizzle with the oil and balsamic glaze, season with salt and pepper and scatter with rosemary. Use your hands to thoroughly coat the grapes and crush some of them a bit. Bake for 20 minutes or until glazed. Remove from the oven and cool a bit.

Meanwhile toast the bread and top each piece with a thick layer of ricotta. If the ricotta is a bit dry as mine was, mix in some cream to make it nice and creamy. Spoon the grapes over the ricotta and serve.

Variation: South Americans can substitute Queso Fresco for the Ricotta

Bruschetta at Nico Osteria in Chicago

Cindy is a flight attendant with United Airlines and we met through mutual friends when we were all living in Paris, some 15 years ago. After a few years working out of Paris she moved back to Chicago and has been asking us to visit ever since.

At last we made it. On a balmy evening in September we walked out of the arrivals hall at Chicago’s O’Hare airport and there was Cindy, waving furiously from her open-top vintage BMW. With our luggage squashed into the boot and half of the back seat we set off on a Chicago-by-night city tour, on our way to Cindy’s centrally-located apartment.

Cindy has been just about everywhere and I don’t only just mean United Airlines destinations. I mean from Anchorage to Timbuktu. When she visits a city she leaves no stone unturned. Tuesdays the museums are free, she said, so the morning after we arrived we crossed the Museum of Contemporary Art off the long list of things we had to fit into our six days in Chicago.

What a fabulous city. Wonderful architecture, a great public transport system and lots of free concerts and shows. Cultural highlights included a free two and a half hour concert of operatic arias in Millennium Park, with a full orchestra and choir. And a free lunchtime piano and violin concert at the Chicago Cultural Centre, an amazing Art Deco building which we toured afterwards. Cindy had acquired free passes for me to join her pilates classes at the exclusive East Bank Club, which enjoyed the patronage of Obama and Oprah when they lived in Chicago. And if one of the bars was serving free cocktails you can be sure that Cindy knew about it.

Cindy

Culinary highlights included a lobster sandwich at the French Markets – simple but so good – a delicious lunch from one of the many restaurants at Eataly, dinner at Nico Osteria and the $25 three course lunch at one of Nico Osteria’s sister restaurant Blackbird.

At Nico Osteria we sat on bar stools looking into the kitchen and, by asking a few culinary questions, soon built up a rapport with the sous chef. The head chef, meticulously checking each dish before it left the kitchen, Gordon Ramsey-style, decided we were foodies and sent out some extra dishes for us to try. Baskets of colourful tomatoes, large and small adorned the bustling kitchen. They were at the tail end of a tomato-inspired menu, the chef explained, and in three days everything would change.

We decided to share some bruschetta and they were all delicious. Today’s recipe is inspired by Nico Osteria’s Bruschetta with Chicken Liver Mousse, Marinated Onion and Lemon Honey. Instead of the Lemon Honey I used Tomato Baharat Jam, which goes so well with all kinds of pâté. Their chicken liver mousse had a bit of a kick, but I decided not to add chilli to mine.

The following day we had lunch at Blackbird and told the Maitre d’ that their set price menu had been highly recommended by the chef at Nico Osteria. Say no more – we were treated like family, with complimentary champagne and an amazing Lyonnaise-type salad, served in a crispy potato basket with a soft-poached egg on top arriving before our three course meal.

If you’ve never been to Chicago I suggest you put it on your list.

img_1257


Bruschetta with Chicken Liver Pâté, Marinated Onion and Tomato Baharat Jam

Chicken liver pâté (see recipe)
Tomato Baharat Jam (see recipe)
1 onion, halved then very thinly sliced
2 Tbs white wine vinegar or white balsamic vinegar
2 Tbs hot water
2 tsp honey
Pinch of salt
1 baguette (French loaf)
Extra Virgin olive oil
1 large clove garlic, crushed
A few halved cocktail tomatoes
A few rocket leaves

Make the pâté and tomato jam – the day before serving if you like. Mix onion with vinegar, honey, hot water and salt and leave to marinate.

To serve, cut baguette in half horizontally, then cut into serving sizes about 10-12cm long. You should get 6 or 8 from a loaf. Discard the very ends of the loaf. Mix olive oil with garlic, brush over both sides of the bread then toast till golden on a griddle pan.

Arrange toasted baguette on serving plates. Spread each one liberally with chicken liver pâté then garnish with marinated onion (drained and dried with paper towels) and Tomato Baharat Jam. Finish with some lightly dressed baby tomato halves and rocket leaves.

Makes 6-8 bruschetta

The Best Guacamole

Many years ago I tried a fabulous Guacamole at the house of a Mexican diplomat. It’s so long ago I can’t even remember her name, but she gave me the recipe and I’ve been making it ever since. I guess you’d expect a Mexican to know how to make Guacamole.

I had been making my own version for years, but this authentic recipe taught me a couple of tricks. Firstly, don’t puree the avocados – mash them roughly with a fork so they remain a bit chunky. Secondly, a dash of cumin powder works wonders, although if you don’t like cumin you can always leave it out. Another tip is not to use overripe avocados as the dip will discolour very quickly if you do.

IMG_4089

2 large ripe but not overripe avocados, seeded and peeled
1 very small onion, grated (or ¼ medium onion)
½ clove garlic, crushed
2-3 tsp lime juice
2-3 tsp olive oil
2 Tbs chopped coriander
Salt and freshly ground black pepper, to taste
1 tsp ground cumin
½ tsp dried oregano
1 large tomato, peeled, seeded & diced (optional)
To serve:
Corn chips

Mash avocados roughly with a fork, then gently mix in remaining ingredients, except tomato. Cover with plastic wrap and chill. Fold in tomato just before serving. Garnish with extra chopped coriander or a few pieces of tomato and serve with corn chips.

Makes 1-2 cups

Note: instead of one large tomato use 3-4 baby ones (I used baby Roma). No need to peel, just remove seeds and dice.