Sticky Pork Ribs with Plums

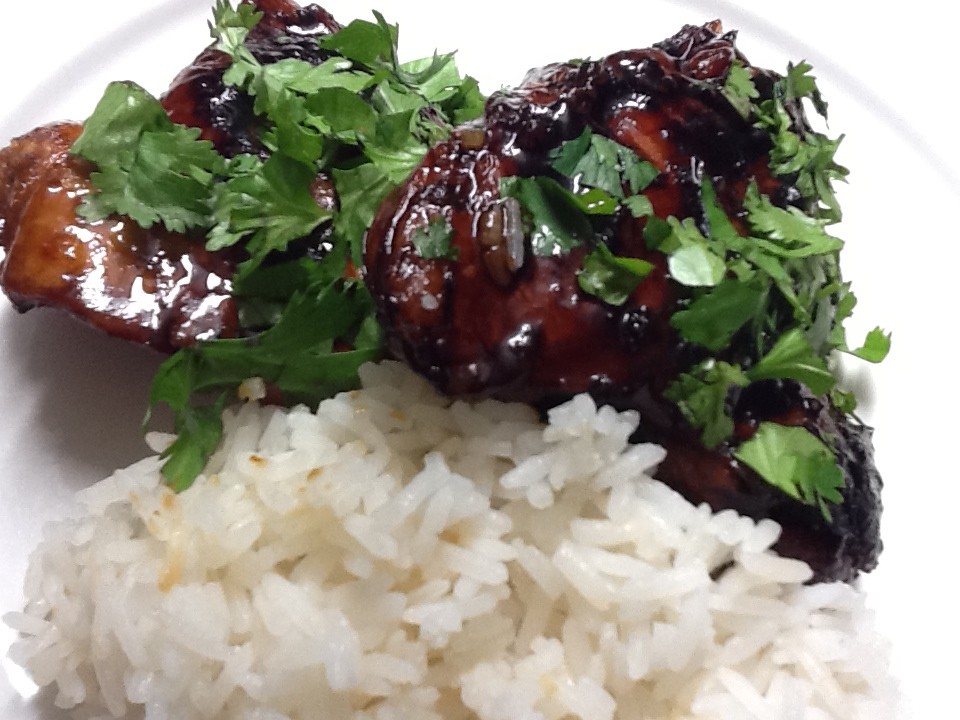
What the supermarkets here call pork spareribs are actually pork belly rashers, as they have no bones. I bought a packet and was planning to cook them with a sticky sauce. Then my Thai friend Pom gave me some plums, so I decided to throw them in towards the end of the cooking time. The result was delicious with the fruit providing just the right contrast to the richness of the meat.

Sticky Pork Ribs with Plums

8-10 pork belly rashers or spare ribs
salt and freshly ground black pepper
2 Tbs BBQ sauce, or HP sauce or Tomato Ketchup
2 Tbs oyster sauce or Sweet Chilli Sauce
1 Tbs Worcestershire sauce
1 Tbs honey or brown sugar or maple syrup
1 crushed clove garlic
2-3 tsp grated fresh ginger
About 8 plums

Preheat oven to 180°C. If liked remove rind from the pork. Leaving it on results in chewier pork, but I like it that way. Place pork in a baking pan and season on both sides. Bake for an hour to an hour and a half or until tender, turning them over about halfway through the cooking. Tip off the fat. Mix the three sauces with the honey/brown sugar or maple syrup, garlic and ginger and spread some over the pork. Add the plums, stoned and cut into quarters. Return pan to the oven for about 15 minutes then remove, turn the pork over and spread with remaining sauce. Continue to cook for a further 15 minutes or until nicely glazed and plums are cooked. Serve with steamed rice and steamed bok choy.

Serves 3-4

Variations: leave out the plums altogether if preferred, or substitute peaches or nectarines.

Toblerone Ice Cream Parfait with Chocolate Sauce

Woolworths was selling 400g Toblerones for half price so I bought a couple and put them in the pantry (trying to forget they were there) until I came up with inspiration for a new dessert.

By using good quality bought vanilla ice cream you can make this parfait in a jiffy. If you have time to make your own ice cream so much the better. While you could make this in an ordinary loaf shape, using a triangular tin looks snazzier, especially as Toblerones are that shape. You can buy them online.

If preferred, leave out the chocolate coating. This chocolate sauce recipe is an old family favourite. Great to have in the fridge to serve with ice cream or waffles, though one batch doesn’t last long if you have kids around, or even grown up kids!

Toblerone Ice Cream Parfait with Chocolate Sauce

2 litres good quality vanilla ice cream
1 x 400g Toblerone chocolate bar
Chocolate Coating:
200g dark or milk chocolate
2 Tbs vegetable oil
Chocolate Sauce:
½ cup sugar
½ cup water
4 Tbs cocoa
2 Tbs golden syrup
Large knob of butter
1 tsp vanilla essence

Remove ice cream from freezer and spoon into a large bowl. Leave to stand for a few minutes while you chop the Toblerone into small chunks. Not too long as you don’t want the ice cream to melt. Thoroughly mix Toblerone into ice cream. Line loaf tin (triangular or rectangular) with plastic wrap, leaving the excess hanging over the sides. Fill with ice cream mixture, pushing down and smoothing the top. Cover with the plastic wrap then freeze several hours or overnight.

Chocolate Coating: Remove parfait from freezer, tip out (you may need to hold a hot towel over the base to loosen it), peel off the plastic wrap and place on serving dish. Meanwhile melt chocolate in a bowl over simmering water and mix in the oil. Working quickly cover the parfait with melted chocolate. Put back in the freezer to set.

Chocolate Sauce: Choose a large pan because this sauce has a tendency to boil over. Place all ingredients, except butter and vanilla essence, in pan. Mix with a whisk to remove lumps, then boil for 5 minutes without stirring. Cool for 10 minutes. Stir in butter and vanilla.  Reheat before serving and serve warm not hot.

To serve: Remove parfait from freezer for about 10 minutes before serving. Slice with a large sharp knife dipped into very hot water. Serve with the chocolate sauce.

Serves 12

Note: if you can’t buy golden syrup substitute corn/glucose syrup or honey.

Sticky Chilli Chicken

You may have noticed that Café Cat has been quiet for the past 3 weeks while I was on a business trip to Chile. This involved catching up with lots of friends – rather too many lunches, dinners and pisco sours – the Chilean national tipple. But life’s too short to avoid occasional periods of over-indulgence!

For some reason jet-lag is always better coming back from Chile to Australia than it is going. Even so, in the first few days after returning from somewhere which is 14 hours behind AEST, I am not at my most creative. So we’ve been eating quick and easy, tried and tested dishes such as this one for Sticky Chilli Chicken. The original recipe came from Donna Hay – I’ve just cut down a bit on the sugar and the soy sauce. It may sound like a lot of chillies, but the end result is not very hot. Any leftovers are nice cold.

Sticky Chilli Chicken1.5kg chicken pieces (I use thighs)
Chilli Sauce:
3 red chillies, seeded and finely chopped
1 Tbs grated ginger
2 cups water
1/3 cup soy sauce
1/3 cup sugar
½ cup vinegar
½ cup chopped coriander

Place all ingredients for sauce except the coriander in a deep frying pan which has a lid and simmer for 3 minutes. I use an old-fashioned electric frypan. Trim chicken pieces and remove skin if liked. Add chicken to pan, cover and cook for half an hour, turning from time to time. Remove lid and continue to cook for 20-25 minutes, turning chicken from time to time until the sauce has become sticky and the chicken is well coated. Watch carefully towards the end as you don’t want the sauce to completely dry up and burn. Add coriander and serve with steamed rice.

Serves 4

Pom’s Crunchy Biscuits

My Thai friend Pom makes these delicious crunchy biscuits. She gave me some as a gift recently, but they were so good I ate them all as I was driving home, so Matthew didn’t get any. I asked her for the recipe and decided to double the quantities because I knew that 16 biscuits wouldn’t last long.

They’re like muesli in a biscuit – healthy, satisfying, good for lunch boxes or to go with a cuppa. An Australian cup measure is 250ml or a quarter of a litre.

Pom's Crunch Biscuits4 cups cornflakes
2/3 cup sugar or honey
250g butter at room temp
2 eggs
1 tsp vanilla essence
1 cup sultanas
2 cups SR flour
½ cup sesame seeds (white or black or a mixture)
½ cup shredded or dessicated coconut
½ cup sunflower or pumpkin kernels
1 cup chocolate chips or chopped chocolate

Preheat oven to 180ºC. Place cornflakes in food processor and process briefly to break them up a bit, but not much. If you need to chop the chocolate do it now and add it to the cornflakes. Place sugar or honey and butter in food processor and mix until smooth and creamy. Add eggs and mix well, then flour and vanilla. When smooth, scrape into the bowl with the cornflakes, add remaining ingredients and mix well. Line two or three baking trays with baking paper. Form mixture into 3cm balls and arrange on trays with spaces in between. Bake for 12-15 minutes or until golden – don’t overcook or they will be dry. Cool then store in a tin with a lid.

Makes about 32

Note: the recipe is easy to halve and you can vary the ingredients to suit you taste. Add more coconut and less sultanas, use chopped nuts instead of the kernels, or leave out the chocolate and substitute something else

How to Cook Flank Steak

I recently attended the Fine Food Fair at the Sydney Convention Centre. As I was wandering round I saw a cooking demonstration about to start, grabbed a chair and sat down. The subject of the demo was how to cook cheap cuts of meat quickly, rather than by one of the slow methods we usually use with less tender cuts.

The chef was a Pom like me, so he called the cut of beef he was using skirt. Here in Australia it’s known as flank. He said there were five rules for the successful quick-cooking of flank steak:

  • use a piece of lean flank steak about 2.5cm thick
  • marinate for about 30 minutes in a mixture which includes lemon or lime juice
  • cook over high heat for 3-4 minutes each side, turning once, to achieve medium-rare
  • rest meat loosely-covered for the same amount of time as you cooked it
  • slice thinly downwards, across the grain

Samples were passed around and the results were impressive. The meat was tasty and surprisingly tender so I decided try it at home. At the demo they served it in bread rolls which they called Vietnamese Steak Sandwiches. We had ours on top of the salad.

You can use any combination of crunchy vegetables for the salad. I used one carrot instead of two and added one coarsely grated raw beetroot and some finely shredded red cabbage.

The marinade can also be varied with any herbs, spices or sauces that take your fancy.

1 piece of flank steak weighing 600-750g and about 2.5cm thick
Marinade:
Juice of ½ lemon or 1 lime
2 Tbs soy sauce or Worcestershire Sauce
2 Tbs fresh grated ginger or 2 cloves garlic, crushed, or bothphoto
Salt and freshly ground black pepper
Salad:
2 spring onions, finely sliced on the diagonal
½ cup fresh coriander leaves
1 cucumber, thinly sliced
2 carrots, coarsely grated
Salad Dressing:
1 clove garlic, crushed
1 tsp sugar
Pinch chilli powder (optional)
1 Tbs rice wine vinegar
1 Tbs water
Salt and pepper to taste

Combine marinade ingredients except salt and pepper, add meat, turn to cover and leave for 30 minutes, turning occasionally. At the demo they marinated it in a sealed plastic bag, but I just used a dish. Mix salad ingredients in a bowl and dressing ingredients in a jar with a lid and shake.

Preheat BBQ or griddle to very hot. Drain steak and pat dry with paper towels. Season with salt and pepper on both sides. Cook steak for 3-4 minutes each side, turning once, until medium-rare. Remove from  heat, cover loosely with a piece of foil or a saucepan lid and leave to rest for 6-8 minutes. Slice thinly downwards, across the grain. If serving in rolls, split and lightly toast them. Mix salad with dressing.

Serve beef and salad in rolls or arrange on individual plates.

Serves 4

Note: if preferred just use your regular salad dressing instead.

Deconstructed Ice Cream Sundae with Popcorn & Salted Caramel Sauce

The idea for serving an ice cream sundae with a crunchy cone stuck on top, like a hat, came from the fairly new and very popular Canberra bistro called Eightysix. The idea for making a 2 litre container of bought vanilla ice cream more exciting, by adding halva and other ingredients came from Maggie Beer. I put these two ideas together for a quick and delicious dessert. Matthew said he wasn’t very hungry and would “share” mine. But after a few mouthfuls I knew I wouldn’t be able to leave half, so I told him to get his own.

If you can’t find halva – a Middle Eastern sweet made from nuts and sugar which tastes a bit like nougat – you could chop up a couple of Crunchie bars. The fresh mint really makes a difference, helping to cut through all that sweetness. If preferred you can leave the salt out of the caramel sauce. For an even quicker version of this dessert, just use plain vanilla ice cream.

Deconstructed Ice Cream Sundae with Popcorn & Salted Caramel Sauce

Ice Cream:
2 litres bought vanilla ice cream
125g halva, chopped
2-3 Tbs finely chopped fresh mint
½ cup lightly toasted nuts (pistachios, slivered almonds or pecans)
Salted Caramel Sauce:
½ cup sugar
½ cup cream
60g butter
½ tsp salt
To serve:
1 pkt waffle ice cream cones
1 pkt caramel popcorn

Remove ice cream from the freezer and after 15 minutes scrape it into a large bowl. Add remaining ingredients and mix through. The ice cream needs to thaw just enough to allow you to mix them in but don’t let it soften too much. Put back into container and into the freezer. For the sauce, melt the sugar in a small heavy-based pan until melted and dark caramel colour. Add cream and butter and mix until smooth. Put aside and warm slightly to serve.

To serve, fill ice cream cones generously with ice cream then place upside down in serving dishes. Sprinkle a few popcorn around and drizzle with the warm caramel sauce.

Serves 6 or more

Healthy Oven-Baked KFC

Served with oven chips and coleslaw or a mixed salad this healthy version of Kentucky Fried Chicken – baked in the oven, rather than deep fried – is popular with kids. It’s not haute cuisine as you can see from the photo, just a very basic, economical family meal. It featured regularly in our house when the kids were growing up.

A salsa made from diced fresh mango or peach, red onion, fresh ginger, Thai sweet chilli sauce and chopped coriander is a nice addition for the adults. A diced avocado is an optional addition.

Healthy Oven-Baked KFC1 packet corn chips (see note below)
1 packet breadcrumbs (preferably Japanese Panko crumbs)
1 kg chicken pieces with skin
½ cup plain flour
1-2 tsp powdered chicken stock or salt or celery salt
Freshly ground black pepper to taste
3 tsp of dried herbs and spices of your choice (paprika, oregano etc)
1 egg plus 2 Tbs milk, beaten
Spray oil (olive, canola, whatever you use)

Preheat oven to 180°C. Place some of the corn chips in a food processor and process to make crumbs. Mix with the packaged breadcrumbs in a proportion of about two to one. Place about 2 cups in a shallow bowl and keep the rest in a sealed container for another time.

Mix flour with salt, pepper, herbs and spices in another shallow bowl. Be generous with the chicken stock powder or salt – it needs it. Mix the beaten egg and milk in a third bowl. Coat chicken pieces with seasoned flour, then with beaten egg and lastly with the crumb mixture, patting it on well. Place chicken on a baking try lined with non-stick baking paper – not necessary but saves on washing up. Spray chicken lightly with oil. Bake for about about 45 mins, turning once and spraying the other side with oil about halfway through. The chicken is ready when it’s golden brown and cooked through – test with a sharp knife.

Serves 4-6

Note: if you don’t have corn chips substitute cornflakes.

Oven Chips: cut potatoes into thick chunky chips and cook in boiling salted water for 8-10 minutes or until half-cooked. Drain and pat dry with paper towels. Place in a bowl with a small slug of olive oil, mix to coat, then add a shake of plain flour and turn again to coat. Arrange chips in a single layer on a tray lined with baking paper, sprinkle with coarse salt and bake for 45 minutes on the shelf above the chicken, or until golden brown. The flour is optional but gives the chips a nice crunchy coating.

Joan’s Apple Crumble

JoanWe all know that children need good role models. But do we ever stop growing up? I think adults also need older friends to look up to and think “That’s how I want to be when I’m that age”. Such friends are a rare commodity and to be treasured.
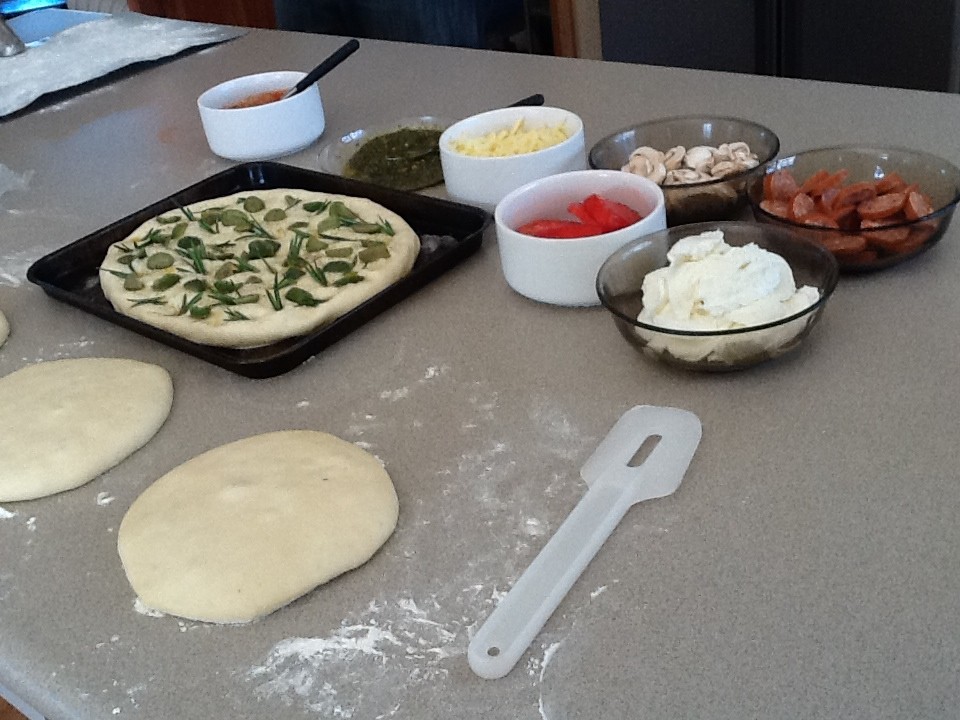
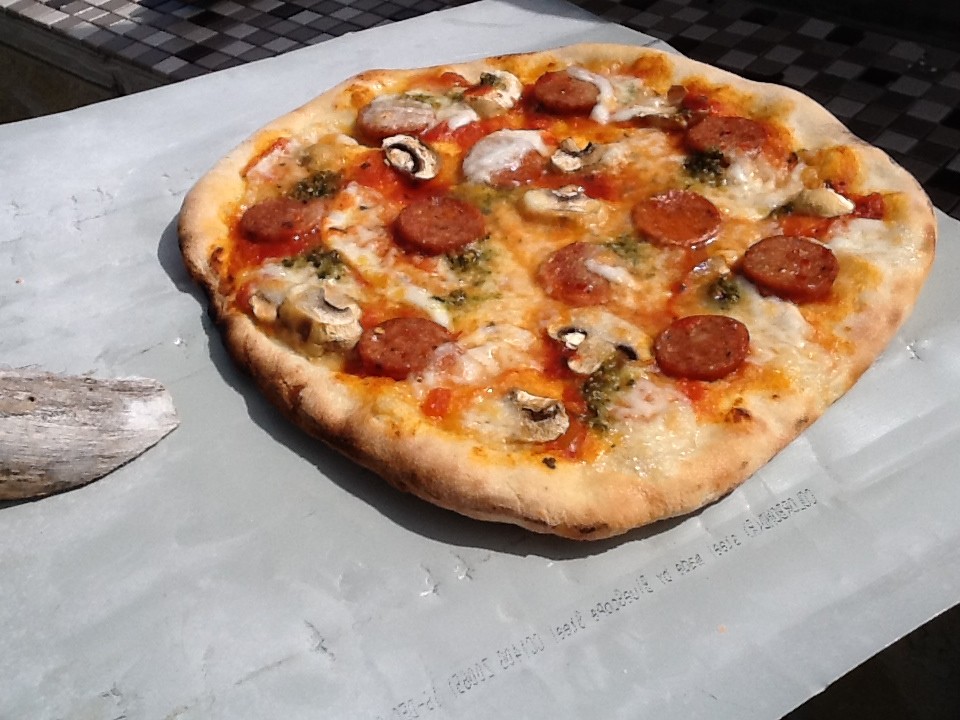
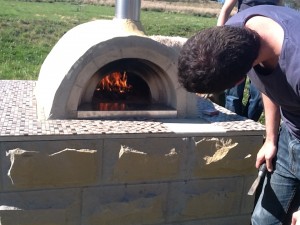
When I married and moved to Canberra I left my friends and family in Europe. Fortunately a lovely lady called Joan Tyrrel, thirty years my senior, took me under her wing. She became my surrogate mother, friend and confidante.

As our family grew Joan and her husband John became an extra set of grandparents for our kids and godparents to our daughter. John had taught Matthew English at Canberra Grammar School where he was also the Chaplin for many years. The Tyrrels had three married children of their own and grandchildren. But they had enough love to go around and we were the fortunate beneficiaries.

When I rang and asked if it was okay to call in for coffee or lunch Joan never said sorry I’m busy, or it’s not convenient. She led a very full life – one of the secrets to longevity – but she always had time for me. Our shared love of cooking meant we often talked about food and swapped recipes, home grown vegetables, jars of home-made jam and chutney. People of all ages enjoyed Joan’s company because she was interested in what they were doing. With such a positive and vibrant personality, she never seemed old. I remember once asking John how he was. “I’m very well thank you” he replied, “Joan says I’m not allowed to say anything else”. We all laughed, but it was so like her.

Having grown up during the War Joan hated waste. When she switched on her dishwasher there wasn’t room for another spoon or fork. And she always cut the Finish tablets in half, swearing that half did just as good a job as a whole one.

Joan died in February 2011 aged 88, after a short battle with cancer and John followed about a year later of old age and because he was completely lost without Joan. They were very much a team and I miss them both, but mostly I miss my special friend and mentor. Her last words to me were “We had such fun together, didn’t we?”

Joan’s recipe for a quick and delicious apple crumble is different because she always left the skin on the apples and melted the butter for the topping.

Joan's Apple Crumble5 apples
1-2 Tbs sugar, to taste (Joan always used raw sugar)
Topping:
125g butter
½ cup brown sugar
1 tsp cinnamon
1 cup plain flour

Preheat oven to 180°C. Core and slice apples and arrange in a buttered pie dish or in 6 individual ramekins. Sprinkle with sugar.

Melt butter, add sugar and cinnamon. Lastly add flour and crumble between fingers. Sprinkle over the apples, then bake at for 30-40 minutes, or until golden brown and bubbly. Serve with cream or vanilla ice cream.

Once cooked the individual apple crumbles will keep in the fridge for 5-6 days, covered. Just zap in the microwave for a minute, top with some ice cream and serve for an instant mid-week dessert.

Serves 6

Home-made Pizza

A proper Italian pizza has a thin, crispy crust and minimal topping. Nothing remotely like the thick, soggy versions sold in many fast food chains. The Associazione Verace Pizza Napoletana says that when cooked a pizza base should be no more than 4mm thick at the centre, though it will be thicker around the edges. And they should know, they invented them.

Home-made pizzaWhen our kids were growing up pizza featured regularly on the menu. The pizza delivery motorbikes never came to our house because my view is that anything home-made is better than the bought version, not to mention cheaper. At the time our offspring thought they were deprived, but now they have their own families and also make their own.

For a larger group make 3-4 times the recipe and form the dough into balls. Have the toppings ready in small dishes and let people choose their own. With a salad and a bottle or two of vino you’re all set for a casual meal which appeals to all ages.

Home-made pizza15g fresh yeast or 7g dry yeast
1 tsp sugar
½ tsp salt
2 cups plain flour (preferably 00)
1 Tbs olive oil
½ to ¾ cup warm water

Mix ½ cup warm water with yeast and sugar. Leave for 10 minutes. Sift flour and salt into a bowl, add oregano, oil and yeast mixture. Mix well, adding more warm water until you have a firm, not sticky, dough. If preferred make in a food processor or in a mixer with a dough hook.

Turn dough onto a floured surface and knead for a couple of minutes until smooth and springy. Form into a ball, place in a lightly oiled bowl and turn to coat with oil. Cover and leave at room temperature for an hour, or until doubled in size. Alternatively, cover and refrigerate overnight to prove more slowly.

Preheat oven to its highest temperature. If using, put pizza stone in the oven to get really hot. Knead dough lightly and form into a ball (or two balls) and leave, covered with a tea towel for about 20 mins or until doubled in size.

To assemble pizzas place a ball of dough on a lightly oiled pizza pan and press out to size using oiled fingers, working from the middle out. If using a pre-heated pizza stone, or a wood-fired pizza oven, press dough out into a large round on a well-floured pizza paddle.

Home-made pizzaArrange toppings on pizza – be sparing – less is more. Slide onto stone if using one and bake for about 5 minutes or until golden and crispy. Time will vary depending on your oven. Our outdoor wood-fired oven shown in the photo heats up to over 400°C, so pizzas only take about 3 minutes. In an ordinary oven they can take up to 12 minutes. Keep an eye on it.

Makes one very large or two medium photopizzas

Topping suggestions:

  • Tomato sugo (sold in jars to go with pasta) with thinly sliced mushroom, sliced pepperoni or chorizo and grated mozarella
  • Pesto with sliced fresh buffalo mozarella and sliced fresh tomatoes
  • Pesto, peeled prawns, grated mozarella and pine nuts
  • Additional toppings: stoned olives, anchovies, sun-dried tomatoes, caramelized onions, extra oil, fresh herbs

Dream Bars

This recipe first appeared in the Australian Women’s Weekly Big Book of Beautiful Biscuits when it was published in 1982. I’ve been making it ever since and it’s always popular.

The original recipe uses 2 cups fruit mince (mincemeat) but I use a cup of dried fruit and a cup of jam instead. It’s great for using up all those bits of jam and marmalade at the bottom of jars – something my family say I’m famous for. It’s always a great achievement when you can find things in the fridge which need using up and turn them into something finger lickin’ good.

When I returned to take the photo someone, who shall remain nameless and blamed the dog, had already eaten a piece.

photo

Base:
180g butter at room temp
2/3 cup brown sugar, lightly packed
2 cups plain flour
Topping:
4 eggs
1 cup brown sugar, firmly packed
2 tsp vanilla essence
2 Tbs Plain flour
1 tsp Baking Powder
3 cups dessicated coconut
1 cup jam (any flavour)
1 cup dried fruit

Preheat oven to 180°C. Process butter and sugar in food processor until creamy. Add sifted flour and mix until you have crumbs which are starting to stick together. Press mixture into a greased Swiss Roll tin or slice tin (mine is 35x25cm) lined with baking paper. It doesn’t have to look very smooth but it does need to be evenly spread to cover the base. Bake for 10 mins or until golden.

Process eggs, sugar and vanilla in food processor. Add coconut, jam and fruit and process just enough to mix. Spread topping over the cooked base, bake for 25-30 mins or until firm and golden brown. Cool, dust with sifted icing sugar and cut into squares.

Variation: Frangipane Bars: make the base as above. When cooked, spread with about a cup or so of raspberry jam or lemon curd. For the filling mix 125g butter, softened, with 1 cup caster sugar in food processor until light and fluffy. Add 4 eggs, ¼ cup plain flour, 3 cups almond meal (or another ground nut) and a tsp of vanilla or almond essence. Spread evenly over the base, sprinkle with flaked almonds and bake for 25-30 mins or until firm and golden brown.