I began collecting recipes when I was at school. Some of the recipes in my large collection have been in my family for generations, others were passed on by friends and chefs around the world. Many have been adapted over the years to make them lighter or update their presentation. I’ve served them to royalty, PMs and other VIPs and there have been no complaints. I hope you are inspired to make some of them.
This a perfect last minute dessert as it only takes 10 minutes to make and about an hour to set. The recipe came from Matthew’s bachelor survival cook book, so it goes back a long way. There’s actually no cheese in the recipe, but if you make it in a spring-form pan it looks like a cheesecake.
I often make it in half cup glasses as shown in the photo. Put them all in a round quiche dish or similar and cover with plastic wrap (or a shower cap which I find very useful in the kitchen!) and they will last several days in the fridge. Instead of the crunchy topping, top with a few fresh berries. Or both.
200g plain sweet biscuits (I used Ginger Nuts)
125g butter, melted
1 can condensed milk
Grated rind 4 large lemons
½ cup lemon juice
300ml cream, whipped
Fresh raspberries, blueberries or strawberries (optional)
Whiz biscuits in food processor until you have crumbs. Melt butter in a medium sized bowl in microwave. Add biscuit crumbs and mix well, then divide between about 16 half cup glasses or ramekins. Save about 4 Tbs of crumbs for the topping, unless you are going to decorate with just berries. Alternatively press crumbs over the base of a 20cm spring-form pan.
In a clean bowl, thoroughly mix condensed milk, lemon juice and rind, then fold in the whipped cream. Divide filling among the glasses or spread into spring-form pan. Refrigerate for at least an hour and serve decorated with the remaining crumbs or some berries, or both. If making in a spring-form pan it’s best to refrigerate for several hours or overnight so it cuts nicely.
Serves 16
Note: other versions of this no-bake cheesecake use 250g cream cheese instead of the cream. In this case mix the cream cheese (at room temp) with the condensed milk, lemon juice and rind in a food processor and omit the whipped cream.
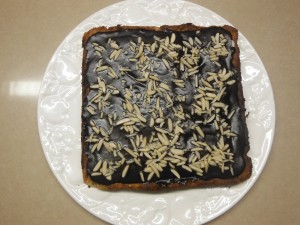
Our Polish friend Peter was coming for dinner so I decided to make something for dessert which would remind him of his homeland. After searching online I came across Mazurek, a nutty cake, not quite as dense as shortbread, covered with chocolate icing and nuts.
There are as many recipes for Mazurek as I’ve had hot dinners, so having found a version for which I had the ingredients – essential when you don’t want to go shopping – I adjusted it slightly and came up with this.
Peter explained that Mazurek is traditionally served at Easter so my timing was perfect. He hadn’t tasted one for many years and was delighted to take home the leftovers.
Serve for afternoon tea or as dessert, with a dollop of cream. Scrumptious.
250g butter at room temperature
½ cup sugar
1 egg
1½ cups almond meal (see note below)
1 cup plain flour
pinch salt
¼ tsp almond essence
¼ cup cream or sour cream Chocolate Icing:
½ cup dark chocolate chips or chocolate squares
1 Tbs corn (glucose) syrup
2 Tbs cream
2 Tbs butter To decorate:
¼ cup flaked or slivered blanched almonds
Preheat oven to 200ºC. Grease a 9″ (22cm) square cake pan and line with non-stick baking paper. In a food processor or with electric beaters mix butter and sugar until light and fluffy. Add egg, salt and almond essence and mix well. Add flour and almond meal and mix well. Scrape into cake pan and spread out evenly. Bake for 20 mins or until light golden – don’t overcook or cake will be dry. Cool completely in tin.
Remove cake and place on a flat serving plate. Place chocolate, corn/glucose syrup, cream and butter in a small bowl over simmering water and when melted stir till smooth. Cool a little then spread icing over cake and decorate with almonds.
Serves about 16
Note: make your own almond meal by blitzing blanched or unblanched almonds in food processor until fine.
Variations: use hazelnuts, walnuts or pecans instead of almonds.
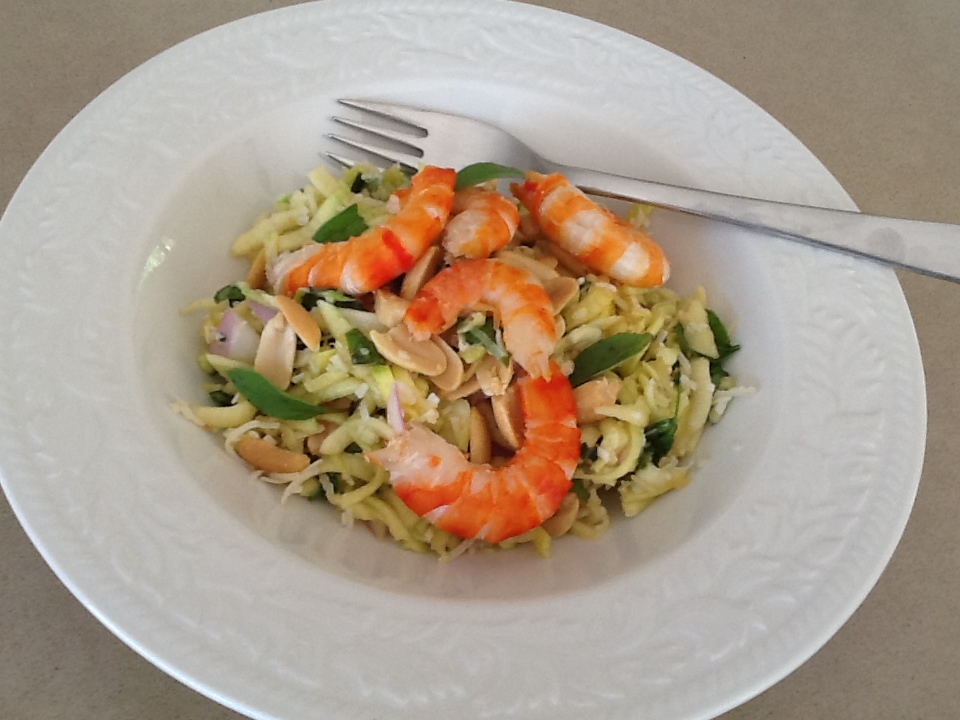
My friend Jurate who lives in the Sydney suburb of Haberfield gave me 3 green mangoes. Actually the tree is in her neighbour’s garden, but he’s happy for her to take the fruit that hangs on her side of the fence.
We’ve been to Thailand so many times, I’ve lost count. When travelling back to Australia from Europe we find a few days of relaxation, massage, great food and swimming is the perfect way to break the journey and get over some of the jet lag.
I used the mangoes to make one of our favourite Thai dishes, Green Mango Salad and it was delicious.
3 green mangoes, peeled and coarsely grated or cut into fine julienne
3 spring onions or 1 small red onion, finely sliced
½ cup fresh grated coconut or desiccated coconut
¼ cup Thai or ordinary basil, shredded
¼ cup coriander, coarsely chopped Dressing:
Juice of 2 limes
2-3 Tbs palm sugar, crushed, or brown sugar
1 Tbs Thai sweet chilli sauce
1 small red chilli, seeded and finely chopped
2 Tbs fish sauce To garnish:
Roasted peanuts, roughly chopped
About 20 cooked prawns, peeled
Mix salad ingredients in a bowl. Mix dressing and taste – it should have a nice balance of sweet, salty, sour and hot. Mix dressing with salad, then serve garnished with the peanuts and prawns.
Serves 4
Note: green mangoes are usually available in Asian shops. If liked you can bulk up this salad by adding 2-3 cups of beansprouts.
What the supermarkets here call pork spareribs are actually pork belly rashers, as they have no bones. I bought a packet and was planning to cook them with a sticky sauce. Then my Thai friend Pom gave me some plums, so I decided to throw them in towards the end of the cooking time. The result was delicious with the fruit providing just the right contrast to the richness of the meat.
8-10 pork belly rashers or spare ribs
salt and freshly ground black pepper
2 Tbs BBQ sauce, or HP sauce or Tomato Ketchup
2 Tbs oyster sauce or Sweet Chilli Sauce
1 Tbs Worcestershire sauce
1 Tbs honey or brown sugar or maple syrup
1 crushed clove garlic
2-3 tsp grated fresh ginger
About 8 plums
Preheat oven to 180°C. If liked remove rind from the pork. Leaving it on results in chewier pork, but I like it that way. Place pork in a baking pan and season on both sides. Bake for an hour to an hour and a half or until tender, turning them over about halfway through the cooking. Tip off the fat. Mix the three sauces with the honey/brown sugar or maple syrup, garlic and ginger and spread some over the pork. Add the plums, stoned and cut into quarters. Return pan to the oven for about 15 minutes then remove, turn the pork over and spread with remaining sauce. Continue to cook for a further 15 minutes or until nicely glazed and plums are cooked. Serve with steamed rice and steamed bok choy.
Serves 3-4
Variations: leave out the plums altogether if preferred, or substitute peaches or nectarines.
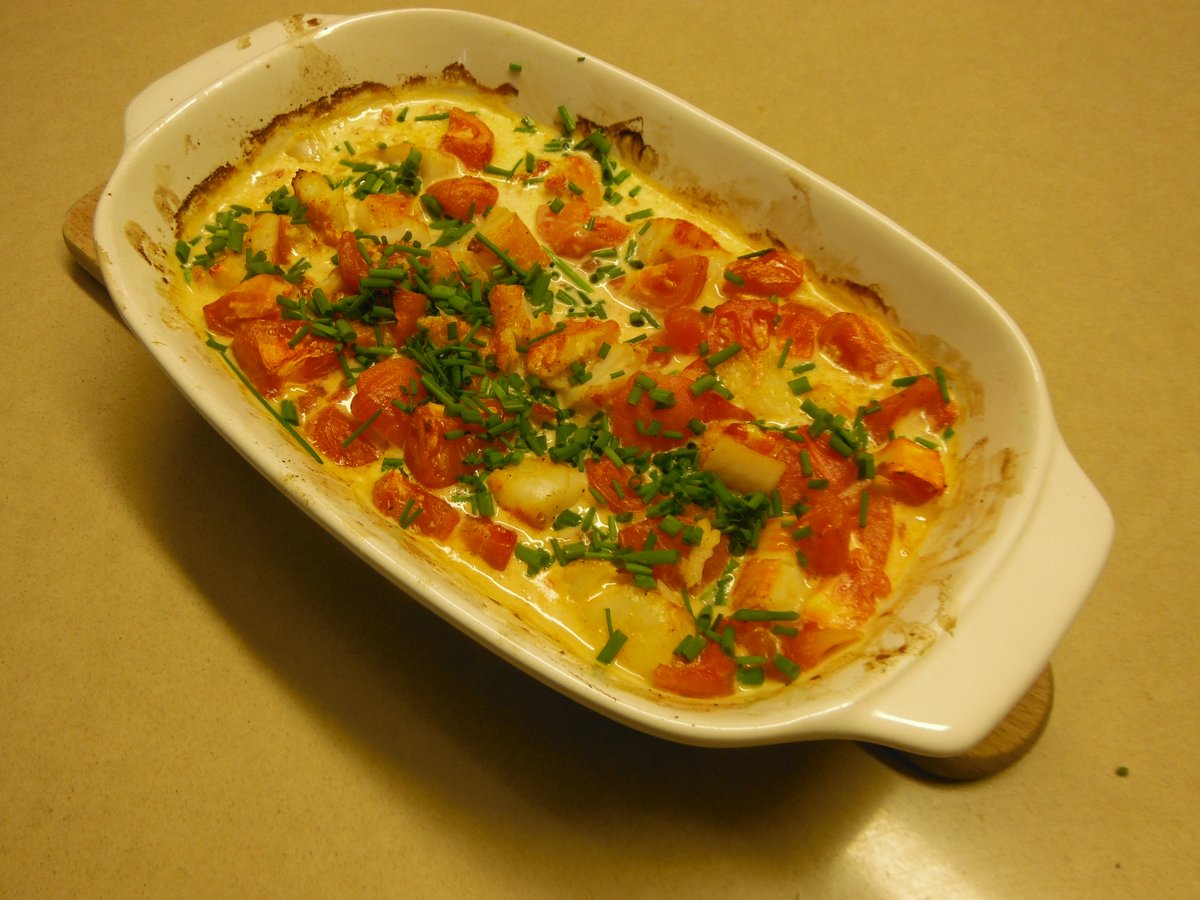
When I was growing up in the UK my mother used to cook smoked haddock in milk. I have never seen smoked haddock in Australia, but I often buy a couple of fillets of smoked cod and stick them in the freezer to whip out on a busy day.
I invented this dish many years ago and it has become a favourite mid-week dinner. All you need are tomatoes – which we have in the garden at the moment – and some cream. The recipe is easy to halve if you’re cooking for one.
2 fillets smoked cod or haddock (about 350g)
3-4 tomatoes
About 1/3 cup cream
Black pepper
Chopped fresh herbs to garnish
Preheat oven to 200ºC. Remove skin from fish, cut into bite size chunks and arrange in a small, shallow, oven-proof dish, lightly greased. If you have time, remove skin from tomatoes by pouring boiling water over them for a minute or so. This is optional – I don’t mind them with the skin left on. Cut tomatoes into chunks and sprinkle over the fish. Drizzle with cream and season with pepper. You probably won’t need salt as the fish is salty. Bake for 20-25 mins or until golden and bubbly. Garnish with some herbs and serve with steamed rice or mashed potatoes and a steamed green vegetable such as peas, snow peas, green beans or asparagus.
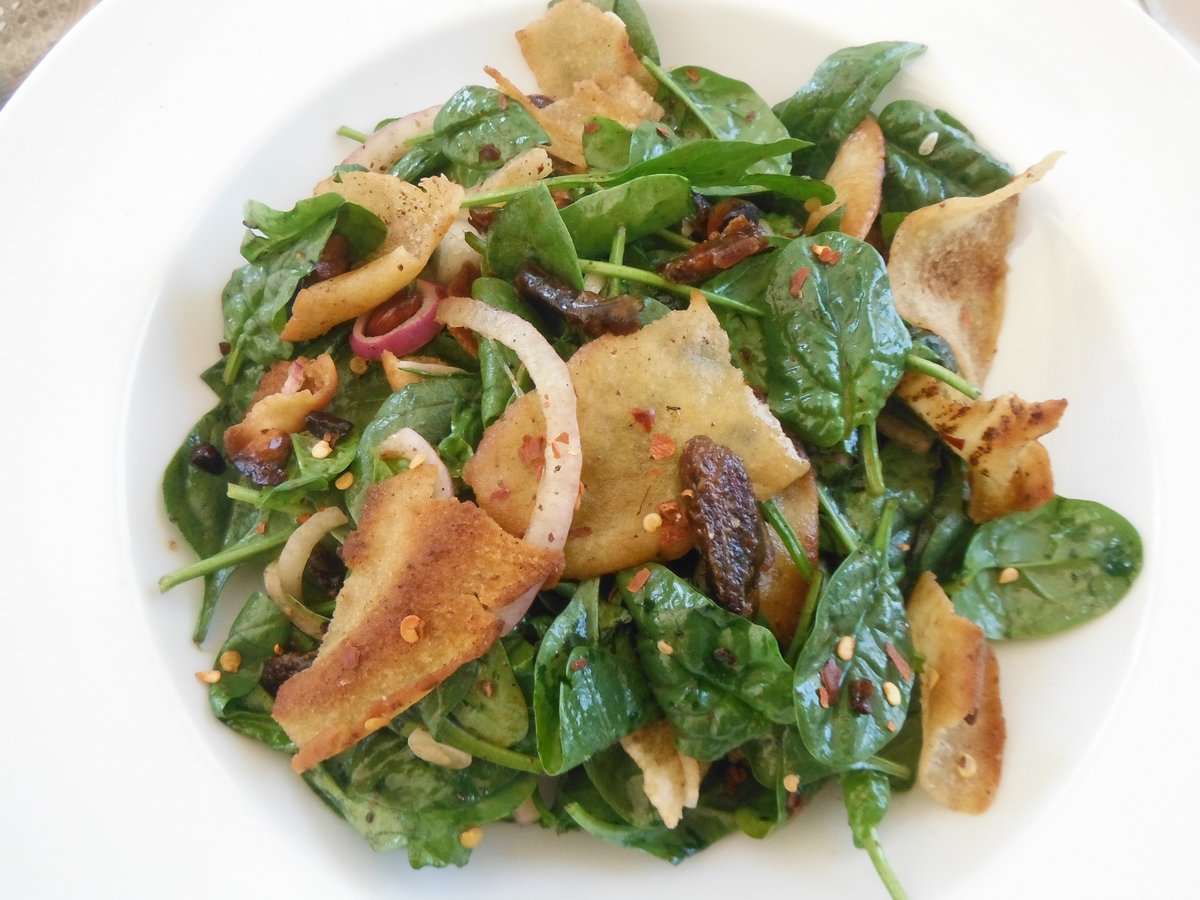
Israeli-born Yotam Ottolenghi trained at Le Cordon Bleu in London. He then worked at the Michelin starred restaurant The Capital and later in the pastry section of the Kensington Place restaurant. He went on to become head pastry chef at Baker and Spice in Chelsea, where he met his Palestinian life partner Sami Tamimi. In 2002 their first delicatessen opened in Notting Hill. They have since opened three more establishments, selling some of the best takeaway food in London. Together Yotam and Sami have also co-authored several cook books.
Their culinary style is bold and often influenced by Middle Eastern flavours. This scrumptious salad comes from their book Jerusalem and came highly recommended by my daughter Catherine. The pan fried pita croutons idea is one you can use in other salads. You could do them with or without the nuts and use walnuts, pecans, pine nuts or macadamias to ring the changes. You could also use halved raisins if you don’t have any dates.
1 Tbs white wine vinegar
½ medium red onion, thinly sliced
100g pitted dates, cut into 1cm pieces
30g unsalted butter
2 Tbs olive oil
2 small pitas, split in two horizontally then torn into 3-4cm pieces
75g whole almonds (not skinned), roughly chopped
2 tsp Sumac
½ tsp chilli flakes (I used dried crushed whole chillies)
150g baby spinach leaves, washed and dried
1-2 Tbs lemon juice
salt
Place vinegar, onion and dates in a small bowl, add a pinch of salt and mix well. Leave to marinate for 20 mins then drain off any remaining vinegar and discard.
Heat butter and half the oil in a medium frying pan. Add pita and almonds and cook, stirring all the time, for 4-6 mins over medium heat until golden. Watch carefully the nuts don’t burn. Remove from heat and mix in the sumac, chilli and ¼ tsp salt.
To serve, mix spinach leaves with the pita and almonds. Add the dates and red onion, the remaining Tbs of oil, lemon juice to taste and another pinch of salt. Taste for seasoning and serve immediately in one large salad bowl or on individual plates.
Serves 4-6 as a side salad or 2 as a main course
Note: Sumac is a Middle Eastern ground spice available in ethnic markets and gourmet grocers.
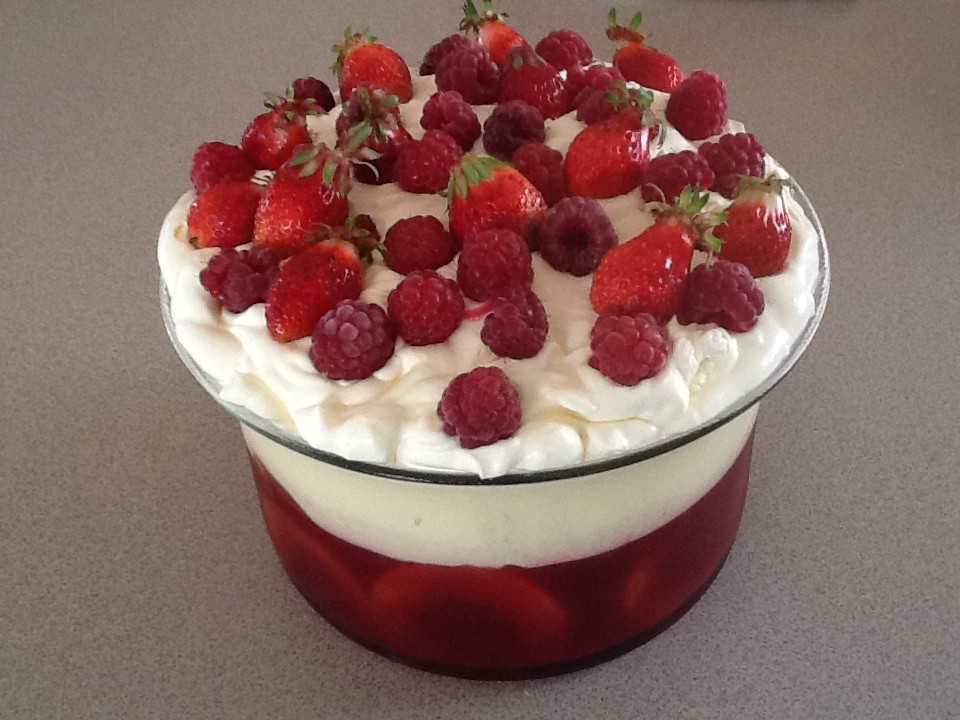
When I was growing up in England a trifle was always served for special occasions – birthdays, high days and holidays and if we were entertaining special guests. If someone served trifle you knew you were getting the right royal treatment. The basic combination was always sponge fingers, a splash of sherry, fruit, raspberry jelly made from a packet, custard – the instant Bird’s Eye variety – and whipped cream.
Many years ago my friend Daphne served a real raspberry jelly and I was blown away. Made from sieved raspberries, sugar and gelatine, it was nothing like the packet variety. So when I make a trifle these days I make real raspberry jelly and crème anglaise, instead of the fake custard of my youth. If you’re in a hurry use a couple of packet of bought raspberry jelly – see the notes.
You can use fresh or frozen raspberries to make the jelly. I usually use frozen berries as they’re cheaper and available all year round. You just need a few fresh ones to garnish – which in this photo came from our garden – and I added a few strawberries to add a touch of green. I prefer not to add sherry, as my mother always did, as I don’t want anything to detract from the intense raspberry flavour of the jelly.
Funny how the French call custard crème anglaise, when many Brits grew up on the packet variety as I did. British housewives got used to using Bird’s Eye custard powder during WW2, when eggs were rationed and hard to come by. In my recipe for crème anglaise I use whole eggs rather than just the yolks, so I add some cornflour because you want the custard to be nice and thick.
The end result is even more delicious than my childhood memories. Suffice it to say that Matthew, who was put off British desserts such as custard, rice pudding and tapioca as a result of spending several years at boarding school in England, comes back for second helpings.
Base: 8 lady finger (Savoiardi) sponges 1 large can peach halves or slices in natural juice or 4 large fresh peaches or nectarines, peeled and halved Jelly: 1 kg raspberries, fresh or frozen 3-4 Tbs sugar, or to taste 2 Tbs powdered gelatine Crème Anglaise: 1 cup cream (250 ml) 2 cups milk (500 ml) 2 to 4 Tbs sugar, to taste (I use 1 Tbs) 2 tsp vanilla essence 4 eggs 3 Tbs cornflour To finish: 250 ml whipping cream Fresh raspberries to garnish (+ a few strawberries if liked)
Start the trifle the day before serving.
Base: Arrange lady fingers in the bottom of a glass dish – see note below. They might fit better in your dish if you cut them in halves. Arrange the peaches over the sponge. I used peach halves and arranged them around the edge of the dish standing up, with the cut faces against the glass. If using fresh peaches they need to be very ripe and peeled.
Jelly: Thaw raspberries if frozen. Push them through a sieve, discarding any pulp which won’t go through. Add enough water to the raspberry juice/puree to make up to 800 ml and sweeten to taste. Sprinkle gelatine over half a cup of water then zap in the microwave to dissolve. Mix gelatine mixture into raspberry mixture, then pour gently over the peaches and sponge fingers. The sponge fingers will float to the top, but keep pushing them under so they soak up the jelly. Refrigerate until set.
Crème anglaise: In a non-stick saucepan heat cream, milk, sugar and vanilla essence until almost boiling. Beat eggs and cornflour with a balloon whisk in a bowl, then pour in the hot cream mixture and whisk to combine. Pour back into the saucepan and continue to cook, stirring constantly with a wooden spatular which has a flat base, until the custard has thickened and will coat the back of the spatular. Be careful as you don’t want scrambled eggs. Cool a bit then carefully pour over the raspberry jelly. Cover and chill overnight.
To finish: Whip cream until thick – it should double in volume – then carefully dollop over the top of the trifle. Decorate with fresh berries.
Serves 8-10
Variations: use strawberries instead of raspberries in the jelly.
Instead of making the raspberry jelly you could place the fruit on top of the sponge layer (300g raspberries will be enough) then make up 2 packets of bought raspberry jelly and pour that over. Use fresh or frozen raspberries or strawberries and some canned or fresh peach halves, or leave out the peaches altogether and just use berries.
Note: the dish I used in the photo was a bit small. A larger one with a wider mouth would have made the trifle less deep and easier to serve. It was a bit difficult to get to the bottom layer, but we managed!
Woolworths was selling 400g Toblerones for half price so I bought a couple and put them in the pantry (trying to forget they were there) until I came up with inspiration for a new dessert.
By using good quality bought vanilla ice cream you can make this parfait in a jiffy. If you have time to make your own ice cream so much the better. While you could make this in an ordinary loaf shape, using a triangular tin looks snazzier, especially as Toblerones are that shape. You can buy them online.
If preferred, leave out the chocolate coating. This chocolate sauce recipe is an old family favourite. Great to have in the fridge to serve with ice cream or waffles, though one batch doesn’t last long if you have kids around, or even grown up kids!
2 litres good quality vanilla ice cream
1 x 400g Toblerone chocolate bar Chocolate Coating:
200g dark or milk chocolate
2 Tbs vegetable oil Chocolate Sauce: ½ cup sugar
½ cup water
4 Tbs cocoa
2 Tbs golden syrup
Large knob of butter
1 tsp vanilla essence
Remove ice cream from freezer and spoon into a large bowl. Leave to stand for a few minutes while you chop the Toblerone into small chunks. Not too long as you don’t want the ice cream to melt. Thoroughly mix Toblerone into ice cream. Line loaf tin (triangular or rectangular) with plastic wrap, leaving the excess hanging over the sides. Fill with ice cream mixture, pushing down and smoothing the top. Cover with the plastic wrap then freeze several hours or overnight.
Chocolate Coating: Remove parfait from freezer, tip out (you may need to hold a hot towel over the base to loosen it), peel off the plastic wrap and place on serving dish. Meanwhile melt chocolate in a bowl over simmering water and mix in the oil. Working quickly cover the parfait with melted chocolate. Put back in the freezer to set.
Chocolate Sauce: Choose a large pan because this sauce has a tendency to boil over. Place all ingredients, except butter and vanilla essence, in pan. Mix with a whisk to remove lumps, then boil for 5 minutes without stirring. Cool for 10 minutes. Stir in butter and vanilla. Reheat before serving and serve warm not hot.
To serve: Remove parfait from freezer for about 10 minutes before serving. Slice with a large sharp knife dipped into very hot water. Serve with the chocolate sauce.
Serves 12
Note: if you can’t buy golden syrup substitute corn/glucose syrup or honey.
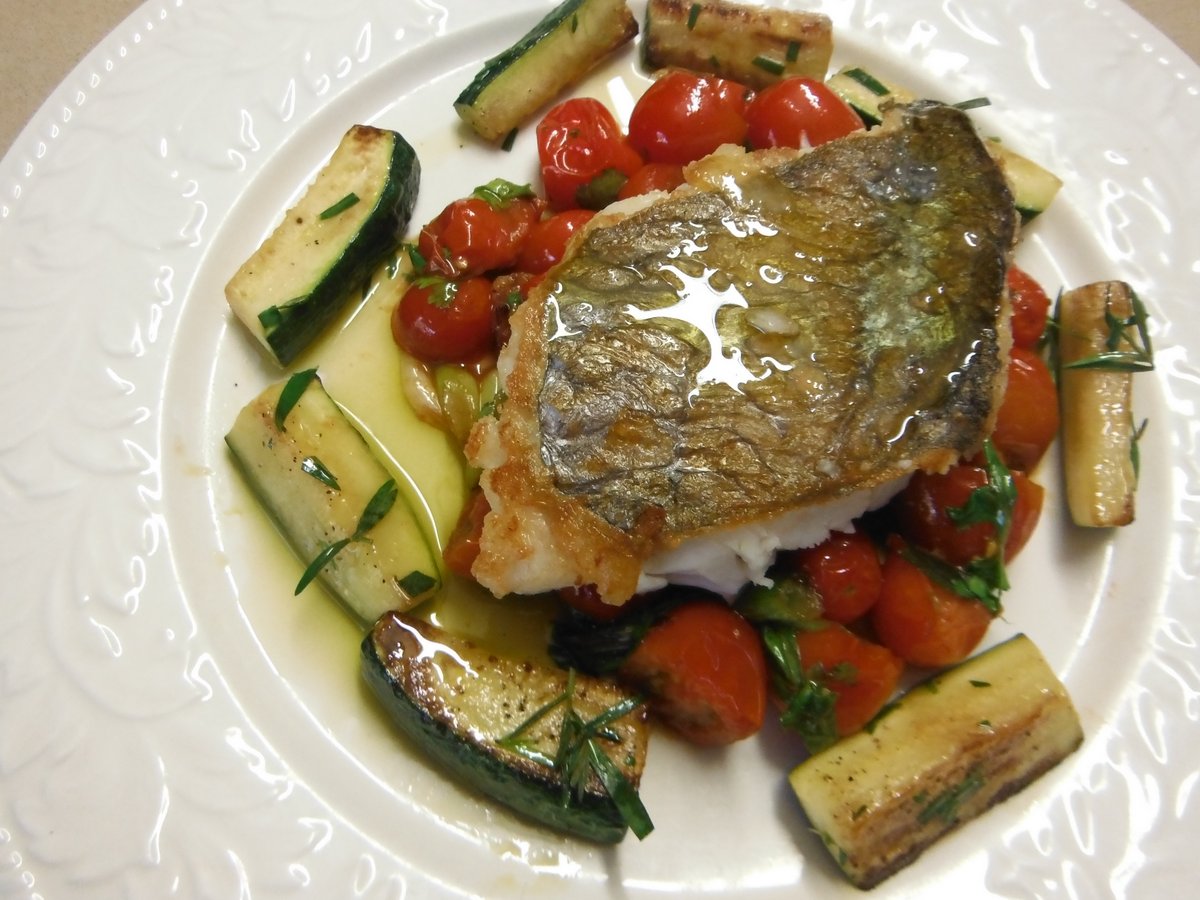
My favourite fish recipes are simple ones like this. With lots of cherry tomatoes in the garden I’m putting it on the menu about once a week at the moment.
2 x 150g thick fish fillets with skin (e.g. snapper, cod, blue grenadier)
2 Tbs olive oil
125g cherry tomatoes, halved
4 spring onions, thinly sliced on the diagonal
Small handful chopped fresh herbs (coriander, parsley, basil)
1 Tbs white balsamic vinegar
Pinch of sugar
Salt and freshly ground black pepper
Dry fish with paper towels then season with salt and pepper on both sides. Spread one Tbs olive oil over the base of a non-stick frying pan and lay fish fillets on top, skin side down. Turn the heat on to medium and slowly heat the pan and cook the fish until the skin is golden and crisp. Turn fish over and cook for about a minute on the other side or until just cooked. Remove from pan to a warm plate and cover with a large saucepan lid to keep warm while you make the sauce.
Add 1 Tbs oil to the pan with the spring onions and cook over moderately high heat, stirring, for a minute. Add tomatoes and cook for another minute, stirring. Finally add vinegar and cook for another minute. Tomatoes should be soft but still keep their shape. Season with the salt, pepper and sugar, stir in the herbs and divide between two warm plates. Place fish on top, skin side up. Serve with a green vegetable such as pan fried zucchinis (courgettes) as shown in the photo.
Serves 2
Note: white wine vinegar or verjuice can be used instead of white balsamic vinegar.
When Tetsuya Wakuda opened his restaurant Tetsuya’s in Sydney in 1989 it was a culinary breath of fresh air and Australians were literally wowed. By combining French cooking techniques he had learnt while working at Kinsela’s for Tony Bilson with the pure clean flavours of his heritage this smiley Japanese chef was an overnight success.
The Sydney Morning Herald Good Food Guide gave Tetsuya’s their highest possible award every year from 1992 until 2009. Not bad for a guy who arrived in Sydney in 1982 with nothing more than a small suitcase and a love of food.
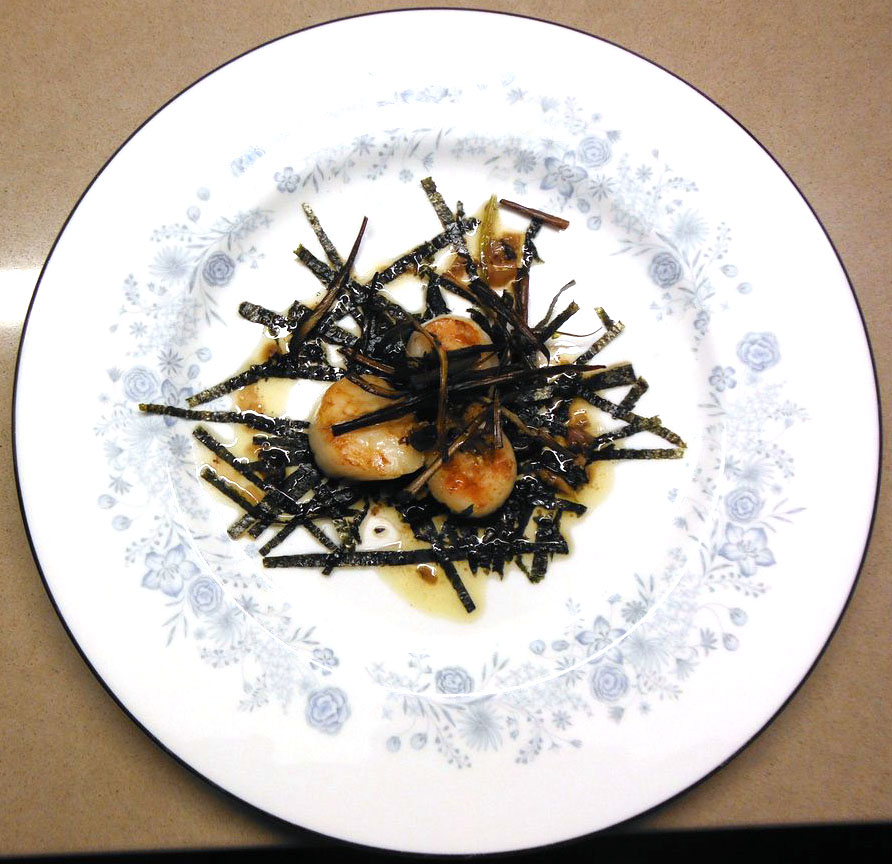
This delicious starter appeared in a newspaper article about Tetsuya some 20 years ago and I cut it out. I’ve been making it ever since and it always goes down well. Scallops are quite expensive but three per person is enough for a light starter.
24 large scallops, without roe
1 leek, white part only, cut into fine julienne
oil to fry
3 Nori sheets, very finely sliced*
Dressing:
¾ cup vegetable or light olive oil
¼ cup salted black beans, finely chopped*
¼ cup finely chopped shallots
3 Tbs rice wine vinegar*
2 Tbs mirin*
1 clove garlic, crushed
2 Tbs fresh ginger, grated or finely chopped
1 tsp soy sauce
Thaw scallops if frozen and dry thoroughly with paper towels. Place dressing ingredients in a jar with a lid and shake well. Taste and add a bit more rice wine vinegar if necessary, to get the right balance. Deep fry leeks in hot oil until crispy then drain on paper towels. Recipe can be made ahead to this stage.
To serve, arrange the nori “straw” on 8 serving plates. Brush or lightly spray scallops on both sides with some oil, then sear on a hot pan or griddle for 1-2 minutes each side or until golden. Arrange three scallops on each plate, drizzle with some of the dressing, then garnish with the crispy leeks.
Serves 8
Notes: * ingredients marked with an asterisk are available from Asian food stores. Leftover dressing will keep for a week or two in the fridge and goes well with grilled fish or chicken. The black beans come in tins or packets. If you buy them in a tin, drain and rinse well. Large raw prawns can be used instead of scallops and if you don’t have any nori, serve on a bed of finely shredded rocket.