Bread & Butter Pudding with Caramelised Bananas

Matthew doesn’t like bananas or custard, especially if they’re served together as Banana Custard. A few years at boarding school in the UK during his impressionable youth is to blame. He describes over-ripe greenish-black banana slices mixed into lumpy, cold, congealed custard. You can just imagine it.

I grew up in the UK with my mother’s version of this traditional British dessert – hot, creamy custard with perfect slices of banana folded through, all topped with lightly toasted coconut flakes. Delicious.

In the early days of our marriage I tried to persuade Matthew that my banana custard was different. He would love it. But no-way-José could I persuade him to try it. I had never been to boarding school, he said, so I had no idea how strongly these culinary disasters were etched on his soul.

For the first six months of married life we lived in a granny flat tacked onto a large house which was owned by an elderly widower. From time to time we invited Tom for dinner and once or twice he invited us back. He wasn’t much of a cook and his repertoire was fairly basic. Roast hogget (somewhere in age between lamb and mutton) with vegetables, cooked in a pressure cooker to within an inch of their lives, by which time they all took on the same greyish hue, followed by a simple dessert.

As I helped Tom to clear away the dishes from the main course I spotted the dessert on the sideboard. Banana Custard. This is going to be fun, I thought.

Now it’s important to point out that Tom had quite clearly used the boarding school recipe book. And for those who don’t know him, I should also point out that Matthew was about five years into what ended up being a successful career in diplomacy.

Tom served three generous helpings of Banana Custard. Matthew glanced at me and rolled his eyes. He could see I was on the verge of uncontrollable laughter. He was not even slightly amused. Well, the diplomat rose to the occasion and you would have been proud of him. He ate the lot, then looked at me with an expression of relief that clearly said “Thank God that’s over.”

I really don’t know what came over me, but I heard myself saying “That was delicious Tom, Banana Custard is Matthew’s absolute favourite.” And with that Tom served Matthew a huge second helping.

By the time he had finished the second bowl Matthew was looking somewhat green around the gills. But he didn’t follow through with his threat to kill me when we got home, divorce proceedings were avoided and we’re still together 40 years later.

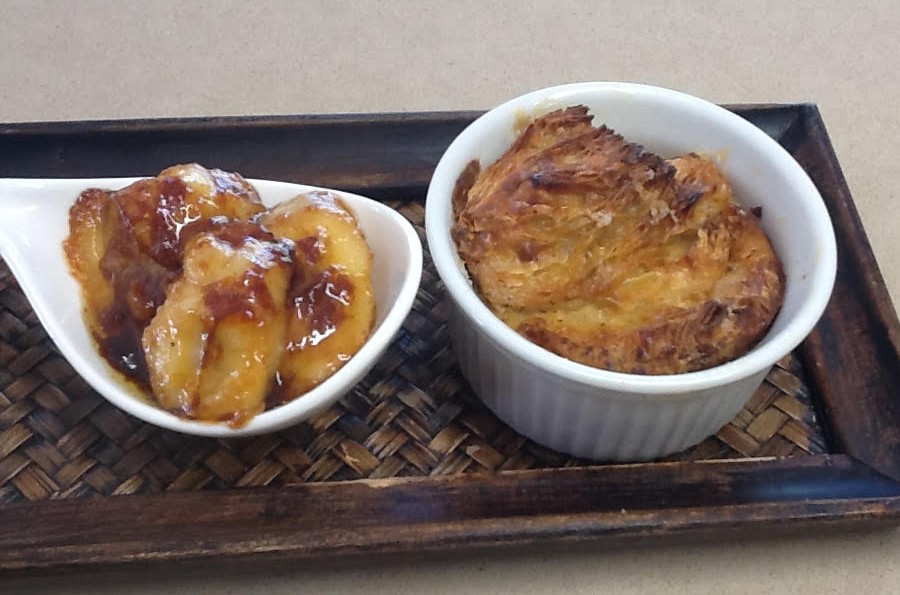
This Bread and Butter Pudding with Caramelised Bananas, from one of my favourite UK food writers Nigel Slater, is a 21st century update on Banana Custard. So delicious even Matthew eats it!

Bread & Butter Pudding with Caramelised Bananas

300g brioche or croissants
1 vanilla pod or 1 tsp vanilla extract
6 cardamom pods
½ tsp cinnamon
400ml can coconut milk
400ml milk (or use half milk and half cream)
3 eggs
3 Tbs brown sugar
Pinch salt
A sprinkle of sugar for the topping
For the bananas:
2 Tbs sugar
50g butter
4 large bananas
Zest of one orange
To serve:
Thick cream (optional)

Preheat oven to 180°C. Butter a baking dish (approximately 22cm) or 6-8 individual ones. Lightly toast the sliced brioche or halved croissants until golden-brown. Arrange in dish, overlapping slightly. If using small dishes you will need to cut the brioche or croissants into smaller pieces.

Remove cardamom seeds from the pods and crush with a mortar and pestle or a rolling pin. Slice the vanilla bean in half and scrape out the seeds. With a hand whisk, beat cardamom, vanilla seeds or extract, cinnamon, both milks, eggs and sugar in a large bowl until combined.

Pour custard over brioche and sprinkle a little more sugar over the top. If using individual dishes you can fill them to almost the top, but you may have some custard left over. Dessert can be made ahead to this point and kept in the fridge for several hours. Bake for 25 minutes or until nicely browned and the custard is just set. Cool for 10-15 mins then serve with the bananas.

For the bananas: cut in half length-ways or slice on the diagonal. Heat sugar in a large non-stick frying pan. Swirl it around and when melted and caramel colour add the butter and swirl to combine. Add the bananas and turn to coat them with caramel on both sides. Cook very briefly or they will become too soft. Sprinkle with orange zest and serve immediately with the bread pudding and thick cream if liked.

Serves 6-8

Gluten-free Christmas Pudding

Christmas puddings keep for months and improve with age, so I usually make them in October or November. One for the family and a couple of smaller ones to give to friends. I collect pudding bowls in second hand stores for this purpose.

In cooler climates you can store them in the pantry, but in Australia I prefer to keep them in a second fridge we have in the garage. Sometimes I make two large puddings and keep one to serve at a “Christmas in July” dinner party. And if that doesn’t happen the second pudding will still be delicious the following Christmas, more than 12 months after it was made!

I decided to adapt my traditional recipe to make it gluten-free. Still perfectly nice for everyone, but suitable for a growing percentage of the population who don’t tolerate gluten. A food processor makes quick work of the breadcrumbs, grated apple, chopped figs and pureed orange. Some people don’t like mixed peel and glacé cherries, so I have included substitutions for these.

The number of puddings you end up with from this recipe depends on the size of the bowls – two big ones, or one big one and two small ones, or four small ones. This year I doubled this recipe and ended up with 8 puddings of various sizes as you can see in the photo.

Gluten-free Christmas Pudding150g currants
200g dried figs, stalks removed then chopped
200g sultanas
200g raisins
60g dried mixed peel or dried apricots, chopped
60g glace cherries or dried sour cherries
60g blanched slivered almonds (or walnuts or macadamias)
2 Granny Smith apples, unpeeled, cored & grated
½ tsp salt
1 tsp each ground cinnamon, nutmeg and cloves
350g gluten-free bread made into crumbs in food processor
4 eggs, beaten
150-200g dark brown sugar
½ cup brandy or rum
1 cup gluten-free beer or sherry
1 Tbs black treacle
250g unsalted butter, melted
1 tsp bicarbonate of soda
1 orange, blitzed in food processor, skin and all
Brandy Butter to serve

Place all the ingredients in a very large bowl and mix well. Choose 2 to 4 pudding bowls, depending on size, grease lightly then fill with pudding mixture. They don’t rise much so bowls can be filled almost to the top.

Cover puddings with buttered baking paper, butter side down, and tie down with string. Steam puddings (see below) for about 5 hours or until evenly browned. Cool then cover with a fresh piece of baking paper or wrap in foil and store in the fridge.

Steaming the puddings: If you have a very large stock-making saucepan you can steam two puddings at the same time, one on top of the other. Place a metal trivet or an upturned saucer in the bottom of the pan, then the first pudding, then an upturned side plate and then the second pudding. Pour hot water in to come halfway up the bottom pudding. Hopefully everything fits and you can put the lid on. If not use two pans, or make half the recipe and just one pudding. Turn on the heat and let the water simmer for 5 hours, topping up from time to time as necessary.

The other way to steam puddings is in the oven. Choose a deep roasting pan into which the puddings all fit. Pre-heat oven to 150°C. Place bowls in roasting pan. Pour in enough hot water to come halfway up the bowls. Cover the entire roasting pan with foil and crimp it under to seal. You may need two pieces if it’s not very wide. Place in the oven for 5 hours. Check after 2  hours and top up the water as necessary.

To serve, steam puddings again for 2-3 hours and serve with Brandy Butter.

Makes 2-4 puddings

Millefoglie di Melanzane

We recently spent a week in Sicily where we hired a car and drove from Palermo to Patti, Taormina, Syracuse and back to Palermo. We spent a couple of days in each of these cities, soaking up the history and visiting some amazing churches and ancient monuments in the area. I won’t go into details of where to stay and what to do – there’s plenty of information on Trip Advisor and we found most of our accommodation on Airbnb.

Lots of windy roads and a few crazy drivers made the driving something of a challenge. The weather was considerably hotter than we had expected for mid-September, so we avoided sight-seeing in the middle of the day. Nonetheless we had a great time and would definitely recommend a trip to this part of Italy.

On the whole, the food in Sicily is good, especially if you’re a fan of pizzas and pasta. Finding good places to eat other dishes was more of a challenge. Everything we ordered which involved eggplants (aubergines) was delicious – stuffed eggplant, capponata (an Italian version of ratatouille with eggplant as the main ingredient) and eggplant fritters to name a few.

Our favourite city was Syracuse, especially the old city located on the island of Ortigia. Our favourite restaurant in Syracuse was Notre Dame where we ate outside enjoying the balmy evening weather. This bistro is run by an enthusiastic young couple and serves an interesting menu including this delectable Millefoglie di Melanzane – a layered Eggplant Terrine. It was so good we went back twice and on the second occasion the chef gave me the recipe.

Millefoglie di Melanzane

Canola or a mild-flavoured olive oil
2 large eggplants or 3 smaller ones
400g red capsicum (peppers)
2 eggs
2 sheets gelatine, soaked in water or 3 tsp powdered gelatine
Salt and pepper to taste

Cut capsicum into quarters and remove stalks and seeds. Cook in boiling, salted water for 15-20 mins or until soft. While still hot place them in a food processor with the eggs, gelatine, salt and pepper and process until smooth.

Meanwhile slice eggplants thinly lengthwise, discarding the first cut which is just skin. Heat some oil in a large frying pan and fry the eggplant slices, about 3 at a time, until golden brown and cooked on both sides. Add more oil as required. Drain on paper towels.

Choose a silicone loaf pan which doesn’t need to be lined, or line a metal one with non-stick baking paper. Starting and ending with a layer of eggplant slices, layer the eggplant and red capsicum puree in the loaf pan. Cover and refrigerate overnight.

Using a serrated knife, cut terrine into 4-6 thick slices and serve with some lightly dressed rocket leaves.

Serves 4-6

No-Bake Raspberry Cheesecake

We were staying with Catherine in Newcastle for a few days when she said “Oh by the way, we’re invited to a BBQ lunch tomorrow and we’re taking a dessert. What shall we make?”

We found cream cheese, cream and 2 punnets of raspberries in the fridge and a few other ingredients in the pantry. The result was this delicious no-bake cheesecake which was popular with the adults and kids alike.

Make this the day before serving.

IMG_0695300g white chocolate
500g Philadelphia-style cream cheese (at room temp)
300ml thick cream
3 Tbs caster sugar
1 cup fresh or frozen (thawed) raspberries
½ cup red jam (preferably raspberry)
About 12 sweet biscuits or sponge fingers
To serve:
1-2 cups fresh raspberries
Honey to drizzle

Melt chocolate in a bowl over simmering water. In another bowl, with electric beaters, beat cream cheese, cream and sugar until smooth. Add melted chocolate and mix well.

Line a loaf tin with plastic wrap, leaving a generous overhang. With a fork, mash 1 cup raspberries with the jam on a plate. Spread half the cream cheese mixture in the loaf tin. Spread the berry mixture over the top. Then spread the rest of the cream cheese mixture over the jam mixture. Arrange a single layer of biscuits or sponge fingers over the surface, pushing them in slightly – this will be the base. Rectangular or square ones are easier than round ones. Bring excess plastic wrap over the top to cover, then refrigerate overnight.

No-Bake Raspberry Cheesecake

To serve, tip cheesecake onto serving plate and remove plastic. Arrange raspberries over the top and drizzle with honey.

Serves 12

Variation: use strawberries instead of raspberries

Rhubarb and Strawberry Crisp

You have to add quite a bit of sugar to rhubarb to make it palatable. But a friend told me recently that she cooks it with a little salt instead of sugar and eats it with Greek yoghurt.

So as we had rhubarb in the garden I decided to experiment. I mixed all the rhubarb pieces with a little melted butter (or you could use olive oil) then rolled half in some raw sugar and arranged them on a baking sheet lined with baking paper. I then added a little salt to the remaining rhubarb, mixed it well and arranged the sticks on the other half of the baking sheet. I baked them in a hot oven for about 15 mins or until they were “al dente”.

unnamed (2)

The sweet ones were, as you would expect, quite sweet and delicious served with meringues and whipped cream. Interestingly the salty ones were not unsweet – the salt having brought out the natural sweetness of the fruit. Serve for breakfast or dessert with thick Greek yoghurt and a drizzle of honey if you need more sweetness. They would also go well as a garnish for duck. chicken or pork.

My third experiment was to cook the rhubarb with some fruit cordial such as Ribena – an idea I read somewhere once and filed away in my head. The result was a delicious ruby red compote. Rhubarb and strawberries go well together, so I used the compote to make a tasty variation on a traditional rhubarb crumble.

500g rhubarbunnamed (1)
½ cup blackcurrant or raspberry cordial (see note)
1 punnet strawberries
125g butter
4 Tbs brown sugar
4 Tbs self-raising flour
4 Tbs rolled oats
4 Tbs slivered or flaked almonds
1 tsp vanilla essence

Wash and trim rhubarb and cut into 2- 3cm lengths. Place in a bowl, add the cordial and mix. Cover and microwave for 5 mins or until cooked but not mushy. Meanwhile wash and hull strawberries and cut them into quarters. Grease a small round or oblong pudding dish. Mix strawberries with rhubarb and spread over base. Melt butter then mix in sugar, flour, oats, nuts and vanilla. Spoon evenly over the fruit, using a fork to close any gaps and give an even covering. Can be made ahead to this stage.

Pre-heat oven to 180°C. Bake for 25 mins or until golden brown. Serve warm with vanilla ice cream, cream or labneh flavoured with a little icing sugar and a few drops of vanilla essence.

Serves 4-6

Notes: if preferred double the rolled oats and leave out the nuts or double the nuts and leave out the oats. Instead of using fruit cordial to cook the rhubarb, use a little water and sugar to taste.

Chocolate and Ginger Cheesecake

Chocolate and Ginger Cheesecake
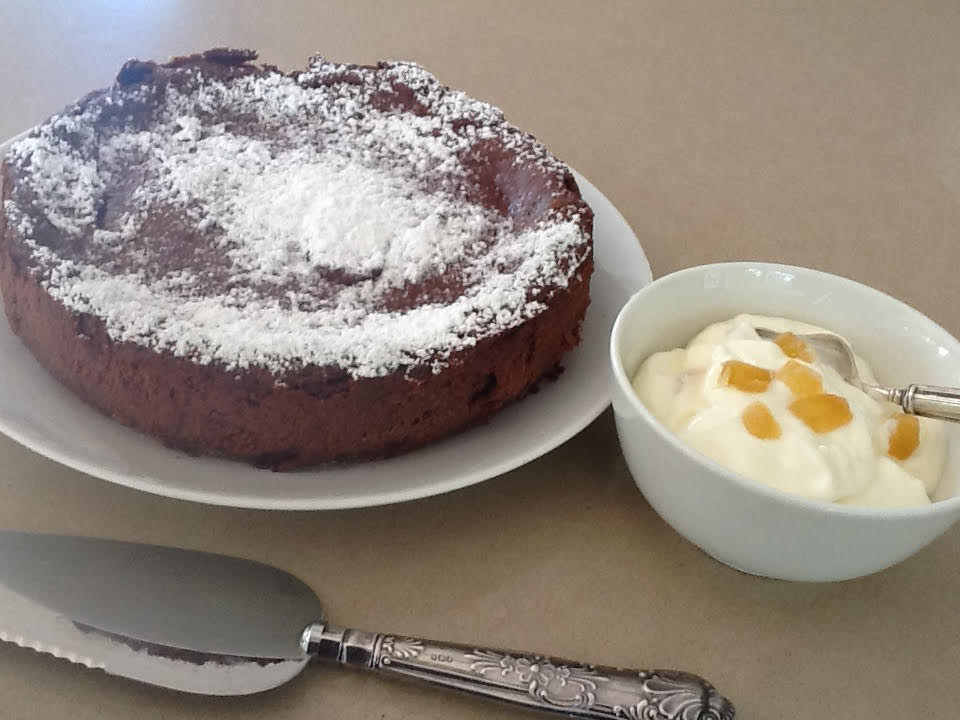
With a food processor this dessert is quick to make. Really chocolatey and not too sweet.

Crust:
125g Ginger Nut biscuits
50g butter
Filling:
250g mascarpone or sour cream
500g ricotta cheese
2 eggs
2-3 Tbs sugar, to taste
150g dark chocolate, melted in microwave
2-3 Tbs crystallised ginger, chopped
To serve:
Labneh
Icing sugar
Crystallised ginger or stem ginger in syrup, chopped

Pre-heat oven to 170°C. Place biscuits in food processor and process until fine. Melt butter in microwave, mix in biscuit crumbs then tip into a 20cm (8″) springform pan which has been greased and bottom lined with baking paper. Press the mixture evenly over the base of the tin. Bake for 10 mins.

While biscuit crust is cooking make filling. Wipe out the food processor. Place all ingredients except ginger in processor and mix till well combined, stopping to scrape down the sides halfway. Add chopped ginger and process briefly, just to combine.

When ready remove biscuit base from the oven tip in the filling and smooth the top. Return to the oven for 30 mins or until just set, but still a bit wobbly when shaken. Cool cheesecake, then refrigerate several hours or overnight.

Dust the top of the cheesecake with icing sugar. Serve with Labneh or whipped cream, with some chopped ginger and a little icing sugar mixed in.

Serves 10-12

Kheema with Peas

When we had a house full of kids I made recipes using minced beef all the time. Lasagne, spaghetti bolognese, shepherd’s pie – they are all great ways to feed a family with just half a kilo of mince. Now there’s just the two of us I only buy mince occasionally – otherwise we’d be forever eating leftovers!

This recipe was posted recently by Jill Dupleix, a well-known food writer in Australia. I love anything with peas so I decided to make it, adjusting the quantities to go with half a kilo of mince rather than the 750g she used.

It’s very quick to make and sure to be a hit with all the family.

Kheema with Peas1 Tbs oil
1 large onion, chopped
1 large clove garlic, crushed
500g minced lamb or beef
1 Tbs tomato paste
1 Tbs grated ginger
½ tsp each turmeric, coriander
¼ to ½ tsp chilli powder or flakes (optional)
1 tsp garam masala
Two cups water or stock
Salt and freshly ground black pepper to taste
1 tsp sugar
2-3 cups frozen peas
To serve:
Chopped fresh coriander
Steamed Rice
Indian bread such as Roti
Plain yoghurt

Heat oil in a large frying pan and cook onion and garlic until soft but not brown. Add meat and cook for 5 mins, breaking it up as you go, until browned. Add remaining ingredients except peas and simmer for 20 mins. Add peas and cook for a further 5-10 mins, or until peas are cooked and Kheema is thick.

Sprinkle with chopped coriander and serve with rice, bread and plain yoghurt on the side. Warm the Indian bread by heating for a minute or so on each side in a dry frying pan over moderate heat.

Serves 4

Variations: use a drained can of beans or chick peas instead of the green peas.

Cubanos

We recently watched a movie called Chef starring Jon Favreau who was also the writer and director.

Favreau plays an amiable chef who works in a high-end restaurant in Los Angeles. The owner of the restaurant – a controlling, nasty piece of work played by Dustin Hoffman – forces the chef to cook dated dishes he doesn’t want to cook and they end up getting a very bad review.

Encouraged by his Cuban ex-wife the chef quits his job and starts a mobile food truck business with a friend, selling Cuban fast food. It’s a huge success, the chef reconnects with his 10 year old son, remarries his gorgeous ex-wife and everyone lives happily ever after.

The toasted sandwiches called “Cubanos” looked so delicious I decided to do some research and make them for Café Cat. They’re pretty high in cholesterol so I wouldn’t recommend eating them every day!

Cubanos were often eaten for lunch by workers in sugar mills and cigar factories in Cuba in the late 1800s. They are now popular in various parts of the United States, especially Miami.

In the movie they made them with Cuban bread, which looked like a wide baguette called a Flute in France. Any roast pork will do, but if you want authentic Cubanos make the Cuban version below.

I once watched Nigella Lawson make toasted sandwiches in a frying pan with a chopping board and a weight on top. I couldn’t help wondering why she didn’t jusr buy a proper sandwich press. They aren’t expensive and allow you to make toasted sandwiches with any kind of bread or wrap.

Cubanos

Baguettes or large bread rolls
Sliced roast pork (see below)
Sliced ham
Sliced Swiss cheese
Sliced dill pickles
Your favourite mustard
Melted butter

Split baguettes lengthwise and cut into sandwich lengths – about 15cm – or split the bread rolls. Heat up a sandwich press until hot. On one side of the sandwich place a layer of ham, a layer of sliced pork, a layer of sliced cheese and then a few sliced pickles. Spread mustard generously on the other half, then stick the sandwich together. Brush both sides with melted butter, place in sandwich press, close lid and cook until the bread is golden brown and cheese is melting. Serve immediately.

Cuban Roast Pork

2-2½ kg pork shoulder roast
4 tsp salt
1 cup lemon, lime or Seville orange juice
1 bay leaf
3 tsp oregano
3 tsp ground cumin
15-20 cloves garlic, depending on size, peeled

Stab meat all over with a sharp knife to make deep holes.  In a food processor or blender blend salt, fruit juice, bay leaf, oregano and cumin. Pour over the pork and rub in well, then cover and refrigerate overnight.

Next day remove pork from fridge and let come to room temperature for a good hour. Preheat oven to 140°C, tip off the marinade and reserve. Roast meat, uncovered for 4-5 hours or until well done. Baste often with the reserved marinade and turn occasionally. Remove from the oven and put the pork on a plate or cutting board. Cover loosely with foil and leave to rest. This pork is enough to feed a crowd with Cubanos.

Lemon Drizzle Cake Salvation Creek

As we were heading off to Europe last year for an extended holiday my friend Karen lent me a few good books.

We thoroughly enjoyed The House at Salvation Creek, a delightful memoir by Susan Duncan, but soon realised that it’s actually a sequel to her first book. So when we got back I borrowed the first one, Salvation Creek, from the local library.

Pittwater, where the narrative takes place, is described by Wikipedia as “a tide-dominated drowned valley estuary 40 km north of Sydney.” Duncan’s descriptions of the native flora and fauna are exceptional. A friend in Denmark to whom I recommended the books said “Susan Duncan brought some warm Australian sunshine into the bleak, grey days of a Danish winter.”

Duncan’s relationship with her ageing mother is something many readers will relate to. And of course I loved all the references to what she was cooking. This is her recipe for Lemon Drizzle Cake. Very easy and a real crowd pleaser.

Zest of 1 large lemon
250g caster sugar
250g butter (at room temp)unnamed
4 large eggs
250g SR flour
Pinch salt
1 level tsp baking powder
Syrup:
Juice of 1 large lemon
150g sugar

Preheat oven to 160ºC and prepare a round or square cake pan. I used a 22cm (9″) square silicone pan, so there was no need to grease and line the bottom with baking paper, which you need to do with a metal pan.

Place lemon zest and sugar in food processor and blitz for 1-2 mins. Add butter and mix for a minute then add the eggs, sifted flour, baking powder and salt. Mix for 1- 2 mins then stop to scrape down the sides and mix for another minute. Scrape into cake pan, spread out evenly and bake for 30-40 mins or until golden and well risen. Test cake with a toothpick inserted in the middle, which should come out clean, but don’t overcook the cake. Remove from oven and pour over the syrup while hot, using a knife to distribute it evenly. If liked serve garnished with flowers e.g. potato vine as in photo.

Syrup: heat lemon juice and sugar together in a small saucepan to form a syrup.

Serve for afternoon tea or as a dessert with whipped cream and some berries. Duncan suggests mixing some icing sugar and passionfruit pulp into the cream.

Serves 16

Notes: The original recipe says to cook the cake for 30-35 mins but mine took 40. The recipe can be doubled and it makes very good cupcakes. She says it freezes well.


Roast Chicken with Jerusalem Artichokes and Lemon

The Jerusalem artichokes from our veggie garden are ready to use, so I went through some cookbooks looking for new ways to use them. This easy and delicious recipe comes from Jerusalem by one of my favourite chefs, Yotam Ottolenghi and his partner Sami Tamimi.

I’ve made a few slight adjustments. The original recipe uses fresh tarragon which I didn’t have, so I used marjoram which grows profusely in our garden and doesn’t get hit so early by the frost. It worked well. If you don’t have any saffron add a couple of teaspoons of turmeric. Ottolenghi says to peel the artichokes but it’s such a fiddly job we just scrub them and trim off any black bits.

If you don’t have Jerusalem artichokes substitute parsnips, pumpkin, sweet potatoes or ordinary potatoes.

500g Jerusalem artichokes
8 chicken thighs, skin-on, trimmed
Juice of 1 lemonDSCF1116
12 garlic cloves, peeled and sliced
12 shallots, peeled & halved lengthwise
1 lemon, halved lengthwise & sliced thinly
1 tsp saffron threads
¼ cup olive oil
¾ cup water
1½ Tbs pink peppercorns (optional – see note)
1 Tbs fresh thyme leaves or 2 tsp dried
2 Tbs fresh marjoram or tarragon, chopped
1 to 2 tsp salt, to taste
Freshly ground black pepper
To serve:
Extra chopped herbs
Extra lemon juice

Scrub and trim the artichokes, then cut into even chunks about 2cm thick. Place in a saucepan and cover with water. Bring to the boil and simmer for 10 mins, drain. Place all ingredients in a large mixing bowl and mix well with hands. Cover and leave to marinate for 1-2 hours or overnight.

Preheat oven to 220°C. Tip chicken and marinade into a rectangular roasting tin (mine is non-stick) and spread out evenly. Cover with foil and roast for half an hour. Remove foil, baste chicken with the juices, then roast for a further 15 mins or until cooked and nicely browned.

Serve garnished with some extra chopped fresh herbs and a squeeze of lemon juice.

Serves 4

Note: pink peppercorns are not really peppercorns at all (look them up on Google if you’re interested). You can buy them in specialty shops such as The Essential Ingredient. They go well with smoked salmon, Gravlax, chicken and fish dishes.