Kedgeree was a popular Anglo-Indian breakfast dish in Victorian England, introduced by army officer’s wives returning from India. The main ingredients are rice, fish and eggs. Some versions add curry paste and other ingredients, but when we were growing up my mother made a very simple kedgeree which I still make.
Before I married I lived in a little bed-sit in Geneva which only had two hotplates and no oven. I could get home from work, absolutely starving and have a bowl of kedgeree ready in 20 minutes.
Filling and satisfying, for me it’s pure comfort food. It’s easy to eat with a fork in front of the TV with a glass of chilled white wine. The perfect dish for a quiet evening at home when you don’t want to spend much time cooking and don’t feel like anything heavy or spicy. You can use smoked fish or canned salmon or tuna instead of the prawns. But for me the prawns really make the dish, so I always keep some handy in the freezer.
The second kedgeree recipe uses the same basic ingredients of rice, fish and eggs, but is more complicated and spicy. Equally nice, just totally different.
1 cup long-grain rice (such as basmati or jasmine)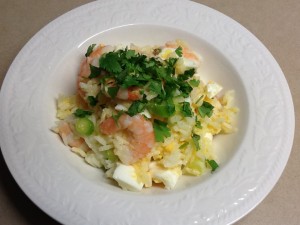
2-3 eggs
250-300g peeled cooked prawns
2 spring onions, thinly sliced
25g butter, cut into small pieces
salt and freshly ground black pepper to taste
chopped fresh parsley or coriander
Put the rice on to boil and the eggs on to hard boil. I have been known to throw them all in the same pan, for speed! When cooked drain rice thoroughly and place in a warm serving bowl. Add butter and stir till melted. Then add the eggs, peeled and roughly cut up, the spring onions, prawns and season to taste. Serve immediately sprinkled with chopped herbs.
Serves 2
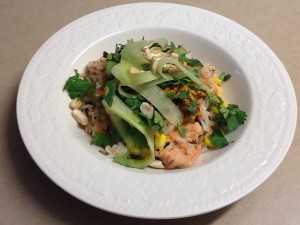
Asian Kedgeree
 1 cup long grain rice (such as basmati or jasmine), cooked
1 Tbs vegetable oil
2 spring onions, thinly sliced
1-2 tsp grated ginger
½ small red chilli, seeded and finely chopped
1 tsp brown sugar
100g smoked trout, flaked
½ cup canned corn, drained
About 1 Tbs fish sauce – to taste
Scrambled egg topping:
1 Tbs vegetable oil
2-4 tsp curry paste or powder, to taste
2 tsp brown sugar
½ small red chilli, finely chopped
2-3 tsp tamarind paste, to taste
2-3 tsp fish sauce, to taste
2 eggs, beaten
To serve:
1 small Lebanese cucumber, peeled and cut into ribbons (discard seeds)
2 Tbs cashew nuts or peanuts, lightly toasted and roughly chopped
Chopped fresh coriander and lime wedges
Make scrambled eggs first. Heat oil in a small frying pan and cook curry paste for a minute, stirring. Add sugar, chilli and tamarind paste and cook for 1-2 mins. Add egg and cook until lightly scrambled. Lastly add fish sauce to taste and remove from heat.
Heat oil in a large frying pan and cook spring onions, ginger, garlic and chilli stirring for 1-2 mins. Add rice, sugar, trout and corn. Cook for 1-2 mins or until heated through then add fish sauce to taste. Divide kedgeree between two serving bowls, top with the scrambled egg and garnish with cucumber, nuts, lime wedges and coriander.
Serves 2
Variations: use frozen corn or peas instead of canned corn. Cook in boiling water for a few minutes then drain. Use smoked salmon, canned salmon or tuna instead of the smoked trout.
Note: if you can’t find tamarind paste add a good squeeze of lemon or lime juice instead.

 2 Tbs instant coffee powder & ½ cup boiling water