Big Mary’s Raspberry Jam

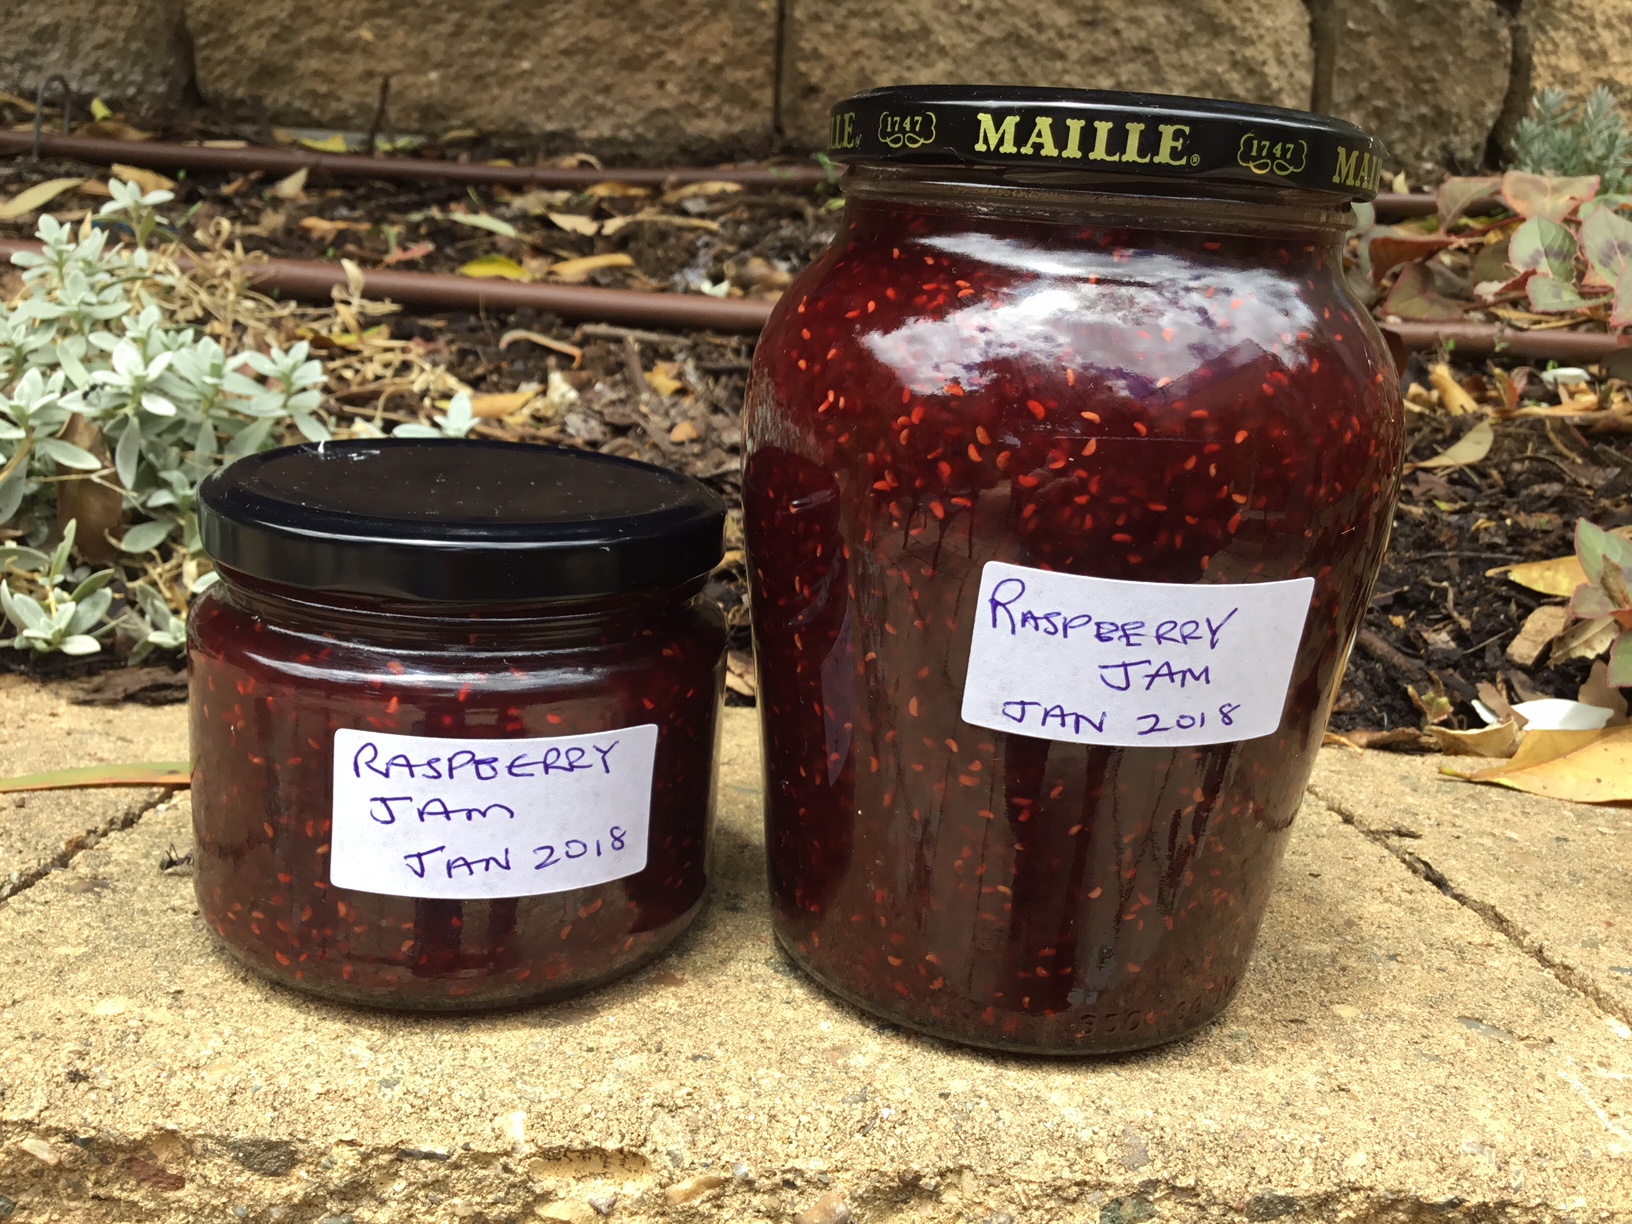
There are three good times to make raspberry jam. Firstly with fresh raspberries if you have them growing in your garden. Secondly with fresh raspberries in mid-summer, when they’re at their lowest price in your local farmer’s market or supermarket. And thirdly with frozen raspberries. So basically any time is a good time as frozen berries work just as well as fresh ones and they’re considerably cheaper. With frozen fruit the jam ends up a darker red, as you can see in the photo.

Holidays spent as a child with my Dad’s cousins at Hill House, a dairy farm in the very north of England, had a huge impact on my love of cooking. From Great Auntie Vina and Little Mary I learnt how to bake a full repertoire of cakes and pastries. And my Dad’s cousin Big Mary, so-named in order to distinguish her from her brother’s wife Little Mary, who was much shorter, taught me to make raspberry jam. She also gave me the recipe for a spectacular dessert called Mexican Bombe which I make for special occasions. It’s not on the Weight Watchers diet, but everyone loves it.

Unopened jam keeps for several months without refrigeration, but Big Mary said it was best to make a kilo or even half a kilo of raspberries into jam and keep the rest in the freezer to make another batch at a later date. Freshly-made raspberry jam, she said, was much nicer than jam made a few months ago.

With experience you will know when jam has reached setting point, just by looking at it. If you’re new to jam-making the best way to check for setting point is as follows. Put a saucer in the freezer before you start, so it gets very cold. When you think the jam may have reached setting point (which varies according to the acidity of the fruit from 5 to 20 minutes) place a scant teaspoonful onto the cold saucer then put it back in the freezer for a minute or until cold. To avoid over-cooking most cookbooks suggest you take the jam off the heat while you’re testing. Push the cold jam with your finger and if it’s ready you will see that it’s starting to gel. If it’s not ready it will still be liquid when cold.

Raspberry jam is delicious on fresh bread or with croissants. It’s also the perfect topping for thick Greek yoghurt or as a filling for a sponge cake, with some whipped cream. And if you ever make too much to eat yourself, it makes the perfect gift.

1 kg raspberries (fresh or frozen)
800g sugar
A small knob of butter

Place raspberries in a large heavy-bottomed pan with sugar and heat gently, stirring, until sugar has dissolved. A preserving pan is best. Bring to a rolling boil and boil for 5 minutes or until setting point is reached. Stir in a knob of butter which will dissolve any scum.

Pour into hot sterilised jars. Place lids on while jam is hot. Store in dark cupboard and refrigerate after opening.

To sterilise jars, wash thoroughly in hot soapy water, rinse in hot water, then drain. Microwave on High (without lids) for 2 minutes just before you pour in the jam, so they are still hot. Dry the lids and put them on immediately.

Variations: For strawberry jam add the juice of a lemon when cooking the fruit. I like to use small strawberries for jam rather than the huge ones you can buy these days. For apricot jam start by cooking the fruit in 2-4 Tbs water (less if fruit is very ripe, more if not), then proceed as above, adding the juice of a lemon.

Makes 2-4 jars, depending on size of jars

Mushroom and Spinach Frittata

If you’re a regular reader of this blog you will have noticed that we like to give meat and fish a rest about once a week and go vegetarian.

A frittata is an egg-based Italian dish, similar to an omelette. A vegetable frittata makes a tasty light supper and any leftovers are nice cold the next day. Choose a medium sized non-stick frying pan (mine is 25 cm or 10 inches) with a metal handle, so it can go in the oven.

When the frittata comes out of the oven the metal handle will be very hot. I forgot and have the blisters to show for it.

Mushroom and Spinach Frittata

1 Tbs olive oil
60g butter
200g mushrooms, cut into quarters or sliced if large
1 clove garlic, finely chopped
About half a bunch of spinach
6 eggs
½ cup sour cream or fresh cream
Grated rind and juice of half a lemon
2-3 Tbs grated Parmesan cheese
1 tsp salt and freshly ground black pepper to taste
Sour Cream Sauce (optional):
½ cup sour cream
2-3 Tbs finely chopped parsley

Preheat oven to 180°C.

Heat half the butter and oil in the frying pan and cook the mushrooms and garlic over moderately high heat for 2 minutes, stirring, then transfer to a bowl. Strip the spinach from the stalks and discard the stalks. Tear the spinach into smaller pieces. Add to the frying pan with the remaining oil and butter and cook, stirring, for 2 minutes until wilted. Add to the bowl with the mushrooms.

In another bowl using a balloon whisk beat the eggs, sour cream, lemon juice and rind, grated Parmesan and salt and pepper. Pour into the frying pan, Scatter the spinach and mushrooms and any juices over the top. Place small pieces of goat’s cheese or feta all over the top. Place back on the stove until the frittata starts to set, then bake for 10 minutes, or until puffed and golden. Cut the frittata into wedges and serve with a mixed salad and the sour cream sauce.

Sour Cream Sauce: mix sour cream with chopped parsley.

Serves 2-3

Variations: use small broccoli florets instead of spinach; use Pecorino instead of Parmesan cheese; use a mixture of fancy mushrooms instead of the usual ones

Pasta with Prawns and Pepperoni or Chorizo

This recipe comes from my friend Ferne. She’s made it for me twice, once in Canberra and once in Brisbane where she now lives. Both times it was delicious.

Any kind of pasta will work, but my preference is to use fresh fettuccine, sold in most Australian supermarkets in 375g packets.

With a mixed salad and some fresh crusty bread, this recipe will serve 4.

375g fresh fettuccine
20g butter
250-300g pepperoni or chorizo, sliced
350g peeled raw prawns (weight after peeling)
Salt and freshly ground black pepper
2 cloves garlic, crushed
1 cup dry white wine
Juice and zest of 1 lemon
½ a fresh diced chilli, seeds removed, finely chopped
Handful chopped parsley
½ cup cream
Extra virgin olive oil to garnish

Cook pasta according to packet instructions then drain. Meanwhile heat butter in a large frying pan and cook pepperoni or chorizo for a few minutes, until starting to brown. Add prawns and garlic and continue to cook, stirring, until prawns turn pink. Add wine and lemon juice and cook over moderately high heat for 3-5 mins, to reduce the sauce by half. Add chilli and seasoning to taste. Mix in the cooked pasta, the parsley and cream. Divide between 4 bowls. Top with extra chopped parsley and drizzle a little oil around each serving.

Makes 4 servings


Turkish Green Rice

Cappadocia, in the middle of Turkey is well worth a visit. We stayed in Göreme in a cave hotel which had been carved out of the rock, but was nonetheless very comfortable.

Over the centuries the inhabitants of this region have carved out shelters, houses, churches and monasteries from the rocky outcrops, which are often described as fairy chimneys. The geology and history of the area is fascinating and in order to see the terrain from above we went on a balloon flight at dawn. One hundred and twenty balloons all taking off at about the same time is a sight to behold.

A Turkish passenger on our inward flight asked for a drink which the flight attendant poured from what looked like a two litre bottle of milk, but as he poured I could see it was much too thick to be milk. When I asked if I could “have what he’s having” the flight attendant looked sceptical. He said that usually only Turks asked for Ayran and I might not like it, so he gave me a little to try before filling up my glass. It’s basically plain yogurt watered down to pouring consistency, with a little salt added. Full of probiotics it’s really good you, so I drank it all the time while we were there. Delicious.

This was our third trip to Turkey and we felt perfectly safe. The people are friendly and helpful and the food is simple, but healthy and delicious. Lots of kebabs and grills, as well as vegetable dishes, salads and traditional casseroles cooked slowly in sealed clay pots. Thick yoghurt drizzled with local honey was my favourite dessert.

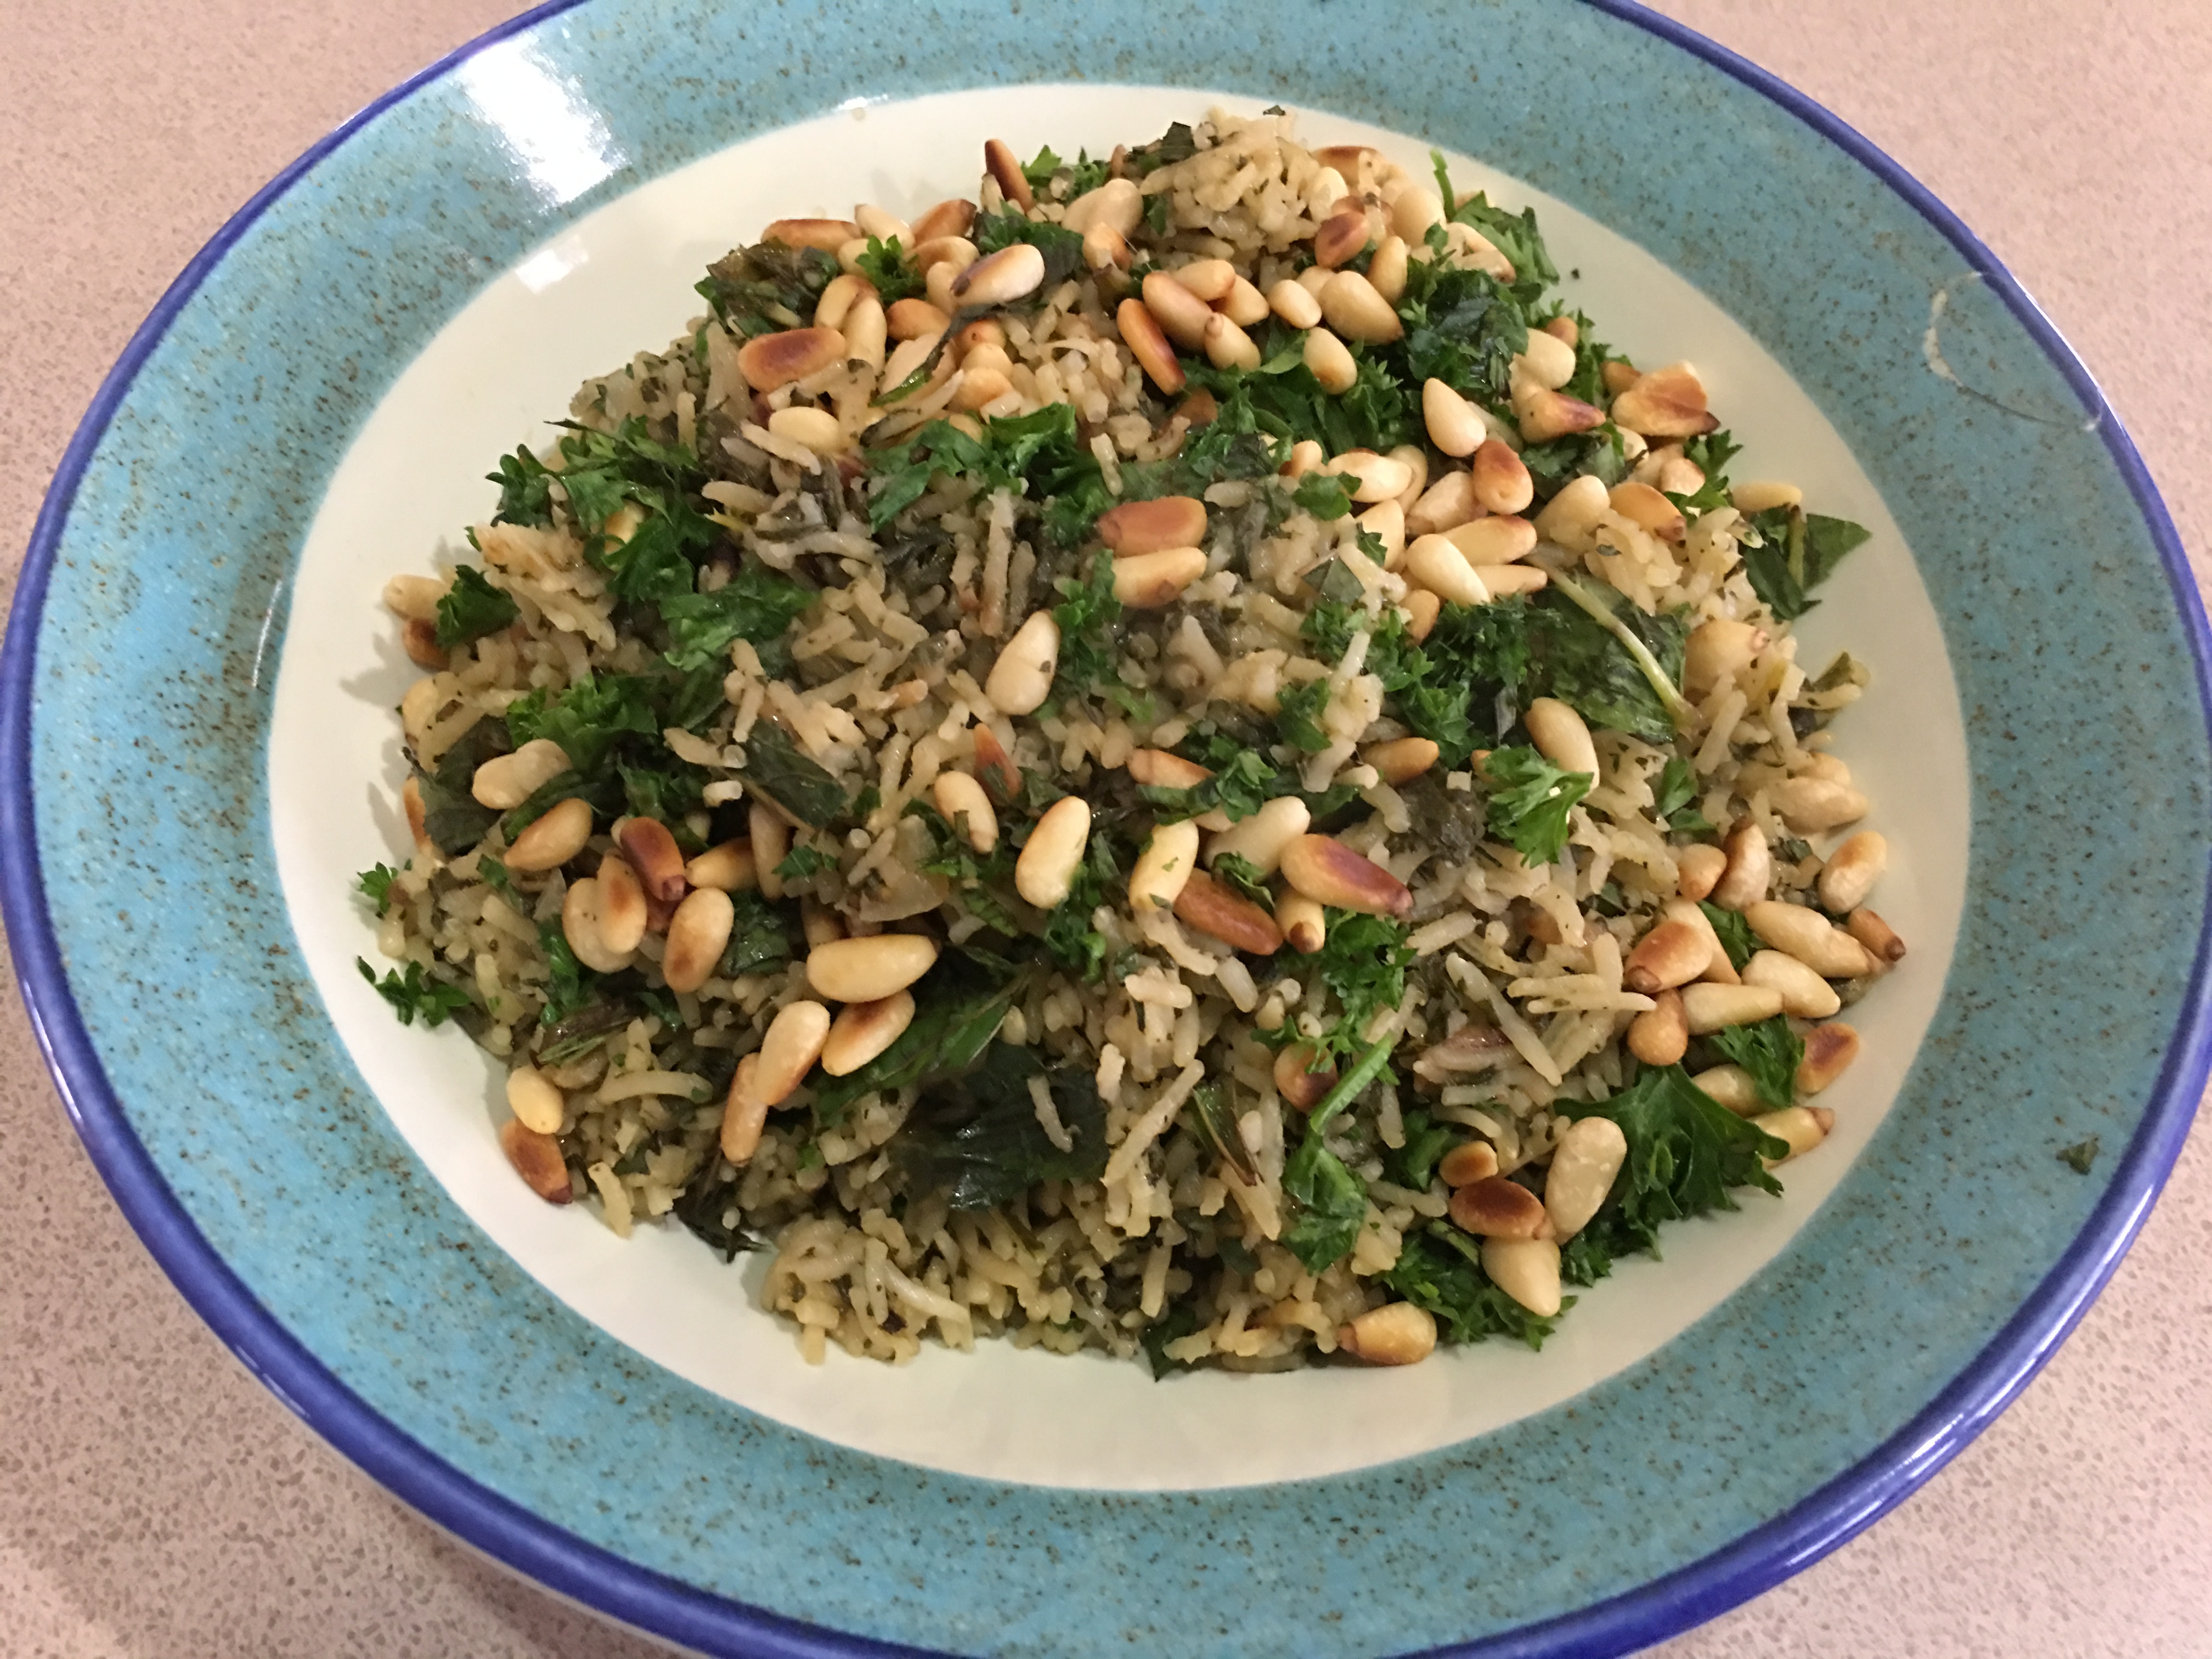
This rice recipe is from the inflight magazine on Turkish Airlines. It makes quite a lot so you may want to halve the recipe. Serve it with kebabs, hummus, Turkish bread and a salad of diced tomato, onion and cucumber.

2 cups long grain rice such as Basmati
1 packet frozen spinach or 1 bunch fresh spinach
1 onion, finely chopped
50g butter
3 cups water
Salt and freshly ground black pepper to taste
2-3 Tbs each finely chopped parsley and mint
2 Tbs pistachio nuts or pine nuts, lightly toasted in a dry pan

If using fresh spinach, remove leaves and discard stalks. Wash thoroughly. With just the water clinging to the leaves, place spinach in a large saucepan, cover and cook, stirring from time to time, for a few minutes or until wilted. Place in food processor and chop finely. You will need a generous cup or more of this chopped spinach, or use thawed frozen spinach. Quantities are flexible.

Heat butter in a large saucepan and cook onion until soft, stirring from time to time, and allowing it to brown slightly. Add rice, spinach, water, salt and pepper, bring to the boil, then cover and turn the heat as low as it will go. Cook for 20 minutes or until rice is cooked and has absorbed all the liquid. If not quite ready, turn off the heat and let it sit for a few minutes to continue cooking in its own steam. Stir in the chopped herbs. Check for seasoning and if liked add another knob of butter. Garnish with the toasted nuts.

Serves 6-8

Mango Kulfi

To make traditional Indian or Pakistani ice cream, known as Kulfi, you begin by cooking sweetened flavoured milk over a low heat, stirring continuously to stop it from sticking and burning, until the volume is reduced by half. The milk takes on a distinctive flavour due to the caramelization process and this is the base you use to make the ice cream.

Having read a few articles and recipes online, I decided to replace the cooked milk with what is called Manjar or Dulce de Leche in South America. If you can’t find this use a can of Nestle Caramel Top n Fill, which is readily available in Australian supermarkets.  Kulfi can be made in any flavour, but mango kulfi is very popular in India, so as I had a packet of frozen mango in the freezer I thought I would give it a try.

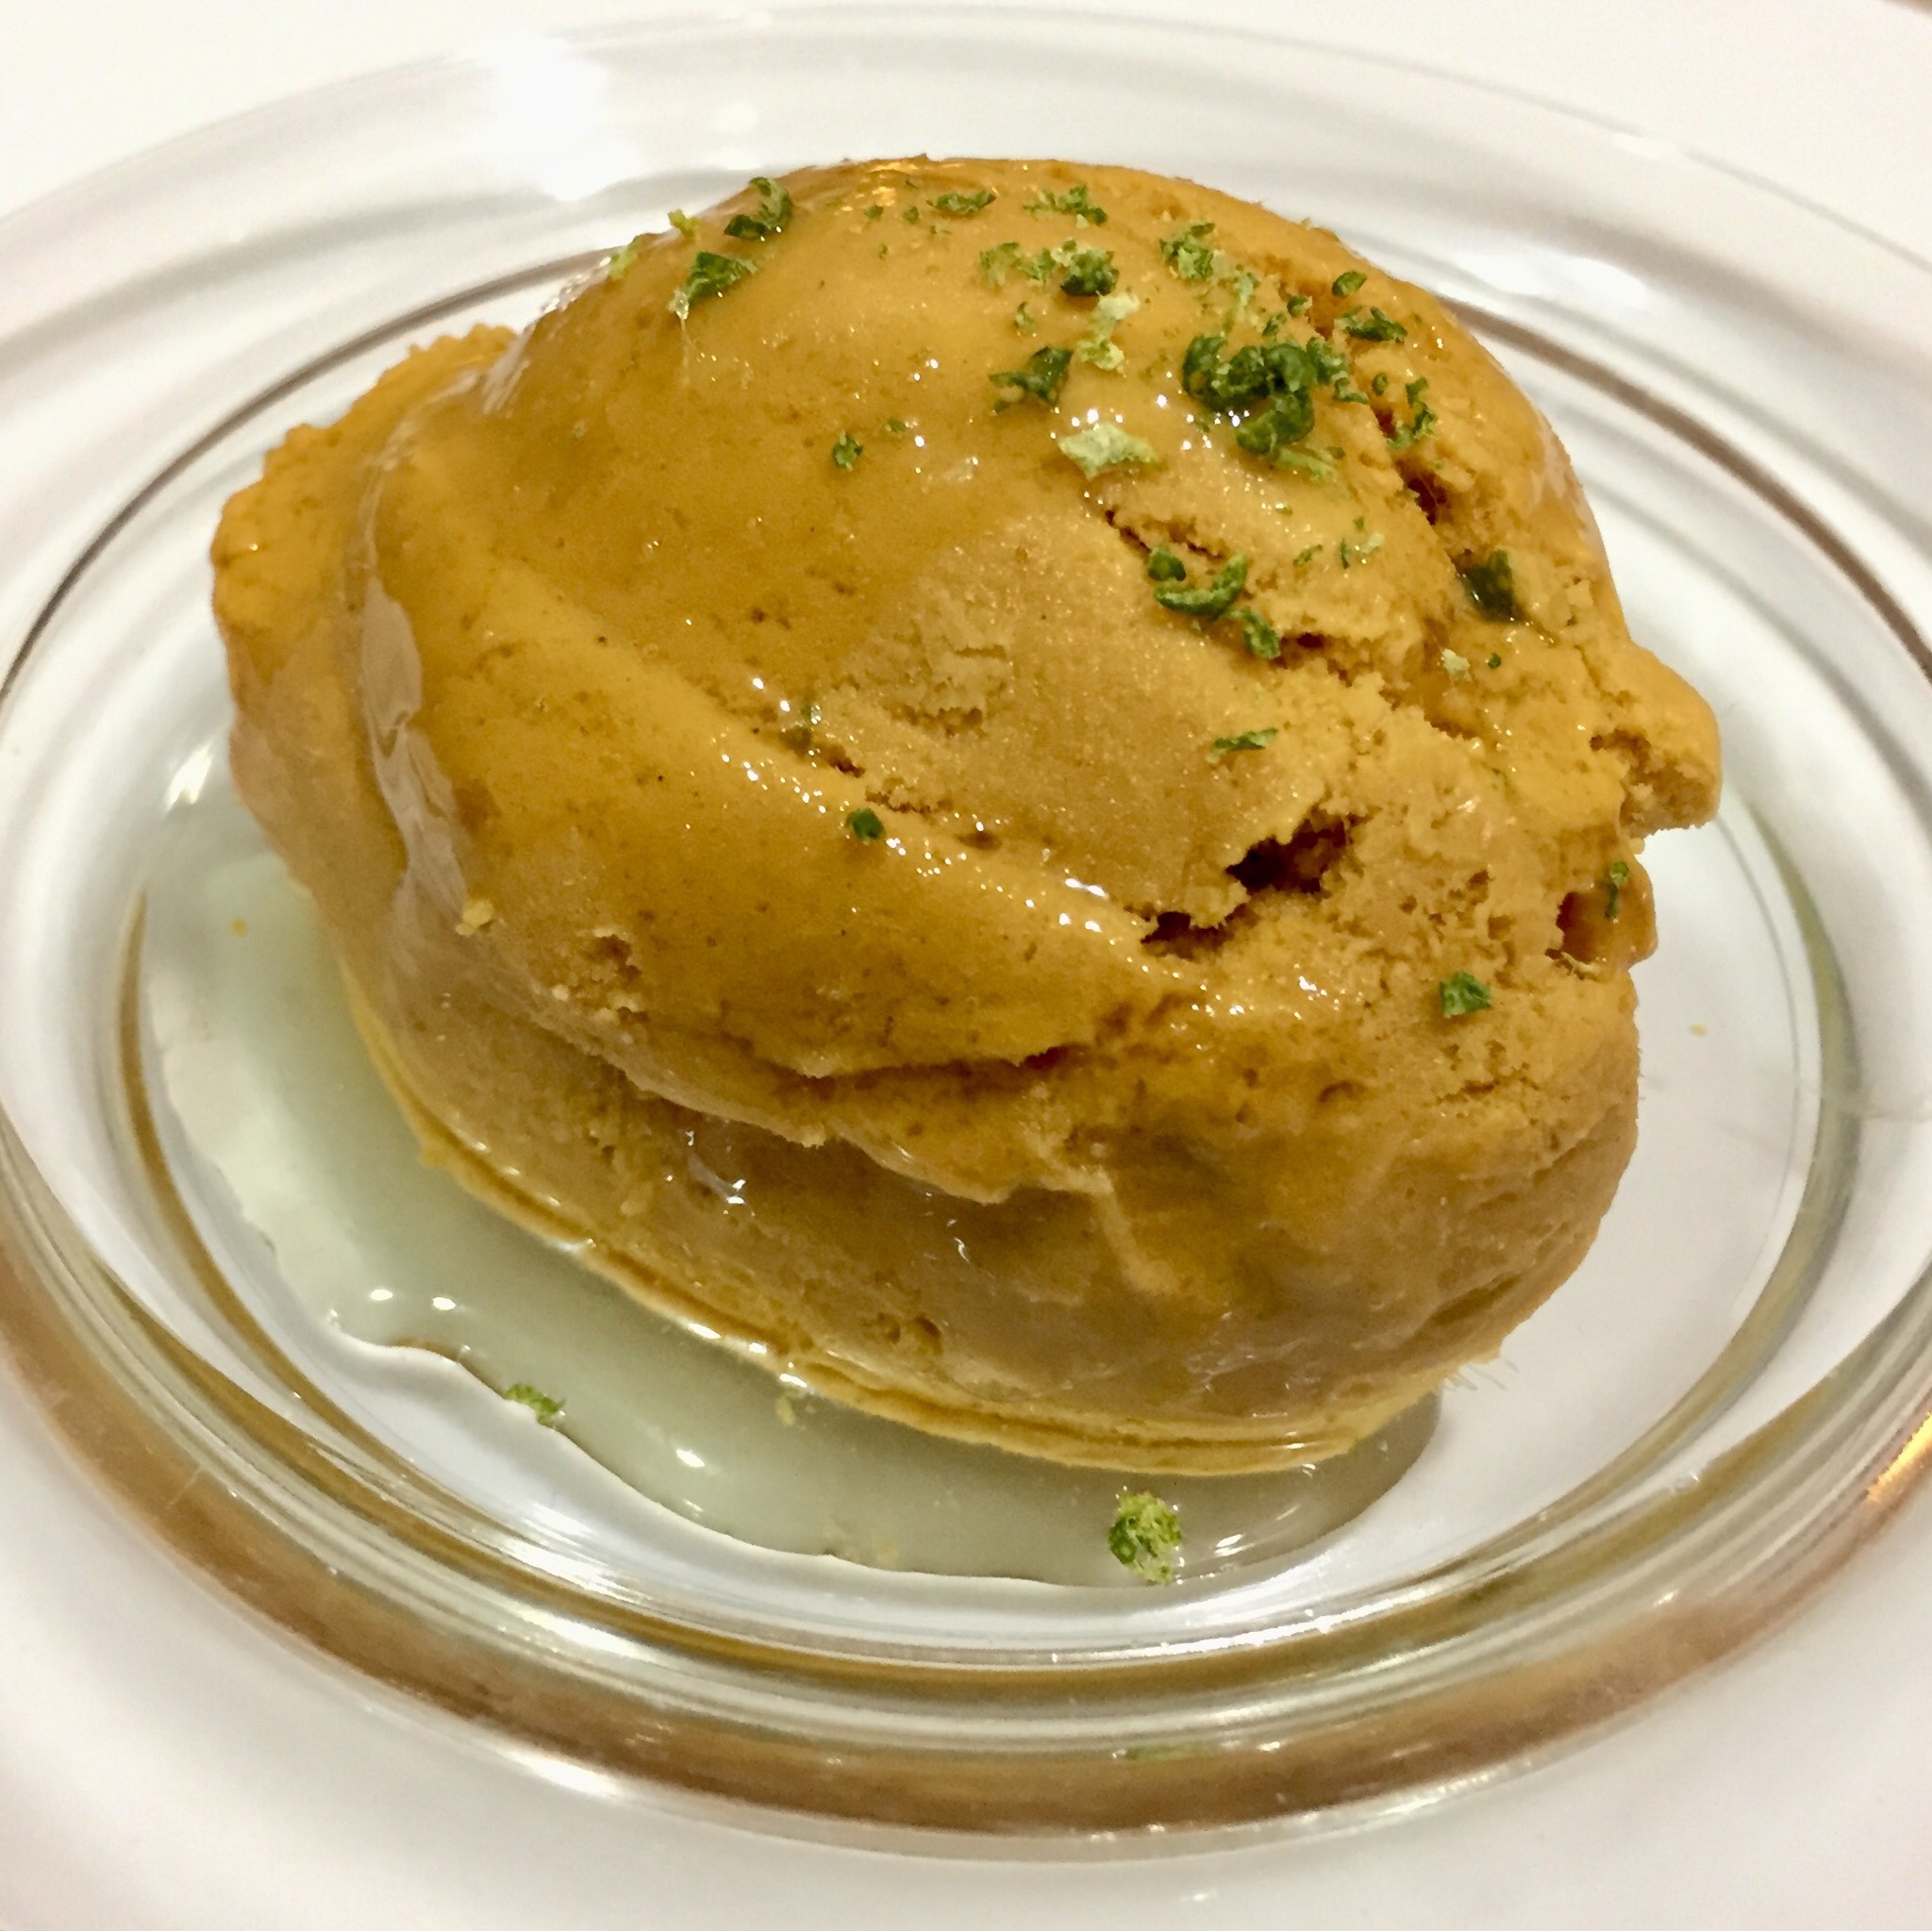
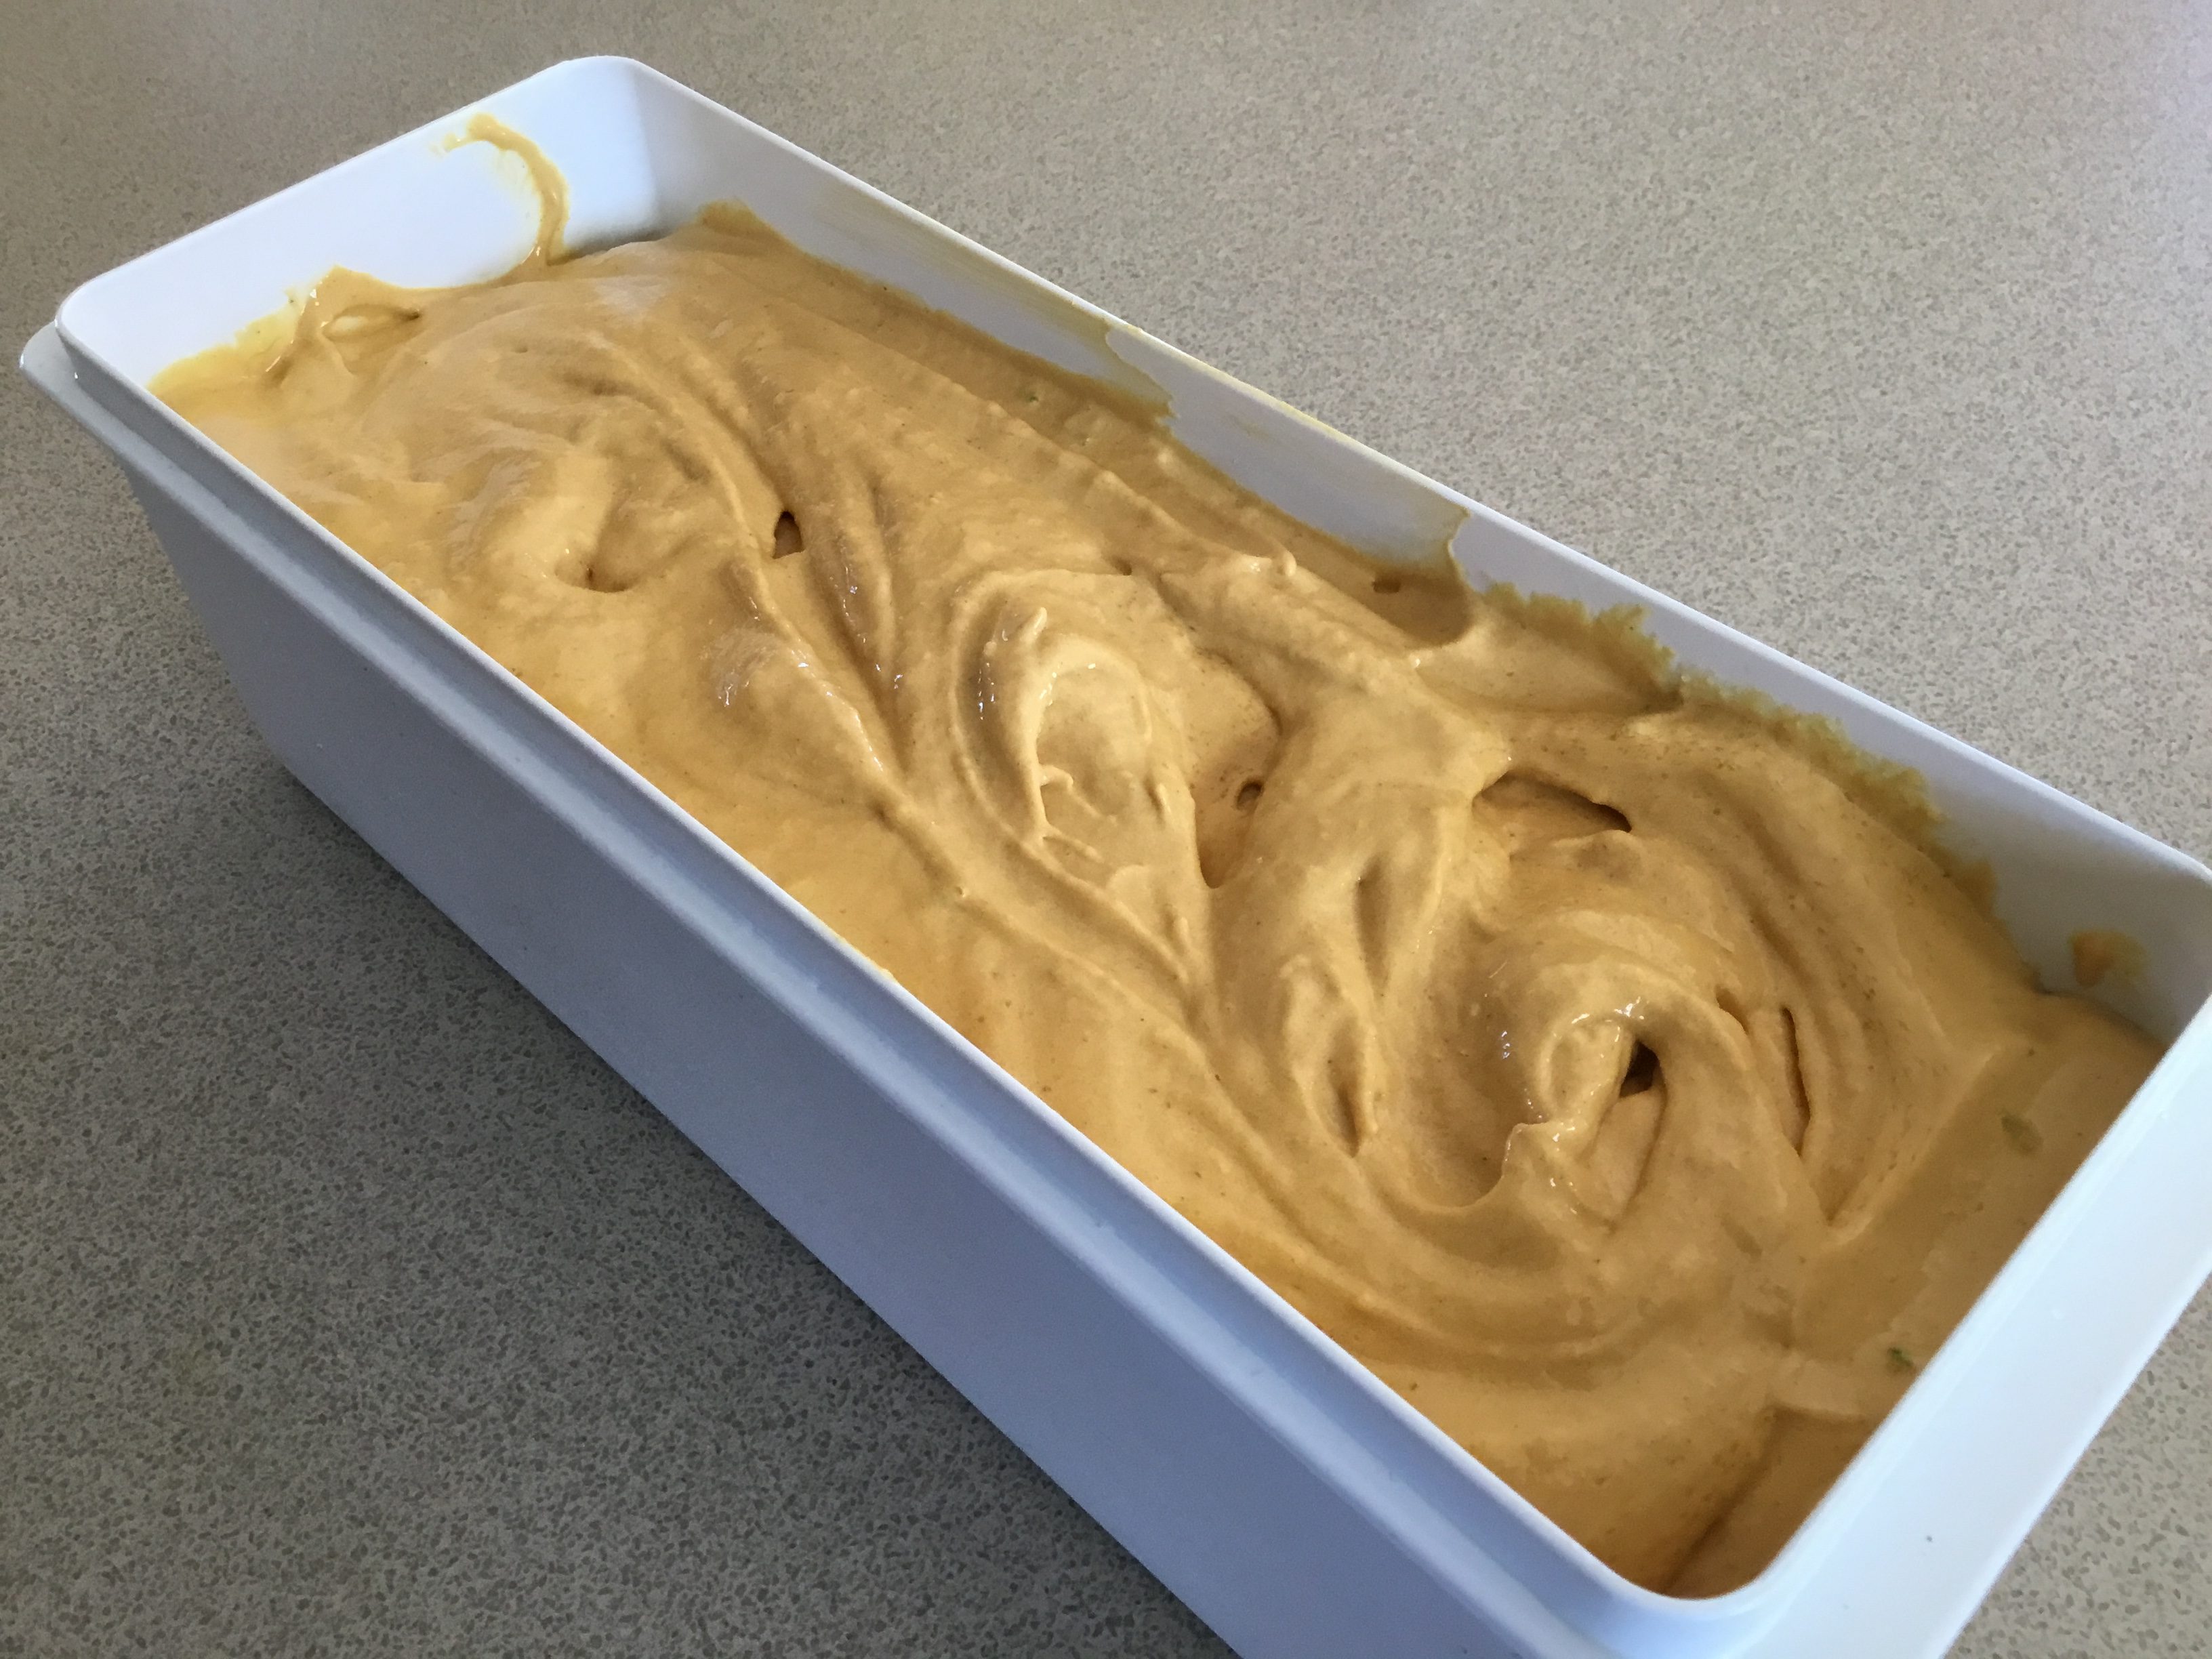
This method of making ice cream in a food processor with frozen fruit virtually turns your food processor into an ice cream machine. As the frozen fruit breaks up it freezes the other ingredients. As you can see from the photo of the Kulfi when it was ready to go into the freezer, it already had the consistency of ice cream. Quick Raspberry Ice Cream is another recipe on this blog which uses this speedy food processor method. You can use any frozen fruit but the pieces must be fairly small or the motor will struggle.

250g Dulce de Leche or Manjar (or 1 can Nestle Caramel Top n Fill)
300ml cream (thickened, whipping, double)
1kg frozen mango pieces (I bought mine at Aldi)
Ground cardamom to taste
Pinch of salt
Grated rind and juice of 1 lime (save a little zest for garnish)
Lime Syrup to serve (optional)
Juice of 1 lime
½ cup water
¼ cup sugar
Lime zest

Place Dulce de Leche or Caramel topping in food processor with cream. Process until mixed and then, with the motor running, slowly add the mango cubes through the feed tube. Depending on what size food processor you have, you may need to make the Kulfi in two batches. Mine was just big enough. Keep mixing until all the mango cubes have been pureed, stopping to scrape down the sides with a spatula from time to time. Add cardamom (half a teaspoonful then mix and taste and see what you think), the salt and the lime zest.

Scrape Kulfi into a plastic container, cover and freeze for 3-4 hours or overnight. Remove from freezer 15 mins before serving. Scoop into bowls, drizzle with lime syrup and garnish with a little lime zest.

Lime Syrup: Place lime juice, water and sugar in a small saucepan and heat to dissolve sugar. Continue cooking until reduced by a third to a half and syrupy. Cool.

Serves 8-10

Burrata with Rockmelon

The Fine Food Fair was on at the Convention Centre in Sydney last month. It runs over 4 days every September and alternates between Sydney and Melbourne.

That’s Amore Cheese makes Italian-style cheeses in Thomastown Victoria. They had a stand at the Fine Food Fair, with a wonderful selection of their wares on display. The burrata was superb so I made a point of finding out where to buy it in Canberra where I live. It’s sold at the Mart Deli at the Fyshwick Markets and when I popped in just before closing time last Sunday they were selling everything with 25% off and there were just two pots of Burrata left. I bought them both.

Burrata is made from cow’s milk, rennet and cream and is a typical product of Murgia in the south of Italy. The outside consists of mozzarella, while the inside contains stracciatella and cream, giving it a delicious, soft texture.

Burrata goes well with fruit so I came up with this easy dish which combines it with rockmelon. It also goes well with:
  • Sliced tomatoes – use really flavoursome ones from your garden or farmer’s market – drizzle with Extra Virgin olive oil and garnish with basil leaves
  • Grilled figs – drizzle the figs with honey before grilling and serve with burrata as a starter or dessert
  • Grilled capsicums – drizzle with Extra Virgin olive oil and maybe some basil pesto


One Burrata cheese (125g net)
Melon balls (or substitute mango, peach or nectarine slices)
Extra virgin olive oil
Balsamic glaze
Finely shredded spring onion
Salt flakes and cracked black pepper
Crusty fresh bread to serve

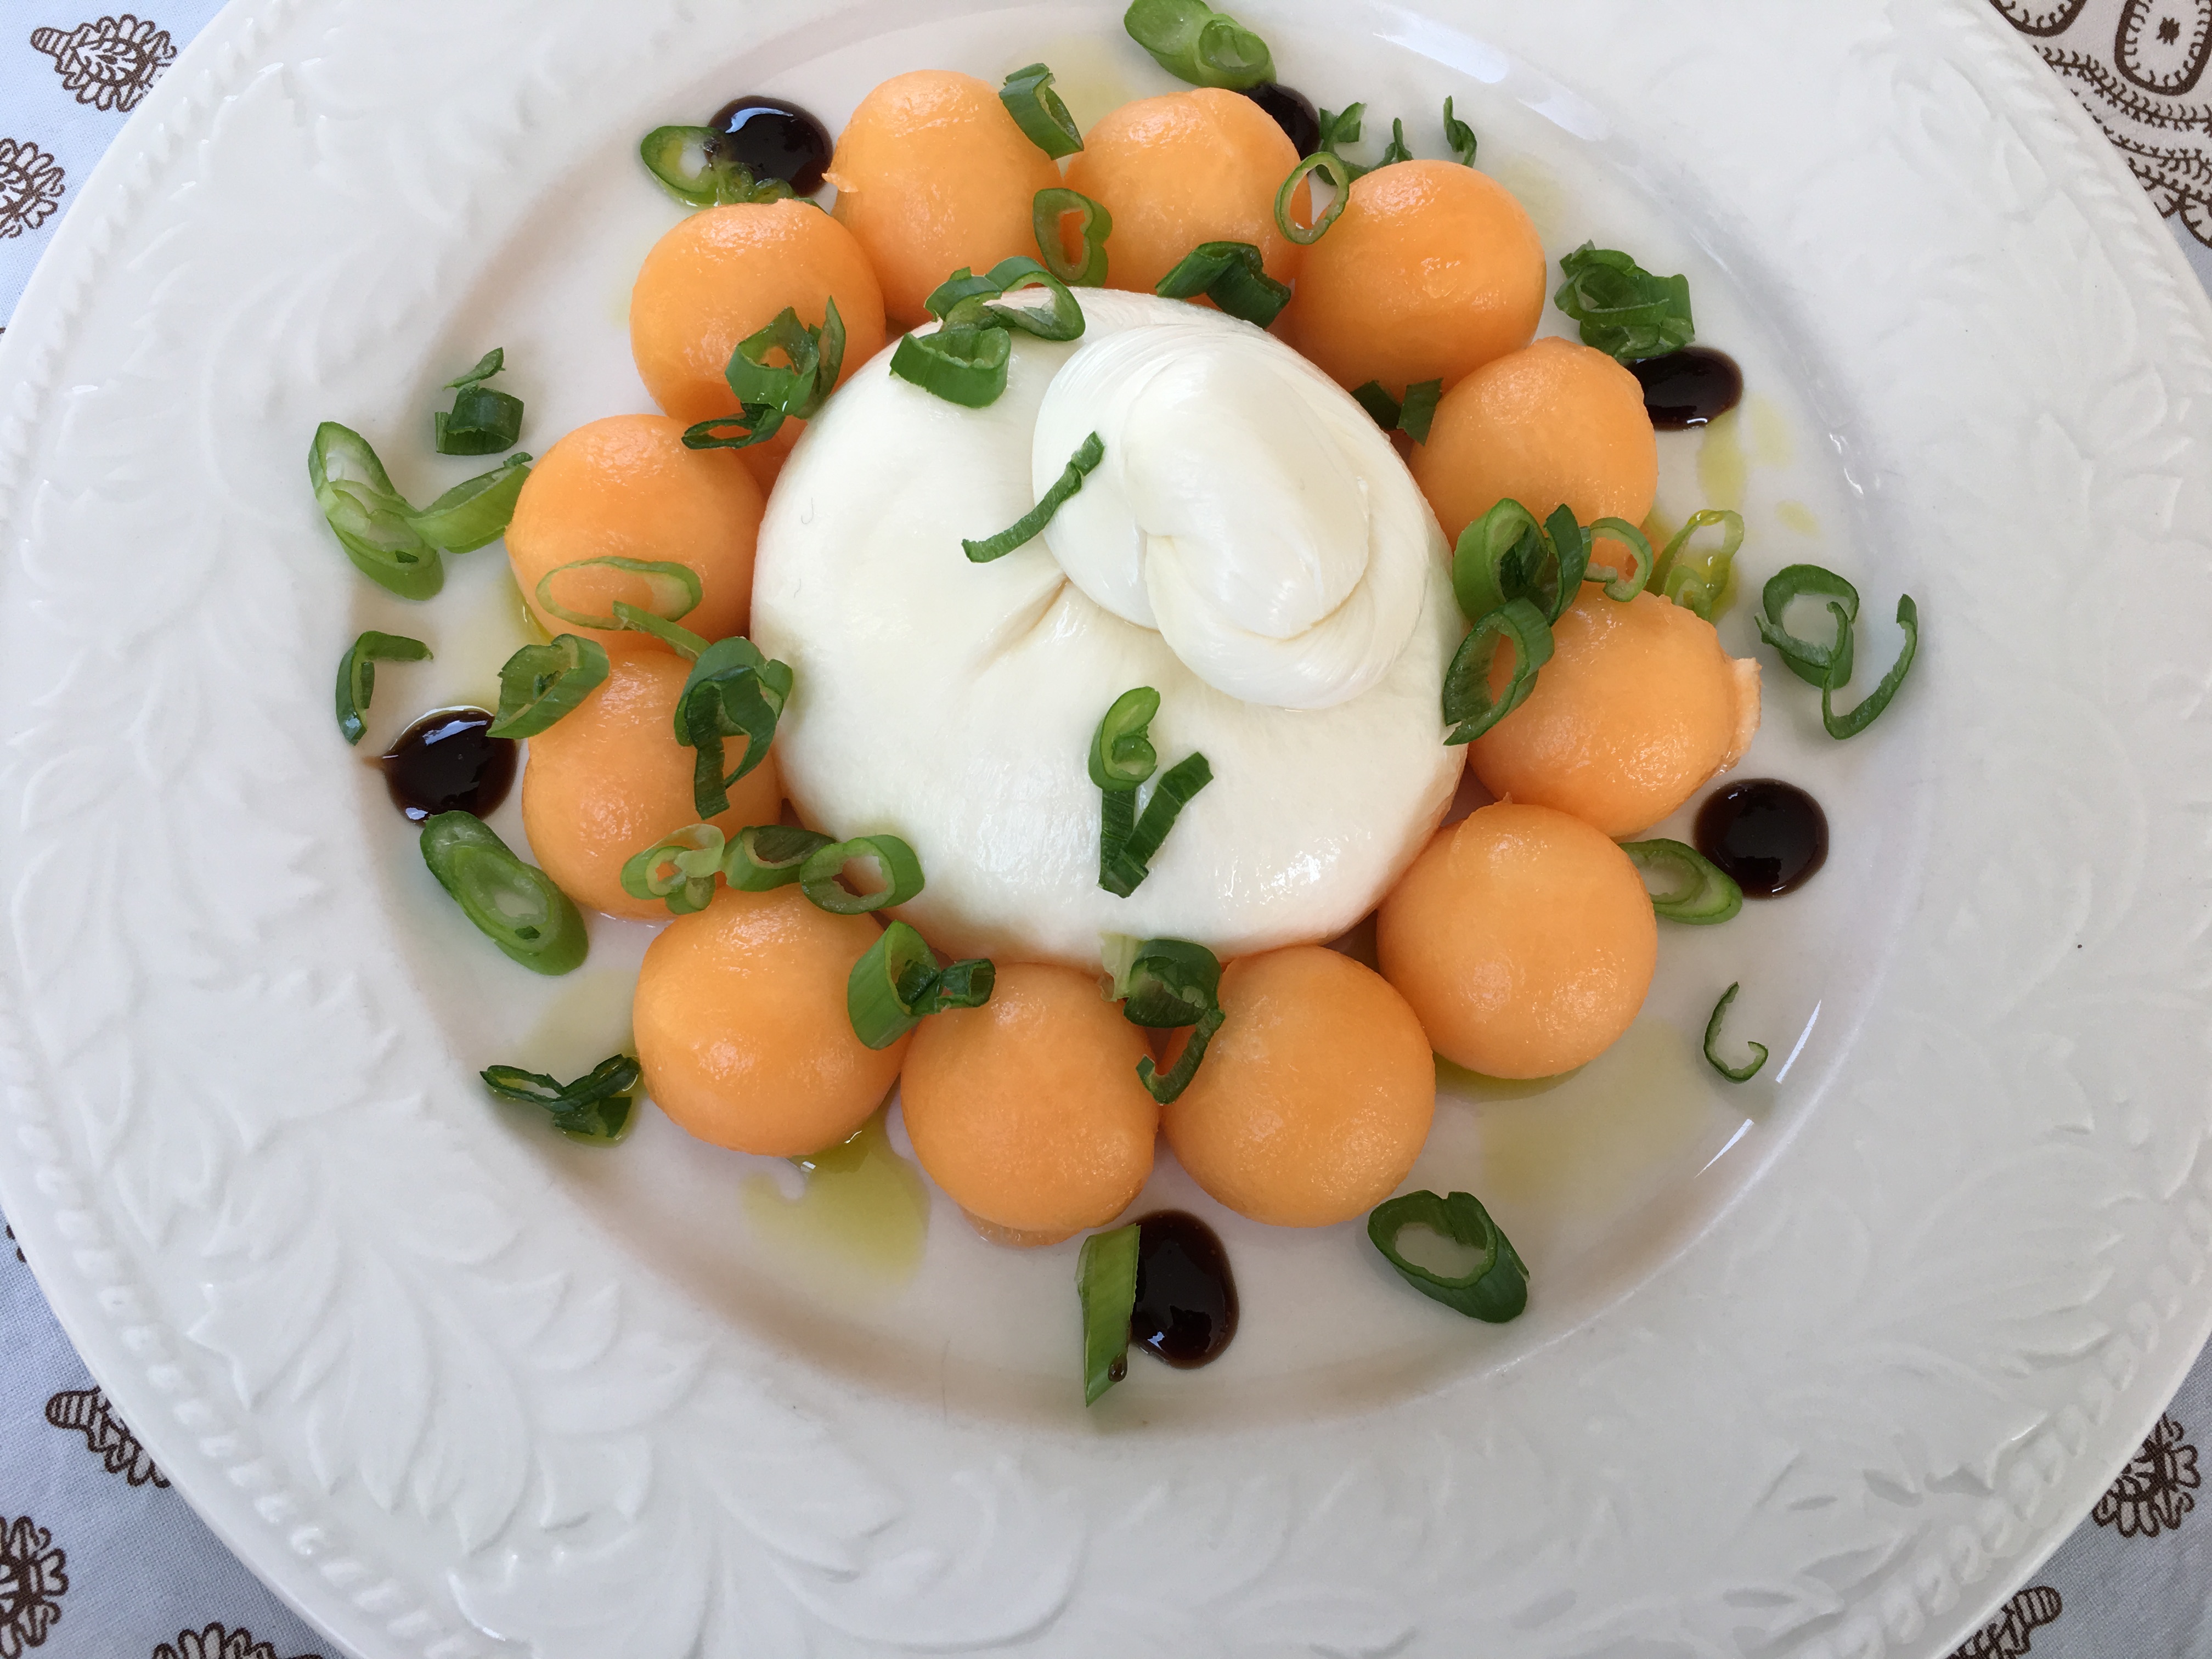
Place cheese in the middle of serving plate then arrange remaining ingredients around it, as shown in the photo.

Serves 1 or 2 as a starter or snack

Bruschetta with Goujons of Fish, Peaches & Buttermilk Dressing

This recipe was inspired by a bruschetta we ordered while we were in Chicago last year. I remember it was topped with homemade fish fingers – otherwise known as “goujons”- peaches, tomatoes, cucumber and a creamy dressing. The rest I had to invent.

The tomato is often thought of as a vegetable, but in fact it’s a fruit. If you don’t like fruit with savoury dishes, you won’t like this recipe, but I love the fresh flavour combination. If liked leave out the bread. Leftover dressing is delicious served with any salad.

4 slices of baguette, cut on the diagonal (I used sourdough)
Olive oil to brush onto the bread
500g white fish fillets (I used Basa) cut into fat fingers
3 Tbs plain flour, seasoned
1 egg, beaten
1 cup or more breadcrumbs (preferably Panko)
1 small cucumber, sliced on the diagonal
A few cherry tomatoes, halved
2 peaches or nectarines, peeled and sliced
2 Tbs olive oil
25g butter
Fresh herbs such as mint or coriander
Buttermilk Dressing:
¼ cup mayonnaise (preferably homemade)
3 Tbs buttermilk
1 Tbs chopped chives
2 tsp cider vinegar
½ tsp salt
½ tsp ground black pepper
1 clove garlic, crushed

Coat fish fingers (goujons) with the seasoned flour, shaking off the excess, then with the beaten egg and lastly with the breadcrumbs. Heat oil and butter in a large frying pan and fry them for 2-3 minutes each side, or until golden brown and cooked through. Drain on paper towels.

Place all ingredients for dressing in a jar with a lid and shake well. Brush the bread on both sides with the olive oil (if liked mix in a crushed clove of garlic) then grill till golden. I toasted mine in an electric sandwich press which works well and avoids having to turn on the grill.

Arrange toasted bread slices on 4 plates. Arrange the fish on top then garnish with the cucumber, the tomato halves and the peach or nectarine slices. Drizzle with some of the dressing and garnish with fresh herbs.

Makes 4 bruschettas

Salmon en Croute with Dill Mayonnaise

This recipe takes a little longer than most of the recipes on this blog, but it’s really not that complicated and an elegant way to feed a crowd.

I bought the salmon at Costco because their salmon never has any bones in it. If there’s one job I really hate it’s removing salmon bones with tweezers. In Australia puff pastry comes in pre-rolled squares which measure about 25x25cm. If you live somewhere it’s sold in a block you will need enough to roll out to a rectangle which is a bit bigger than double the size of the salmon.

1 side of salmon (skinless and boneless)
Puff pastry (I used three 25x25cm squares)
2 leeks
1 bunch spinach
50g butter
Salt and freshly ground black pepper
½ cup cream
Salt and freshly ground black pepper to taste
1 egg, beaten
To serve:
1 cup mayonnaise (preferably home made)
1 bunch dill, stalks discarded

Clean leeks to remove any grit then chop finely, using all the white part and some of the green. Heat half the butter in a frying pan and cook leeks gently, stirring often, for 10 minutes or until soft but not brown. Add cream and cook until evaporated. Season to taste. Wash spinach and remove stalks. Place in a large saucepan with just the water clinging to the leaves and cook, stirring, until wilted right down. Place in food processor with the remaining butter and process to a slightly chunky puree. Season to taste. Prepare the leeks and spinach the day before and keep refrigerated.

Roll out pastry. I used three ready-rolled squares. Two squares stuck together and one square cut in half and stuck together lengthwise then joined onto the two big squares along the long side. Roll over the joins with a rolling pin so they stick. If using a block of pastry you will need to roll it out thinly to a rectangle slightly larger than twice the size of the salmon. Place pastry on a lightly greased baking tray – I used the shallow oven tray which came with my oven. If liked, line the tray first with baking paper.

Spread the leek mixture down the centre of the pastry in the shape of the salmon, then lay the salmon on top and cover with the spinach. Make sure the salmon is covered entirely by the leeks on the bottom and the spinach on the top. Fold in the two ends of the pastry which should be 2-3 cm longer than the fish. Cut diagonal slashes into the pastry on the two sides as far as the salmon, then bring them in alternately to create a pseudo-plait, pinching the ends together. If it doesn’t look like a work of art, don’t worry it will look amazing when it’s cooked. If liked, arrange a row of diamond shapes, made from pastry off-cuts, down the join in the middle, to cover any imperfections. Refrigerate until serving time.

Preheat oven to 180°C. Brush pastry all over with beaten egg. Bake for 30-40 minutes or until well-browned. Place mayonnaise and dill in food processor and process until smooth.

Serve slices of the salmon pie with the dill mayonnaise. New potatoes and a steamed green vegetable such as broccolini, asparagus, green beans or snow peas go well with this.

Serves 8-10

Easy Chicken with Pesto

Jamie Oliver has a lot of recipes where you arrange all the ingredients in a shallow baking tray, stick it in the oven and Bob’s your Uncle. He calls them tray bakes.

This recipe was inspired by that idea and by the fact that I still have quite a bit of pesto which I froze in ice cube trays last summer. I want to use it before summer starts and the fresh basil in the garden is ready to use. Frozen pesto is useful in winter to spread on pizza bases (instead of tomato), to mix into pasta dishes or to garnish soups

This recipe really is easy, quick and delicious. The first photo shows the dish ready to go in the oven and the second one ready to serve.

1 kg boneless, skinless chicken thighs
1 cup baby tomatoes
½ to 1 cup pitted olives, black or green
About 10 cloves garlic, peeled but left whole
½ to ¾ cup pesto (home made or bought)
125g creamy goat’s cheese or feta
Salt and freshly ground black pepper
Extra Virgin olive oil
A few sprigs of thyme (optional)

Preheat oven to 180°C. Trim chicken thighs and cut them in half. Arrange in one layer in a shallow baking dish tin. Arrange the tomatoes, olives and garlic evenly, tucking them in between the chicken pieces. Put blobs of pesto and small chunks of cheese evenly over the dish, season with salt and pepper, add a few small sprigs of fresh thyme (if available) and drizzle with some olive oil. Bake for 45 minutes, turning chicken over halfway through the cooking time.

Serve with couscous, rice, mashed potatoes or crusty bread, to soak up the juices and a mixed salad.

Serves 4

Variations: use chicken drumsticks or thighs with bones and skin.

Maple-Glazed Chicken with Prosciutto

Food writer and restaurant critic Jill Dupleix has been contributing to the Australian food scene for several decades.

This is one of her recipes, slightly adapted. The original version uses a mixture of two tablespoons each of maple syrup, miso and soy sauce to brush onto the chicken before baking. It’s quite a salty mixture and I found I had far too much, so when I made it the second time I used half. I also omitted the garnish of deep fried vermicelli noodles, which I don’t think is necessary. Depending on the size of your prosciutto slices, you will need one or two per serving. You can get away without tying the bundles with kitchen string, but they’re less likely to burst open if you do.

6 large chicken thighs, skinless and boneless
4 spring onions, all the white and most of the green
2 cloves garlic
2 Tbs olive oil
6 or 12 thin slices prosciutto (or rindless streaky bacon)
1 Tbs miso paste
1 Tbs soy sauce
1 Tbs maple syrup
To serve:
1 spring onion
Mashed sweet potatoes
A green vegetable such as peas or brussels sprouts

Trim chicken thighs of any excess fatty bits. Place chopped spring onions, garlic and oil in food processor and process until chunky-smooth. Place prosciutto on work surface, slightly overlapping if you’re using two. Place a chicken thigh on top. Spread each one with some of the spring onion mixture, then roll up, placing the join underneath and tie with a piece of kitchen string. Place chicken rolls on a baking tray lined with baking paper. If liked, prepare ahead to this stage and leave in the fridge for up to a few hours.

Preheat oven to 180°C. Mix miso paste, soy sauce and maple syrup and brush over the rolls. Bake for 25-30 mins or until cooked through. They will take slightly longer if they’ve been in the fridge prior to cooking.

To make the garnish, cut spring onion into 4 cm lengths, then into very thin strips. Place these in a bowl of iced water so they curl. Serve each chicken roll on a nest of mashed sweet potatoes, either whoile or sliced, garnished with the spring onion curls and green peas.

Serves 6