The two most popular posts on Café Cat are both made in a slow cooker, so I thought it was time to post another recipe.
While I probably only use it four or five times a year, a slow cooker is great for winter, when we eat more casseroles. It’s also perfect when you want something which looks after itself as it cooks.
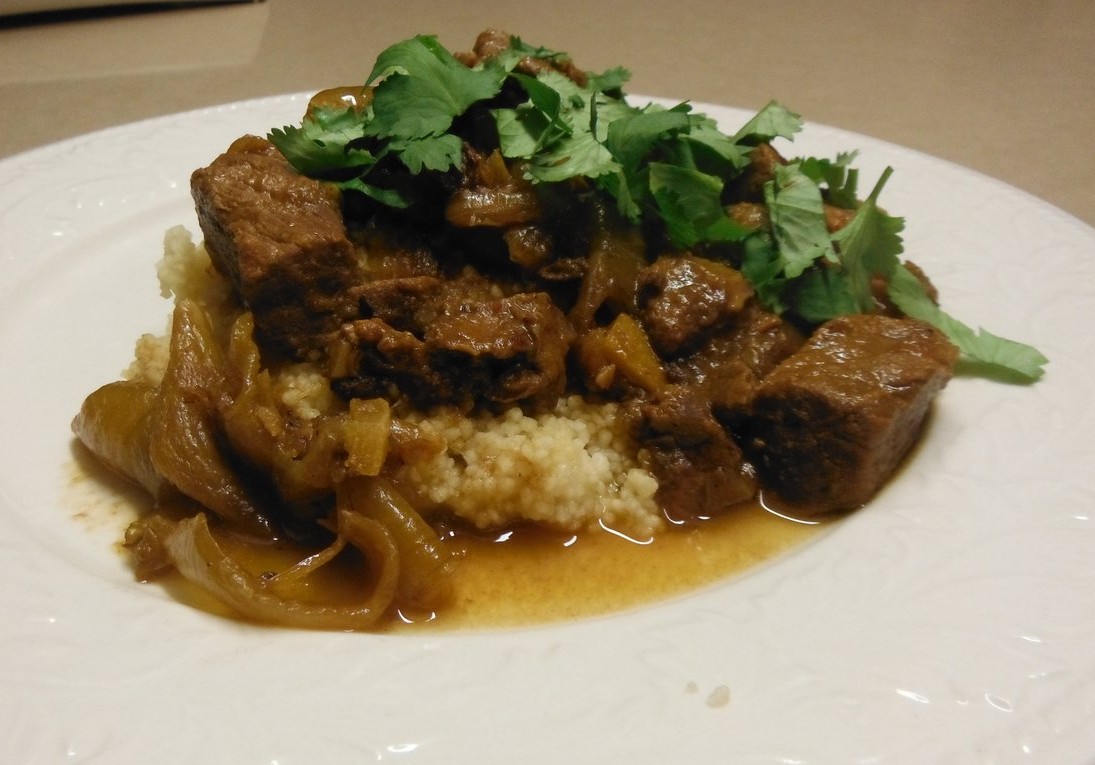
This Lamb and Date Tajine came from my friend Kien who lives in Amsterdam. I’ve cut down a bit on the liquid which is all you need to do to adapt any recipe for a slow cooker. I couldn’t find any really small onions so I used nine larger ones and cut them in half. As with all casseroles, the leftovers were even better when reheated two days later.
 1kg lean lamb cut into 2cm cubes (shoulder, leg)
2 tsp ground coriander
2 tsp fresh ginger, coarsely grated
Pinch of saffron
1 Tbs olive oil + extra
18 whole small onions, peeled
4 cloves garlic, crushed
1 Tbs plain flour
1 Tbs tomato paste
1 cinnamon stick, broken in two
450ml lamb or beef stock
4 Tbs chopped fresh coriander
Rind of one preserved lemon, diced (see note below)
100g dates, sliced
1 Tbs honey
Salt and freshly ground black pepper to taste
Marinate meat with ground coriander, ginger, saffron and olive oil for 24 hours in the fridge. Brown lamb all over in 2-3 batches in a non-stick frying pan over moderately hot heat – there’s no need to add any oil as there’s oil in the marinade – then place in slow cooker.
Add a little oil to the pan with the whole baby onions and cook until lightly golden all over, then add to slow cooker. Add garlic to the pan and cook gently for a minute or so, adding a little more oil if necessary. When soft add flour and continue to cook for a minute or so, stirring. Add stock gradually, stirring until thickened, then add to slow cooker with the cinnamon stick and tomato paste. Cover and cook on High until it starts to bubble, then turn to Low and cook for 6-7 hours or leave it on high for 3-4 hours. It might suit you to cook it for longer if you have to go out. Cooking times vary from slow cooker to slow cooker.
When meat is tender add honey, dates and preserved lemon and season to taste with salt and pepper. Preserved lemons are salty so you probably won’t need any salt. Cook for another hour or so. Garnish with fresh coriander and serve with couscous.
Serves 4-6
Notes: While lamb is more authentic in a Moroccan tajine, cubed lean beef also works well in this recipe. Preserved lemons are sold in some gourmet shops. They give this recipe a distinctive flavour, so it’s worth keeping an eye out for them next time you’re in a gourmet shop. One jar is enough for several recipes. Or you can make your own as I do.