Roasted Vegies with Hummus

My daughter Catherine invented this delicious vegetarian recipe when she only had some beetroot, a leek and an avocado as inspiration. It’s at times like this when some of the best dishes are created. Remember the TV programme Ready, Steady Cook where participating cooks were handed a bag of ingredients and had to whip up a meal with no recipe, or even time to plan?

This recipe is flexible because you can use any vegetables you have on hand. I didn’t have any leeks so used a big onion and instead of potatoes I added carrots. I also used a creamy Danish feta rather than goat’s cheese and pecan nuts instead of walnuts.

Roasted Vegies with HummusHummus – homemade or bought
1 avocado
3 small beetroot
2 carrots
1 red capsicum (pepper)
4 cloves garlic, peeled
1 onion or 1 leek, or both
Olive oil
Salt and freshly ground black pepper
2 Tbs coriander leaves
50 goat’s cheese or feta
2-3 Tbs walnut or pecan halves, toasted
Balsamic glaze or a fruity finishing vinegar (I used apricot, Catherine used cherry)

Preheat oven to 200ºC. Cut vegetables into even-sized chunks or sticks, mix with a good slug of olive oil, salt and pepper and spread out in a single layer on a baking tray lined with baking paper. Bake for 30 mins or until tender and starting to brown at the edges, turning them about halfway through. Remove from the oven and let them cool a bit. Spread about 3 Tbs hummus on two large serving plates. Arrange half an avocado, sliced, on each plate on the edge of the humus, as shown in photo. Pile the roasted vegetables on top, then garnish with the coriander, the crumbled cheese and the toasted walnuts or pecans. Drizzle with the vinegar.

Serves 2

Salted Caramel & Macadamia Cheesecake

Salted caramel desserts are very “in” at the moment. I first tasted this combination of flavours in Brittany, where you can buy a salted caramel spread in jars to eat on toast like Nutella. The Bretons also use it as one of the many fillings you can choose for crepes sold by street vendors in the region. I know it’s not good to eat too much, but Matthew and our two boys are very keen on anything salty and this includes salted caramel desserts.

Israeli-born chef Yotam Ottolenghi created this delicious caramel and macadamia cheesecake. All I have done is to add salt to the caramel sauce, cut down a bit on the biscuits in the crust and the sugar in the cheesecake filling.

Salted Caramel and Macadamia Cheesecake

Base:
About 130g plain sweet biscuits (I used 9 Digestives)
40g unsalted butter
Filling:
500g ricotta cheese, at room temperature
250g cream cheese, at room temperature
100g caster sugar
4 eggs
½ cup sour cream
Seeds scraped from 1 vanilla pod or 2 tsp essence
Topping:
150g macadamia nuts
90g caster sugar
Sauce:
65g unsalted butter
160g caster sugar
100ml cream
½ to 1 tsp salt, to taste

Base: Preheat oven to 140ºC. Lightly grease a 20cm spring-form cake tin and line the base and sides with baking paper. Whiz biscuits to crumbs in food processor. Melt butter in microwave, add biscuit crumbs and mix. Tip into the cake tin and flatten with the bottom of a glass to create a level base.

Filling: In a bowl with electric beaters or in a food processor, mix all ingredients for filling until smooth. Scrape into cake tin and bake for 50 mins or until set in the middle. Cool then refrigerate for a couple of hours or overnight, covered.

Topping: Preheat oven to 140ºC. Spread macadamias over a baking sheet and roast for about 15 mins or until light golden brown. Watch them carefully – mine got a bit too brown as you can see in the photo. Remove and set aside. Place sugar in a heavy-based saucepan and heat gently until it turns golden-brown. Do not stir, but you can lift and swirl from time to time. Add nuts and mix gently with a wooden spoon. Pour onto a tray lined with foil or non-stick baking paper and leave to set. Chop roughly with a large knife, leaving some of the nuts halved or whole.

Sauce: Melt butter in a heavy-based saucepan, add sugar and stir constantly over medium heat with a wooden spoon until you have a smooth, dark caramel. It may split, but that doesn’t matter. Add cream carefully – it will splutter – and stir to combine. Sieve to remove any gritty bits then cool.

To serve: Remove sides and base of cake tin and place cheesecake on a serving plate or board. If you want to present it whole, spoon the sauce in the middle, allowing it to spill over the sides a bit and scatter the nuts over the top. Alternatively arrange slices on individual plates, then decorate with the nuts and spoon over some of the sauce. Keeps for 3 days in the fridge.

Serves 10

Slow Roasted Pork Belly with Caramelised Onions & Apples

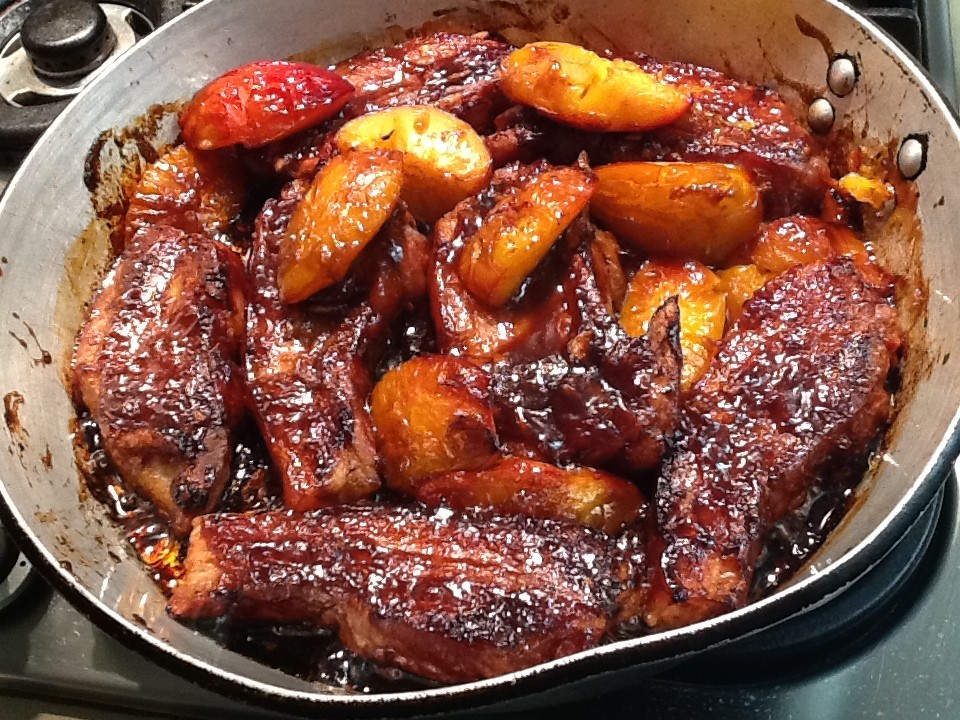
When we were growing up my sister Dee used to say she couldn’t eat pork which tasted “hairy”. I think I know what she meant. If you’re going to serve pork with the skin it has to be crunchy. There’s nothing attractive about soft pork fat and skin.

Pork belly has become quite trendy in the last few years and there are lots of recipes on Google for different ways to cook it. Some are quite complicated, involving lots of ingredients. This is one of my favourite recipes for pork belly. It combines just two flavours with the pork – onion and apple – plus a few herbs.

Slow Roasted Pork Belly with Caramelised Onions & Apples1kg boneless pork belly with skin
salt, olive oil and freshly ground black pepper
2 tsp dried mixed herbs
2 large onions
2 large green apples
¼ cup water
1 Tbs sugar

If the butcher hasn’t already done so, score pork skin all over in parallel cuts just under a centimeter apart, cutting through the skin only. Preheat oven to 160°C. Peel onions, cut into eighths and place in a roasting pan in the middle, like a nest. Rub pork all over with a little oil and season with salt and pepper. Press herbs into the meat side. Place pork skin side up on the onions and bake for about 2 hrs. During this time do not baste. If after an hour or so you think the onions are starting to burn, take them out and put the pork back. You want them to be caramelised, but not overly so.

Meanwhile peel core and slice apples and place in a saucepan with water and sugar. Simmer for 10-15 mins until cooked. After 2 hrs, remove pork from oven and take it out of the pan. Tip off all the fat which can be kept and used for roasting potatoes. Turn oven up to 200°C. Mix onions with apples and place in the pan as before, like a nest, with pork on top. Bake for 30 mins or until skin is blistered and crunchy all over. Divide apples and onions between six plates. Cut pork into six neat squares or rectangles with a sharp heavy knife and place on top.

Serves 6

Pumpkin Soup with Chorizo

This year we successfully grew our own pumpkins for the first time, on our property Woodlands. We only harvested six and the one in the photo is the biggest. Next season we will try to plant them earlier and see if we can do better. The good thing about pumpkins is that they keep for several months without refrigeration, until you cut into them.

Pumpkin Soup with Chorizo2 Tbs olive oil or butter
1 large onion, chopped
2 cloves garlic, chopped
1 kg pumpkin, peeled, seeded and cubed
2 carrots, peeled and cut into chunks
5 cups chicken or vegetable stock (or use a cube and water)
1 tsp ground cumin
1 tsp smoked paprika
Salt and freshly ground black pepper, to taste
½ cup cream or sour cream
2 Tbs pumpkin seeds, lightly toasted in a dry frying pan
1 chorizo, casing removed, finely diced (see variations below)
Extra virgin olive oil (optional)

Heat oil or butter in a large, heavy-based pan and cook onion and garlic, stirring often, until softened. Add pumpkin, carrots, stock, cumin and paprika and simmer for 20 minutes or until vegetables are tender. Allow to cool a bit then blend soup in a blender until smooth. Soup can be stored in the fridge at this stage for up to 3 days, covered.

Fry chorizo in a frying pan without oil for 3-4 mins, stirring, until browned. Reheat soup with cream and season to taste. If it’s a bit too thick add some milk. Serve soup garnished with pumpkin seeds, chorizo and a drizzle of olive oil. Serve with fresh bread or toast.

Variations: instead of chorizo use pepperoni or bacon. If you don’t have smoked paprika use ordinary.

Serves 4

Salmon with Bois Boudran Sauce

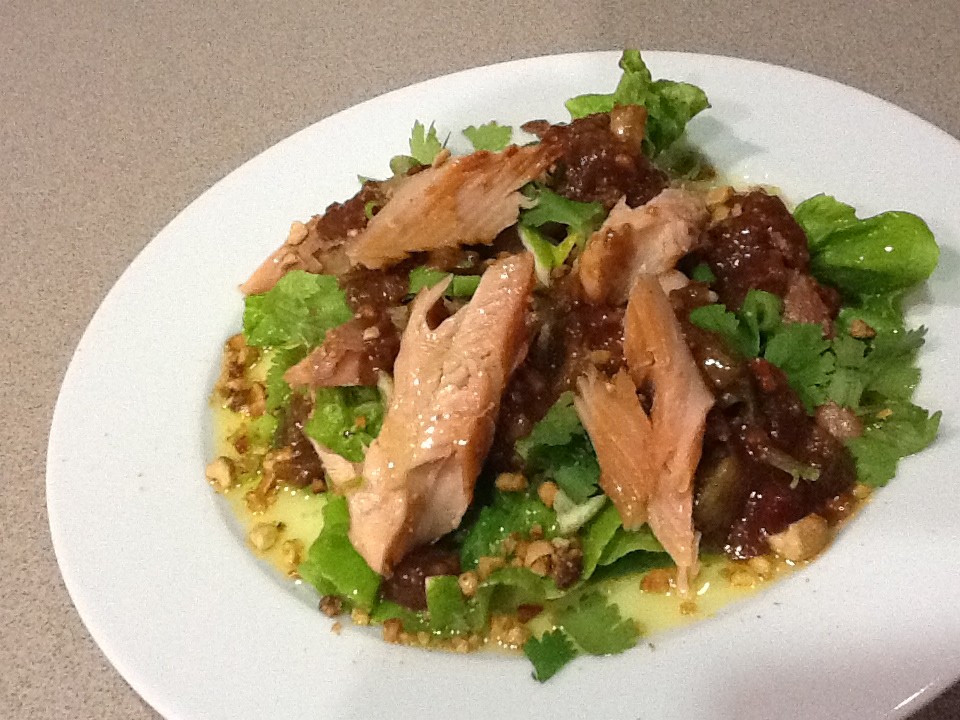
We eat salmon fillets about once a week. It’s quick and easy and we love it. Sometimes I spread the fish with a mixture of grated fresh ginger and Thai sweet chilli sauce and bake it in a very hot oven on lightly oiled aluminium foil for about 8 minutes. Other times I pan fry or bake the seasoned salmon and serve it with this sauce, adapted from a recipe by French chef Michel Roux. It’s really just a thick herby, tomatoey vinaigrette.

In 1967 Roux opened Le Gavroche in London with his brother Albert. The restaurant became the first in England to win three Michelin stars. In 1972 they opened The Waterside Inn, which went on to become the first restaurant outside France to hold three Michelin stars for over 25 years and is now run by Michel’s son Alain.

This sauce is great to have in the fridge because it goes with all sorts of things and keeps for at least a week. In fact I think it improves after a day or so. It goes well with roast chicken or steak and is absolutely delicious served in half an avocado. The original version uses tarragon which definitely gives the sauce a distinctive flavour. But fresh tarragon is not always available, so vary the recipe with different herbs and see what you like best.

Salmon with Bois Boudrain Sauce1 cup mixed fresh herbs, loosely packed (see note)
3-4 French shallots, peeled (or substitute one small onion)
¾ cup vegetable oil e.g. canola
2 Tbs white wine vinegar or lemon juice
½ cup tomato ketchup
A few drops of Tabasco
2 tsp Worcestershire sauce
Salt and freshly ground black pepper, to taste

Place chopped onion or shallots in a pan with water, bring to the boil, then drain thoroughly. Place herbs and onion in food processor and chop finely. Scrape into a jar with a lid, add remaining ingredients and shake well to combine. Serve at room temperature on grilled or pan-fried salmon, roast chicken or steak. Keeps in the fridge for up to a week.

Makes about 1.5 cups

Note: the original recipe used chervil, chives and tarragon. In the photo I used dill, parsley and coriander. Use whatever you have available.

Satay Beef in Lettuce Cups

This quick mid-week dinner will be popular with all the family. If you have young kids who don’t like things too spicy just leave out the chilli. If you don’t put too much filling on the lettuce you can roll them into parcels to eat with your fingers. Otherwise eat with a knife and fork. Serve the filling in wraps or pitta breads instead of lettuce leaves to make them more filling for growing kids. I like mine drizzled with Thai sweet Chilli sauce, as you can see in the photo.

Satay Beef in Lettuce Cups1 Tbs oil
1 large onion, finely chopped
500g lean beef mince
½ cup satay sauce (see note below)
1/3 cup beef stock
1 Tbs soy sauce
2 Tbs sherry
1 Tbs grated ginger
1 tsp sugar
1 small red chilli, seeded and finely chopped
½ cup chopped fresh coriander and extra to garnish
1 butter lettuce, washed and dried, leaves left whole
Salt and freshly ground black pepper to taste
1 Lebanese cucumber, peeled and chopped
¼ cup roasted  peanuts, chopped

Heat oil in a wok or frying pan over medium heat. Add onion and beef and cook, stirring, for 6 minutes or until onion is soft and meat has browned all over. Add satay sauce, stock, soy sauce, sherry, ginger, sugar and chilli and continue to cook for a minute or two until the liquid has almost gone. Add coriander. Season to taste – you probably won’t need any salt. Serve beef in lettuce cups garnished with cucumber, peanuts and extra coriander.

Serves 4

Note: I used Ayam brand Satay sauce but if you don’t have any substitute crunchy peanut butter – not quite the same, but it will do.

Joan’s Apple Crumble

JoanWe all know that children need good role models. But do we ever stop growing up? I think adults also need older friends to look up to and think “That’s how I want to be when I’m that age”. Such friends are a rare commodity and to be treasured.

When I married and moved to Canberra I left my friends and family in Europe. Fortunately a lovely lady called Joan Tyrrel, thirty years my senior, took me under her wing. She became my surrogate mother, friend and confidante.

As our family grew Joan and her husband John became an extra set of grandparents for our kids and godparents to our daughter. John had taught Matthew English at Canberra Grammar School where he was also the Chaplin for many years. The Tyrrels had three married children of their own and grandchildren. But they had enough love to go around and we were the fortunate beneficiaries.

When I rang and asked if it was okay to call in for coffee or lunch Joan never said sorry I’m busy, or it’s not convenient. She led a very full life – one of the secrets to longevity – but she always had time for me. Our shared love of cooking meant we often talked about food and swapped recipes, home grown vegetables, jars of home-made jam and chutney. People of all ages enjoyed Joan’s company because she was interested in what they were doing. With such a positive and vibrant personality, she never seemed old. I remember once asking John how he was. “I’m very well thank you” he replied, “Joan says I’m not allowed to say anything else”. We all laughed, but it was so like her.

Having grown up during the War Joan hated waste. When she switched on her dishwasher there wasn’t room for another spoon or fork. And she always cut the Finish tablets in half, swearing that half did just as good a job as a whole one.

Joan died in February 2011 aged 88, after a short battle with cancer and John followed about a year later of old age and because he was completely lost without Joan. They were very much a team and I miss them both, but mostly I miss my special friend and mentor. Her last words to me were “We had such fun together, didn’t we?”

Joan’s recipe for a quick and delicious apple crumble is different because she always left the skin on the apples and melted the butter for the topping.

Joan's Apple Crumble5 apples
1-2 Tbs sugar, to taste (Joan always used raw sugar)
Topping:
125g butter
½ cup brown sugar
1 tsp cinnamon
1 cup plain flour

Preheat oven to 180°C. Core and slice apples and arrange in a buttered pie dish or in 6 individual ramekins. Sprinkle with sugar.

Melt butter, add sugar and cinnamon. Lastly add flour and crumble between fingers. Sprinkle over the apples, then bake at for 30-40 minutes, or until golden brown and bubbly. Serve with cream or vanilla ice cream.

Once cooked the individual apple crumbles will keep in the fridge for 5-6 days, covered. Just zap in the microwave for a minute, top with some ice cream and serve for an instant mid-week dessert.

Serves 6

Beef Massaman Curry in a Slow Cooker

Of all the posts on Café Cat, the most popular to date is the Beef Korma cooked in a Slow Cooker. When people search on Google for a beef curry cooked this way, my recipe comes up first.

A slow cooker is the perfect way to cook a curry or a stew. As the meat cooks slowly the liquid doesn’t evaporate the way it does in the oven, so it’s best to add about a quarter or half the amount you would normally use. You can always add more later if necessary.

I’ve adapted this Thai Massaman Beef Curry by Bill Granger for the Slow Cooker. It’s nice and spicy, without being overly hot. If you’re going to serve it with rice, we didn’t think the potatoes were really necessary, so leave them out if you prefer.

Beef Massaman Curry in a Slow Cooker1 tsp crushed dried chilli
1 Tbs finely chopped fresh ginger
2 tsp cumin seeds
Seeds removed from 5 cardamom pods
1 red onion, cut in half
6 cloves garlic
1 stalk lemongrass (white part only)
2 Tbs coriander roots
1 Tbs Tamarind paste
2 Tbs vegetable oil
1.2kg stewing beef (blade, shin, chuck) cut into 3-4cm pieces
400ml can coconut milk
1 Tbs sugar
1 Tbs fish sauce
¼ cup water
400g small potatoes, scrubbed and halved (optional)
To serve:
1 Tbs lime or lemon juice
Fresh coriander sprigs
2 Tbs roasted peanuts, chopped
Steamed rice

In a mortar and pestle pound the chilli, ginger, cumin, cardamom and 1 tsp salt until finely ground. In a food processor whiz the red onion, garlic, lemongrass, coriander root, tamarind paste and 1 Tbs of the oil, until finely chopped, then mix in the chilli-spice mix.

Heat remaining 1 Tbs oil in a large frying pan and brown the meat in 2 or 3 batches, for about 2 minutes each side, then place in slow cooker. Add the curry paste to the frying pan and cook, stirring, for 2 minutes or until fragrant. Add to slow cooker with the coconut milk, sugar, fish sauce, potatoes (if using) and water. Cover and cook on low for 6-8 hours or until beef is tender. Stir every couple of hours, adding a little more water if necessary.

To serve: Add lime or lemon juice, check seasoning and serve garnished with the coriander and peanuts, with steamed rice on the side.

Note: If preferred curry can be cooked in a heavy casserole with a lid in the oven where it will take about 3 hours at 160°C. In this case increase the water to ¾ cup and add the potatoes, uncooked, about halfway through cooking time. For low-carb version omit the potatoes.

Serves 4-6

Quick Banana and Oat Bread

Matthew’s not mad about bananas or coconut, so I usually avoid using them in cakes. Sometimes I sneak them in and hope he won’t notice.

This recipe only uses one banana, so the flavour isn’t overpowering. It’s delicious served fresh on the day it’s made. Or you can keep it in the fridge, well-wrapped, for up to a week and serve it toasted.

As it doesn’t contain any fat this banana bread is quite healthy, eaten on its own. But of course it’s even nicer with things on top! Serve it toasted for breakfast, topped with butter and jam; with a sliced banana, ricotta cheese and a drizzle of honey or with home made strawberry jam and ricotta as shown in the photo. I like to freeze the individual slices wrapped in plastic wrap so they can then be toasted from frozen and are ready in a jiffy.

Quick Banana and Oat Bread1 ripe banana
2 eggs
1 cup buttermilk (see note below)
2½ cups self-raising flour, sifted
½ cup oats
½ cup desiccated coconut
¼ to ½ cup honey, to taste
1 tsp vanilla essence
½ cup sunflower kernels (shelled sunflower seeds)

Preheat oven to 180°C. Grease a large loaf tin and line the bottom with baking paper. Place banana in food processor and process till smooth. Add remaining ingredients except sunflower kernels and process just enough to mix. Add sunflower kernels, tip into prepared loaf tin and smooth the top. Sprinkle with a few more oats, press them in, then bake for an hour, or until well-risen, golden brown and a skewer inserted in the middle comes out clean. Can take up to an hour and a quarter, depending on your oven. Cool and serve fresh or toasted. Can be frozen.

Makes one loaf

Note: if you don’t have buttermilk substitute half milk and half plain yoghurt. If you don’t have any sunflower kernels, double the oats or the coconut.

Apple Tart Rue de Vermont

When I worked for the British Mission to the UN in Geneva, located on the 5th floor of a large building on the Rue de Vermont, there was a patisserie at street level. By mid-morning irresistible smells came wafting up through the office window, so someone was dispatched to buy a few slices of apple tart, still warm from the oven, to keep us going till lunch time. Those were the days when I could do that on a regular basis, without it going straight to my hips!

Before I left Switzerland I asked the owner if she would part with the recipe and she was happy to do so. Puff pastry is a bit of a pain to make, so I usually buy it. That is until I discovered Nigella Lawson’s food processor version which is a cinch to make and of course much nicer. Actually any pastry will do and you may prefer to use shortcrust pastry, bought or home-made.

Apple Tart Rue de Vermont

Nigella’s Food Processor Puff Pastry

2 cups plain flour
Good pinch of salt
250g butter, cut into ½ cm slices
2 tsp lemon juice
4-5 Tbs cold water

Filling:
1 kg eating apples, peeled and sliced
2 eggs
2 Tbs plain flour or almond meal
½ cup milk (or half milk and half cream)
2 Tbs sugar
2 Tbs unsalted butter
Extra sugar

Pastry: place flour, salt and butter in food processor. Pulse until butter has been cut into small pieces but is still visible. With the motor running add the lemon juice and enough water for the pastry to start to stick together, then stop immediately. Don’t process for long because you want to keep the pieces of butter intact.

Tip out the sticky crumbs and with floured hands form them into a neat rectangle about 15 cm long and about half as wide. Wrap in plastic wrap and refrigerate 30 mins. Remove from fridge and roll pastry until the long side is twice as long. Fold one end into the middle and the other end over it to the edge, like an envelope. Turn pastry so the open ends are at the bottom and top, then roll again into a long rectangle. Repeat the folding and rolling twice, but the last time don’t do the final rolling – leave it with the open ends. Wrap in plastic wrap and refrigerate several hours or up to three days. Can be frozen.

Preheat oven to 180°C. Remove pastry from fridge and, unless you’re working on a hot summer’s day, let it stand for a short while, so it’s not rock hard. Roll out on a floured surface and use to line a rectangular metal Swiss roll or slice tin, trimming off any excess. Mine is 35x25cm. Arrange rows of overlapping apple slices over the base. Be generous – the pie should be very full with the apple slices standing almost upright.

In a small bowl with a fork or balloon whisk, mix egg with flour (or almond meal) and sugar, then gradually mix in milk/cream. Brush over the apples to moisten them, then pour the rest over. Tilt tin to ensure it reaches the corners, then dot the apples with very small pieces of butter and sprinkle lightly with extra sugar. Bake for about an hour or until well browned, almost burnt in places, to give it that authentic European patisserie look. If liked shake over some extra sugar and serve warm, just as it is, or with cream or ice cream, or both!

Serves 12