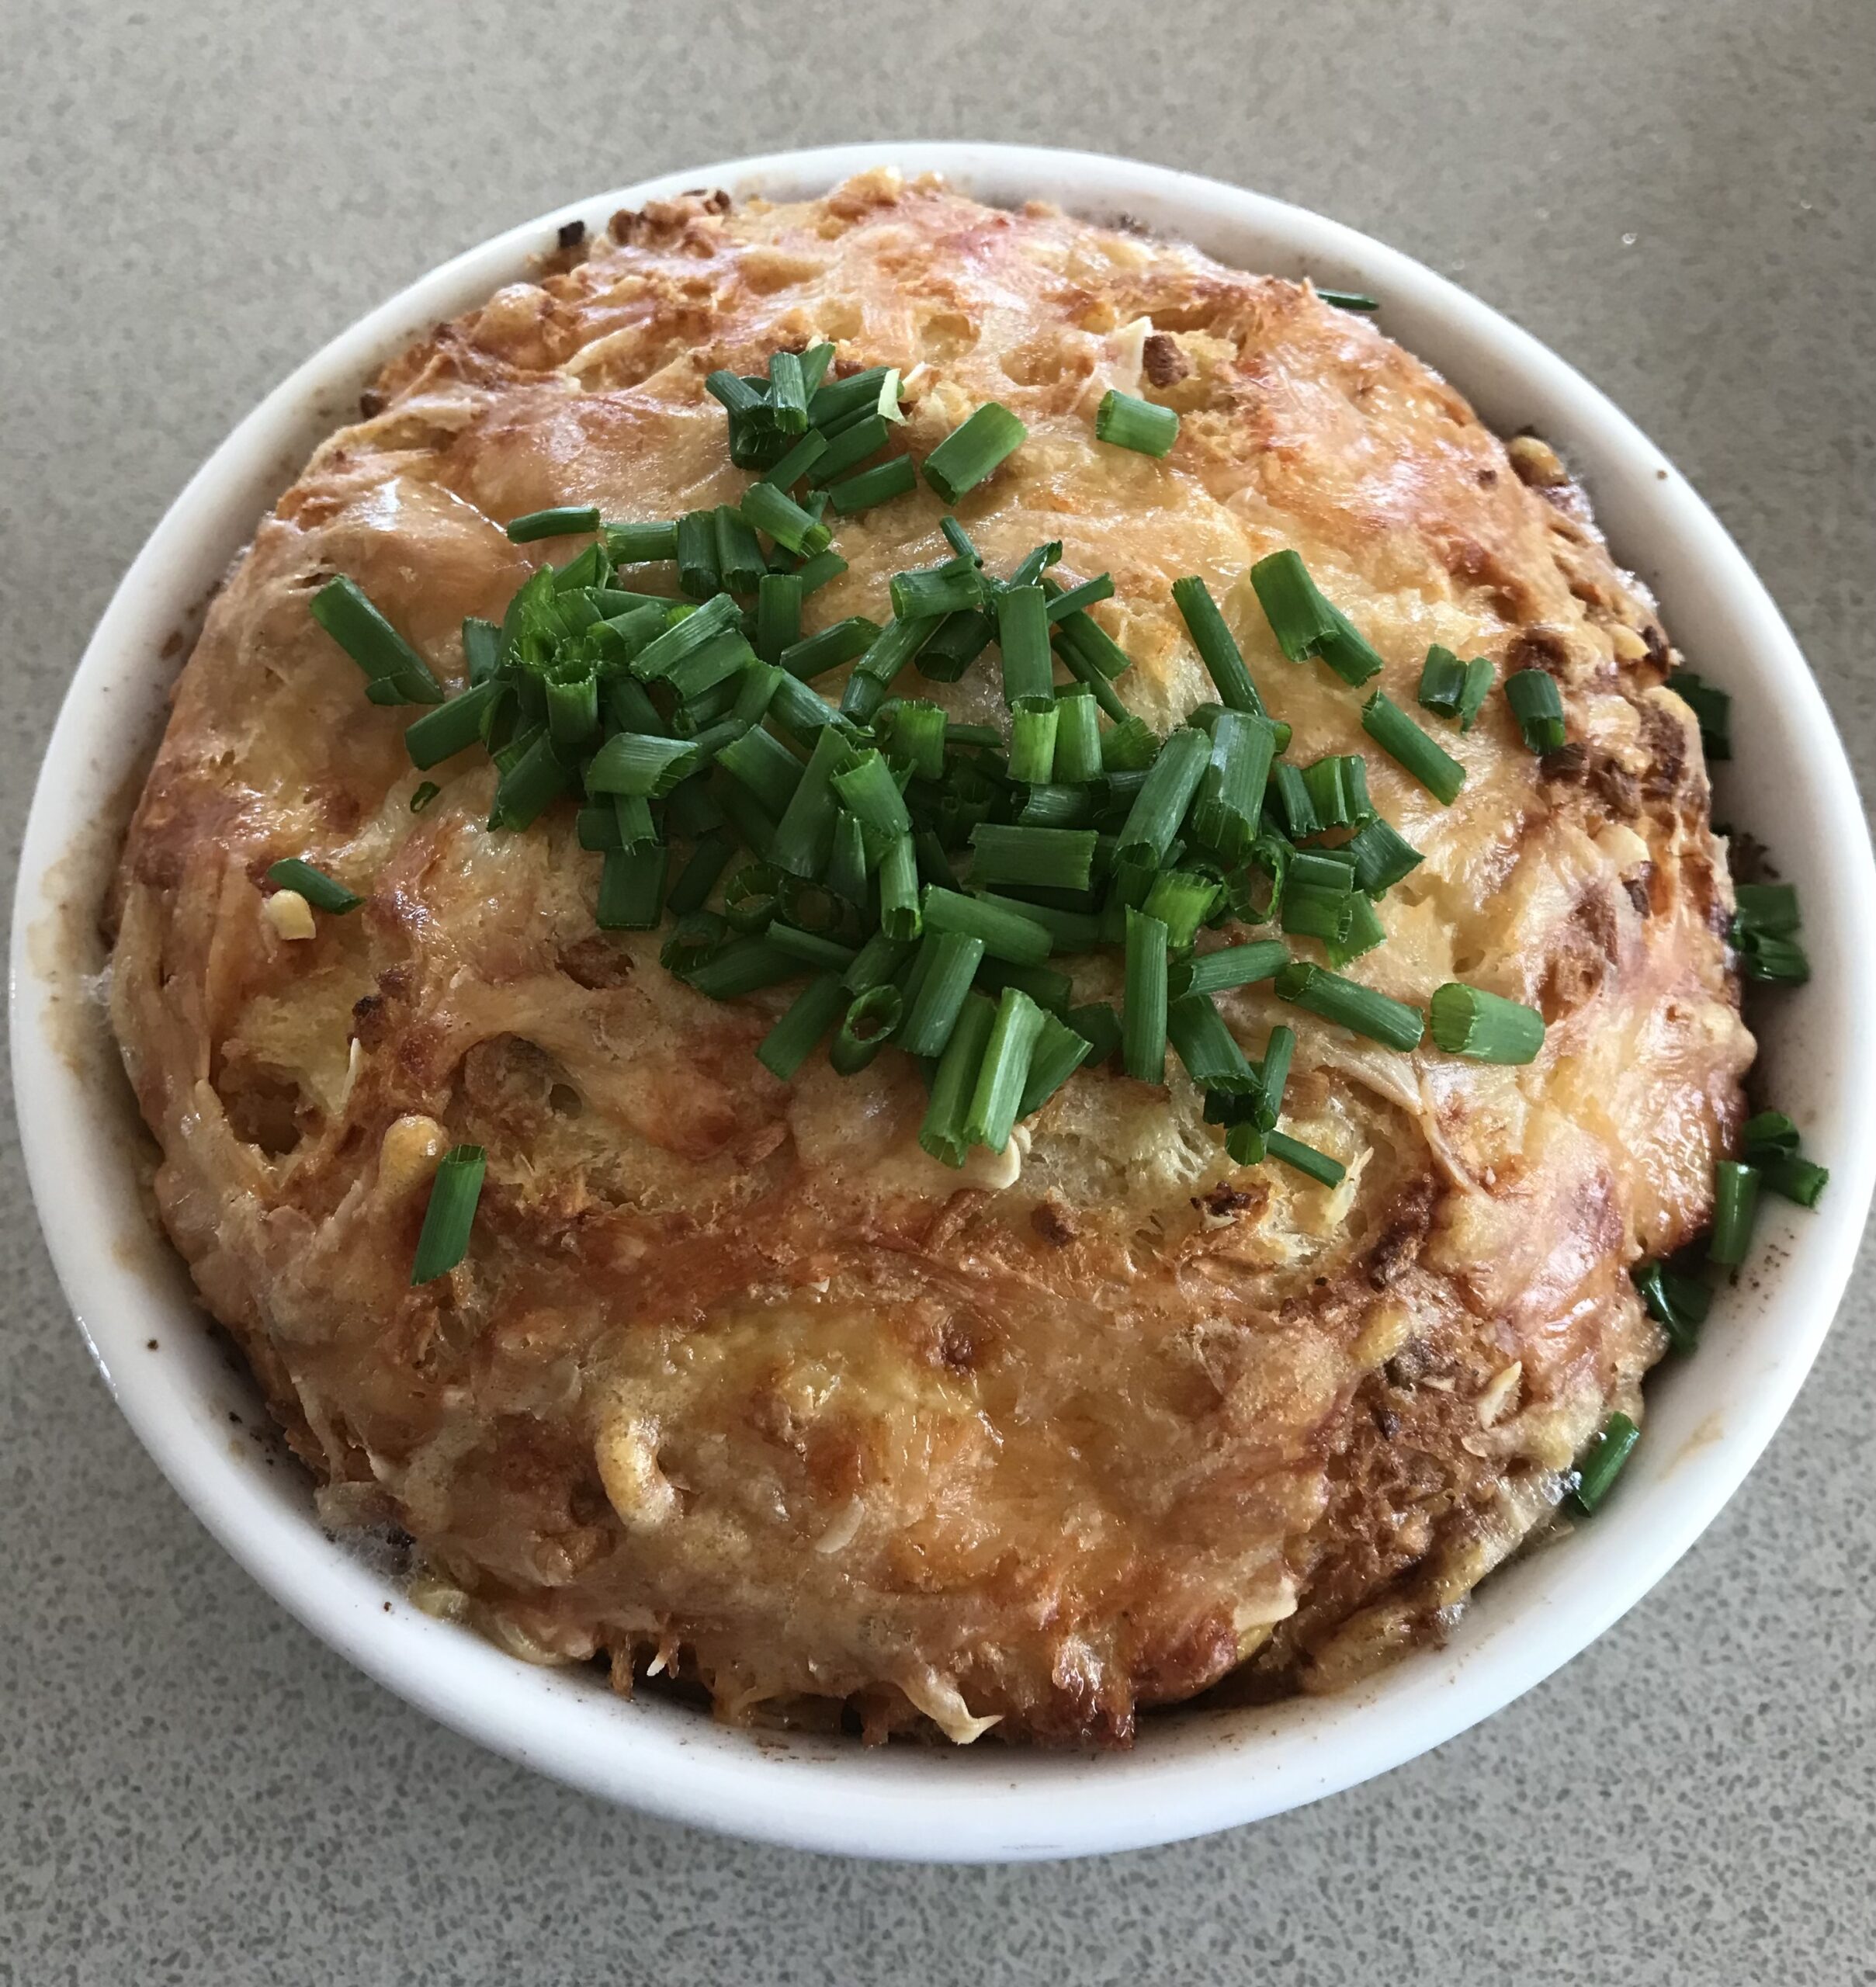
French Onion Soup

In the early 1970s I was posted by the Foreign Office to work at the British Mission to the UN in Geneva for 3 years.

A large number of ski resorts are located less than an hour and a half’s drive from Geneva, in the French Alps. Every Sunday morning in winter a gang of us from work would clamber aboard one of the buses which left from the main railway station. At six thirty sharp the bus would head off to a different ski station each week. It was still dark and most of us caught up on sleep on the way.

By nine o’clock, when the ski lifts opened, we were all geared up with our rented skis and boots and ready to hit the slopes. The ski club which organised these expeditions had a number of excellent instructors. On arrival at our destination we separated into 3 groups: beginners, intermediates and advanced. Some lied about their ability in order to get the better-looking instructors. It was great value with the bus and the full day lesson all included in the price.

At lunch time we met at a nominated bistro and queued up for one of the hot self-service meals. An early start and all that physical exercise meant we were ravenous. Hearty soups, pizzas, toasted cheese sandwiches and French fries, with or without steak, were all popular ways of replenishing the energy we’d expended in the morning. My favourite was the French Onion Soup. Hot spiced wine and hot chocolate were amongst the preferred beverages.

It took me a few goes to get this soup right. Making it a day or two in advance really improves the flavour.

1½ kilos onions, peeled and thinly sliced
60g butter and 1 Tbs oil
½ tsp sugar
1 tsp salt
3 Tbs flour
2 litres beef or chicken stock
½ cup dry white wine
Salt and pepper to taste
3 Tbs dry sherry or brandy
12-16 slices French bread sliced 2 cm thick (or 6-8 larger slices of bread)
300g coarsely grated Gruyere or other Swiss cheese

In a large heavy-bottomed saucepan, cook onions in butter and oil over low heat, stirring often and with a lid for about 15 mins, or until soft. Add sugar and salt and raise the heat to moderate. Cook for 30-40 mins, stirring often, or until deep golden brown. Add flour and cook, stirring, for 2-3 minutes. Add stock and wine slowly, stirring. Simmer, covered, for 30-40 minutes, stirring from time to time. Cool then refrigerate until ready to serve. Can be kept in the fridge for up to 3 days.

Reheat soup, adding sherry or brandy and salt and pepper to taste. Cover bread slices with grated cheese and grill until golden and cheese is bubbling. Ladle soup into 6-8 bowls and place one or two slices of the cheesy toast on each serving. This soup is best made a day or two before serving.

Serves 6-8

Pasta with Chicken, Bacon, Artichokes & Spinach

Roast chickens were half price when I did my supermarket shopping this week. They are always handy to have in the fridge to whip up one or two quick meals.

I used one drumstick and one thigh to fill a couple of wraps for lunch. Onto the wraps I spread some home-made mayonnaise, then topped with the chicken, a few roasted pumpkin cubes with pesto (leftover from the previous night’s dinner), some lettuce leaves, grated carrot and a little Tomato Kasaundi – a delicious curried chutney which isn’t on Café Cat yet, but will be in due course. You could use another chutney. Invented on the spur of the moment, this wrap filling was a winning combination.

In an attempt to follow a fairly low carb diet we don’t eat a lot of pasta – maybe once or twice a month. When we do, I like to make something tasty with lots of additions, so it’s not all pasta. The only thing I had to nip to the corner shop for was the spinach, everything else was in the fridge or pantry. If you don’t have a cooked chicken in the fridge you could pan-fry one chicken breast instead.

250g pasta of your choice
80-100g chunky bacon bits (lardons)
2 Tbs olive oil
1 onion, chopped
1 cooked chicken breast, shredded or chopped
Salt and freshly ground black pepper
3 cloves garlic, crushed
1 cup artichoke hearts (from a jar or can), sliced
2 cups baby spinach leaves, firmly packed
1/3 cup cream
To serve:
Freshly grated Parmesan cheese

Cook pasta in boiling salted water until al dente. Drain, keeping 1 cup of the cooking water, then put back into the pan with the reserved liquid.

Meanwhile cook the chunky bacon bits in a non-stick frying pan until browned and crispy. Remove from the pan. If you like discard the bacon fat but I usually keep it. Add the oil and onion to the pan and cook, stirring often, until soft and starting to brown. Add the onions to the pasta with the bacon, chicken, garlic, artichokes, spinach and cream. Turn on the heat just long enough to heat everything through, stirring. Season to taste.

Serve the pasta topped with grated Parmesan and freshly ground black pepper.

Serves 2-3


Tahini Cookies

The Middle Eastern paste known as tahini can be used in both savoury and sweet dishes. Made by pulverising sesame seeds, it’s an integral ingredient in hummus, a dip we’ve all grown to love since it has become widely available in supermarkets and delis.

These very quick and easy cookies use tahini, combined with ground nuts and honey or maple syrup, and don’t contain any butter or oil.

2 cups ground almonds or walnuts (make in the food processor then measure)
½ tsp salt
¾ cup tahini
½ cup maple syrup or honey or half and half
2 tsp vanilla essence
To decorate:
Pecan or Walnut halves

Preheat oven to 150°C. Place ground nuts and salt in a bowl. Place tahini, maple syrup or honey and vanilla essence in a small saucepan and heat, mixing, just enough to make it smooth. Mix into the dry ingredients.

Pinch off pieces the size of a large walnut and roll into balls. Arrange on a biscuit tray lined with baking paper, leaving enough room for them to spread. Press each ball with your finger to flatten slightly, then decorate with a pecan or walnut half and press them in.

Bake for 10-12 minutes or until golden brown. Cool then store in a sealed container.

Makes 16-20

Note: I didn’t have quite enough ground nuts so I used 1½ cups of ground nuts and ½ cup plain flour. If you want to make them gluten-free, just use ground nuts.

Minestrone

This traditional Italian soup is perfect for lunch or a light dinner in the cooler months of the year. Make a big pot at the weekend and serve it for lunch or dinner a couple of times through the week, or take some to work to reheat in the microwave.

There are as many recipes for minestrone as there are for bolognese sauce, so to a certain extent you can just use what you have on hand. Onion, garlic, carrot, tomato and celery are the basic essentials, while the other vegetables are mostly optional. If you have it in the fridge add it, but don’t make a special trip to the shops just to buy one zucchini or one potato.

In the minestrone I made for the photo I didn’t add any potato, zucchini, leek or spinach/cabbage. I did add frozen peas and the kernels from a cob of fresh corn which needed using up. The spiral pasta is bigger than the size I usually use in minestrone, but it’s what I had in the pantry. Vegetarians can just leave out the bacon.

Served topped with grated Parmesan and some crusty bread or toast, it’s guaranteed to warm the cockles of your heart, as my Irish grandmother used to say. In other words, it will give you a warm fuzzy feeling.

2 Tbs olive oil
1-2 onions, peeled and diced
1 leek, trimmed and diced (optional)
3-4 carrots, peeled and diced
2-3 celery stalks, diced
2 cloves garlic, crushed
2-3 rashers bacon, diced (optional)
Kernels from 1 cob corn, or one zucchini, diced
2 cups frozen peas
2 cups shredded spinach or cabbage
1 large potato, peeled and diced (optional)
2 tsp dried oregano
2 tsp dried thyme
1 can cannellini beans, drained (or another bean)
2 x 400g cans tomatoes, whizzed in food processor
1 Tbs tomato paste
2 Tbs sherry (optional)
2 litres chicken or vegetable stock (or water + 2 stock cubes)
Salt and freshly ground black pepper, to taste
2-3 tsp sugar
200-250g small pasta
To serve:
Grated Parmesan cheese
Chopped fresh parsley

Heat olive oil in a large heavy-based saucepan, then add bacon and the diced vegetables, but not the frozen peas and spinach/cabbage. Cook, stirring often, for 10 minutes or until vegetables are al dente.

Add the rest of the ingredients, bring to the boil, then simmer until the pasta is cooked. Add more water as required and check for seasoning.

Serve the soup topped with grated Parmesan cheese and chopped parsley, with fresh bread or toast.

Keeps in the fridge for 4-5 days and improves in flavour. Add water as necessary on reheating, if the soup appears to be too thick.

About 8 servings

Chinese Sesame Noodles with Eggplant

These Chinese Sesame Noodles with Eggplant always leave me thinking that if I had to be a vegetarian, this is one of the dishes I would make often. Some vegetarian dishes are satisfying and others just don’t hit the spot.

The original version came from Australian cook Belinda Jeffery, cooking presenter on the TV show Better Homes and Gardens for many years. I’ve been making it for over 20 years and yes I’ve tweaked it slightly (I know, I’m incorrigible) and added the optional pine nuts which were suggested by Matthew.

Served at room temperature it’s perfect for a shared buffet or as a light family dinner. Also great for lunch boxes.

This week’s recipe is especially for Moya and John and my brother David.

2 large eggplants, cut into 1cm thick slices
3 spring onions, sliced finely on the diagonal
125g bean sprouts
A good handful chopped fresh coriander
450g fresh noodles (Hokkien or Singapore)
Lightly toasted pine nuts to garnish (optional)
Basting mixture:
2 Tbs sesame oil
2 Tbs olive oil
3 Tbs soy sauce
2 Tbs vinegar
¼ cup sugar
1 small red chilli, finely chopped (with or without seeds, up to you)
2 tsp finely chopped or grated fresh ginger (I tend to use more, like double!)
1 large clove garlic crushed

Cook noodles according to packet directions and drain. Preheat oven to 200°C. Mix basting ingredients. Arrange eggplants on two large shallow baking trays lined with baking paper. Brush both sides with the basting mixture. Bake for 20-25 minutes or until tender, brushing them again about halfway through the cooking time.

When eggplant is cool enough to handle cut into quarters, halves or thick slices and mix with remaining basting mixture. In a large shallow serving dish mix the eggplants with the noodles, bean sprouts, spring onions and coriander, keeping a little for decoration. Taste and add some extra olive oil or soy sauce, if necessary. Garnish with the reserved coriander and a few toasted pine nuts (optional, but they do add a nice bit of crunch) and serve warm or at room temperature.

Serves 4

Tilly’s Ginger Nuts

My mother-in-law’s sister, Tilly Archer, gave me this recipe for ginger nuts when I was newly-married and recently arrived in Australia.

Tilly was a sprightly lady in her late seventies when I met her and she was always busy – baking, making preserves, gardening and travelling. She said the secret to longevity was that she didn’t have time to die, her diary was too full. This philosophy certainly worked for Tilly who lived to a ripe old age.

Tilly had a fabulous garden and gave me lots of tips on flower arranging, back in the days when arrangements were more formal and less natural-looking. I was very chuffed when I won first prize with my arrangement at the annual horticultural show.

These super-crunchy biscuits are perfect with a cup of tea or coffee or to pack in school lunch boxes. Kids love them. Oh by the way, I made them once and forgot to add the bicarbonate of soda. They don’t work.

125g butter
¾ cup sugar
¼ cup golden syrup
1 egg, beaten
325g self-raising flour
4 tsp ground ginger
1 tsp bicarbonate of soda

Preheat oven to 180°C. Using a medium-sized saucepan, gently heat butter, sugar and golden syrup. Stir until butter melts and sugar dissolves. Cool for 15 minutes then add the beaten egg and remaining ingredients, sifted and mix well.

While still warm, pinch off pieces of dough the size of a large walnut and roll into balls. Place on oven trays (greased or lined with non-stick baking paper) allowing space for spreading. Depending on the size of your trays you will fit 12 or 16 on each.  Press each ball once in the middle with a finger or a fork to flatten a bit. Bake for 10 minutes, or until deep golden brown. Cool then store in an airtight tin.

Makes 35-40

Baked Fish Fillets with Barley Stuffing

This recipe is adapted from one I found on the New Zealand website Mind Food, which is linked to the magazine of the same name.

Barley is an underrated ingredient, but we love its nutty texture which lends itself to all kinds of recipes where you might normally use rice.

The original recipe for these stuffed fish fillets (actually they’re sandwiched together rather than stuffed) uses two large snapper fillets and serves 4-6. My version is about half the recipe, using two smaller fillets, which serves 2-4, depending on appetites. If you can’t find snapper, any firm-fleshed fish fillets would work.

Having made this recipe I think you could get away without the string. Just sandwich the fillets together with the stuffing and pack the rest around.

2 fish fillets weighing about 250g each
2 Tbs extra virgin olive oil
1 Tbs lemon juice
Salt and freshly ground black pepper
Barley Stuffing:
½ cup pearl barley
2 Tbs pine nuts, lightly toasted
½ small onion (red or brown), finely chopped
½ preserved lemon, flesh discarded, rind chopped
2 tsp salted baby capers
50g feta cheese, crumbled
¼ cup chopped mint
¼ cup chopped parsley
Salt and freshly ground black pepper, to taste

For the stuffing, cook barley in boiling salted water for 30-40 minutes, or until tender. Drain well then mix with remaining ingredients.

Preheat oven to 200°C. Place one fish fillet on a baking tray lined with baking paper. Season on both sides then cover with the barley stuffing. Season the second fish fillet and arrange on top. Use kitchen string to tie the “sandwich” at 3-4cm intervals. Place any leftover barley stuffing around the fish package. Drizzle with 1 Tbs olive oil and lemon juice. Bake for 20 minutes, or until cooked through when tested with a fork or skewer.

Remove string and cut the fish downwards into between 2 and 4 servings. Drizzle the remaining tablespoon of olive oil around the fish. Serve with a green vegetable such as peas or beans.

Serves 3-4


Easy Peasy Salmon Sushi

Salmon sushi make a quick and tasty, not to mention healthy meal, especially if you make them using an ice cube tray. I made the rice cakes a bit too tall, so the ratio of rice to salmon wasn’t quite right. Next time I won’t fill the ice cube holes so full.

1 cup sushi rice
1¼ cups water
1-2 Tbs Mirin
1-2 Tbs Rice Wine vinegar
Salt and pepper to taste
2 salmon fillets, skin removed
To serve:
Black sesame seeds
Wasabi paste
Soy sauce
Pickled Ginger
Sliced avocado

Place rice and water in a saucepan with a good pinch of salt and bring to the boil. Cover and turn down the heat as low as possible. If you have a heat diffuser use it under the pan. Cook rice for 15 minutes, then turn off the heat and let it sit for 15 minutes to continue cooking in the steam.

Oil an ice cube tray – I used a spray can. You may need more than one ice cube tray depending on how many holes it has. Fill with the rice, pushing down firmly, then refrigerate for a couple of hours or more.

To serve, tip out the rice cakes and arrange them on a serving tray. Thinly slice the salmon and drape a piece over each rice cake. Sprinkle with black sesame seeds.

Serve with wasabi paste, soy sauce, pickled ginger and sliced avocado.

Makes 16-20 sushi to serve 2-3 as a light meal or more as an aperitif.

Beef and Chestnut Casserole

When I was growing up in England in the 60s my mother regularly made a beef and chestnut casserole in winter, which we all loved.

She found the recipe on the back of an Oxo beef stock cube packet. Apart from beef, chestnuts and Oxo cubes I remember she added sherry or red wine, but I didn’t have the recipe. A couple of years ago I contacted the makers or Oxo cubes to see if they could help, but they couldn’t.

I decided to have a go at recreating this dish and here is the result. Simple but delicious. Served with mashed potatoes and a green vegetable it’s perfect for a winter gathering.

1.2kg lean beef (chuck steak, gravy beef) cut into 2cm cubes
2 Tbs plain flour
Salt and freshly ground black pepper
3 Tbs olive oil
2 large brown onions, chopped
2 beef Oxo cubes, crumbled (or use another brand)
1 cup dry sherry or red wine
1 Tbs fresh thyme leaves or 1 tsp dried
2-3 carrots, sliced (optional)
2-3 cups water
400g peeled chestnuts (see note below)
Chopped parsley to garnish

Mix beef with seasoned flour to coat thoroughly. Heat 1 Tbs oil in a large non-stick frying pan and brown the meat on both sides. Remove to a large casserole dish with a lid. Repeat with remaining beef and another Tbs of oil. Add to the casserole. Add the last Tbs oil to the frying pan and cook the onions, stirring often, until softened but not browned. Add to the casserole with the sherry or red wine, thyme, and carrots If using.

If you use fresh uncooked chestnuts you have peeled yourself add them now. If using cooked ones add them later.

Preheat oven to 150°C. Mix  2 cups of water into the casserole and bake for 2-3 hours or until meat is tender. Check and stir every hour or so and add more water if necessary. You want the casserole to be nice and thick. If using cooked chestnuts add them about half an hour before the casserole is ready.

If preferred, cook the casserole in a slow cooker for about 4 hours on High or 8 hours on Low. If using this method you will definitely need less water than when using an oven.

I like to make casseroles the day before serving as it improves the flavour. Reheat on the day with the addition of a little more water, if required.

Garnish with chopped parsley and serve with mashed potatoes (with lots of butter added) and a green vegetable.

Serve 6-8

Note: fresh chestnuts are fiddly to peel so I bought two 200g packets of peeled, cooked whole chestnuts made by a company called Cheznuts. At $12 a packet they’re not cheap but they were certainly convenient.


Baked Gnocchi with Tomatoes, Basil and Cheese

This is a very quick and easy dish to feed your kids or grandkids, using a packet of bought gnocchi.

It can be thrown together in no time at all, but if you feel like making your own gnocchi, by all means do so. I made it with the packet variety when a couple of the grandkids were coming for dinner and it was really quite tasty.

500g packet potato gnocchi
2 Tbs olive oil
250g cherry tomatoes, halved (or larger tomatoes, quartered)
125g fresh mozzarella, cut into chunks, or use small bocconcini balls
1 cup fresh basil leaves
Salt and freshly ground black pepper
1/3 cup pine nuts (optional)
¾ cup cream
1 cup grated cheddar cheese

Preheat oven to 200°C. Place gnocchi in a bowl, cover with boiling water and leave to stand for 2-3 minutes. Drain well. Tip gnocchi into a shallow lasagne-type dish. Add the olive oil and seasoning and mix well. Tuck the tomatoes, mozzarella chunks or bocconcini balls and most of the basil in between the gnocchi. Scatter the pine nuts over, drizzle with the cream and sprinkle with the grated cheddar.

Bake for 20-30 minutes or until golden brown and cooked. Garnish with remaining basil and serve with a green salad.

Serves 4