Raspberry Trifle

When I was growing up in England a trifle was always served for special occasions – birthdays, high days and holidays and if we were entertaining special guests. If someone served trifle you knew you were getting the right royal treatment. The basic combination was always sponge fingers, a splash of sherry, fruit, raspberry jelly made from a packet, custard – the instant Bird’s Eye variety – and whipped cream.

Many years ago my friend Daphne served a real raspberry jelly and I was blown away. Made from sieved raspberries, sugar and gelatine, it was nothing like the packet variety. So when I make a trifle these days I make real raspberry jelly and crème anglaise, instead of the fake custard of my youth. If you’re in a hurry use a couple of packet of bought raspberry jelly – see the notes.

You can use fresh or frozen raspberries to make the jelly.  I usually use frozen berries as they’re cheaper and available all year round. You just need a few fresh ones to garnish – which in this photo came from our garden – and I added a few strawberries to add a touch of green. I prefer not to add sherry, as my mother always did, as I don’t want anything to detract from the intense raspberry flavour of the jelly.

Funny how the French call custard crème anglaise, when many Brits grew up on the packet variety as I did. British housewives got used to using Bird’s Eye custard powder during WW2, when eggs were rationed and hard to come by. In my recipe for crème anglaise I use whole eggs rather than just the yolks, so I add some cornflour because you want the custard to be nice and thick.

The end result is even more delicious than my childhood memories. Suffice it to say that Matthew, who was put off British desserts such as custard, rice pudding and tapioca as a result of spending several years at boarding school in England, comes back for second helpings.

Raspberry and Peach Trifle

Base:
8 lady finger (Savoiardi) sponges
1 large can peach halves or slices in natural juice
or 4 large fresh peaches or nectarines, peeled and halved
Jelly:
1 kg raspberries, fresh or frozen
3-4 Tbs sugar, or to taste
2 Tbs powdered gelatine
Crème Anglaise:
1 cup cream (250 ml)
2 cups milk (500 ml)
2 to 4 Tbs sugar, to taste (I use 1 Tbs)
2 tsp vanilla essence
4 eggs
3 Tbs cornflour
To finish:
250 ml whipping cream
Fresh raspberries to garnish (+ a few strawberries if liked)

Start the trifle the day before serving.

Base: Arrange lady fingers in the bottom of a glass dish – see note below. They might fit better in your dish if you cut them in halves. Arrange the peaches over the sponge. I used peach halves and arranged them around the edge of the dish standing up, with the cut faces against the glass. If using fresh peaches they need to be very ripe and peeled.

Jelly: Thaw raspberries if frozen. Push them through a sieve, discarding any pulp which won’t go through. Add enough water to the raspberry juice/puree to make up to 800 ml and sweeten to taste. Sprinkle gelatine over half a cup of water then zap in the microwave to dissolve. Mix gelatine mixture into raspberry mixture, then pour gently over the peaches and sponge fingers. The sponge fingers will float to the top, but keep pushing them under so they soak up the jelly. Refrigerate until set.

Crème anglaise: In a non-stick saucepan heat cream, milk, sugar and vanilla essence until almost boiling. Beat eggs and cornflour with a balloon whisk in a bowl, then pour in the hot cream mixture and whisk to combine. Pour back into the saucepan and continue to cook, stirring constantly with a wooden spatular which has a flat base, until the custard has thickened and will coat the back of the spatular. Be careful as you don’t want scrambled eggs. Cool a bit then carefully pour over the raspberry jelly. Cover and chill overnight.

To finish: Whip cream until thick – it should double in volume – then carefully dollop over the top of the trifle. Decorate with fresh berries.

Serves 8-10

Variations: use strawberries instead of raspberries in the jelly.

Instead of making the raspberry jelly you could place the fruit on top of the sponge layer (300g raspberries will be enough) then make up 2 packets of bought raspberry jelly and pour that over. Use fresh or frozen raspberries or strawberries and some canned or fresh peach halves, or leave out the peaches altogether and just use berries.

Note: the dish I used in the photo was a bit small. A larger one with a wider mouth would have made the trifle less deep and easier to serve. It was a bit difficult to get to the bottom layer, but we managed!


Quick Gazpacho for Two

Having just picked our first Lebanese cucumber I decided to whip up a quick gazpacho and serve it for lunch 10 minutes later. I have a good recipe which makes several litres and serves a crowd, but it takes more than 10 minutes to make. So I threw the cucumber into the food processor, added some other ingredients until it tasted right, and here it is.

Quick gazpacho for two2 cups tomato passata from a jar
1 small Lebanese cucumber, washed and ends trimmed
¼ cup olive oil
1 thick slice of onion, red or white
1 Tbs sweet chilli sauce
1 small clove garlic, crushed
Salt and freshly ground pepper to taste
Juice of ½ a lemon
Water
To garnish:
Greek yoghurt
1 small or ½ large avocado, diced
Fresh coriander or parsley, roughly chopped with scissors

Place all ingredients except garnish in a food processor and whiz till smooth. Add enough water to make to desired consistency (it won’t need much) and adjust seasoning, then whiz again. Chill until serving time, or if you’re in a hurry just add a couple of ice cubes when you add the water. Divide between two serving bowls. Garnish with a dollop of Greek yoghurt, some diced avocado and chopped fresh parsley or coriander

Optional extra: some home made croutons. You can also add some red capsicum or a touch of fresh chilli. Instead of avocado top with some diced cucumber and/or tomato.

Serves 2

Spicy Eggplant and Tomato Soup

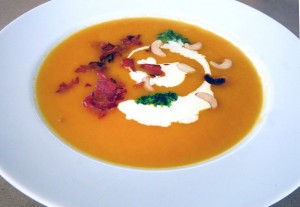
This soup is quick, easy and satisfying. I invented it one day when I had a friend coming for lunch and one lonely eggplant sitting in the fridge. I just stuck it in the oven and let it cook while I did something else. The final mixing and reheating takes less than 10 minutes.

While the subtle flavour of the eggplant is somewhat overpowered by the tomato, it does provide a nice texture. And the peanut butter, garlic and chilli add an Asian touch to the flavour combination.  I’ve made the recipe with both crunchy and smooth peanut butter and while they’re both nice I prefer the creamier result you get with the smooth variety. But If you’ve only got crunchy I wouldn’t go out and buy a jar specially.

Spicy Eggplant and Tomato Soup1 large eggplant
1 clove garlic, crushed
1 500g jar tomato sauce for pasta (see note)
1 jar of water (and maybe a bit more)
1 tsp sugar
1 chicken or vegetable stock cube
3 Tbs peanut butter
1 small red chilli, seeded and chopped
Salt and freshly ground black pepper to taste
To serve:
sour cream or thick Greek yoghurt
fresh coriander
fresh bread or toast

Preheat oven to 180ºC. Pierce eggplant a couple of times with a knife, so it doesn’t explode in the oven. Place in the oven for 30-40 minutes, or until it feels soft when you squeeze it. Halve eggplant and scrape out the flesh into a food processor, discarding skin.

Add remaining ingredients and process until smooth. Tip into a saucepan and heat to boiling point. Check seasoning and add a bit more water if necessary to make desired consistency. This will depend on how big your eggplant was.

Ladle into soup bowls and top each serving with a dollop of sour cream or yoghurt and chopped coriander. Serve with fresh Turkish or sourdough bread or toast.

Serves 4

Note: Most pasta sauces weigh about 500g. I used about two thirds of a 700g jar of Woolworths Home Brand Chunky Pasta Sauce.

Pear & Avocado Salad with Blue Cheese Dressing & Caramelised Walnuts

A perfectly ripe pear and an avocado sitting next to each other in the fruit bowl provided the inspiration for this healthy week-end lunch. I’ve always liked the sweetness fresh fruit adds to an otherwise savoury salad. You can use any type of blue cheese and pecans instead of walnuts.

Two Pear Salad with Blue Cheese Dressing & Caramelised Walnuts2 baby cos lettuce hearts
1 large ripe pear
1 ripe avocado
2 tsp oil
About 20 walnut halves
2 tsp honey
Dressing:
½ cup vegetable oil of your choice
Juice of ½ lemon or lime
¼ cup cream or sour cream
2-3 Tbs blue cheese
Freshly ground black pepper
To serve:
Finely chopped parsley or chervil

Arrange lettuce on two plates. Peel and halve pear and remove core with a melon baller, arrange on plate. Peel avocado, remove stone, cut each half into slices but not quite to the narrow end, then fan out on the plate. Heat oil and cook walnuts for a minute or two, stirring. Add honey and continue to cook and stir until sticky and glazed then turn off the heat – be careful, they burn easily. Place all ingredients for dressing in food processor and process until smooth. Start with 2 Tbs cheese, then taste and see if it needs more. Drizzle some of the dressing over the salads, sprinkle with walnut halves and herbs.

Serves 2

Smoked Salmon and Scrambled Egg Tartlets

I’m always looking for new ideas for weekend lunches. Something light and tasty to go with a glass of wine. This delicious combination of scrambled eggs, smoked salmon and crisp pastry comes from Gordon Ramsey.

Once cooked the pastry shells will keep for several days in a sealed container in the fridge and just need to be reheated in a hot oven for 2-3 minutes. For the garnish I prefer salmon roe which is a dark pink colour, but had to make do with the fake black “caviar” shown in the photo, because it’s easier to find at the weekend in a suburban supermarket. The rocket leaves look huge, I know, but that’s how they grow in our garden.

Smoked Salmon and Scrambled Egg TartletsPuff pastry, bought or home-made
3-4 eggs
2-3 Tbs milk
Salt and freshly ground black pepper
25g butter
4 slices smoked salmon
Salmon roe or Lumpfish roe (fake caviar)
Rocket salad, lightly dressed

Preheat oven to 200ºC. Line two individual quiche tins with pastry, rolled out thinly. Line with foil then add dry beans or corn to hold the foil flat. Bake blind for 10 mins then remove foil, prick pastry with a fork to make sure it stays flat and put back in the oven for another 5 mins or until golden and crisp. These can be made ahead and kept in a container with a lid for up to a week.

If tarts have been made ahead and are cold, reheat them in a hot oven for 2-3 minutes. Beat eggs with milk and add salt and pepper to taste. Melt butter in a non-stick pan and scramble the eggs. Place two slices smoked salmon in each tart shell, with the darker edges towards the middle. Top with the eggs, garnish with the salmon roe or lumpfish caviar and serve with a rocket salad.

Serves 2

Cauliflower & Stilton Soup with Pesto

On a cold wintery day a bowl of steaming soup hits the spot. I’m not a great fan of blue cheese, eaten on its own, but I do like the more subtle flavour you get when you use it in a soup or salad dressing.

We were recently served a soup like this (without the pesto) at a cocktail party at the Press Club, in small espresso cups. I suspect they added at least 2 cups of cream, which was delicious and okay in such small servings, but not what you want to indulge in for lunch.

Cauliflower & Stilton Soup with Pesto

50g butter
1 onion, finely diced
1 cauliflower, trimmed and cut into pieces (stalks are fine too)
4 cups chicken or vegetable stock, preferably home-made
1 cup cream
100g Stilton, or another blue cheese
Milk
Salt and freshly ground black pepper
To serve:
Pesto

Melt butter in a large heavy-based saucepan and cook onion over moderate heat, stirring oven, until soft and translucent. Add cauliflower and stock and simmer for 20 mins or until cauliflower is tender. Cool a bit then blend until smooth in a blender, adding the cream, the blue cheese and some milk to keep things moving. Tip back into the saucepan, adding enough extra milk to achieve desired consistency. Season to taste. Reheat and served topped with a swirl of pesto.

Serves 6

Greek-Style Lamb with Rocket Salad

This Greek-style roast lamb is very similar to a recipe I posted a couple of weeks ago. This one is accompanied by a rocket salad rather than roasted vegetables, making it a more summery dish. On one large platter it makes a good addition to a casual buffet.

Greek-Style Lamb with Rocket Salad

1 shoulder of lamb, bone removed
2-3 tsp salt (to taste)
6 cloves garlic
1 Tbs peppercorns
6 sprigs of rosemary
2 Tbs dry oregano
2 Tbs olive oil
100 ml white wine vinegar or lemon juice
1/4 cup water
1/4 cup red wine or sherry
To serve:
Rocket
Feta or goat’s cheese
Toasted pine nuts
Lemon and olive oil dressing
Pitta or Turkish bread

Preheat oven to 170°C. Trim excess fat from lamb. In food processor or using a mortar and pestle, make a paste with the salt, garlic, peppercorns, rosemary, oregano and olive oil. Place lamb in a roasting pan and spread it on both sides with the herby paste, massaging it in. Add vinegar or lemon juice, water and wine or sherry to the bottom of the pan and cover with foil. Bake for an hour, then turn the meat over and baste with pan juices. Cover again with the foil and return to the oven for another hour or until the meat is very tender and almost falling apart. Remove foil, turn the meat over again and turn the oven up to 200°C. Cook for a further 20 minutes, or until browned on top.

Prepare a large serving dish or individual plates with a simple rocket salad, dressed with lemon juice and olive oil. When the lamb is ready break it into pieces using two forks or cut it into pieces and arrange over the salad. Sprinkle with feta or goat’s cheese and toasted pine nuts. If liked, drizzle with some of the juices from the roasting pan. Serve with warm pitta or Turkish bread.

Serves 8

Moroccan Lamb

I started making this Moroccan lamb when we were living in Paris. I served it when my Dad came over from the UK with the rest of my family to celebrate his 80th birthday in 2000. The recipe has evolved over the years and become a family favourite. Our eldest son James makes it so regularly it has become his signature dish.

Moroccan Lamb1 leg or shoulder of lamb, trimmed of excess fat
1/3 cup lemon or lime juice
1 Tbs tomato paste
1 tsp ground cumin
1-2 tsp sambal ulek (harissa or chilli paste)
1-2 large cloves garlic crushed 
1 Tbs fish sauce
Moroccan vegetables:
Oven roasted vegetables
1 can chick peas, drained
1-2 tsp cumin, to taste
Mint Yoghurt:
1 cup thick Greek yoghurt
½ cup chopped fresh mint
1 clove garlic, crushed
pinch salt
1/2 tsp honey

Place lamb in a roasting pan. Combine remaining ingredients and spread over both sides of lamb. Cover and leave to marinate for several hours or overnight in the fridge.

Preheat oven to 160°C. Remove lamb from fridge and allow to come to room temperature, then add 2 cups water. Bake lamb, covered tightly with aluminium foil, for 3 hours, turning and basting every hour or so. Increase temperature to 180°C, remove foil and cook for another 30-40 mins. If all the liquid has evaporated, add it bit more water. Meat should be very tender and almost falling off the bone. Slice and serve on a bed of Moroccan vegetables, garnished with a dollop of Mint Yoghurt.

Moroccan vegetables: Click on the link to find the recipe for oven roasted vegetables. Mix in the chick peas and cumin about 10-15 minutes before the vegetables are ready.  As the lamb and veggies need different oven temperatures you may prefer to make the roast vegetables earlier in the day, mix in the chick peas and cumin and leave the baking tray aside. Then to serve, if they have got cold, put the tray into the oven for the last 20-30 minutes of cooking time of the lamb, then they will both be ready at the same time.

Mint Yoghurt: mix yoghurt with remaining ingredients and refrigerate until serving time.

Serves 6-8

Home-made Pizza

A proper Italian pizza has a thin, crispy crust and minimal topping. Nothing remotely like the thick, soggy versions sold in many fast food chains. The Associazione Verace Pizza Napoletana says that when cooked a pizza base should be no more than 4mm thick at the centre, though it will be thicker around the edges. And they should know, they invented them.

Home-made pizzaWhen our kids were growing up pizza featured regularly on the menu. The pizza delivery motorbikes never came to our house because my view is that anything home-made is better than the bought version, not to mention cheaper. At the time our offspring thought they were deprived, but now they have their own families and also make their own.

For a larger group make 3-4 times the recipe and form the dough into balls. Have the toppings ready in small dishes and let people choose their own. With a salad and a bottle or two of vino you’re all set for a casual meal which appeals to all ages.

Home-made pizza15g fresh yeast or 7g dry yeast
1 tsp sugar
½ tsp salt
2 cups plain flour (preferably 00)
1 Tbs olive oil
½ to ¾ cup warm water

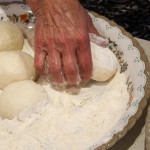
Mix ½ cup warm water with yeast and sugar. Leave for 10 minutes. Sift flour and salt into a bowl, add oregano, oil and yeast mixture. Mix well, adding more warm water until you have a firm, not sticky, dough. If preferred make in a food processor or in a mixer with a dough hook.

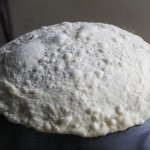
Turn dough onto a floured surface and knead for a couple of minutes until smooth and springy. Form into a ball, place in a lightly oiled bowl and turn to coat with oil. Cover and leave at room temperature for an hour, or until doubled in size. Alternatively, cover and refrigerate overnight to prove more slowly.

Preheat oven to its highest temperature. If using, put pizza stone in the oven to get really hot. Knead dough lightly and form into a ball (or two balls) and leave, covered with a tea towel for about 20 mins or until doubled in size.

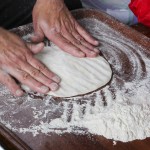
To assemble pizzas place a ball of dough on a lightly oiled pizza pan and press out to size using oiled fingers, working from the middle out. If using a pre-heated pizza stone, or a wood-fired pizza oven, press dough out into a large round on a well-floured pizza paddle.

Home-made pizzaArrange toppings on pizza – be sparing – less is more. Slide onto stone if using one and bake for about 5 minutes or until golden and crispy. Time will vary depending on your oven. Our outdoor wood-fired oven shown in the photo heats up to over 400°C, so pizzas only take about 3 minutes. In an ordinary oven they can take up to 12 minutes. Keep an eye on it.

Makes one very large or two medium photopizzas

Topping suggestions:

  • Tomato sugo (sold in jars to go with pasta) with thinly sliced mushroom, sliced pepperoni or chorizo and grated mozarella
  • Pesto with sliced fresh buffalo mozarella and sliced fresh tomatoes
  • Pesto, peeled prawns, grated mozarella and pine nuts
  • Additional toppings: stoned olives, anchovies, sun-dried tomatoes, caramelized onions, extra oil, fresh herbs

Seafood Mornay

When I was at school in England we made Russian Fish Pies in cookery classes. Steamed white fish, chopped hard boiled eggs and parsley were mixed with a thick white sauce, encased in puff pastry and baked. At the time I thought it was delicious, but I now realise that the fish was over-cooked.

This recipe for Seafood Mornay uses raw seafood mixed into a thick sauce flavoured with cheese and sherry. Either top it with grated cheese and breadcrumbs or make it into pies. Both are delicious – the latter a bit more filling, but not too bad as they only have pastry on the top, not underneath. Either way the seafood is cooked al dente, the way it should be.

Seafood Mornay500g firm white fish fillets, no skin or bones
500g salmon fillets, no skin or bones
500g peeled raw peeled prawns
3 Tbs breadcrumbs (about one slice of bread whizzed in food processor)
3 Tbs grated Parmesan cheese
2 Tbs parsley
Sauce:
60g butter
60g plain flour (about 2 very heaped Tbs)
1½ cups milk
½ cup cream
salt and pepper to taste
pinch of nutmeg
2 Tbs sherry
150g Gruyere cheese, grated (you can substitute cheddar or Ementhal)

Cut fish into cubes about 2-3 cm square then place with prawns in a colander to drain while you make the sauce. Melt butter, add flour, cook for a minute then gradually add sherry, milk and cream. Add salt, pepper, nutmeg and cheese. Season generously because the seafood hasn’t been seasoned. Remove from heat as soon as cheese melts. The sauce will be very thick, but the fish will create juices as it cooks, especially if it’s been frozen, so you need a thick sauce to counteract this. If it seems unmanageably thick add a dash more milk. Mix sauce with seafood and place in one large buttered ovenproof shallow dish or 8-10 individual dishes.

Preheat oven to 200°C. Mix Parmesan, breadcrumbs and parsley and sprinkle over. Mornays can be refrigerated, covered for up to 24 hrs or frozen, well-wrapped, for up to 2 months. If frozen, thaw before cooking.

Bake for 30-40 mins until golden brown all over and bubbly. Serve as a main dish with a green vegetable such as beans or snow peas and rice or new potatoes.

Serves 8-10

Seafood Pies

Seafood mixture (see above)photo
1 egg, beaten
Sour Cream pastry:
250g plain flour
125g butter
1/3 cup sour cream
1-2 Tbs cold water
1 tsp salt

Place flour in food processor, add cold butter cut into pieces and process until fine crumbs. Add sour cream and salt and start motor again. Gradually add water through the chute with motor running. As soon as pastry forms a ball tip out and pat into a flat disc. Wrap in plastic wrap and refrigerate until needed.

Preheat oven to 200°C. Divide fish mixture amongst 8-10 buttered dishes, such as soufflé dishes shown in photo which have a one cup (250ml) capacity. Fill almost level with the top. Roll out pastry on a floured surface and cut circles the diameter of dishes plus 2-3cm. Dampen edges of dishes, place pastry circles on top and press pastry on to seal. Cut a hole for steam to escape. Brush with beaten egg then bake for 30-40 mins or until golden brown and bubbling through the steam vent.

Makes 8-10 pies