Mango Cheesecake

I was looking for a dessert to serve on New Year’s Eve that could be made ahead, didn’t involve turning on the oven, used seasonal fruit, could be transported from Canberra to Sydney with ease and didn’t include raw eggs, making it suitable for a pregnant lady.

This recipe which meets all the criteria appeared in a recent advertisement for Kraft Philadelphia cream cheese.The only change I made was to increase the lemon rind from one teaspoon to one tablespoonful.

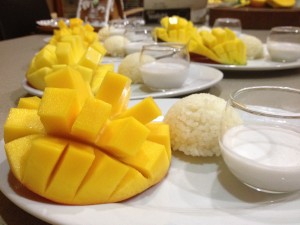
Mangoes are at their cheapest in Australia at this time of year. Choose ones which are not over-ripe as they’re easier to slice thinly and curve for the decoration. I made the cheesecake the day before and took it to Sydney in an Esky (Australian name for a cold box, for those who don’t know) on New Year’s Eve. All I had to do was arrange the mango slices on top and it was ready to serve.

The original recipe didn’t include passionfruit, but we ate the leftovers on New Year’s day with some pulp spooned over. It was a definite plus, enhancing the flavour of the mango and providing colour contrast.

Mango Cheesecake

200g fresh mango, puréed in food processor
¼ cup glucose syrup (also known as Corn Syrup)
1¼ cups sweet biscuit crumbs (e.g. Digestives, crushed in food processor)
75g butter, melted
500g cream cheese at room temperature
¾ cup sugar
1 Tbs grated lemon rind
2 tsp gelatine dissolved in
¼ cup boiling water, cooled
220g white chocolate, melted and cooled
1 cup cream, softly whipped
2 mangoes extra, thinly sliced
Pulp from 2 passionfruit (optional)
Thick cream to serve

Place mango purée in a saucepan with glucose syrup. Cook, stirring over a medium heat for 15 minutes or until thickened and reduced by half. Set aside to cool.

Combine biscuits and butter and press evenly over the base of a 20-22 cm springform pan. In food processor or by hand beat cream cheese, sugar and lemon rind until smooth. Mix in gelatine mixture and melted chocolate, then fold in the whipped cream. Pour filling over biscuit base. Spoon over mango mixture and swirl through the white mixture using the tip of a knife, smoothing the top. Refrigerate 3 hours or overnight. Serve decorated with fresh mango slices and, if liked, some passionfruit pulp. Serve thick pouring cream separately.

Serves 12

Variations: use peaches, apricots or strawberries instead of the mangoes – pulp in the filling and sliced fruit to decorate. For a Ginger Mango Cheesecake use ginger nut biscuits for the crust and mix 2-3 Tbs finely chopped crystallised ginger into the filling.

Note: if preferred, omit the white chocolate and use one and a half cups of cream, whipped. When whipped the cream will more than double in volume.

Roast Cauliflower

I’ve always been a fan of green vegetables such as cauliflower, brussels sprouts and broccoli, which a lot of people don’t like. When I was growing up cauliflower was boiled – usually for far too long – and served with a knob of butter, or margarine, if you were lucky. Sometimes a parsley or a cheese sauce would vastly improve the situation. But when I think back to those over-boiled veggies, I realise it’s hardly surprising some people were put off eating them for life.

All those vegetables which were traditionally boiled in water are much nicer when roasted in the oven with olive oil. Asparagus for example takes on a whole new character when cooked in this way. If you’ve never roasted caulfilower, give it a try. You might even convert some members of the family who don’t normally like this vegetable.

Roast Cauliflower

1 small or half a large cauliflower, cut into large flowerets
1 tsp cumin
1 tsp paprika
Salt and freshly ground black pepper, to taste
2-3 Tbs olive oil
3 Tbs pine nuts
1 slice bread, made into crumbs in food processor
2-3 Tbs snipped chives

Pre-heat oven to 180ºC. Place cauliflower in a shallow roasting pan. Sprinkle with cumin, paprika, salt and pepper and drizzle with oil. Mix with fingers to coat thoroughly, then bake for 30-40 mins or until cooked “al dente”. About halfway through the cooking time give the cauliflower a stir and sprinkle with the breadcrumbs and pine nuts.

Serve garnished with the chives, either hot or at room temperature. It’s even nice cold.

Serves 4-6

Mini Leek Quiches

As an Ambassador’s wife – an unpaid job I enjoyed for many years – I made food for more cocktail parties than I can remember.

Working on 10 per person, I used to reckon that a two hour cocktail party for 300 guests needed 3000 canapes. Some people eat less, but others definitely eat more and it’s always preferable to have a few left over than to run out. The trick is to start a week or two before the event and freeze anything which freezes well, which covers pretty much anything using pastry, such as mini quiches and empanadas. That just leaves the things that don’t freeze well – prawns, smoked salmon and so on – to be made on the day of the party. A chest freezer is essential in order to do this on a grand scale. I used to keep a running tally of how many items we had made so far – 200 of this, 300 of that – until the grand total came to however many we needed.

Nowadays our parties are much more normal in size, but I still like to plan ahead. These little quiches can be frozen and baked when needed so they are perfect. You can use various fillings, but leek or onion, spinach and feta and quiches lorraine are always popular.

Mini Leek Quiches

I’ve just made a few trays to have on hand over  the Christmas-New Year period and you can see them in the photo, all ready to go into the freezer. Having collected them from second hand shops over the years, I have enough patty tins to make about 200 mini quiches. I also have some smaller tins, which produce a one bite, elegant little morsel, but they’re very fiddly to make so I usually make these bigger ones, especially now that I have officially retired from diplomacy!

Shortcrust Pastry (make twice):
250g plain flour
125g butter
good pinch salt
3-4 Tbs cold water
Filling:
6 leeks, washed trimmed and chopped
50g butter
4 eggs
300 ml cream
150 ml milk
Salt and freshly ground black pepper
¼ tsp grated nutmeg
2 cups grated cheese (gruyere is best, but cheddar will do)

Pastry: Place flour, salt and butter in food processor and process until it looks like breadcrumbs. With the motor running gradually add about 3 Tbs cold water, stopping the motor as soon as the mixture starts to form a ball. Tip out, form into a ball, wrap in plastic wrap and refrigerate until needed. Can be refrigerated for 3-4 days or frozen for a month or two. For this recipe you will need to make this recipe twice.

Filling: in a large frying pan melt butter and add leeks. Fry gently for 15 minutes, stirring frequently, or until soft. Do not allow to brown. Cool. In a large bowl beat eggs with cream, milk, nutmeg, salt and pepper. Add cooked leeks and grated cheese and mix well.

Roll out pastry thinly using a little plain flour to prevent sticking and cut circles to fit patty tins. Very lightly grease the tins, then line with pastry circles. Fill with leek mixture, level with the top of the pastry. Freeze tins uncovered until frozen, then cover each tin with a supermarket bag. Once frozen the plastic bags won’t stick to the quiches, so you can store them stacked one on top of the other.

To serve, remove plastic bag and bake from frozen for 30-40 mins at 180°C. If not frozen they will take 20-30 mins. Cool for 5-10 minutes, then remove from tins with a knife and serve warm.

Variation: for Mini Onion Quiches use 6 large onions instead of leeks

Makes 65-70 mini quiches

Moroccan Carrot Salad with Olives & Feta

When we lived in Chile in the 1990s I was President of Santiago Stage, an amateur theatre group which produced 3 or 4 plays a year in English. We raised money for a hospital which treated burnt children called Coaniquem and over two years we completely transformed a children’s home for 130 orphans called Los Girasoles. It was very satisfying and we had a lot of fun doing it. Our sitting room became the set for rehearsals for weeks on end. Fortunately I have a very tolerant husband.

While I was in Santiago recently my dear friend Elaine hosted a lunch to reunite our thespian friends. Elaine and I met in 1992 when we both had parts in a play called Home by David Storey. It’s about a home for people who are not quite right in the head, so we were definitely type cast. Elaine’s paternal uncle was the famous British actor Quentin Crisp and she has inherited his ability to tell a good story and make people laugh. When we took the play on tour to Concepcion (yes, we were very proud telling everyone that!) Elaine and I spent several hours in the dining car of the overnight train, drinking pisco sours and telling each other stories. We laughed so much I had a pain in my side. How we managed to get back to our carriage and into our narrow bunks I will never know. Elaine says I made her climb the ladder and sleep in the top bunk, but I honestly can’t remember.

When we arrived in Concepcion we were met by the head of the British Council. He had undertaken to book the theatre and sell tickets and we were staying at his house. As Elaine and I unpacked we could hear him making frantic phone calls. He had completely forgotten we were coming and hadn’t sold any tickets. We performed to an audience of about 20, but fortunately they all clapped loudly.

The day of the Santiago Stage reunion lunch was warm and sunny so we were able to sit outside. Elaine decided to do a buffet, consisting of quiches and lots of different salads and I helped. This carrot salad has been in my repertoire for many years and it’s always a good addition to a buffet, being both unusual and filling. Elaine had a lovely orange plate which was perfect to serve it on. Using whole baby carrots, if you can get them, makes it look even snazzier.

Moroccan Carrot Salad with Olives and Feta

1 kg carrots peeled and cut into fat sticks
2 large onions, chopped
2-3 bay leaves
2 Tbs fresh thyme or 4 tsp dried thyme
1 tsp sugar
1 tsp cumin powder
4 Tbs olive oil
Salt and freshly ground black pepper
2 Tbs sherry vinegar (or substitute another vinegar)
100g stoned green olives (I use pimento stuffed ones, cut in halves)
100g feta cheese (or substitute soft goat’s cheese)
Juice of one lemon or lime
Chopped fresh coriander
2 Tbs finely chopped preserved lemon, skin only (optional)

Heat oil in a large frying pan and cook the onions gently until soft – 5 minutes or so. Add the carrots and cook, stirring for 5 minutes more. Add thyme, sugar, cumin, salt and pepper, cover and cook for another 5 minutes, stirring from time to time. Add vinegar and cook for 15 minutes, stirring once or twice. Add olives, cover again and cook for another 10-15 minutes. Carrots should still have a bit of bite left in them. Place in a serving dish. Add the feta cubes and squeeze over the lemon or lime juice at the last minute. Garnish with the coriander and preserved lemon, if using. If preferred, keep the olives till the end and sprinkle them over with the coriander as a garnish as I did in this photo. Serve at room temperature.

Serves 8-12 as part of a buffet

Vichyssoise

Leeks from the gardenThe leek crop started to go woody and needed to be pulled up. As you can see in the photo there were quite a few, so I decided to make Vichyssoise and some mini Leek Quiches to freeze for the holiday season, which I’ll post in a few days. I freeze them uncooked and they are great to whip out and bake when people drop in for a drink.

Some people don’t like cold soups but Vichyssoise is equally nice served hot or cold. It’s one of those traditional French dishes which never goes out of fashion. It freezes well just after blending, before you add the cream. If you want to cut down on the cream, replace half or two thirds of it with milk. It won’t be quite as creamy but still delicious.

Vichyssoise2 kg potatoes
2 leeks or 1 leek and 1 large onion
300 ml cream
6 cups chicken stock (preferably homemade)
Salt and freshly ground black pepper to taste

Peel and chop potatoes. Wash and chop leeks, keeping all of the white part and some of the green. Place vegetables and stock in large pan, bring to the boil, reduce heat and simmer, covered for 30 mins or until tender.

Blend soup till smooth in an electric blender then return to pan and stir in cream. If soup is too thick add a little milk to achieve desired consistency, then adjust seasoning. Serve chilled, garnished with snipped chives, a little extra cream and some freshly ground black pepper. Alternatively soup can be reheated, without boiling and served hot, topped, if liked, with a few bits of crispy bacon as shown in the photo.

Serves 6

Sticky Chilli Chicken

You may have noticed that Café Cat has been quiet for the past 3 weeks while I was on a business trip to Chile. This involved catching up with lots of friends – rather too many lunches, dinners and pisco sours – the Chilean national tipple. But life’s too short to avoid occasional periods of over-indulgence!

For some reason jet-lag is always better coming back from Chile to Australia than it is going. Even so, in the first few days after returning from somewhere which is 14 hours behind AEST, I am not at my most creative. So we’ve been eating quick and easy, tried and tested dishes such as this one for Sticky Chilli Chicken. The original recipe came from Donna Hay – I’ve just cut down a bit on the sugar and the soy sauce. It may sound like a lot of chillies, but the end result is not very hot. Any leftovers are nice cold.

Sticky Chilli Chicken1.5kg chicken pieces (I use thighs)
Chilli Sauce:
3 red chillies, seeded and finely chopped
1 Tbs grated ginger
2 cups water
1/3 cup soy sauce
1/3 cup sugar
½ cup vinegar
½ cup chopped coriander

Place all ingredients for sauce except the coriander in a deep frying pan which has a lid and simmer for 3 minutes. I use an old-fashioned electric frypan. Trim chicken pieces and remove skin if liked. Add chicken to pan, cover and cook for half an hour, turning from time to time. Remove lid and continue to cook for 20-25 minutes, turning chicken from time to time until the sauce has become sticky and the chicken is well coated. Watch carefully towards the end as you don’t want the sauce to completely dry up and burn. Add coriander and serve with steamed rice.

Serves 4

Candied Pears made in a Slow Cooker

Candied or glacée fruit has been made for centuries as a means of preserving fruit through the winter months. During a recent wander around the Adelaide Central Market I came across some Candied Vanilla Pears, which inspired me to have a go at making my own. They were a rich dark brown colour and delicious. They almost looked as if they were made of chocolate.

After reading through half a dozen recipes online, I found one which uses a slow cooker. This appealed to me as you can go away and leave the fruit to cook for hours without looking at it. It’s a time-consuming activity and you only end up with a few pieces, but having successfully done one batch I think I’ll do some more. The criss-cross pattern you can see in the photo is from the wire rack!

For those who have never been, the Adelaide Central Market is fabulous. Around 80 under cover stalls selling fresh fruit and vegetables, as well as fish, meat, bread, cheeses and other gourmet delicacies. It’s open every day except Sundays and public holidays. I wish we had something similar in Canberra.

Candied Pears made in a Slow Cooker6-8 large pears, only just barely ripe
water
sugar
1 vanilla pod, split, seeds scraped out
2 very heaped Tbs glucose syrup (about half a 500g jar)

Halve pears lengthwise. No need to peel and you can leave the stem on one  half. Use a metal skewer to pierce fruit all over. Place in slow cooker and add enough water to barely cover. Remove pears and measure the water – mine was a litre or four 250ml cups. In a medium saucepan, heat the water with one and a half times the amount of sugar – so for me that was six cups – stirring to dissolve the sugar.

Put pears back in slow cooker with enough syrup to cover, keeping the rest as spare in case you need to top up. Add vanilla pod and seeds, cover, turn the heat setting to high and cook for 6 hours. The recipe said to turn the pot down to low setting, but it also said the liquid should be gently bubbling. In my slow cooker that meant using the high setting. Keep an eye on it and if they seem to be cooking at more than a bare simmer, turn the  heat down to low. If you cook the pears too quickly they will break up.

After six hours turn off the heat and leave to cool overnight. Next day turn to high and repeat the process, letting it gently simmer with the lid on for six hours. Next day do the same again, so that’s three times in total. I found I didn’t need to add more liquid but if you do, use the reserved syrup to top up.

Next day add the glucose syrup, turn the slow cooker to high and when it starts to bubble cook for about 3 hours, adding more syrup if pears are not covered.

Remove fruit from syrup while it’s still warm and place on a wire rack to drain. Keep the rich dark brown syrup to serve drizzled over pancakes or waffles. It will keep for months in a sealed bottle.

When fruit has stopped dripping preheat oven to 100ºC. Place the rack over a baking tray and place in the oven for an hour or two. When the surface of the fruit no longer feels very moist to the touch they are ready. Don’t overdo it or the pears will be a bit chewy. Leave the pears as they are for a shiny look, or roll each piece in granulated sugar for a frosted look.

Fruit will keep for several months in a tightly sealed container. Serve with cheese – they go especially well with brie and cheddar and look great on a cheese board.

Makes 12-16 pieces

Note: if preferred, cut pears into quarters instead of halves.

Fettuccine Primavera

I’ve been asked to write a guest post for Café Cat because Mum’s currently in Chile on a business trip. With a bumper crop of both broad beans (also known as fava beans) and snow peas in my garden, I thought I’d share a recipe for Fettuccine Primavera.

Crop of broad beans and snow peas
As with most things I cook, this is a hybrid of recipes found online and from cook books, picking and choosing the bits I thought sounded good. Since making it last week I have cooked it again making a few variations, including adding smoked salmon, and will add it to our summer rotation as a delicious way to use any green legumes.

Fettuccine Primavera
500g fresh fettuccine
2 garlic cloves, crushed
1 Tbs wholegrain mustard
1 lemon (zest and juice)
200ml thickened cream
1 bunch asparagus, trimmed, then halved
100g snow peas, trimmed, thinly sliced
½ cup broad beans (fava beans), peeled
½ cup frozen peas
4 yellow squash, trimmed, thinly sliced
3 shallots or chives, thinly sliced
Parmesan cheese, shaved

Boil salted water for pasta in large saucepan. Fry garlic in olive oil before adding lemon juice, zest and mustard, combine before stirring through cream. Season to taste, then leave to simmer gently. Cook pasta as per directions. Two minutes before pasta has finished cooking, add vegetables to allow them to cook, but remain crisp. Drain and return to saucepan before stirring through sauce and half of the shallots. Serve with remaining shallots and sprinkle with cheese over the top.

Serves 4

Spicy Eggplant and Tomato Soup

This soup is quick, easy and satisfying. I invented it one day when I had a friend coming for lunch and one lonely eggplant sitting in the fridge. I just stuck it in the oven and let it cook while I did something else. The final mixing and reheating takes less than 10 minutes.

While the subtle flavour of the eggplant is somewhat overpowered by the tomato, it does provide a nice texture. And the peanut butter, garlic and chilli add an Asian touch to the flavour combination.  I’ve made the recipe with both crunchy and smooth peanut butter and while they’re both nice I prefer the creamier result you get with the smooth variety. But If you’ve only got crunchy I wouldn’t go out and buy a jar specially.

Spicy Eggplant and Tomato Soup1 large eggplant
1 clove garlic, crushed
1 500g jar tomato sauce for pasta (see note)
1 jar of water (and maybe a bit more)
1 tsp sugar
1 chicken or vegetable stock cube
3 Tbs peanut butter
1 small red chilli, seeded and chopped
Salt and freshly ground black pepper to taste
To serve:
sour cream or thick Greek yoghurt
fresh coriander
fresh bread or toast

Preheat oven to 180ºC. Pierce eggplant a couple of times with a knife, so it doesn’t explode in the oven. Place in the oven for 30-40 minutes, or until it feels soft when you squeeze it. Halve eggplant and scrape out the flesh into a food processor, discarding skin.

Add remaining ingredients and process until smooth. Tip into a saucepan and heat to boiling point. Check seasoning and add a bit more water if necessary to make desired consistency. This will depend on how big your eggplant was.

Ladle into soup bowls and top each serving with a dollop of sour cream or yoghurt and chopped coriander. Serve with fresh Turkish or sourdough bread or toast.

Serves 4

Note: Most pasta sauces weigh about 500g. I used about two thirds of a 700g jar of Woolworths Home Brand Chunky Pasta Sauce.

Beetroot and Fennel Salad

Raw vegetables are full of nutrients and very good for you. But unadorned they look and taste a bit like rabbit food. It’s the dressing that makes all the difference.

I’ve always been a big fan of beetroot. I grew up in the UK where supermarkets and green grocers sold beetroot cooked and ready to use. My mother used to slice it and dress it with dark malt vinegar, a dash of water and a teaspoon of sugar. This was standard fare in England when I was growing up. My Dad loved it but my mother and I preferred to rescue a few slices before she added the vinegar.

When an exchange student came over from France she didn’t realise that the beetroot was not intended to be polished off in one sitting. It was an accompaniment, like a pickle or chutney, which made an appearance several times a week until it was all gone. Martine looked around the table and said “This salad is delicious. If nobody else wants any more I will finish it.” And with that she tipped the remaining half kilo or so onto her plate. I will never forget the look on my Dad’s face.

I no longer make Mum’s beetroot and vinegar mix and I’ve never liked tinned beetroot. Roasting is a better way to bring out the distinct earthy flavour which is the main appeal for me. I often mix beetroot cubes, which have been roasted in olive oil, with rocket, goat’s cheese or feta, some toasted walnuts and a dash of salad dressing to moisten.

This salad uses raw beetroot and fennel and is very moreish. Using the large 5mm grating disc on my Magimix for the beetroot and the thin slicing blade for the fennel and onion, the veggies are ready in no time.

This salad dressing is my standard, basic, everyday dressing. It’s the one I make up in a one litre jar (with 3 times the recipe) and always have in the fridge. I don’t use it for everything, but it’s great to have on hand when you’re in a hurry and certainly much nicer than anything you can buy. If preferred, leave out the honey or use just a tiny amount or a teaspoon of sugar. Don’t crush the garlic because it will soon overpower the dressing – just leave the cloves whole or sliced in two.

Beetroot and Fennel Salad3-4 beetroot, peeled and coarsely grated
2 fennel heads, trimmed and very thinly sliced
½ to 1 red onion, very thinly sliced
Basic Salad Dressing – see below
1 cup frozen peas (optional)

Mix beetroot, fennel and onion with enough dressing to moisten. Taste to see if it needs a dash more salt. Place peas in a sieve and run under the hot tap to thaw, then sprinkle over the salad. The peas are optional but add a nice colour contrast. Once mixed through, the beetroot with turn them red.

Serves 4-6

Basic Salad Dressing: in an empty screw top jar place 1 cup of vegetable oil (I use Canola), ¼ cup cider vinegar, 1 Tbs Dijon mustard, 1 Tbs honey (or to taste), ½ tsp salt, freshly ground black pepper and 1-2 cloves garlic, peeled and halved. Shake well. Keeps in the fridge for at least a month.