
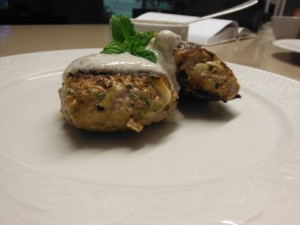
This recipe is adapted from one by Israeli-born Yotam Ottolenghi. He uses turkey mince. I used chicken mince, but you could also use pork or pork and veal mince. He pan fries them, then finishes them off in the oven. I just pan fried them. I also increased the cumin and added the pine nuts for a bit of crunch.
This is a good way to get reluctant kids to eat some green vegetables. Any leftover burgers are delicious cold for lunch.
 500g minced chicken, turkey, pork or pork and veal
2 small or one large zucchini (courgette), coarsely grated
2 spring onions, finely sliced
1 egg
2 Tbs finely chopped mint
2 Tbs finely chopped coriander
2 cloves garlic, crushed
2 tsp ground cumin
2 Tbs pine nuts
1 tsp salt and freshly ground black pepper to taste
½ tsp cayenne pepper (optional)
Oil for frying
Sauce:
½ cup sour cream
½ cup thick Greek yoghurt
1 tsp grated lemon rind
1 Tbs lemon juice
1 clove garlic, crushed
1½ Tbs vegetable or olive oil
1 Tbs Sumac (see note below)
Salt and freshly ground black pepper to taste
Mix all ingredients for sauce in a small bowl and refrigerate until serving time. Mix all ingredients for burgers (not the oil) in a large bowl. Form into about 8 burgers or 16-18 large meatballs.
Heat some vegetable oil in a large frying pan and cook the burgers in two batches for 5-6 minutes each side, or until nicely browned and cooked through.
Serve burgers hot or cold with the sauce.
Serves 4
Note: Sumac is a Middle Eastern spice mix. If you don’t have any use 2 tsp dried cumin and 2 tsp dried coriander instead. If preferred use 1 cup yoghurt for the sauce and leave out the sour cream.
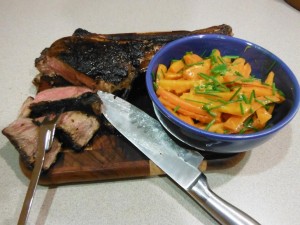 1 Tomahawk Steak weighing 1.3-1.5kg
 2 eggs

 large zucchini (courgettes)
 2 ripe but firm avocados in 1cm dice