
As we were heading off to Europe last year for an extended holiday my friend Karen lent me a few good books.
We thoroughly enjoyed The House at Salvation Creek, a delightful memoir by Susan Duncan, but soon realised that it’s actually a sequel to her first book. So when we got back I borrowed the first one, Salvation Creek, from the local library.
Pittwater, where the narrative takes place, is described by Wikipedia as “a tide-dominated drowned valley estuary 40 km north of Sydney.” Duncan’s descriptions of the native flora and fauna are exceptional. A friend in Denmark to whom I recommended the books said “Susan Duncan brought some warm Australian sunshine into the bleak, grey days of a Danish winter.”
Duncan’s relationship with her ageing mother is something many readers will relate to. And of course I loved all the references to what she was cooking. This is her recipe for Lemon Drizzle Cake. Very easy and a real crowd pleaser.
Zest of 1 large lemon
250g caster sugar
250g butter (at room temp)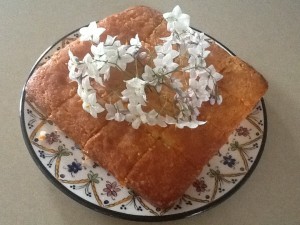
4 large eggs
250g SR flour
Pinch salt
1 level tsp baking powder
Syrup:
Juice of 1 large lemon
150g sugar
Preheat oven to 160ºC and prepare a round or square cake pan. I used a 22cm (9″) square silicone pan, so there was no need to grease and line the bottom with baking paper, which you need to do with a metal pan.
Place lemon zest and sugar in food processor and blitz for 1-2 mins. Add butter and mix for a minute then add the eggs, sifted flour, baking powder and salt. Mix for 1- 2 mins then stop to scrape down the sides and mix for another minute. Scrape into cake pan, spread out evenly and bake for 30-40 mins or until golden and well risen. Test cake with a toothpick inserted in the middle, which should come out clean, but don’t overcook the cake. Remove from oven and pour over the syrup while hot, using a knife to distribute it evenly. If liked serve garnished with flowers e.g. potato vine as in photo.
Syrup: heat lemon juice and sugar together in a small saucepan to form a syrup.
Serve for afternoon tea or as a dessert with whipped cream and some berries. Duncan suggests mixing some icing sugar and passionfruit pulp into the cream.
Serves 16
Notes: The original recipe says to cook the cake for 30-35 mins but mine took 40. The recipe can be doubled and it makes very good cupcakes. She says it freezes well.
 2 eggs
 500g minced chicken, turkey, pork or pork and veal
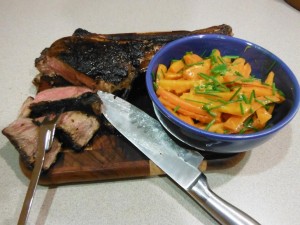 1 Tomahawk Steak weighing 1.3-1.5kg
 Between 1kg and 2kg prawn heads and tails