Chocolate-Espresso Self-Saucing Pudding

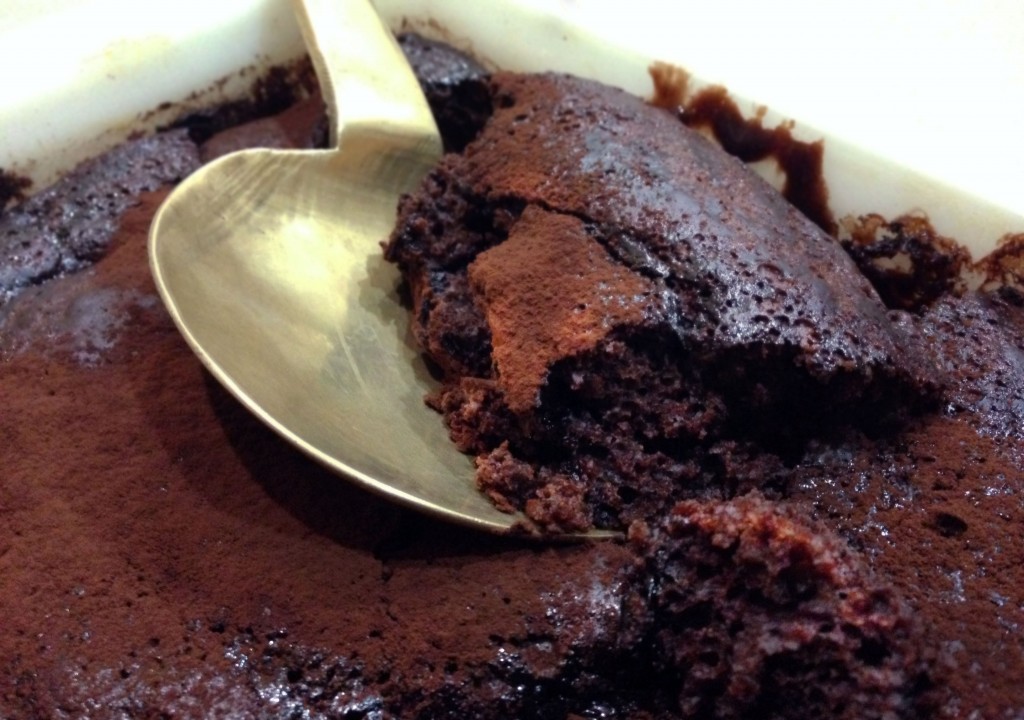
Every grandma worth her salt has a chocolate self-saucing pudding in her repertoire. They’re a cinch to make and because of the unique way the ingredients are assembled a delicious sauce forms under the pudding as it cooks.

Adding a couple of shots of espresso turns this into a more sophisticated dessert for coffee lovers. Adjust the amount of coffee to suit your taste or leave it out altogether and just use 2 cups (500ml) of boiling water. Kids will prefer it without the coffee.

Chocolate Espresso Self-Saucing Pudding

1 cup self-raising flour
½ cup caster sugar
¼ cup cocoa powder
60g unsalted butter, melted
½ cup milk
½ tsp vanilla essence
1 egg
Topping:
½ cup caster sugar
¼ cup cocoa powder
1 cup boiling water and 1 cup hot coffee (2 shots)
To serve:
Cocoa for dusting
Thick cream or vanilla ice cream

Preheat oven to 180ºC and butter a 1.5L capacity ovenproof dish such as a lasagne dish. Sift flour, sugar and cocoa into a bowl and mix. Mix melted butter with milk and vanilla and beat in the egg with a fork. Mix thoroughly into flour mixture then tip into pudding dish and spread evenly. Mix sugar and cocoa for topping and sprinkle evenly over the pudding. Mix boiling water and coffee and carefully pour evenly over the top. Bake for 30 mins or until the top is firm.

Use a sieve to lightly dust the top of the pudding with cocoa powder. Serve with cream or vanilla ice cream.

Serves 6-8

Variations: use brown sugar instead of caster sugar. Add some chocolate chips and/or chopped walnuts.

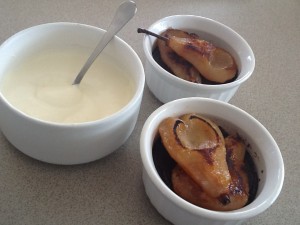
Chocolate Puddings with Ginger Pears

This decadent recipe appeared in the latest issue of Gourmet Traveller. I’ve increased the quantities to serve six, left the sugar out of the the chocolate puddings because I think they’re sweet enough without and made a couple of other slight adjustments. The recipe said to serve the puddings at room temperature, but we preferred them chilled.

Chocolate Puddings with Ginger Pears

Pears:
6 ripe but not over-ripe pears
1 cup Stone’s Green Ginger Wine (see note below)
2 cups water
1 cup sugar
Puddings:
250g dark (70%) chocolate, broken into squares
180g unsalted butter, cut into chunks
2 eggs
2/3 cup cream
2 Tbs crystallised ginger, finely chopped
To serve:
Whipped cream, pouring cream or crème fraîche (see note below)

Place ginger wine, water and sugar in a medium-sized frying pan and bring to the boil, stirring to dissolve the sugar. Peel and halve pears, leaving stems on one half and removing cores with a melon-baller. Place pears in frying pan, cover with a lid and simmer for about an hour, turning them over from time to time. Drain pears and refrigerate, covered until serving time. Keep the poaching liquid.

Preheat oven to 170°C. Place butter and chocolate in a medium sized bowl. Zap in the microwave for 1-2 mins or until melted, stopping to stir halfway. With a balloon whisk, thoroughly mix in the eggs and then the cream. Lastly mix in the ginger. Divide mixture between six 1 cup ramekins and bake for 6-8 minutes. Cool and refrigerate for up to 36 hours, covered.

Drain pears and dry on paper towels. Place cut side down in a medium sized non-stick frying pan. Turn on the heat and cook until pears are slightly glazed just on the one side, then remove carefully from pan. Add any accumulated juices from pears to the poaching liquid. It should have cooled to quite a thick caramel sauce, but if it’s still a bit thin pour it into the pan after removing the pears and cook until reduced and thickened a bit. Cool to room temperature.

Top each chocolate pudding with two pear halves, glazed side up, drizzle with a little caramel sauce and serve with whipped cream, pouring cream or crème fraîche.

Serves 6

Notes: If you can’t find ginger wine, heat 1 cup of white wine with 2 Tbs finely chopped fresh ginger in a saucepan. Simmer for 5 mins then strain.

Make your own crème fraîche by mixing half thick Greek yoghurt with half thickened cream. If liked mix in a teaspoon of icing sugar and a few drops of vanilla essence.

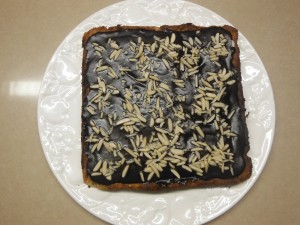
Mazurek

Our Polish friend Peter was coming for dinner so I decided to make something for dessert which would remind him of his homeland. After searching online I came across Mazurek, a nutty cake, not quite as dense as shortbread, covered with chocolate icing and nuts.

There are as many recipes for Mazurek as I’ve had hot dinners, so having found a version for which I had the ingredients – essential when you don’t want to go shopping – I adjusted it slightly and came up with this.

Peter explained that Mazurek is traditionally served at Easter so my timing was perfect. He hadn’t tasted one for many years and was delighted to take home the leftovers.

Serve for afternoon tea or as dessert, with a dollop of cream. Scrumptious.

250g butter at room temperature
½ cup sugarDSCF0579
1 egg
1½ cups almond meal (see note below)
1 cup plain flour
pinch salt
¼ tsp almond essence
¼ cup cream or sour cream
Chocolate Icing:
½ cup dark chocolate chips or chocolate squares
1 Tbs corn (glucose) syrup
2 Tbs cream
2 Tbs butter
To decorate:
¼ cup flaked or slivered blanched almonds

Preheat oven to 200ºC. Grease a 9″ (22cm) square cake pan and line with non-stick baking paper. In a food processor or with electric beaters mix butter and sugar until light and fluffy. Add egg, salt and almond essence and mix well. Add flour and almond meal and mix well. Scrape into cake pan and spread out evenly. Bake for 20 mins or until light golden – don’t overcook or cake will be dry. Cool completely in tin.

Remove cake and place on a flat serving plate. Place chocolate, corn/glucose syrup, cream and butter in a small bowl over simmering water and when melted stir till smooth. Cool a little then spread icing over cake and decorate with almonds.

Serves about 16

Note: make your own almond meal by blitzing blanched or unblanched almonds in food processor until fine.

Variations: use hazelnuts, walnuts or pecans instead of almonds.


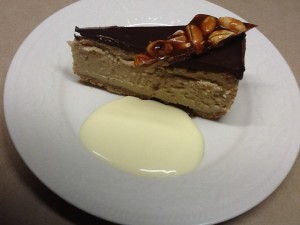
Chocolate Peanut Butter Cheesecake with Salted Peanut Brittle

This recipe will appeal to fans of Reese’s Peanut Butter Cups, those American sweets which combine chocolate with peanut butter. However, I do know a few other people who will say “yuck” when they see this post!

Half cream cheese and half ricotta results in a somewhat lighter texture, but you can use all cream cheese if you prefer. The addition of salted peanuts and salty biscuit crumbs in the crust make a nice contrast to the sweetness of the filling.

This dessert is very rich, so serve in small slices.

Chocolate Peanut Butter Cheesecake with Salted Peanut BrittleBase:
1½ cups salty biscuit crumbs, such as Jatz, Ritz or pretzels
1/3 cup melted butter
Filling:
1 kg cream cheese (or use half cream cheese and half ricotta)
1 cup sugar
½ tsp salt
1 cup peanut butter (smooth or crunchy)
3 large eggs
Topping:
1 cup cream
100g dark chocolate
Salted Peanut Brittle:
100g sugar
100g salted peanuts
To serve:
Thick pouring cream or whipped cream

Have cream cheese at room temperature. Preheat oven to 170ºC. Crush biscuits or pretzels in food processor till they are like breadcrumbs, tip into a bowl with the melted butter and mix well. Line base of a 22-24 cm (8-9″) spring-form pan with baking paper and grease the sides. Tip biscuit crumbs in and press evenly over the base with your hand or the base of a glass. Place in the fridge while you make the filling.

Place cream cheese (or cream cheese and ricotta) in food processor with sugar and mix well. Add remaining ingredients and mix, stopping to scrape down the sides. Scrape filling into the pan and smooth the top. Bake for between 45 mins and an hour or until just set. As soon as it feels set in the middle when you touch with your fingers it’s ready.  Remove from the oven and leave to cool.

For topping, heat cream in microwave or a saucepan till almost boiling. Add chocolate broken into squares and stir till melted. Leave until starting to thicken, then spread evenly over the cheesecake. When cheesecake is cold refrigerate overnight.

To make brittle, heat sugar in a small heavy-bottomed saucepan over medium heat until dark caramel colour. Don’t stir, but you can lift and swirl the pan from time to time, to ensure sugar melts evenly. Add peanuts, swirl to combine, then tip onto a baking pan lined with baking paper or foil.

Remove cheesecake from fridge 15 mins before serving. Run a knife dipped in boiling water around the sides of the cheesecake to loosen, then remove the sides of the pan. Dip knife into boiling water to cut cheesecake into slices. Wipe and dip each time. Break or cut peanut brittle into shards and use to decorate cheesecake. Some whipped or pouring cream goes well.

Serves 16-20 (small slices)

Note: in South America queso fresco can be substituted for the ricotta. You can use sour cream instead of cream and milk chocolate instead of dark in the topping.

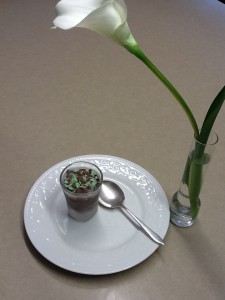
After Eight Parfaits

These little frozen parfaits in shot glasses are perfect to serve after a heavy meal, when no-one feels like eating a large or heavy dessert. I’ve had this recipe for over 20 years. Sometimes I forget about it and don’t make them for a few years, but whenever I do they go down well.

A bottle of mint oil lasts for years. I’ve had mine so long I can’t remember where I bought it. In Canberra you can buy it at The Essential Ingredient in Kingston.

After Eight Parfaits1 cup water
2 Tbs sugar
200g good quality dark chocolate, broken into squares
4 egg yolks
2-3 drops mint oil or essence, to taste
1 Tbs brandy (optional)
250ml cream
Mint chocolates to decorate

Boil sugar and water for 3 minutes. Process in food processor with dark chocolate until smooth. Press down on food processor so it doesn’t splash out. Add egg yolks and blend 15 secs. Add mint essence, brandy and cream and blend 10 secs. Pour into a jug then into 8-10 shot glasses and freeze overnight or until firm.

To serve, decorate each parfait with a mint chocolate. In the photo I used a mint chocolate bar which was green in the middle, roughly chopped. Alternatively use a fresh mint leaf. Remove from freezer 20-30 minutes before serving, so they are not rock hard.

Serves 8-10

Note: you can make this without a food processor. Just add chocolate to sugar syrup, stir to dissolve, then mix in remaining ingredients.

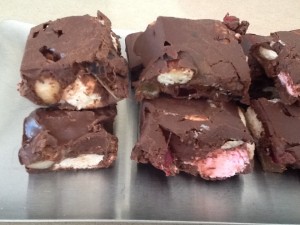
Rocky Road: Eat and Get Fat

When I asked my friend Venessa for her recipe for Rocky Road she sent it by email and at the bottom she wrote “Eat and Get Fat”.  So I thought that was an appropriate title for the New Year, when many people are resolving to lose weight!

According to Wikipedia, Rocky Road was invented in Australia in 1853 as a way of on-selling confectionery spoiled by the long journey from Europe. Gold miners in towns outside Melbourne, such as Ballarat, were wealthy but uncultured. Unscrupulous businessmen took advantage of these men, mixing the spoiled confectionery with low quality chocolate and other “filler” ingredients, such as locally foraged nuts. The name Rocky Road is derived from the rocky road travellers had to take to get to the gold fields.

Here’s Venessa’s recipe which I have doubled and added a few substitutes in brackets. I left out the coconut in deference to someone who doesn’t like it. This is an adaptable recipe, so quantities are approximate. I added a few more marshmallows to make up for not including the coconut.

Rocky Road

400g block of chocolate, broken into squares
1 cup snakes (or other chewy jelly-type sweets), cut up with scissors
1 cup shredded coconut
1 cup marshmallows snipped in half with scissors
1 cup roasted salted macadamia nuts (or other nuts), roughly chopped

Grease and line a slice tin or square cake tin (approx 25 cm) with non-stick baking paper or use a silicone pan which doesn’t need to be lined. Melt chocolate in microwave, approximately 1 minute on high or until melted. Stop to stir halfway through. Add all ingredients and mix well. Tip the rocky road into the tin and smooth the top. Refrigerate for half an hour or until firm, but cut into squares before it sets rock hard. Eat and get fat.

Variation: for White Rocky Road use white chocolate.

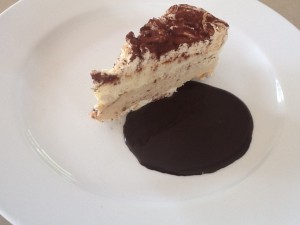
Coffee & Halva Ice Cream Cake with Hot Chocolate Sauce

This cake makes a great dessert or birthday cake to serve a crowd.  It can be made a few days ahead and is always popular.  The coffee and halva flavours might be a bit sophisticated for small children, although our two and a half year old granddaughter Natalia loves olives, artichokes, radicchio and rocket, so you can never tell.  The recipe is adaptable – instead of coffee you could add chocolate chips and instead of halva you could add crumbled honeycomb or violet crumble bars.  Use your imagination.

Halva is a dense, crumbly Middle Eastern sweet containing nuts – a bit like a cross between fudge and nougat.

The chocolate sauce uses ingredients everyone has in the pantry (so you don’t need to rush out and buy a bar of chocolate) and keeps for at least a week in the fridge.  If preferred you can make a sauce by heating a cup of cream to boiling point, then removing from the heat and adding about 200g chocolate (milk or dark), broken into squares.  Stir till dissolved.

Coffee and Halva Ice Cream Cake with Hot Chocolate Sauce

Meringues:
4 large egg whites at room temperature
pinch salt
250g caster sugar
½ cup slivered almonds (optional)
Coffee Ice Cream:
2 litres good quality vanilla icecream (bought or home-made)
2 Tbs instant coffee powder dissolved in 1 Tbs hot water
Halva Ice Cream:
2 x 300ml sour cream
1 tsp vanilla essence
¼ cup icing sugar
250g (approx) halva (from delis and specialty shops)
Chocolate Sauce:
½ cup sugar
¾ cup water
4 Tbs cocoa powder
2 Tbs golden syrup
1 Tbs butter
1 tsp vanilla essence
½ cup cream
To serve:
Cocoa powder

Meringues: Line two baking sheets with baking paper and turn oven to 150°C.  Draw a 20 cm diameter circle on each sheet of paper.  With an electric mixer whip egg whites with salt until they hold their shape, then gradually add the sugar, beating constantly, until you have a thick glossy meringue.  Spread meringue evenly onto the circles you have drawn, leaving a little space all around as they will expand in the oven and you want them to fit into a 20 cm tin.  If liked, sprinkle almonds over one then bake the meringues for about an hour until firm but pale in colour.  Turn off the oven and leave them to cool in there.

Coffee Ice Cream: Remove ice cream from the freezer and let it soften for about 10 minutes then tip into a large bowl and stir until smooth.  Thoroughly mix in coffee mixture, then put back into container and refreeze.  Halva Ice Cream: Mix sour cream with icing sugar, vanilla essence and roughly crumbled halva.  Tip into a plastic container with a lid and freeze.

Remove the two ice creams from the freezer about 10 minutes before assembling the cake.  Place the meringue layer without the nuts in the bottom of a 20 cm springform cake pan, bottom-lined with baking paper.  If too big, carefully trim off the edges with a sharp knife and keep testing, till it goes in.  Spread a layer of coffee ice cream over the meringue.  There will be more of this ice cream than the halva one, so you may decide not to use it all.  Sprinkle the meringue trimmings over the ice cream – unless you’ve already eaten them – then spread evenly with the halva ice cream.  Top with the other meringue, nut side up and trimmed to fit.  Press down gently.  Cover with plastic wrap and place in the freezer for up to 3-4 days.  Remove from freezer about 15 minutes before serving so it’s not rock hard.  Run a knife dipped in boiling water around the outside of the cake to enable you to remove sides from cake tin.  Dust top of cake with cocoa powder through a sieve.  Slice cake with a knife dipped in boiling water and serve with the sauce.

Sauce: Choose a large pan because this recipe will boil over if the pan is too small.  Place all ingredients except butter, vanilla essence and cream in pan.  Mix then simmer for 5 mins without stirring.  Cool for 10 mins then stir in butter and vanilla.  When almost cold mix in the cream.  Serve warm with ice cream.  Keeps for at least a week in the fridge – reheat in the microwave and allow to cool a bit.  If piping  hot it will be too runny.

Serves at least 12

Variation: if preferred divide meringue into three to make three thinner layers.  This allows you to put one between the two flavours of ice cream.

Raspberry Cake with Raspberry Coulis: leave the first layer of ice cream plain vanilla, leaving out the coffee.  For the second layer place the two packets of sour cream in food processor with 2 cups frozen raspberries, 300ml cream and icing sugar to taste.  Blitz enough to combine but leaving the raspberries a bit chunky.  Serve cake with Raspberry Coulis instead of Chocolate Sauce.

Salted Caramel Ice Cream Cake with Hot Chocolate Sauce: Instead of slivered almonds on one meringue layer, use skinned and lightly toasted hazelnuts, roughly chopped.  Instead of the coffee and halva ice cream layers, use three 470ml tubs of Connoisseur Murray River Salted Caramel Ice Cream with Chocolate Coated Hazelnuts.  Remove from the freezer to soften slightly then mix them in a bowl then spread over the first meringue layer.

Chocolate Cappuccino Mousses

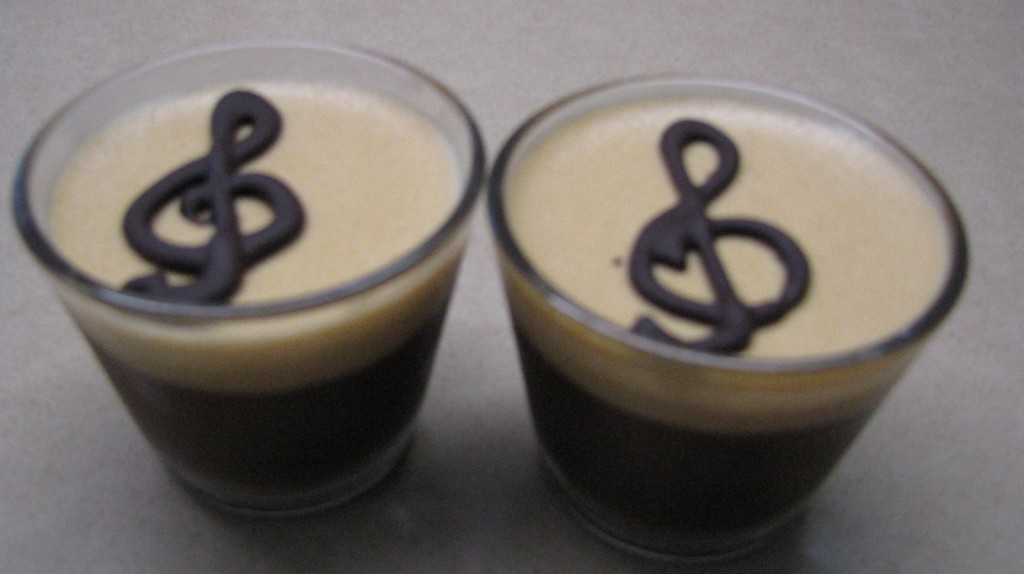
Ever since our daughter Catherine decided that the plural of chocolate mousse should really be mice, the name has stuck.  In our family everyone loves chocolate mice.  I make them in small glasses and if they’re not for a special occasion I put them in the fridge in a flat dish with a shower cap over the top.  Over a few days they quietly disappear.

I usually make them with dark or white chocolate, but decided to create one with a cappuccino flavour.  Nigella Lawson makes a chocolate mousse using marshmallows instead of eggs, so I used her recipe to develop one with a coffee layer on top of a dark chocolate layer.  The 250g packet of marshmallows I bought had both pink and white, so I divided them in half.  There were uneven quantities, so I had to put a few pink ones in with the white ones.  I think using mainly white ones for the coffee layer you end up with a nicer colour.
Chocolate Layer:
125g pink or white marshmallows
½ cup boiling water
75g unsalted butter
250g dark chocolate, broken into squares
1 tsp vanilla essence
1 cup (250ml) cream, lightly whipped
Coffee Layer:
125g white marshmallows
½ cup boiling water
2 Tbs instant coffee powder
75g unsalted butter
250g white chocolate, broken into squares
1 cup (250ml) cream, lightly whipped
To serve: whipped cream and grated or piped chocolate

Place all ingredients for chocolate layer, except the cream, in a large heavy-bottomed saucepan and heat gently, stirring until melted.  You don’t want the mixture to get too hot, so once the mixture is hot but not boiling, turn the heat off and let everything continue to melt in the residual heat.  By the time the marshmallows and chocolate has all melted the mixture should be fairly cool and beginning to thicken.  If not, wait until it is then thoroughly fold the lightly whipped cream into the mixture and divide between about 10 half-cup glasses.  They should be about two thirds full.

Dissolve coffee in the boiling water, then place all ingredients for the coffee layer, except the cream, in a large heavy-bottomed saucepan and heat gently.  Again turn off the heat before the mixture boils and let the ingredients melt in the residual heat.  When mixture is fairly cool and thickening, thoroughly fold the lightly whipped cream into the mixture, then divide between the glasses.

Refrigerate several hours.  Serve decorated with some extra cream, whipped, or grated chocolate.  In the photo they are decorated with piped melted chocolate in the shape of a treble clef, as they were for a musical evening.

Serves about 10 or 12, depending on the size of the glass

Chocolate and Orange Gateau

Friends hosted a New Year’s Eve party where everyone brought a plate.  I’ve heard lots of funny stories about new Australians not understanding this concept and turning up with just a plate.  Indeed my Greek teacher Michael Kazan told me that when he first arrived in Canberra from Athens and someone asked him to bring a plate, he thought to himself that if his hosts didn’t have enough plates, they probably didn’t have enough cutlery or glasses either.  So he took those as well.

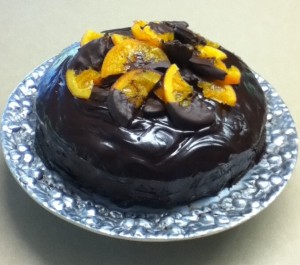
As my contribution to the New Year’s party I took an Orange, Almond and Chocolate Dessert Cake – another recipe from the December edition of Delicious magazine.  I’ve renamed it Chocolate and Orange Gateau and made my own chocolate-covered orange slices rather than buying them.  My fan-forced oven is too hot at 180C for some cakes, especially ones which require longer cooking, so I set it at just under 170C which worked perfectly.

Chocolate and Orange Gateau

Chocolate-covered orange slices:
2 oranges
2 cups water
3/4 cup sugar
150g dark chocolate
Cake:
2 oranges
150g dark chocolate
5 eggs
400g caster sugar
350ml sunflower or canola oil (just under 1 1/2 cups)
1 cup almond meal
1/4 cup cocoa powder
2 1/2 cups plain flour
1 1/2 tsp baking powder
1/4 cup orange liqueur
Ganache:
1 cup thickened cream
350g dark chocolate broken into squares
To serve:
Whipped cream (optional)

For the chocolate-covered orange slices, cut oranges into 1/4 inch slices, discarding the ends which have no flesh in them.  Heat sugar and water in a large frying pan, stirring until sugar dissolves.  Add orange slices, then simmer for 30-40 minutes, turning them from time to time, until the syrup thickens and disappears.  You will need to pay attention towards the end so they don’t stick or burn.  Remove orange slices with tongs to a cake cooling rack.  You can either leave them as whole slices or cut them in half.  They are best made the day before or several hours before serving so they have time to dry out a bit.  When they are dry enough, melt chocolate and dip half the orange slices into the chocolate, then leave to set on baking paper.

For the cake, place oranges in a large saucepan, cover with water, bring to the boil then simmer for about 30 minutes or until tender when pierced with a knife.  Drain and process to a smooth puree in a food processor, then cool.  Preheat oven to 170C.  Grease and line a 24cm spring form cake pan with baking paper.  Place chocolate in a bowl over simmering water (don’t let bowl touch water) to melt, then cool a bit.

In a large mixing bowl whisk eggs, sugar and oil then gradually mix in the orange puree, almond meal and melted chocolate.  Add flour, baking powder and cocoa through a sieve and fold in thoroughly by hand. Pour into cake pan and bake for an hour and 15 minutes or until a skewer inserted in the centre comes out clean.  Cover top loosely with foil if it’s browning too quickly.  Cool for 10 minutes in pan, then invert onto a wire rack.  Drizzle with liqueur then cool completely.

For ganache heat cream to boiling point in a saucepan, then add chocolate, turn off the heat and stir until smooth.  Allow to stand at room temperature until thick enough to spread over the cake, stirring from time to time.  Spread ganache over top and sides of cooled cake with a palette knife and decorate with chocolate-covered orange slices.  If liked serve with whipped cream.

Serves 16

Note: if you don’t have any almond meal you can make your own by blitzing some blanched almonds in the food processor.  If you don’t have any almonds you can substitute walnuts or even pine nuts.  You could substitute self-raising flour for the plain flour and baking powder.

Big Mary’s Mexican Bombe

Our offspring are all married and running their own households.  They all love to cook and we spend a lot of time discussing recipes and things we have made.  James went to a Mexican-themed dinner party the other evening and made an impressive meringue-based dessert called Big Mary’s Mexican Bombe.  I gather everyone went back for seconds and there was none left for breakfast!

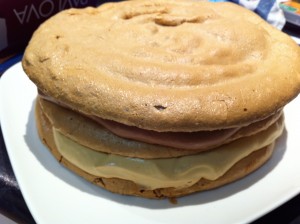
You may wonder how the Bombe got its name.  Well one of my father’s cousins from the Hill House clan in the north of England was called Big Mary, to distinguish her from Little Mary, wife of one of her brothers who was much shorter.  Big Mary gave me this recipe which has always been a winner.  The optional cream around the sides (not shown in the photo) gives the Bombe more of a gateau look and the longer you leave it in the fridge, the more the meringues will soften into a cake-like consistency.  I know the recipe seems to have a lot of sugar in it, but with a few unsweetened raspberries on the side, it just hits the spot!

Big Mary’s Mexican Bombe

4 egg whites
250g brown sugar
2 tsp instant coffee, dissolved in 1 tsp water
Filling:
125g caster sugar
2 Tbs water
2 Tbs water, extra
125g dark chocolate
2½ cups cream
To garnish (optional):
1½ cups cream, extra
50g praline, roughly chopped (optional)

Fresh berries to serve (optional)

Line 3 baking sheets with foil or non-stick baking paper and draw a 20 cm diameter circle on each.  Set oven to 120°C.  Whip egg whites until stiff.  Gradually beat in brown sugar and continue beating until sugar has dissolved and meringue is stiff and shiny.  Fold coffee mixture into meringue and divide amongst the foil sheets, spreading it evenly into three round discs.  Bake for 1 to 1½ hours or until crisp.  If your oven heats unevenly, swap the tins around halfway through cooking time.  A fan-forced oven helps avoid this.  Turn oven off and leave until cold.

Filling: melt chocolate and cool.  Whip cream and divide in two.  Heat sugar and water gently until dissolved.  Increase heat and cook, without stirring, swirling pan from time to time, until you have a rich caramel.  Quickly add extra cold water, being careful to protect your arm from the steam.  Swirl the pan to dissolve the caramel, then cool.

Gradually beat caramel into half the cream and fold cooled chocolate into other half.  Peel meringues from foil.  Place one on a large flat plate, flat side down.  Spread evenly with chocolate cream.  Place another meringue on top and spread with caramel cream.  Place remaining meringue on top and gently press down.  Refrigerate for several hours.

Optional garnish: An hour or two before guests arrive, whip extra cream and spread around the sides of the bombe, filling in the holes to create a smooth surface.  If liked, press roughly chopped praline into the cream.  Refrigerate until serving time.  Serve the bombe in thin slices, accompanied, if liked, by fresh berries.

Serves 12