I began collecting recipes when I was at school. Some of the recipes in my large collection have been in my family for generations, others were passed on by friends and chefs around the world. Many have been adapted over the years to make them lighter or update their presentation. I’ve served them to royalty, PMs and other VIPs and there have been no complaints. I hope you are inspired to make some of them.
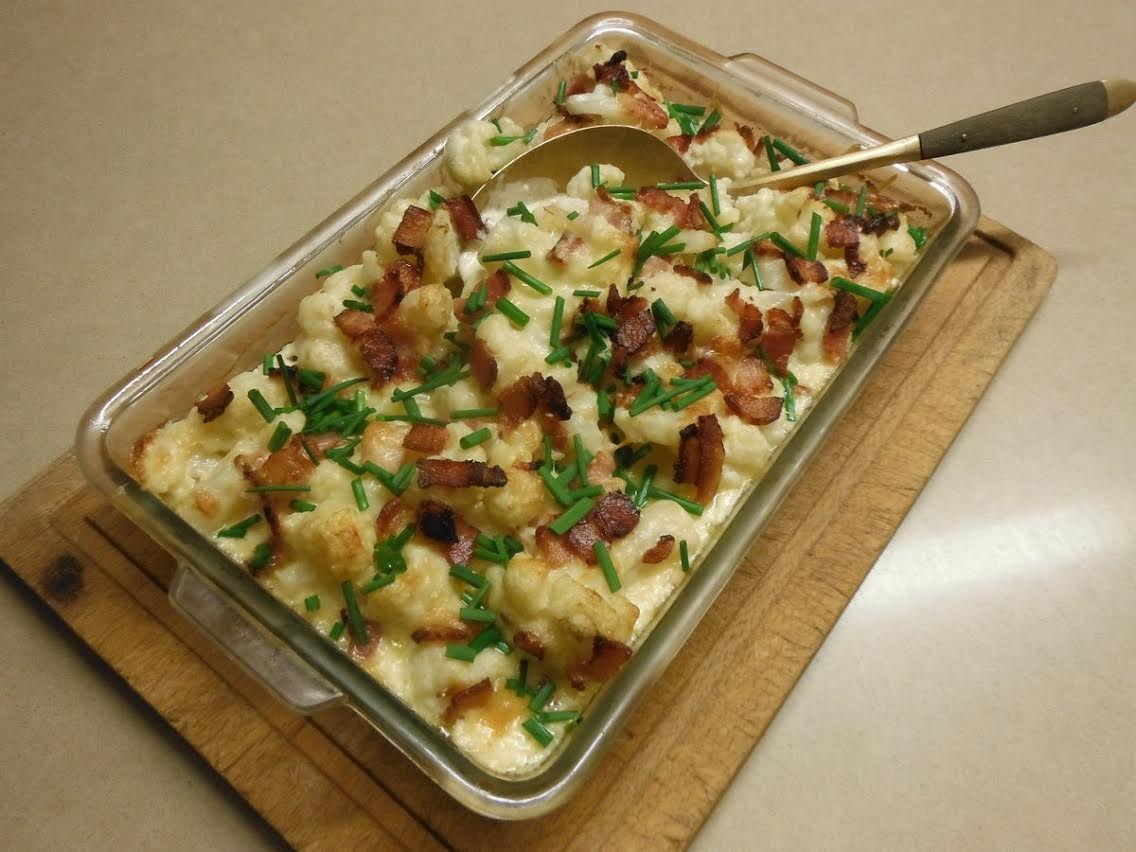
If you’re a fan of cauliflower cheese you will like this one.
I’m sure it would be delicious as a side dish, but we’ve eaten it about four times in the past month as a main course, when we felt like a mainly vegetarian evening meal. For anyone following a low carb diet this ticks all the boxes.
1 large cauliflower cut into flowerets 8 slices bacon, diced and fried in a little oil till starting to go crispy 6 Tbs snipped chives ½ cup mayonnaise (preferably home-made) ½ cup sour cream or cream 2 cups grated cheddar cheese
Preheat oven to 200°C. In a large pot boil water and cook cauliflower for about 8 minutes or until al dente, drain and let cool. In a large bowl combine sour cream, mayonnaise, half the bacon, half the chives and half the grated cheese. Lastly add the cauliflower and carefully mix well. Tip into a shallow greased lasagne-type dish and cover with remaining cheese and bacon. Can be made ahead to this point and kept refrigerated for up to 24 hours, covered.
Bake for 15-20 minutes until cheese is melted. Top with remaining chives and serve. If it has been refrigerated it will need to bake for about half an hour.
Make healthy low-carb “spaghetti” from zucchini, carrots and other vegetables using a Zyliss Julienne Slicer/Peeler. This gadget is really easy to use as you can see from this you tube video. In Canberra you can buy them at the Essential Ingredient.
To serve as a vegetable, stir-fry quickly in a frying pan in a little oil or butter then add seasoning, herbs and maybe a dollop of sour cream. Or use the “spaghetti” in salads or to make this delicious stir fry with prawns.
Zucchini Spaghetti with Prawns
4-6 medium to large zucchini (courgettes)
⅓ cup olive oil
2-3 cloves garlic, crushed
1 tsp dried chilli flakes) or use some fresh chilli
Salt and freshly ground pepper
400g peeled green prawns, tails intact (weight after peeling)
¼ cup lemon juice
¼ cup finely chopped parsley To serve:
Extra Virgin olive oil
1 small red chilli, de-seeded and finely sliced
Heat oil in a large frying pan or wok on medium-high heat. Add garlic, chilli, salt and pepper and cook stirring for a minute. Add prawns and continue to cook, stirring, for 3-4 minutes or until prawns turn pink and are nearly cooked. Add the “spaghetti” and continue to stir fry for a minute or until prawns are cooked and spaghetti is ” al dente ” Add parsley and serve drizzled with a little oil and garnished with a little extra chilli.
My Swiss friend Esther served this simple but delicious starter for a ladies lunch she hosted. You can use smoked salmon or smoked trout and the recipe is easy to halve for two people. Served with a rocket salad and some crusty bread it’s enough for a light lunch.
2 ripe but firm avocados in 1cm dice
1 spring onion (white part and a bit of the green), finely chopped
2 tsp fresh coriander, chopped
Juice of 1 lime or half a lemon
2 ripe but firm mangoes in 1cm dice
1 small red chilli, seeds removed, finely chopped
Salt and freshly ground black pepper to taste
4 slices smoked salmon or trout To serve:
Lemon or lime wedges
Fresh chives
Extra Virgin olive oil
Arrange four stacking rings on serving plates. Mix avocado with spring onion, coriander and lime or lemon juice. Season to taste then divide among the stacking rings and press down firmly with a spoon. Mix mango with chilli, place on top of the avocado and press down. Top each serving with a slice of smoked salmon or trout. Remove stacking ring then garnish plates with a lemon or lime wedge, a couple of pieces of fresh chive and a drizzle of olive oil.
We all need a few desserts in our repertoire which can be made in a jiffy.
The secret is to have a few basic ingredients on hand. For the Blueberry Parfait, for example, you need some Lemon Curd in the fridge and a packet of bought meringues (which keep for ages) in the pantry. Just add berries and cream to your shopping list, or nip down to the corner shop.
When I served this dessert recently and said “Would anyone like any more?” everyone said “Yes please”, so I had to re-load all the glasses!
In Australia you can buy a whole pavlova in a box and I used chunks of that instead of meringues because it’s softer and more marshmallowy. But either will do.
Blueberry Parfaits – in tall parfait glasses or tumblers place a dollop of whipped cream or thick Greek yoghurt, a dollop of Lemon Curd (preferably home-made), some crumbled meringue, more cream or yoghurt, then a few fresh blueberries. Repeat layers and serve immediately.
Mocha Mousse – dissolve 2 tsp instant coffee in 2 Tbs hot water. Mix into 1 cup Nutella chocolate spread. Whip 1 cup cream in another bowl and fold in. Lightly toast ½ cup skinned hazelnuts or almonds and chop coarsely. Break 8 sponge fingers into 6 to 8 small wine or Martini glasses. Drizzle with some Kahlúa or Bailey’s Irish Cream, top with half the chocolate mixture, half the nuts, then repeat. Dust tops with sieved cocoa. Chill before serving.
Blancmange – mix 6 slightly rounded tablespoons cornflour with 1 Tbs sugar and a little cold milk. Bring 1 litre milk and ½ cup cream to the boil then add the cornflour mixture and 1-2 tsp vanilla essence, stirring till thick. Pour into coffee cups which have been rinsed out with cold water. Refrigerate till set. To serve dip quickly in hot water and tip onto serving plates. Meanwhile thaw half a kilo of frozen raspberries with some sugar (to taste) and serve this compote with the blancmanges with some thick cream.
Mangoes with Ginger Wine – peel and slice 4 mangoes and place in serving dish. Heat ¼ cup Stone’s Ginger Wine with 2 Tbs finely chopped glacé ginger until hot, then pour over mangoes. Chill before serving.
Baked Apples – Use a large biscuit cutter to cut 4 circles from 4 slices of bread. Place in a buttered shallow baking dish, top each circle with a whole unpeeled apple, cored. Mix equal quantities melted butter, dried fruit/nuts and brown sugar – a couple of Tbs of each. Add juice and grated rind of an orange then use mixture to stuff the apples. Bake for an hour at 160ºC, basting often. Serve hot with vanilla ice cream or cream. The bread goes all crunchy and delicious.
Moroccan Fruit Salad – in a small saucepan heat the rind and grated juice of an orange with ¼ cup brandy or rum, ¼ cup honey, ½ cup water and a broken cinnamon stick. Pour over 4-6 cups mixed dried fruit such as sultanas, apricots and sliced figs and leave to macerate for several hours or overnight. Serve with toasted pine nuts and Labneh.
Florentines are a delicious treat to serve with coffee after dinner.
Actually they’re delicious any time of day. I swear they talk to me from the tin, sending out “Eat me” messages. They’re quite big, so if it makes you feel better cut them in half, or make smaller ones. But you’ve seen Florentines in cake shops – they’re always big!
Use any combination of dried fruit and nuts you have on hand. I used some dried sour cherries from Costco and craisins (dried cranberries). I left out the candied peel because I’m the only one in our family who likes it.
Woolworths sell non-stick egg rings in two packs for about two dollars, so I bought five packs. I could have made the Florentines slightly thinner and got 12 from the recipe, but I had only bought 10 egg rings, so that was that! If preferred make them free-form by placing heaped tablespoonsful onto the paper – they will spread as they cook.
½ cup cream
½ cup sugar
1 Tbs honey
½ cup dried cherries (glacé or sour cherries)
½ cup dried fruit (I used cranberries)
½ cup candied peel (or more dried fruit)
1 cup flaked or slivered almonds (I used almonds & cashews)
½ cup flour
100g dark chocolate, melted
1 tsp vegetable oil, coconut oil or Copha
Preheat oven to 180°C. Line a baking tray with non-stick paper and arrange the egg rings on top. In a medium sized saucepan heat cream, sugar and honey till boiling. Remove from the heat and add fruit, nuts and flour. Cool for a few minutes so it thickens up.
Divide among the rings spreading evenly then bake for 10-15 mins or until light caramel coloured. Don’t overcook as the fruit easily burns. Leave to cool on the tray.
Melt chocolate and oil or Copha in microwave or in a bowl over boiling water. Dip each Florentine into chocolate on the flat side, shake off excess then cool on non-stick paper, chocolate side up. If you’re in a hurry stick them in the fridge or freezer. And if you have any chocolate left, drizzle a bit on the bumpy side, but let the chocolate set on the first side before you do this. They actually look better on the drizzly/bumpy side.
My friend Maggie made this delicious soup when we were staying with them last year in L’Etang la Ville near Versailles on the outskirts of Paris. Apart from the roasting time, it’s quick to make and with some nice crusty bread – either fresh or toasted – it’s enough for a light supper or lunch. A stick blender is ideal for making this kind of soup where you don’t want it completely smooth.
2 large red peppers (capsicums)
4 large ripe tomatoes, or 6 medium, halved
2 red onions, peeled and quartered
1 small red chilli
4 cloves garlic, peeled
2 Tbs olive oil
Salt and freshly ground black pepper
1 litre vegetable or chicken stock
1 Tbs sugar
1 Tbs tomato paste To garnish:
Sour cream or crème fraîche
Chopped fresh basil or pesto
Preheat oven to 180ºC. Remove seeds from peppers and cut into large chunks about the same size as the tomato halves. Place in a bowl with tomatoes, onions, garlic and chilli, both left whole. Add oil, salt and pepper and mix to coat well.
Line a large baking tray with foil and tip the vegetables onto it, spreading them out into a single layer and drizzling with any oil left in the bowl. Roast for 45 mins until starting to brown a bit at the edges. Tip into a large saucepan. Add stock, sugar and tomato paste. Bring to the boil then blend with a stick blender. If you don’t have a stick blender cool the soup a bit and blend in a normal blender then return to the pan. Adjust seasoning to taste and bring to the boil. Serve garnished with sour cream or crème fraîche and some chopped fresh basil or a swirl of pesto.
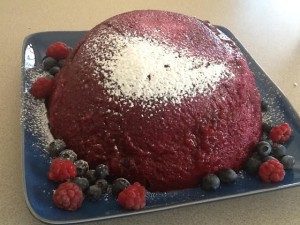
This is an old English recipe which was traditionally made in summer when the red berries are in season. Nowadays you can make it any time of the year with frozen fruit.
I made double the recipe in an 8 cup (two litre) bowl using a 1.5kg bag of mixed frozen berries from Costco. The mix consisted of blueberries, blackberries and raspberries. In England they would also have added a few blackcurrants, but unless you grow them yourself (as we do, but we’ve eaten them all this year!) they’re hard to find in Australia, even in season. It’s hard to say how much bread you will need – I used about two thirds of a loaf. There were just enough raspberries and blueberries in the garden to use as decoration.
750g mixed red berries, thawed if frozen
Sliced homemade-style white bread
100-150g sugar To serve:
Icing sugar
Thick cream or whipped cream
A few fresh berries
Remove crusts from bread and cut to fit bottom and sides of 4 cup pudding bowl. It’s like doing a jig-saw puzzle! Put fruit and sugar in a shallow pan, cover and cook gently for 5-10 mins, shaking occasionally. Cool a bit and adjust sugar.
Using a slotted spoon, half fill basin with fruit, then a layer of bread, fill with remaining fruit and cover with bread. Spoon in enough juice to fill the basin. Use a knife around the edge of the bowl to make sure the juice goes down and colours all the bread. You will probably use it all. Place a small plate and a 1 kg weight on top and stand the bowl in a dish to catch juices. Refrigerate overnight.
To serve, run a knife with a thin blade around the pudding to loosen it from the bowl. Invert onto a serving plate then shake and it should drop out. Dust with icing sugar and serve with thick cream or whipped cream and a few fresh berries.
Black pudding is traditionally eaten in Britain, Ireland and Scandinavia. They also eat it in France and Spain that I know of and several other European countries probably have something similar. It’s basically a sausage made from pork blood, oatmeal and spices.
In the UK where I grew up black pudding was usually served as part of a traditional cooked breakfast, with fried eggs, bacon and mushrooms. It is in fact fully cooked when you buy it, but the flavour and appearance is improved by crisping it up in a frying pan.
In the 1880s a butcher in the West of Ireland called Edward Twomey made his own black pudding which he called after the rural town where he lived. Clonakilty black pudding is still going strong today, with the secret spice blend being handed down through the generations. The recipe was recently shared with an Australian producer, so if you would like to try some please call Cheryl Walsh on 0406 293 691. At the moment they have black pudding and white pudding – which contains pork meat and suet but no blood – with traditional Irish sausages due to be launched mid-February.
We were recently given a Clonakilty black pudding by some Irish friends to try. Black pudding and scallops is a flavour combination which goes together extremely well. So that was my starting point in creating this dish.
The “nutty” black pudding provided a perfect contrast to the creamy scallops, while the pea puree added just the right amount of sweetness – as well as a splash of colour – and the bacon provided a touch of crispy saltiness. Delicious.
2 cups frozen peas 6 large scallops without roe 1 Tbs vegetable or olive oil 3 slices bacon, rind removed, finely diced 6 slices black pudding about 1.5cm thick (about 150g) Salt and freshly ground black pepper to taste 50g butter
Cook peas in boiling salted water until tender. Dry scallops thoroughly with paper towels and season lightly. Heat oil in a medium-sized frying pan and cook bacon until crispy, stirring from time to time. Remove and drain on paper towels. In the bacon fat remaining in the pan, fry black pudding for a minute or two on both sides. Remove and put with the bacon. Lastly cook the scallops for a minute or two each side, or until golden brown.
Drain peas then whiz in food processor with butter, salt and pepper to taste until fairly smooth. Place three dollops of pea puree on two serving plates. Top each with a slice of black pudding and a scallop. Garnish with the bacon and serve immediately.
Note: if liked pass pea purée through a sieve to make if smoother, but I quite like it slightly chunky.
Making Tomato Chutney was on the agenda this weekend. We were onto the last jar and running out is considered grounds for divorce in our house. A trip to the fruit and vegetable market in the last hour before closing provided some lovely ripe tomatoes at a bargain price. Matthew always helps with the chopping, so it didn’t take long to get all the ingredients in the pan.
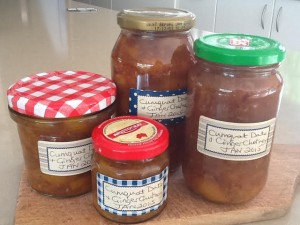
We have a cumquat bush in the garden which is well over 2 metres high. I picked several kilos of fruit a few months back and made them into marmalade as I do every year. The few ripe cumquats that I had missed were starting to fall to the ground as the new season fruit appeared. So while I was in the preserving mood I decided to pick them and see if there were enough to make something. With just one kilo and a few ingredients from the pantry I came up with this tangy spicy chutney which tastes quite different to the tomato one.
The dates add consistency and a delicious caramel flavour. Serve with ham, cold pork, duck or chicken.
1 kg ripe cumquats 1 cup fresh orange juice 2 Tbs lemon juice 2-3 Tbs grated fresh ginger 2 cups sugar 2 medium to large onions, peeled and finely chopped 1 cup chopped dates 1 tsp salt Spices: 12 cardamom pods 1 cinnamon stick, broken in two 3 star anise 1-2 dried birds-eye chillies, broken in two
Cut cumquats into halves or quarters, depending on size and remove seeds. Place in a large heavy-bottomed pan or preserving pan with remaining ingredients. Place spices in a piece of muslin and tie firmly into a small bundle with string, then add to the pot. An old cotton handkerchief or a piece of any thin cotton fabric will do.
Bring to the boil then simmer for about an hour, stirring often, until thick. Remove spice bag, cool it a bit, then remove any bits of chutney stuck to it and return them to the pot. Discard spices, wash out the cloth and keep for next time.
Place 4-5 empty jam jars without their lids in the microwave and zap on High for 2 mins. Fill with the hot chutney using a jug and seal firmly with the lids. Label then store in a dark cupboard where it will keep for several months. Refrigerate after opening.
Where would we be without the humble onion? White, brown, red, cooked or raw, pickled or fried, roasted or stewed. They’re an integral part of cooking around the world.
Onion jam is a delicious way to add some sweet onion flavour to all sorts of things. Use it in toasted sandwiches, on bruschettas, spread over the base of a savoury tart or pizza or served with a grilled steak.
2 kg onions ½ cup olive oil 375ml balsamic vinegar 2/3 cup dark brown sugar, firmly packed ½ to ¾ tsp salt, to taste 2 tsp dried thyme leaves or 4 tsp chopped fresh ones
Peel and slice onions thinly. This takes no time at all with a slicing attachment on a food processor, but you can do it by hand. Heat oil in a large heavy-bottomed pan or preserving pan. Add onions and cook, stirring, for 5 mins or until they start to soften. Cover and cook for about 45 mins over medium heat, stirring from time to time.
Remove lid and continue to cook for another 30 mins, stirring from time to time. Add sugar and balsamic vinegar, stir to dissolve sugar, then bring to the boil and simmer for a further 30 mins. Add thyme and salt and cook for about 10 mins, stirring often, until you have a thick, slightly sticky jam-like consistency.
Place 3-4 standard jam jars or 6-8 small ones in the microwave, without their lids and zap for 2 mins on High. Fill jars with the onion jam then push a knife blade in, right to the bottom, all the way round, to remove any air. Seal with lids while hot. Will keep for several months in a dark cupboard. Refrigerate after opening.

 large zucchini (courgettes)
 2 ripe but firm avocados in 1cm dice
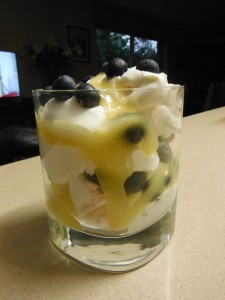 Blueberry Parfaits – in tall parfait glasses or tumblers place a dollop of whipped cream or thick Greek yoghurt, a dollop of

 750g mixed red berries, thawed if frozen
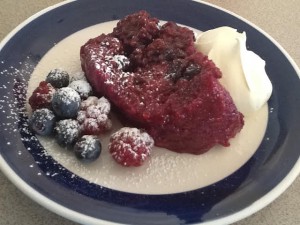 Using a slotted spoon, half fill basin with fruit, then a layer of bread, fill with remaining fruit and cover with bread. Spoon in enough juice to fill the basin. Use a knife around the edge of the bowl to make sure the juice goes down and colours all the bread. You will probably use it all. Place a small plate and a 1 kg weight on top and stand the bowl in a dish to catch juices. Refrigerate overnight.
 Making