Home-made Pizza

A proper Italian pizza has a thin, crispy crust and minimal topping. Nothing remotely like the thick, soggy versions sold in many fast food chains. The Associazione Verace Pizza Napoletana says that when cooked a pizza base should be no more than 4mm thick at the centre, though it will be thicker around the edges. And they should know, they invented them.

Home-made pizzaWhen our kids were growing up pizza featured regularly on the menu. The pizza delivery motorbikes never came to our house because my view is that anything home-made is better than the bought version, not to mention cheaper. At the time our offspring thought they were deprived, but now they have their own families and also make their own.

For a larger group make 3-4 times the recipe and form the dough into balls. Have the toppings ready in small dishes and let people choose their own. With a salad and a bottle or two of vino you’re all set for a casual meal which appeals to all ages.

Home-made pizza15g fresh yeast or 7g dry yeast
1 tsp sugar
½ tsp salt
2 cups plain flour (preferably 00)
1 Tbs olive oil
½ to ¾ cup warm water

Mix ½ cup warm water with yeast and sugar. Leave for 10 minutes. Sift flour and salt into a bowl, add oregano, oil and yeast mixture. Mix well, adding more warm water until you have a firm, not sticky, dough. If preferred make in a food processor or in a mixer with a dough hook.

Turn dough onto a floured surface and knead for a couple of minutes until smooth and springy. Form into a ball, place in a lightly oiled bowl and turn to coat with oil. Cover and leave at room temperature for an hour, or until doubled in size. Alternatively, cover and refrigerate overnight to prove more slowly.

Preheat oven to its highest temperature. If using, put pizza stone in the oven to get really hot. Knead dough lightly and form into a ball (or two balls) and leave, covered with a tea towel for about 20 mins or until doubled in size.

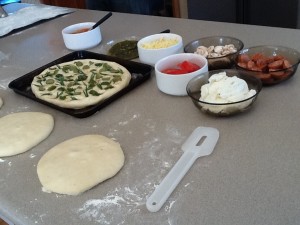
To assemble pizzas place a ball of dough on a lightly oiled pizza pan and press out to size using oiled fingers, working from the middle out. If using a pre-heated pizza stone, or a wood-fired pizza oven, press dough out into a large round on a well-floured pizza paddle.

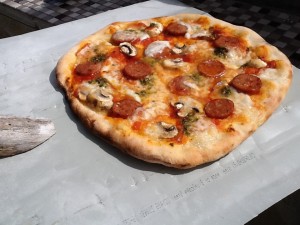
Home-made pizzaArrange toppings on pizza – be sparing – less is more. Slide onto stone if using one and bake for about 5 minutes or until golden and crispy. Time will vary depending on your oven. Our outdoor wood-fired oven shown in the photo heats up to over 400°C, so pizzas only take about 3 minutes. In an ordinary oven they can take up to 12 minutes. Keep an eye on it.

Makes one very large or two medium photopizzas

Topping suggestions:

  • Tomato sugo (sold in jars to go with pasta) with thinly sliced mushroom, sliced pepperoni or chorizo and grated mozarella
  • Pesto with sliced fresh buffalo mozarella and sliced fresh tomatoes
  • Pesto, peeled prawns, grated mozarella and pine nuts
  • Additional toppings: stoned olives, anchovies, sun-dried tomatoes, caramelized onions, extra oil, fresh herbs

Instant Pavlova

We were staying with our daughter and son-in-law in Newcastle last year when they hosted an Australia Day party for about 30 friends plus kids. We ran out of time to make the desserts and bought a couple of pavlovas from Woolworths supermarket. I always make my own and was quite impressed with these bought ones which were moist and marshmallowy in the middle and crunchy on the outside. Not as good as a home-made one, which has more crunchy bits, but not bad. Once you’ve added the whipped cream and fresh berries they’re pretty good as an instant dessert.

When I was shopping for the Easter weekend Woolies had their large pavlovas, which they say serve 20, for half the normal price. So I bought one. Then I started to wonder how to make it look more home-made.

The answer is to use a stacking ring and cut circles from the pavlova. Top with the cream and fruit and voilà – an elegant dessert in no time at all. If you don’t use it all, the rest of the pavlova will keep for several days, so you can cut more circles and serve it again. If you think the pavlova circles are too big, cut them in half horizontally, then you will get twice as many smaller servings.

If you don’t have stacking rings you can make one by cutting the top and bottom off an empty metal can with a suitable diameter. If it’s deep enough top the pavlova with the cream and fruit before removing the ring, as I did for this photo, which results in a neater finish.

I doubt if anywhere other than Australia and New Zealand sells pavlovas in their supermarkets, so I’m afraid this blog post won’t help people living in other parts of the world!

Instant Pavlova1 bought pavlova
Cream, whipped until thick
Fresh berries or passion fruit pulp

Spray the inside of a stacking ring lightly with some vegetable oil, to make removal easier, then cut circles from the pavlova. If the ring is deep enough, top with cream and fruit, if not do it afterwards. If liked drizzle some raspberry coulis around the plate.

Bircher Muesli

In about 1900 a Swiss doctor named Maximilian Bircher-Benner developed a healthy, easily-digested dish for the patients in his hospital.

Bircher Muesli soon became a light evening meal or breakfast dish throughout Switzerland and northern Germany. In the latter half of the 20th century muesli spread to the rest of the Western world and became a commercial product.

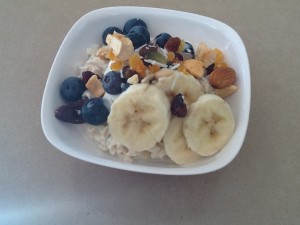
Bircher Muesli makes a nice change from the toasted granola-style ones you buy or make yourself. You can always add some crunch via the toppings.

Bircher Muesli1 cup porridge oats (not the quick-cook variety)
1 cup plain yoghurt
½ cup milk
2 eating apples, cored and grated, including skin
Toppings:
Extra milk
Sliced banana
Fresh berries
Plain yoghurt
Honey to drizzle
Dried fruit, nuts, coconut

Mix oats with yoghurt, milk and grated apples. Cover and refrigerate overnight. Serve with extra milk and a selection of toppings. Keeps in the fridge for two days.

Note:  I like the fact that this muesli is all ready to serve in the morning, when I have less time to spare for things like grating. However, if preferred, soak oats with yoghurt and milk and add grated apple when serving. Some recipes use fruit juice instead of milk, but I prefer milk.

Carrot Avocado and Orange Salad

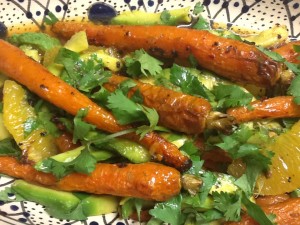
I often make a salad using avocado and orange or grapefruit segments, which go well together. A recipe with the addition of oven-roasted carrots appeared recently in the Canberra Times and came from a cookbook called A Girl and Her Pig by April Bloomfield. I read through the method and found it unnecessarily complicated, so I made a few changes. I also added some honey to the dressing. Here is my tweaked version.

1 bunch baby carrots (about 750g)Carrot Avocado and Orange Salad
2-3 cloves garlic
1 rounded tsp cumin seeds
1 rounded tsp coriander seeds
1 tsp dried crushed chilli (or use some fresh)
Salt and freshly ground black pepper
6 Tbs extra virgin olive oil
2 large oranges
2 large avocados
Juice of ½ a lemon
2 tsp honey
Coarsely chopped fresh coriander

Preheat oven to 200°C. Toast cumin and coriander seeds in a dry pan over moderate heat for a minute or two, or until fragrant. Place in a mortar with garlic, chilli, a tsp of salt, some pepper, 4 Tbs of the oil and crush to a paste. Scrub and trim carrots but don’t peel. Leave a small bit of the greenery at the end. Place carrots in a large baking dish which holds them in one layer. Add paste, mix well to coat. Add ¼ cup water then place in the oven to roast for about half an hour, stirring halfway, until tender and starting to brown a bit. Remove from the oven and cool.

Meanwhile remove peel and pith from the oranges with a serrated knife, then remove each segment by cutting each side of the membrane. Place segments in a small dish and squeeze what’s left of the oranges over the top to remove all the juice. Peel and slice avocados lengthwise.

Arrange carrots, drained orange segments (keep juice) and avocado slices decoratively in a serving dish. Place cooking juices from the carrots in a jam jar. Add orange juice, lemon juice, remaining 2 Tbs oil, honey and salt and pepper to taste. Shake well and drizzle over the salad. Top with the fresh coriander and serve.

Serves 4

Baked Ham with Gratin de Pommes de Terre Dauphinois

Matthew and I met in Geneva in the 70s when I was working for the British Mission to the UN and he was working for the Aussies. We were each there for 3 years and did lots of skiing and eating, but we didn’t meet until he was just about to leave. Somehow we worked things out and here we are decades later!

In Switzerland baked ham is served in many restaurants, invariably accompanied by gratin de pommes de terre dauphinois – or spuds dauphin style in English! Indeed, there’s one place we used to frequent in Geneva which serves nothing else. Ham and potatoes baked with cream, cheese and garlic go so well together – it’s a marriage made in heaven.

A chest freezer in the garage allows me to take advantage of special offers and freeze excess produce from the garden, such as tomatoes and cumquats. Early in the New Year our local supermarket was selling off legs of smoked ham with a good discount, so I bought one and stuck it in the freezer.

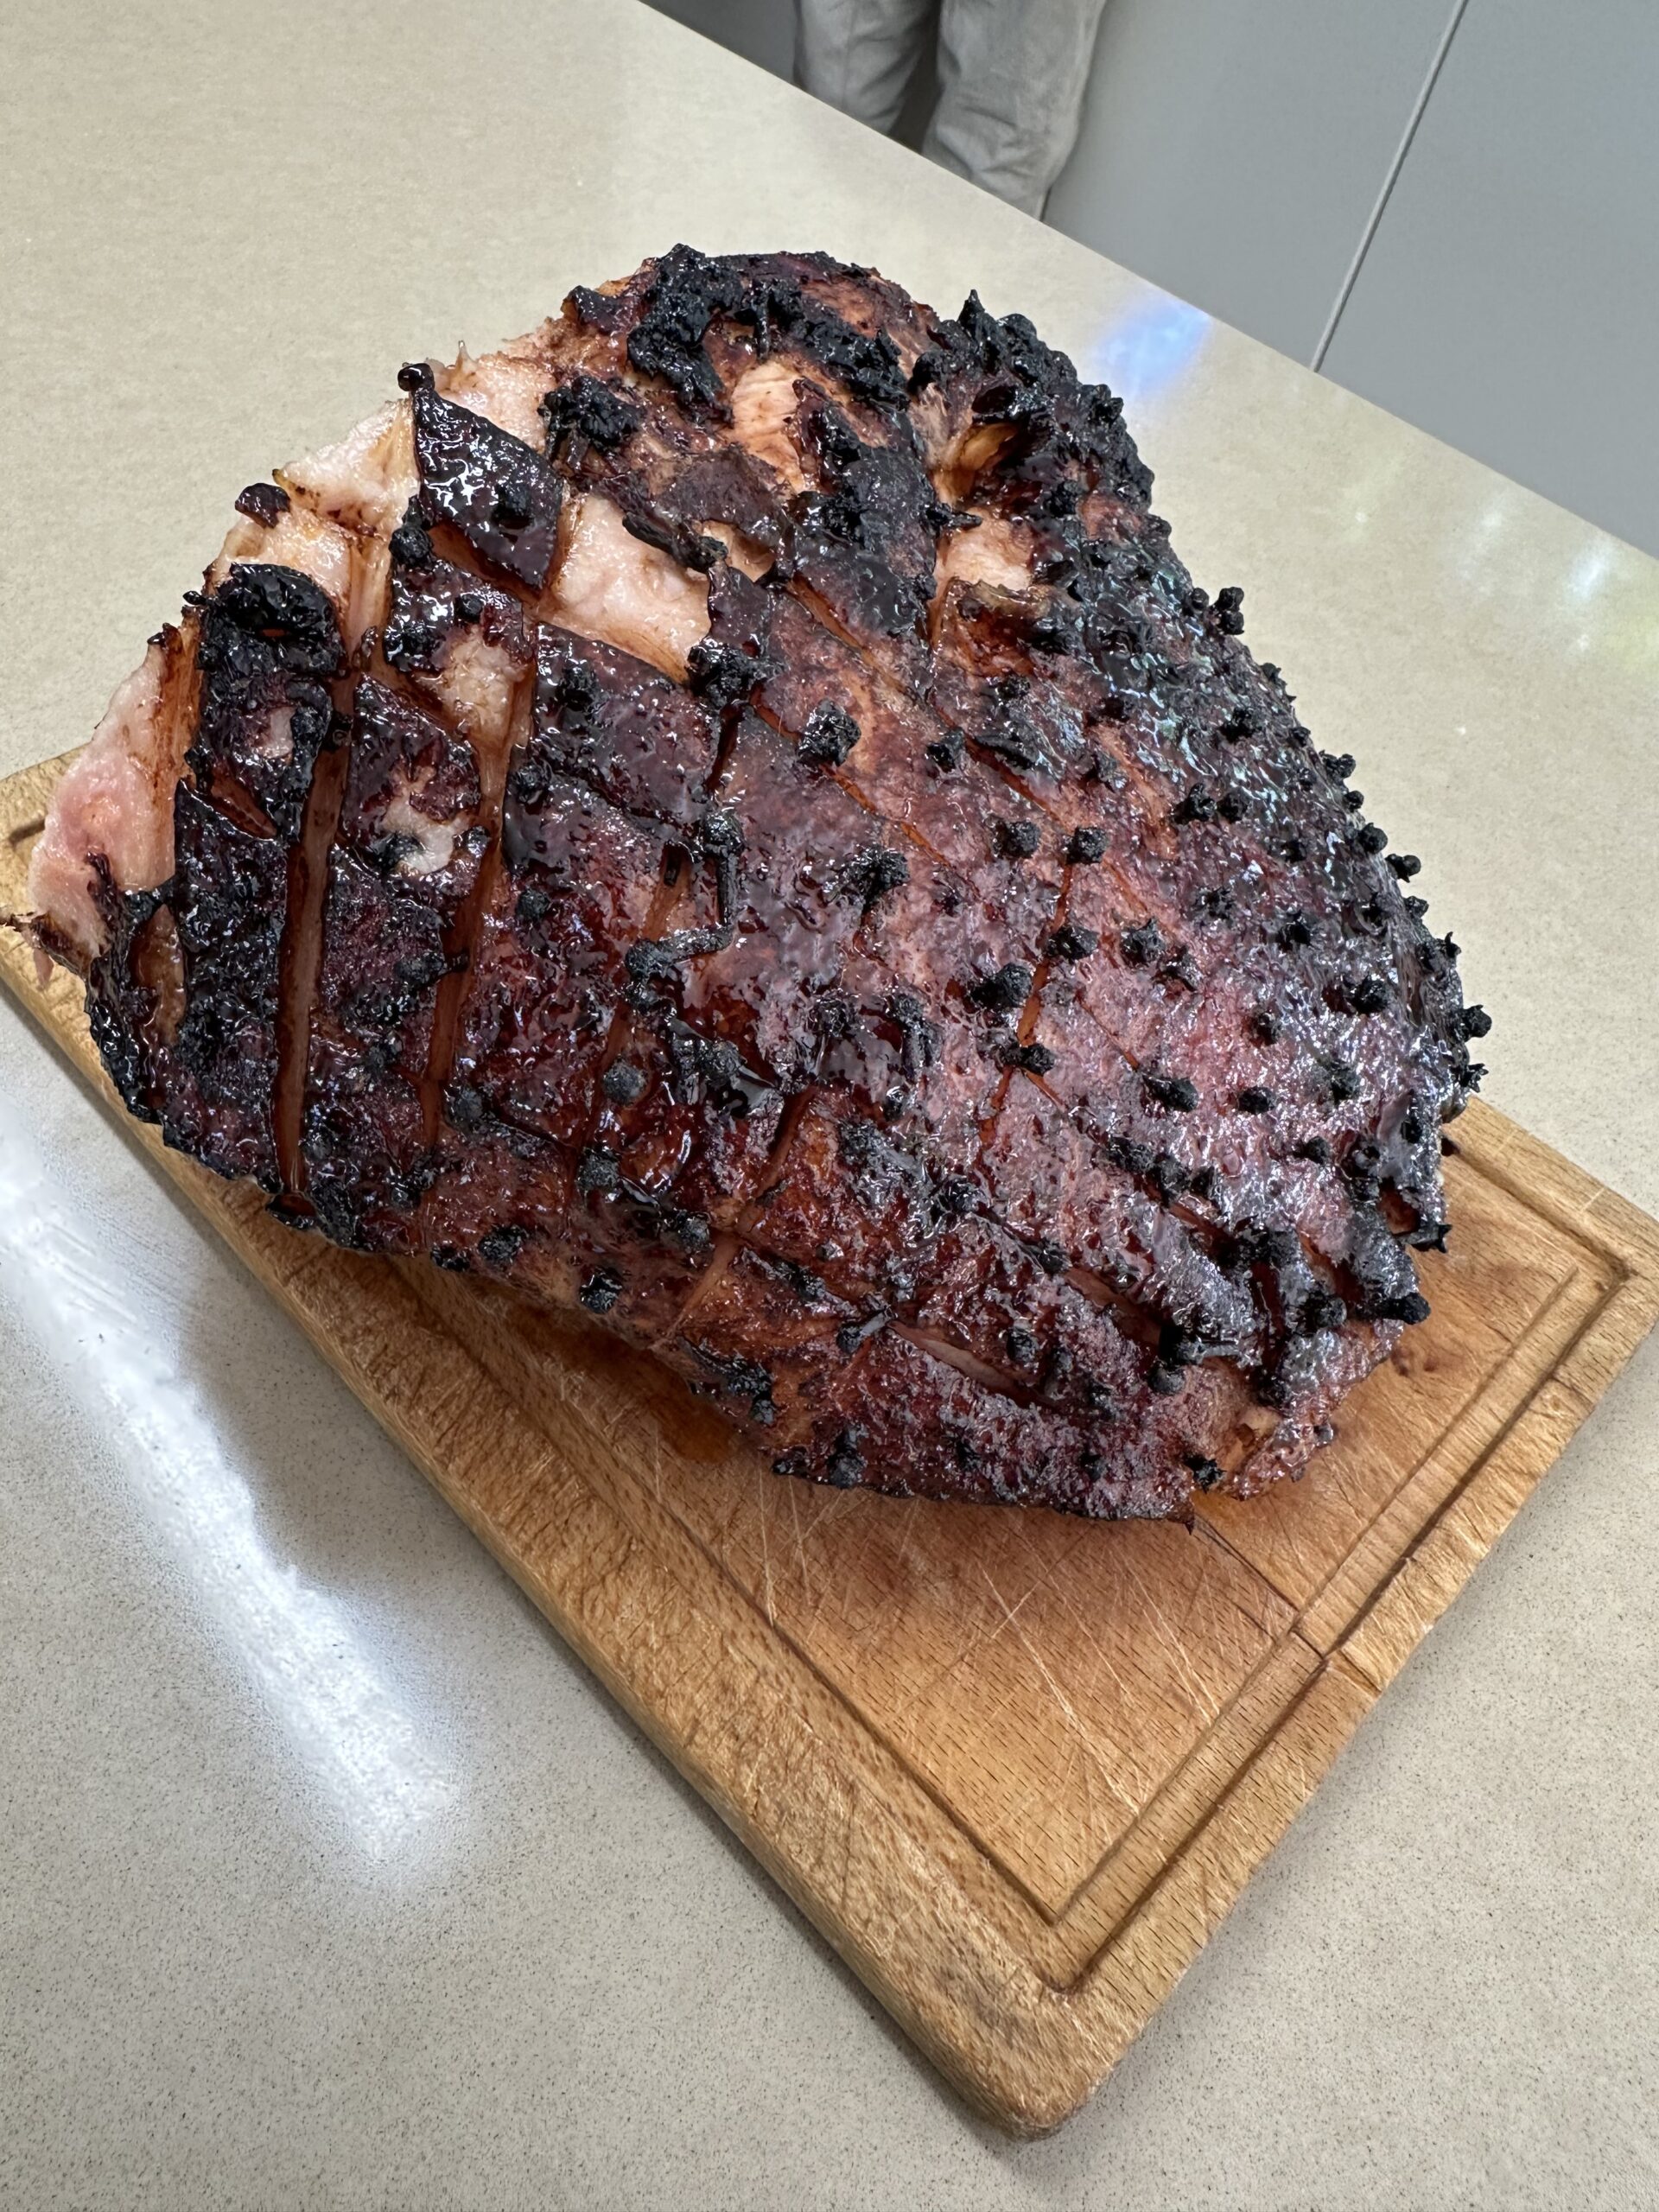
We had friends coming to Woodlands for lunch and as we’ve all had time to get over the festive season I decided it was time to get the ham out of the freezer. There are lots of different recipes for glazes and below are three of my favourites. Basically anything sweet and sticky will do. The gratin recipe is one I picked up on a card in a supermarket while living in Geneva, so it’s very authentic. Gruyère is the traditional cheese for this dish. Other hard cheeses such as Emmenthal or Cheddar will work but the flavour will be different. Forgot to take a photo, so you’ll just have to use your imagination!
Glazes for Ham

Glazed ham

Brandied Apricot Glaze:
1 cup apricot jam
2 tsp soy sauce
2 Tbs vinegar
1 tsp hot English mustard
¼ cup brandy

Citrus Liqueur Glaze:
1 cup concentrated orange juice (or other juice)
¼ cup honey
¼ cup brown sugar
2 tsp soy sauce
2 tsp Dijon mustard
2 Tbs Cointreau or Grand Marnier

Pineapple-Orange Glaze:
¼ cup pineapple juice
2 tsp soy sauce
2 Tbs orange marmalade
1 Tbs honey
¼ cup brown sugar
1 Tbs brandy

Heat all ingredients for glaze in a saucepan, stirring until dissolved. If chunky, push through a sieve, then cool.

To Glaze the Ham:

Remove rind from ham by running your thumb around edge just under skin, loosening and pulling as you go. When you have pulled it to within 15 cm of the shank end, take a sharp pointed knife and cut through rind around shank end in a zigzag pattern, then pull off the rest of the skin up to this edge.

Make parallel cuts through fat at 2-3 cm intervals, just through the surface, not deeply, first one way and then the other to achieve a diamond effect. If liked stick cloves into each diamond space.

Place ham in a large baking dish. Brush with chosen glaze and bake at 180°C for about 45 minutes, brushing with more glaze every 10 minutes or so. It’s ready when it’s an even amber colour all over. Serve hot or cold.

Store the ham on a large plate or chopping board in the fridge. Place the plate inside a cotton ham bag or substitute an old pillowcase. Every time you use the ham rinse the bag in cold water and wring it out tightly. This will help to keep the ham fresh and moist for up to 4 weeks.

Gratin de Pommes de Terre Dauphinois

1 kg potatoes
200ml milk
100ml cream
50g butter
50g grated Gruyere cheese
2 cloves garlic, crushed
salt, pepper and nutmeg to taste

Preheat oven to 180°C. Peel potatoes and slice thinly. Place in overlapping rows in a greased shallow, oven-proof dish, seasoning as you go with salt, pepper and half the garlic. Mix milk, cream, the rest of the garlic and nutmeg and pour over. Cover with foil and bake for 50 minutes or until potatoes are tender – test with a knife. Turn oven up to 220°C and remove foil. Sprinkle with the grated cheese, dot with butter, cut into small pieces and bake for 20 mins or until golden brown.

Serves 6-8
Bailey’s Tiramisu with Berries

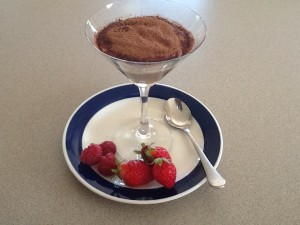
Tiramisu is an Italian dessert consisting of sponge fingers (lady fingers or Savoiardi), egg yolks, mascarpone and a liqueur or fortified wine, traditionally Marsala. There are countless variations on this theme. This version uses egg whites instead of yolks, honey instead of sugar and Bailey’s Irish Cream instead of Marsala.

Bailey's Tiramisu with Berries2 Tbs instant coffee powder & ½ cup boiling water
Or ½ cup strong espresso coffee
2 Tbs Bailey’s Irish cream liqueur
8 Savoiardi sponge fingers
250g mascarpone, at room temp
1 Tbs runny honey
2 Tbs Bailey’s Irish cream liqueur, extra
2 egg whites
Cocoa powder for dusting
Fresh berries to serve

Mix coffee with boiling water and stir to dissolve. Add Baileys. Break each sponge finger into three and add to coffee mixture, stirring to coat. Place 4 pieces of sponge finger in each of six Martini glasses. Divide any remaining coffee mixture among the glasses, pushing down to squash the sponge fingers a bit. Place mascarpone in a mixing bowl. Add honey then Baileys and mix well. In another bowl whip egg whites till soft peaks with electric beaters. Mix into mascarpone, then divide mixture among the six glasses. Chill several hours. Dust with cocoa through a sieve. Serve with berries on the side.

Serves 6

Caprese Salad

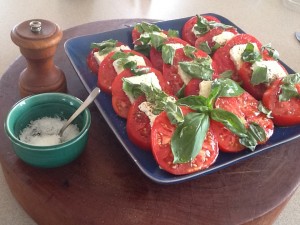
Caprese Salad is a very simple dish consisting of sliced tomatoes and fresh buffalo mozarella with fresh basil, olive oil and seasonings. It’s one of the best ways to enjoy perfect tomatoes in summer. In the photo I used Farmhouse-style cottage cheese from Costco instead of mozarella. But you could substitute any soft, mild-flavoured, sliceable cheese such as “queso fresco” (widely available in South America), goat’s cheese or a creamy feta. It won’t be an authentic Caprese Salad without the mozarella, but it will still taste good.

Drizzle with your best extra-virgin olive oil, then season with crunchy Maldon-style sea salt and freshly ground black pepper. A little balsamic vinegar or balsamic glaze (which is thicker) is a good addition. A loaf of fresh bread – preferably Italian – a bottle of wine and lunch is ready.

Caprese Salad

1 kg vine-ripened tomatoes
About 250g fresh buffalo mozarella (or substitute – see above)
Fresh basil
Extra-virgin olive oil
Maldon style salt flakes
Freshly ground black pepper
Balsamic vinegar or glaze (optional)

Cut tomatoes horizontally into thick slices, discarding both ends. Slice cheese. Arrange tomatoes and cheese on a shallow serving dish, as shown in photo. Sprinkle with torn up basil leaves, drizzle with oil and season with salt and pepper. Drizzle with some balsamic vinegar or glaze, or let people add this if they like at the table. Serve with crusty bread.

Serves 4

Polenta Muffins with Smoked Salmon

When we were living in Paris our daughter Catherine was studying for an Arts-Law degree at the Australian National University in Canberra. She rang one day and said “Hey Mum, I’ve been thinking, when again am I going to have the chance to learn French with free accommodation in Paris?” Always a good negotiator it seems she had it all worked out. Within a month Catherine joined us in our apartment on the 8th floor of the Embassy building in the 15th arrondissement, having arranged to take a semester off uni.

A few days later the Ambassador’s butler Thierry rang. He had heard our daughter was in Paris and wondered if she would like to work at a cocktail party. We found a suitable black skirt and a white blouse and off she went to their apartment on the top floor of the building adjacent to ours.

Matthew and I were attending the party and when we arrived Catherine was busy handing out canapés to the guests. Having worked in several Canberra establishments, including Tilleys in Lyneham, she looked quite at ease. We were chatting in a small group, which included the Ambassador, when Catherine came past again with some delicious hot canapés. As Matthew reached out to take one she whipped the tray away, adding in a stern voice “You’ve had two already!”

The Ambassador was mortified and apologised profusely to Matthew. He said he had never seen this waitress before and she would never be hired again. When we explained who she was we all had a good laugh. The reason she was keeping a close eye on what we ate was because we had been on a diet for a week in an attempt to lose a couple of kilos. Daughters take their duties very seriously.

After a three week intensive course at the Alliance Française Catherine landed a job in a restaurant called Ze Kitchen Gallerie in the Latin quarter. I thought they would give her an easy job filling water glasses and bread baskets, but she was thrown in at the deep end with ten tables to serve each night. She survived and lived to tell the tale – in French!

If you need something quick to make when friends pop round for a drink, these savoury muffins take no time at all and are delicious filled with smoked salmon or gravlax. Best eaten the day they are made.

Polenta Muffins with Smoked Salmon

1 cup self-raising flour, sifted
½ tsp baking powder
½ cup polenta
1 tsp salt
1 Tbs sugar
1 egg
1 Tbs olive oil
¾ cup milk
To serve:
250g cream cheese at room temperature
1 Tbs lemon juice or lime juice
2 Tbs snipped chives or chopped dill
6-9 slices smoked salmon or gravlax
Pickled cucumber with red onion (see below)

Preheat oven to 180°C. Mix all ingredients for muffins and use to fill mini-muffin trays. I used silicone ones which don’t need greasing. Amount per muffin will depend on the size of the trays. Mine hold about a heaped teaspoon of batter. Bake for 10-15 mins or until golden. Cool.

Mix cream cheese with snipped chives or dill and lemon juice. Cut muffins in half and spread about half a teaspoon of cream cheese on the bottom half, then a small piece of smoked salmon or gravlax and some pickled cucumber and onion, drained and patted dry with paper towel. Spread a little more cream cheese on the lids and stick back onto the muffins.  If preferred leave out the pickled cucumber and onion altogether, or substitute a slice of commercial gherkin or a couple of capers. Arrange on a serving tray and garnish with a few more herbs. Best eaten fresh on the day they are made.

Makes about 30

Pickled Cucumber and Onion
Thinly slice one or two Lebanese cucumbers or half a Telegraph cucumber and layer in a jar with a small, thinly sliced red or white onion. Add enough vinegar and water to cover – about half of each – about a tablespoon of sugar and half to one teaspoon of salt. Shake then marinate for several hours before using. Keeps in the fridge for up to a week.

Figs with Smoked Salmon

From Paris a rural drive incorporating a few villages, a château and a good lunch is a delightful way to spend a Sunday in early summer. Or any time of year for that matter. Our friends Lynne and Brian were visiting from Australia and staying with us at the Embassy complex. We booked a table for lunch at La Vanne Rouge in Montigny-sur-Loing, about an hour’s drive from Paris. After a pleasant drive via the Château de Fontainebleau we arrived in the small village of Montigny-sur-Loing. Lynne, Brian and I went to find the restaurant while Matthew parked the car.

The restaurant appeared to be set up for summer in the courtyard, accessed through high timber double gates. There didn’t appear to be any other way in. The gates were locked so I rang the bell and we waited. After a few minutes I rang again. No response. Through the keyhole I could just make out a few tables, but I couldn’t see any staff in order to draw their attention. We had been waiting for more than 10 minutes when Matthew arrived to find me jumping up and down in an effort to be seen by someone inside. I rang the bell again, this time long and hard.

Suddenly the gate was opened by a tiny elderly lady dressed in black, her hair pulled back into a severe bun. Madame looked us over and demanded to know what we wanted. I explained that we had booked a table for one o’clock and apologised for being 15 minutes late, adding by way of explanation that we had been waiting for more than 10 minutes and had rung the bell several times. “That’s impossible. There’s no need to tell lies” she barked back at me. Then in the same cross tone she shouted across the courtyard to a young waiter “Did you take a booking for these people at one?” Fortunately he confirmed that he had. We were getting pretty hungry by this stage and finding somewhere to have a good Sunday lunch in France without a booking is virtually impossible. We know, we’ve tried.

“Follow me” said our unfriendly hostess. And so we did, feeling like four naughty school children. “Sit here” she said, pointing to a table with nothing on it. Madame proceeded to set the table, plonking everything down noisily and glaring at us all the time. “Is this normal?” whispered Lynne, as we sat in silence like stunned rabbits while Madame finished the table. “Um not really, but it does seem to happen more in France than in Australia” I replied when Madame was out of earshot.

The meal arrived and it was excellent. My starter of figs with smoked salmon was so delicious I have been making my own version ever since. Whoever would have thought that figs go so beautifully with smoked salmon? Their chef had made the smoked salmon into a nest in the middle and cut some of the figs into small dice to scatter around the plate. And their salad leaves were very small delicate mesclun, so it all looked very snazzy. My version as you can see is far less glamorous, but not bad for a quick lunch.

Once the food arrived we relaxed and started to enjoy ourselves. As we were eating, Madame’s three-legged dog appeared and I made a fuss of him. That was it, her attitude changed completely and we were friends for life.

Figs with Smoked Salmon

4 cups small mixed salad leaves
Walnut oil
White balsamic vinegar
4 fresh figs, sliced
6 slices smoked salmon, cut into ribbons
1/3 cup pine nuts (see note below), lightly toasted

Dress salad leaves with a little oil and vinegar then arrange on two plates. Arrange smoked salmon and figs over the salad, sprinkle with the toasted pine nuts and drizzle with a little more walnut oil.

Serves 2

Note: Having made a whole heap of pesto last weekend I had run out of pine nuts so I used chopped cashews which were okay but not quite as good. If you haven’t got walnut oil use olive oil.

Rare Roast Beef with Blue Cheese Dressing & Zucchini Bake

A rare roast fillet of beef is handy to have in the fridge in summer. It lasts several days and makes life easy when you have guests staying and limited time to cook, or during a heatwave. It’s expensive, but a little goes a long way.

I’m not a big fan of strong blue cheeses, preferring the milder creamier versions. But toned down a bit with yoghurt and vinegar this Blue Cheese Dressing is delicious with salads – especially crunchy cos lettuce –  steaks and dolloped onto baked potatoes.

While this zucchini (courgette) dish goes well with the beef it’s also nice on it’s own as a vegetarian dish. As you can see from the photo, the zucchini I used were rather larger than those you buy in the shops. Unfortunately that’s what happens when you grow your own. One day you look and they’re not quite ready to pick. You go back a day or so later and they’re huge!

Rare Roast Fillet of Beef

1 fillet beef weighing 1.8 – 2.2kg
salt and freshly ground black pepperphoto
olive oil

Preheat oven to 200°C. Trim meat of any excess fat and sinews. Place in a baking dish, drizzle with oil and season. Bake for 25-40 minutes depending on weight of fillet. A meat thermometer is useful for deciding when to take the meat out. Cool then refrigerate, covered. Serve thinly sliced with the Blue Cheese Dressing.

Blue Cheese Dressing

100g blue cheese
2 heaped Tbs plain yoghurt
1-2 Tbs white Balsamic vinegar, to taste
1 tsp sugar

Place all ingredients in food processor and mix, adding a little water to give a pouring consistency. Keeps for a week in a jar with a lid in the fridge. Shake before using.

Zucchini Bake

Zucchini Bake750g zucchinis, thinly sliced
30g butter
1-2 Tbs olive oil
Sauce:
25g butter
25g flour
2/3 cup grated Parmesan cheese
2/3 cup milk
1 egg, beaten
salt and freshly ground black pepper
½ cup breadcrumbs (about a slice of bread whizzed in food processor)

Preheat oven to 200°C. Heat half the butter and oil in a large frying pan. Sauté zucchini slices until lightly browned on both sides. Drain on paper towels. Heat remaining oil and butter and fry the rest of the zucchini. Make sauce – heat butter in small pan, add flour and cook for 1-2 minutes stirring, gradually add milk, then lastly cheese and seasoning. Remove from heat and mix in the egg. Fold in the cooked zucchini, tip into a buttered shallow ovenproof dish (about the size of a quiche dish) which has been sprinkled with breadcrumbs. Top with remaining breadcrumbs and bake 30 minutes until brown and bubbling.

Serves 6 as a side dish or 3-4 as a vegetarian main