Crème Caramel

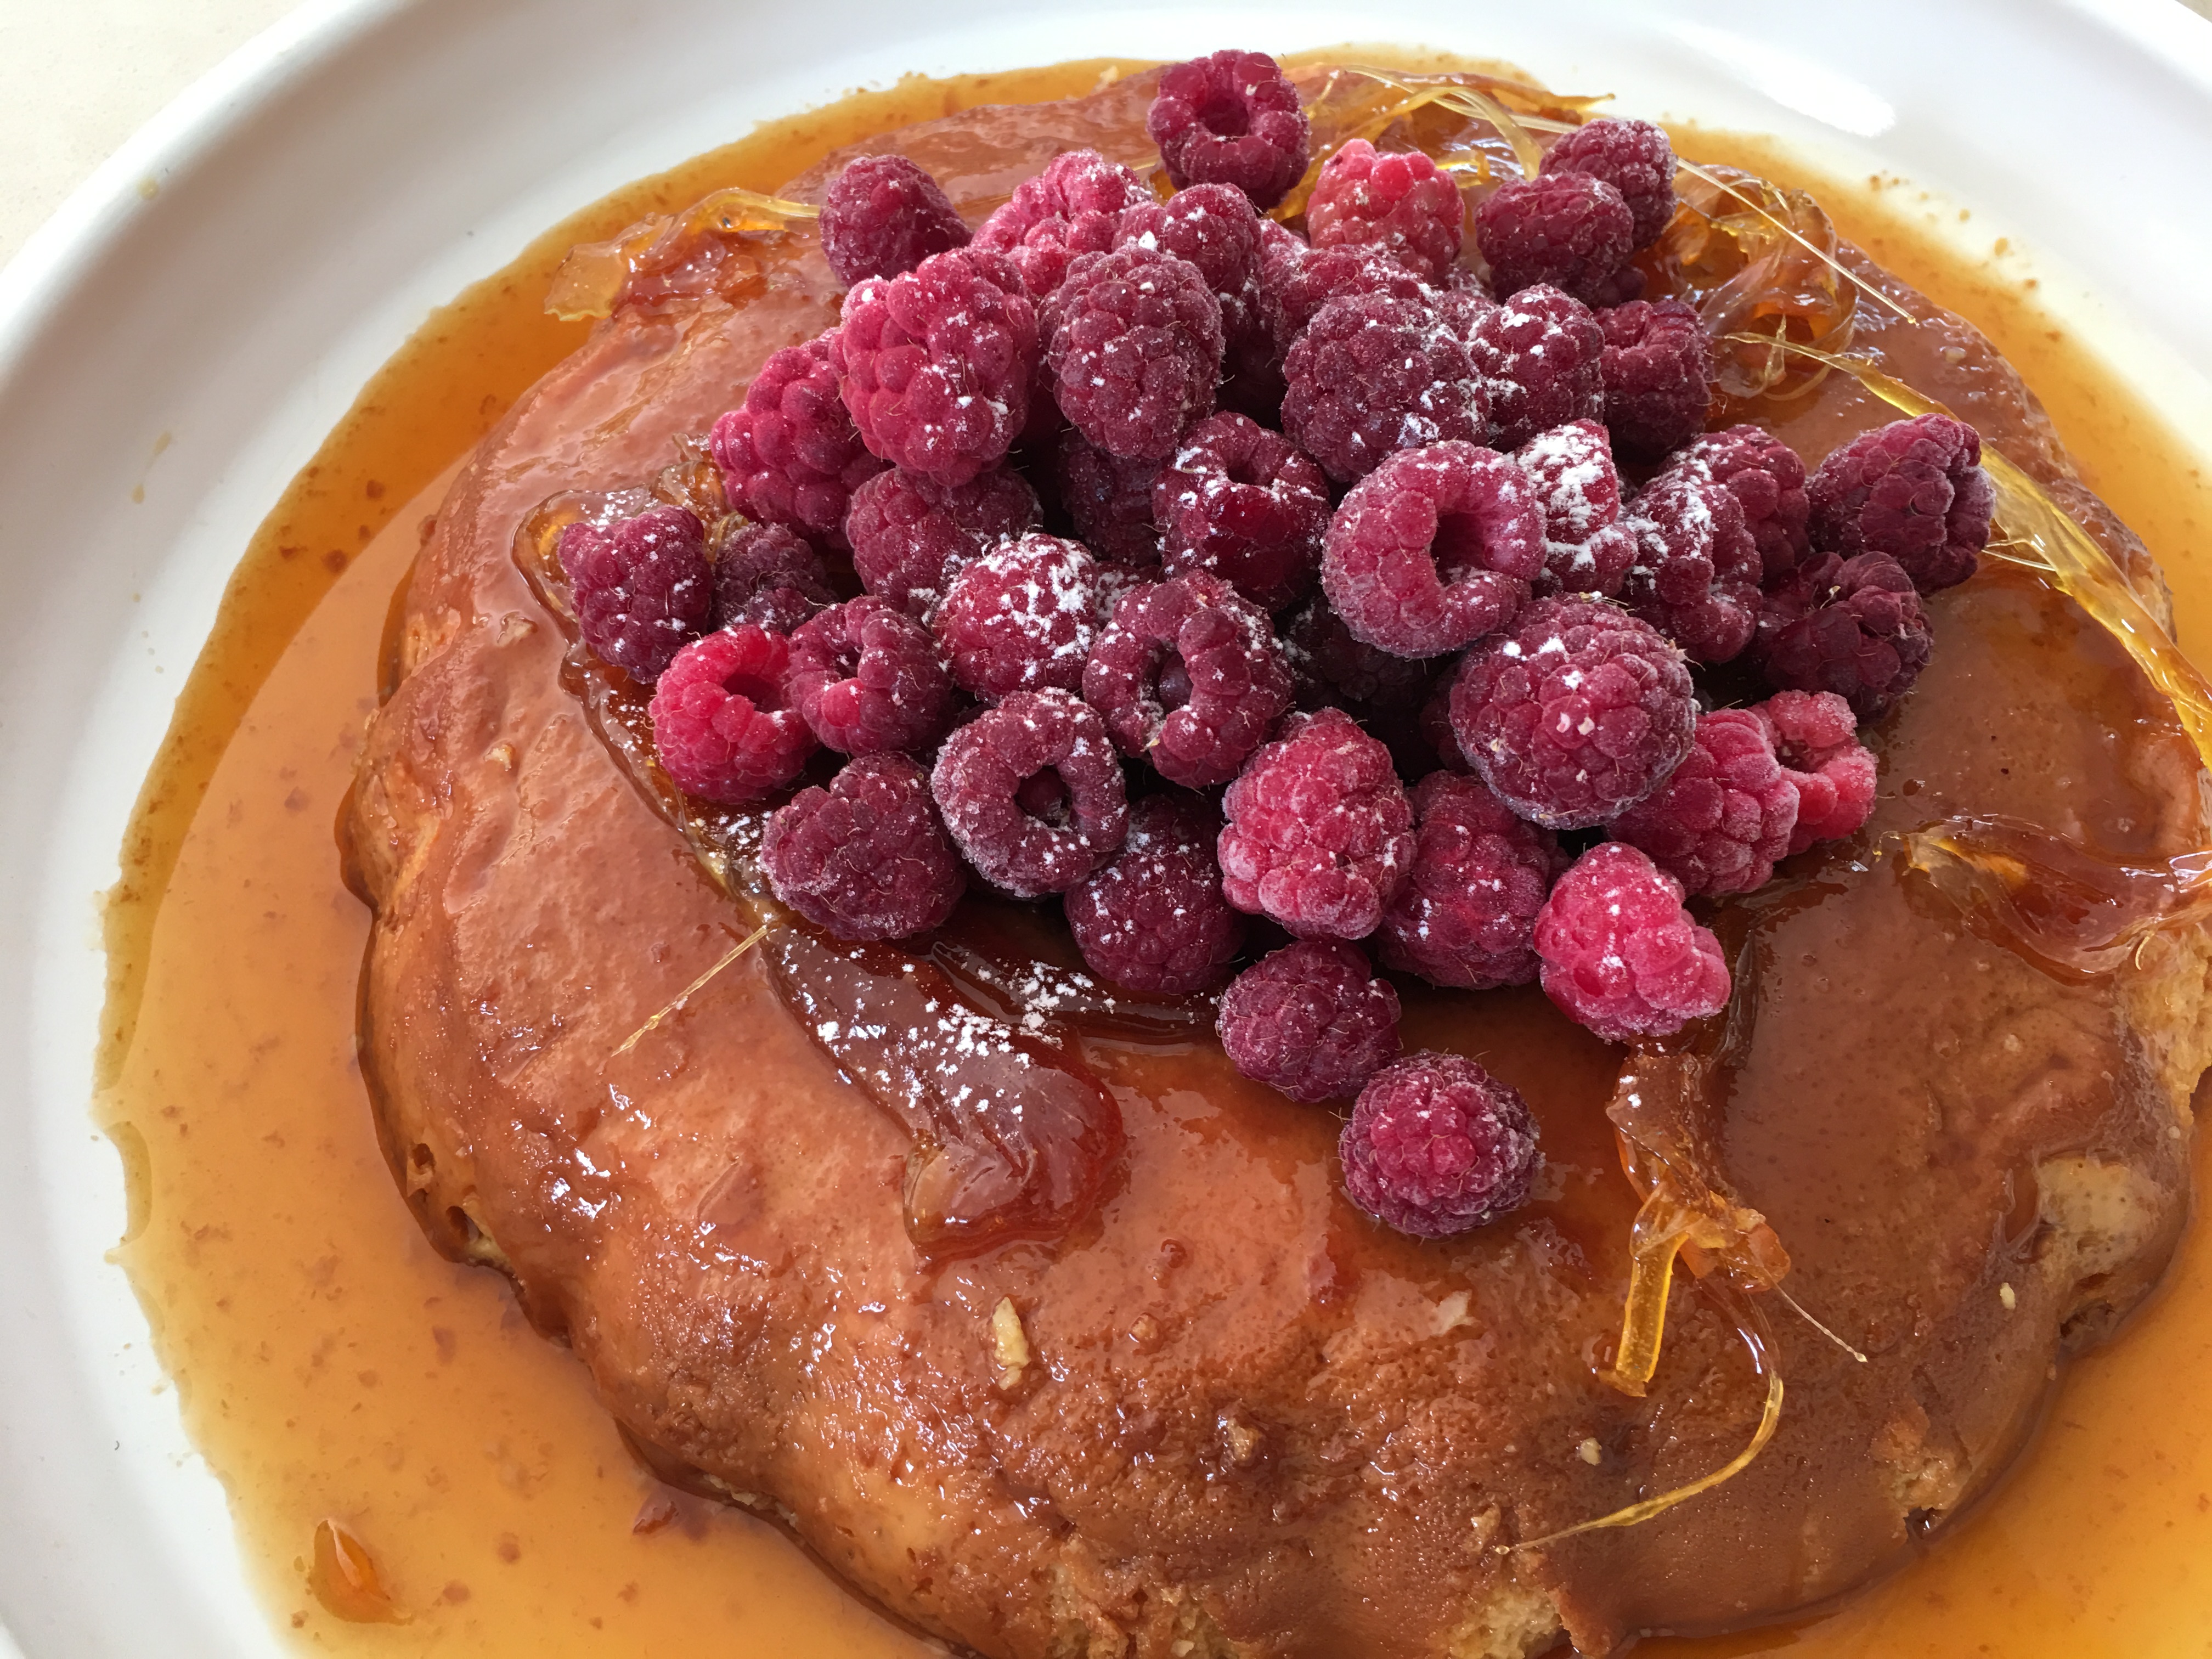
Crème Caramel and Crème Brulée are my two favourite desserts. They’re quite similar in terms of ingredients, but one has a liquid caramel sauce while the other has a crunchy caramel topping, achieved with a blow torch.

The raspberries you can see in the photo were ones I had frozen from our garden a couple of months ago. I took them out of the freezer about half an hour before serving, so they just had time to thaw, but not to go mushy. This dessert is quite sweet so the unsweetened berries and cream provide a nice contrast.

My Dad lived to the ripe old age of 90 and this was what he had for his last meal. I can see his face now, savouring every mouthful. I can’t think of anything I’d rather have for my Last Supper.

½ cup sugar
¼ cup water
5 eggs, thoroughly beaten with a fork
1 tin sweetened condensed milk
3 cups fresh milk (or a mixture of cream and milk)
1 tsp vanilla essence
To serve:
Thick pouring cream
Fresh or frozen berries, just thawed
A dusting of icing sugar (optional)

Preheat oven to 170°C. Heat sugar and water in a heavy saucepan and stir until sugar has dissolved. Boil without stirring until you have a rich caramel, swirling the pan so that it colours evenly without burning. Tip into a lightly oiled ovenproof dish with a capacity of 1.5 to 2 litres (I used a metal ring mold) and swirl around as it cools, so it coats the sides of the mold as well as the bottom.

Beat remaining ingredients together thoroughly with a balloon whisk, then pour through a sieve on top of the caramel, discarding any bits of egg in the sieve. Place the dish in a baking tin and add enough boiling water to come just under halfway up the sides. Bake for 50 minutes, remove and cool, then chill for several hours or overnight.

Loosen around the edges with a thin-bladed knife, then tip onto a serving plate. If all the caramel doesn’t come out, place baking dish or tin in a bowl of very hot water to melt it, then pour it over the dessert. Serve with cream, fresh berries and, if liked, a dusting of icing sugar.

Serves 8-10

Glazed Fig Salad with Feta and Pine Nuts

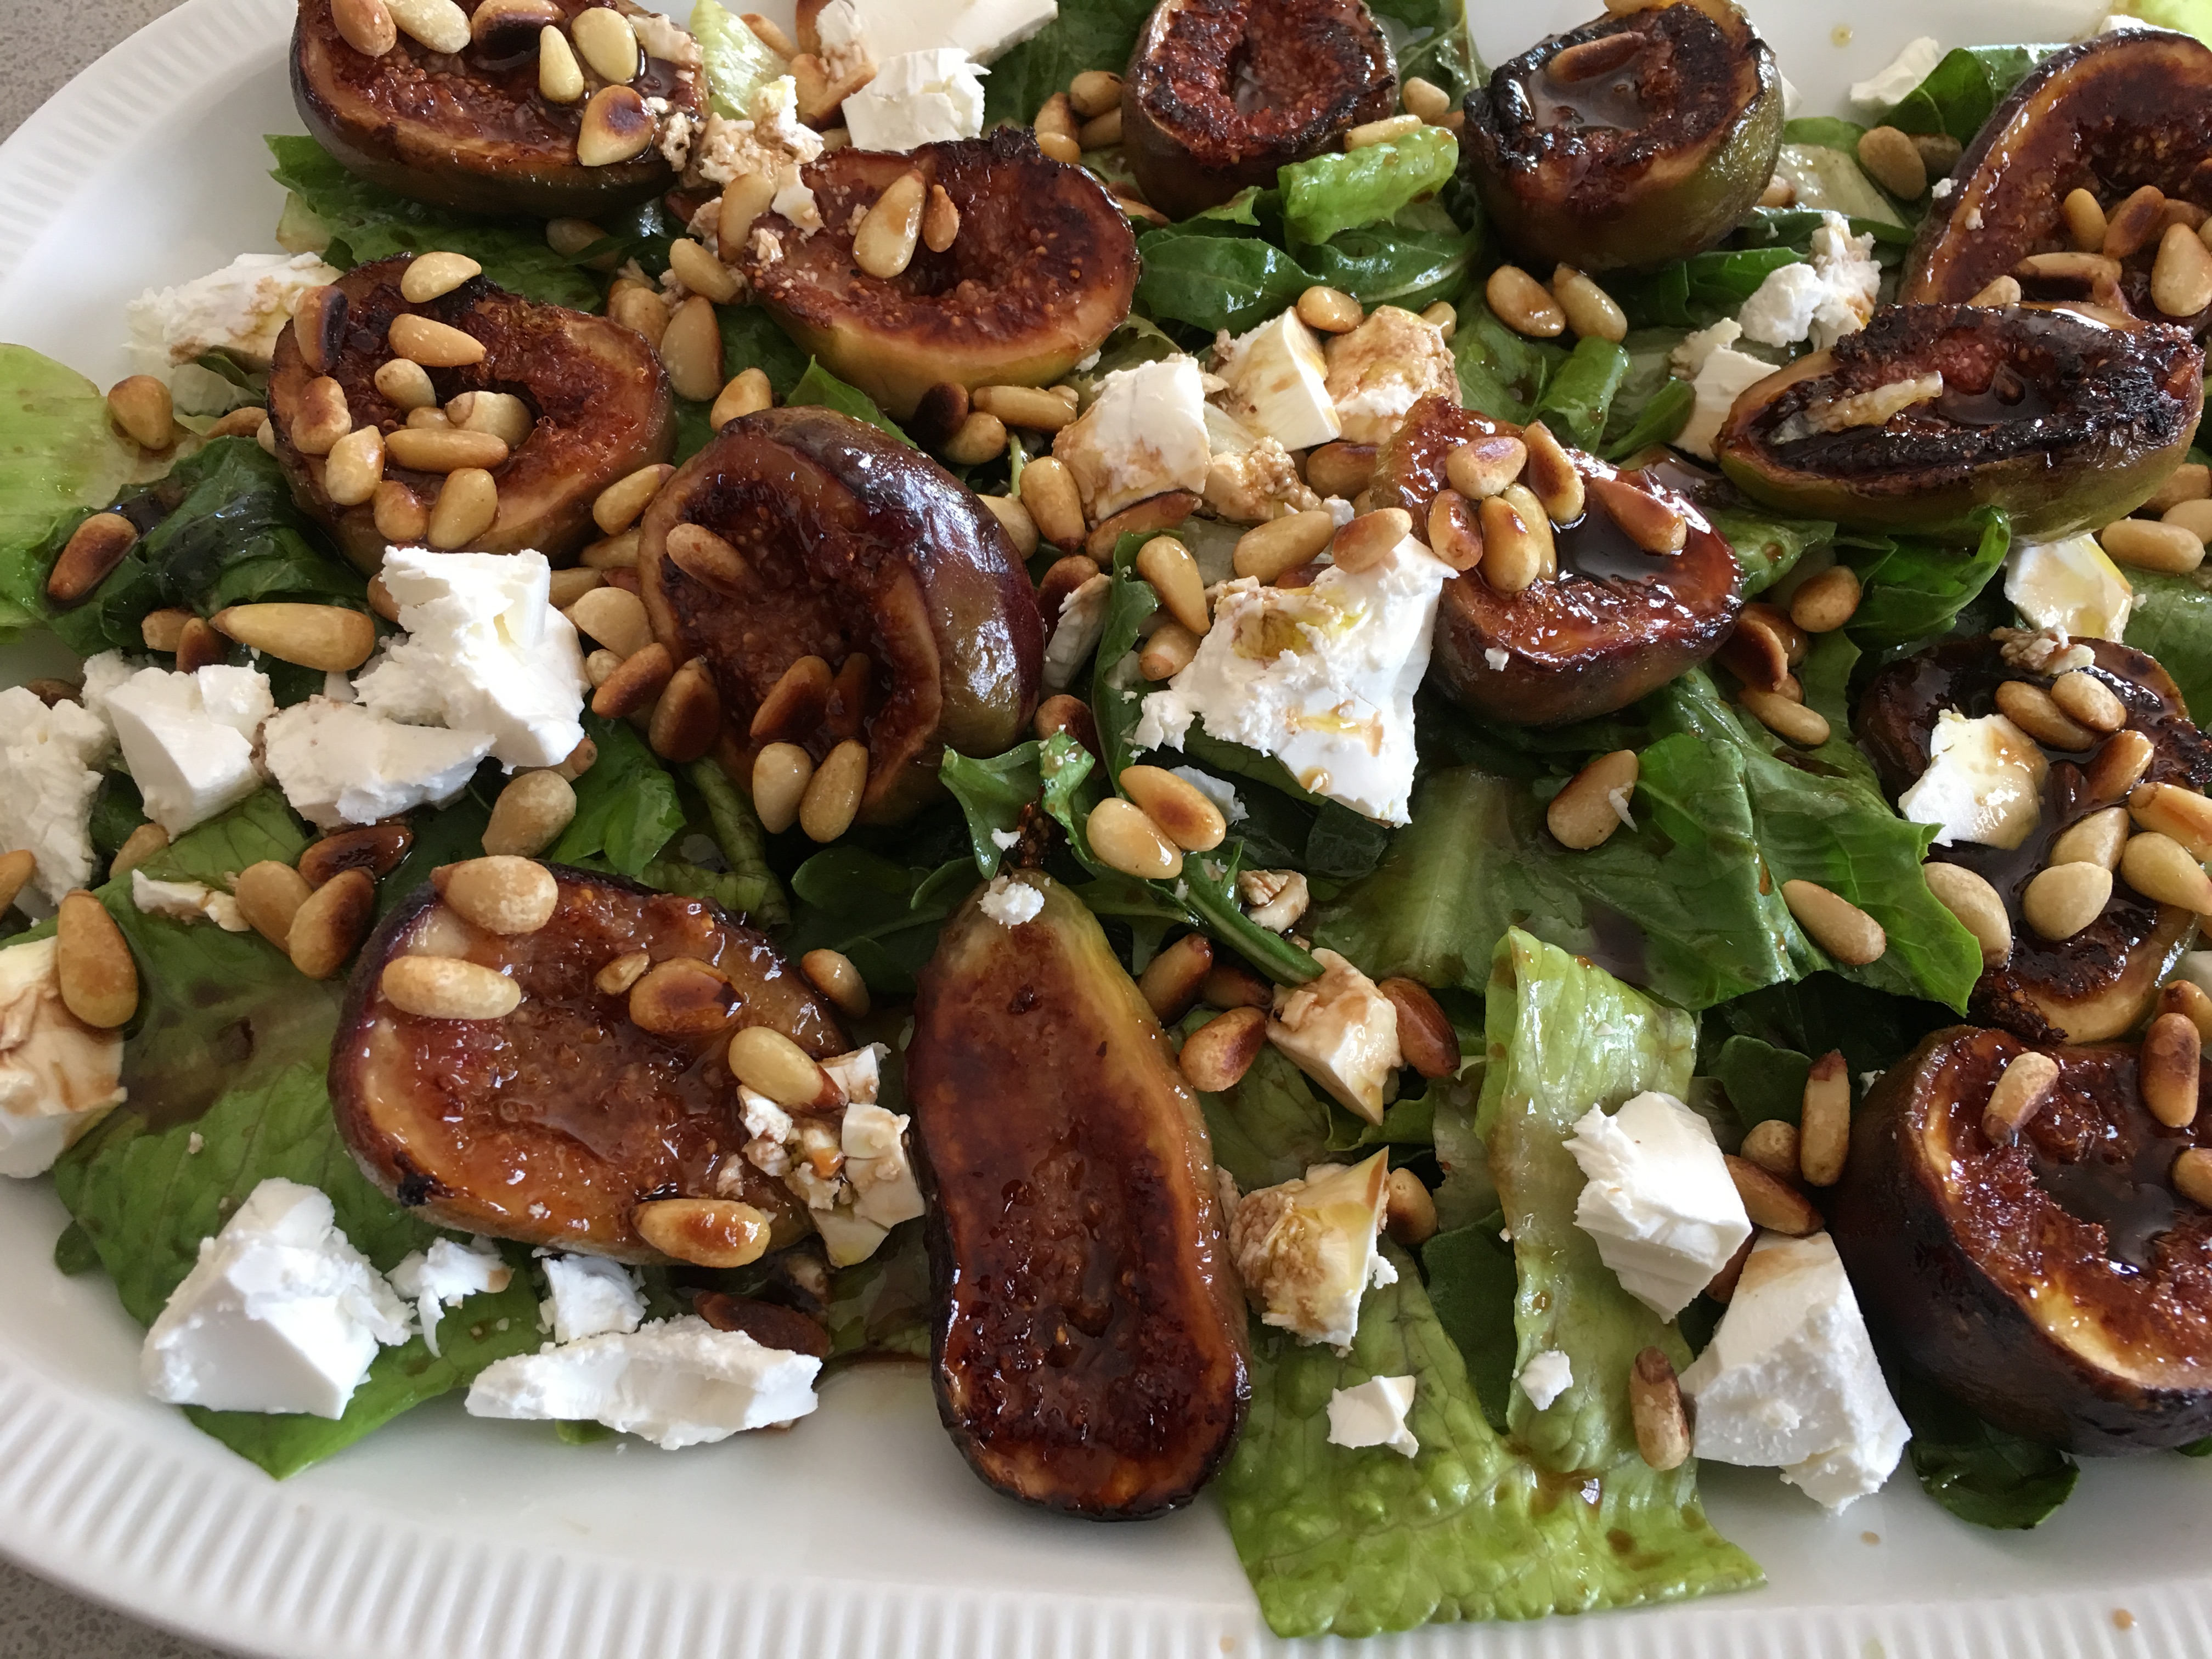
We’ve tried several times to grow figs at the farm. Each time, despite great care (deep hole, sheltered position etc) the tree doesn’t make it. So unfortunately figs are one of the fruits I have to buy.

They’re in season for such a short time and they don’t freeze well, so make the most of them while you can. Another delicious way to serve them in a savoury dish is with Smoked Salmon.

1 Tbs olive oil
12 fresh figs cut in half, stems removed
Mixed salad leaves
½ cup pine nuts, lightly toasted in a dry pan over moderate heat
100g feta cheese or goat’s cheese
Dressing:
2 Tbs balsamic vinegar
Juice of ½ a lemon
1 Tbs honey
¼ cup olive oil
Salt and freshly ground black pepper to taste

Heat oil in a large frying pan. Place figs in the pan, cut side down and cook until lightly browned and caramelised. Remove from pan. Place all ingredients for dressing in a jar and shake well. Mix salad greens with some of the dressing and arrange on a large, flat serving dish. Arrange the figs, cheese and pine nuts on top, then drizzle with more of the dressing.

Serves 4

Prawn Salad with Creamy Dressing and Herbs

This light, refreshing salad, which serves two as a main course or four as a starter, is perfect as an evening meal in the warmer months. Make it when the corn is at its sweetest.

12-16 large raw prawns, shelled and deveined
1 Tbs oil
Salt and pepper to taste
Finely chopped fresh tarragon (or another fresh herb)
2 cobs of fresh corn
3 Tbs sour cream  (or plain yoghurt or coconut cream)
1 Tbs lemon juice
1 Lebanese cucumber, quartered lengthwise then sliced
2 spring onions, thinly sliced on the diagonal
½ small red onion, thinly sliced
3 Tbs coarsely chopped fresh coriander
3 Tbs coarsely chopped fresh mint
Finely chopped fresh chilli, or a pinch of dried chilli flakes, to taste (optional)
Extra virgin olive oil

Lightly season prawns on both sides with salt, pepper and finely chopped fresh tarragon. Heat oil in a small frying pan and fry prawns for 2-3 minutes each side. Turn off the heat and leave to cool. Cook corn cobs in boiling water to cover for 7-10 minutes then drain and cool.  With a very sharp knife, cut the kernels off the cobs, leaving some joined together.

Mix sour cream with lemon juice. Add the cucumber, spring onions, most of the red onion, most of the herbs, most of the corn, chilli to taste and seasoning to taste. Arrange on serving plates, then arrange the prawns on top and garnish with the remaining red onion, corn kernels and herbs. Drizzle a little oil around each serving.

Serves 2 as a main course or 4 as a starter

Substitutions: use cooked, peeled prawns instead of raw ones

Salmon with Macadamia Nut Crust and Zucchini Ribbons

I made this dish when our friends Fiona and Mark came to the farm for the weekend recently. It was inspired by a meal we enjoyed in Tuscany last year. Fiona says she’s made it four times since then, so I thought I had better make it again and record it on the blog, before I forget about it.

The recipe is very quick. Quantities depend on how many you’re feeding.

Salmon portions, with or without skin (about 180g each)
1 heaped Tbs macadamia nuts per person
1-2 Tbs parsley per person
Drizzle of extra virgin olive oil
Salt and freshly ground pepper to taste
1-2 small zucchini (courgettes) per person
Olive oil or butter
Salt and pepper

Line a shallow baking tray with baking paper and arrange the salmon portions on top. Preheat the oven to 200°C. Place the macadamia nuts and parsley in a food processor and pulse until chunky. Add a drizzle of oil through the feed tube with the motor running. Season to taste then spread over the salmon pieces. Bake for 8-10 minutes. Don’t overcook as the nuts will burn.

Top and tail the zucchini then cut into thin ribbons using a vegetable peeler. Discard the first and last slice which will be all skin. Steam for 4 minutes or until al dente. Drain thoroughly then add butter or olive oil and season to taste.

Arrange salmon in the middle of serving plates and surround with the zucchini ribbons.

Variations: use pine nuts instead of macadamias and use chives or basil instead of parsley, or a mixture of two herbs.

Scallops with Champagne Grapes and Almonds

We planted two grapevines at the farm, one red and one white. We didn’t pay a great deal of attention to the varieites and now discover that the black grape is what’s known as a Champagne Grape.

This has nothing to do with Champagne – either the region or the beverage – it’s just the name. The fruit of the Champagne grape is small and round and looks more like a blueberry than a grape. It’s the variety which is dried to make currants, which aren’t really currants at all. Traditionally used in Christmas cakes and puddings, currants are also known as Black Corinthian Raisins or Zante raisins.

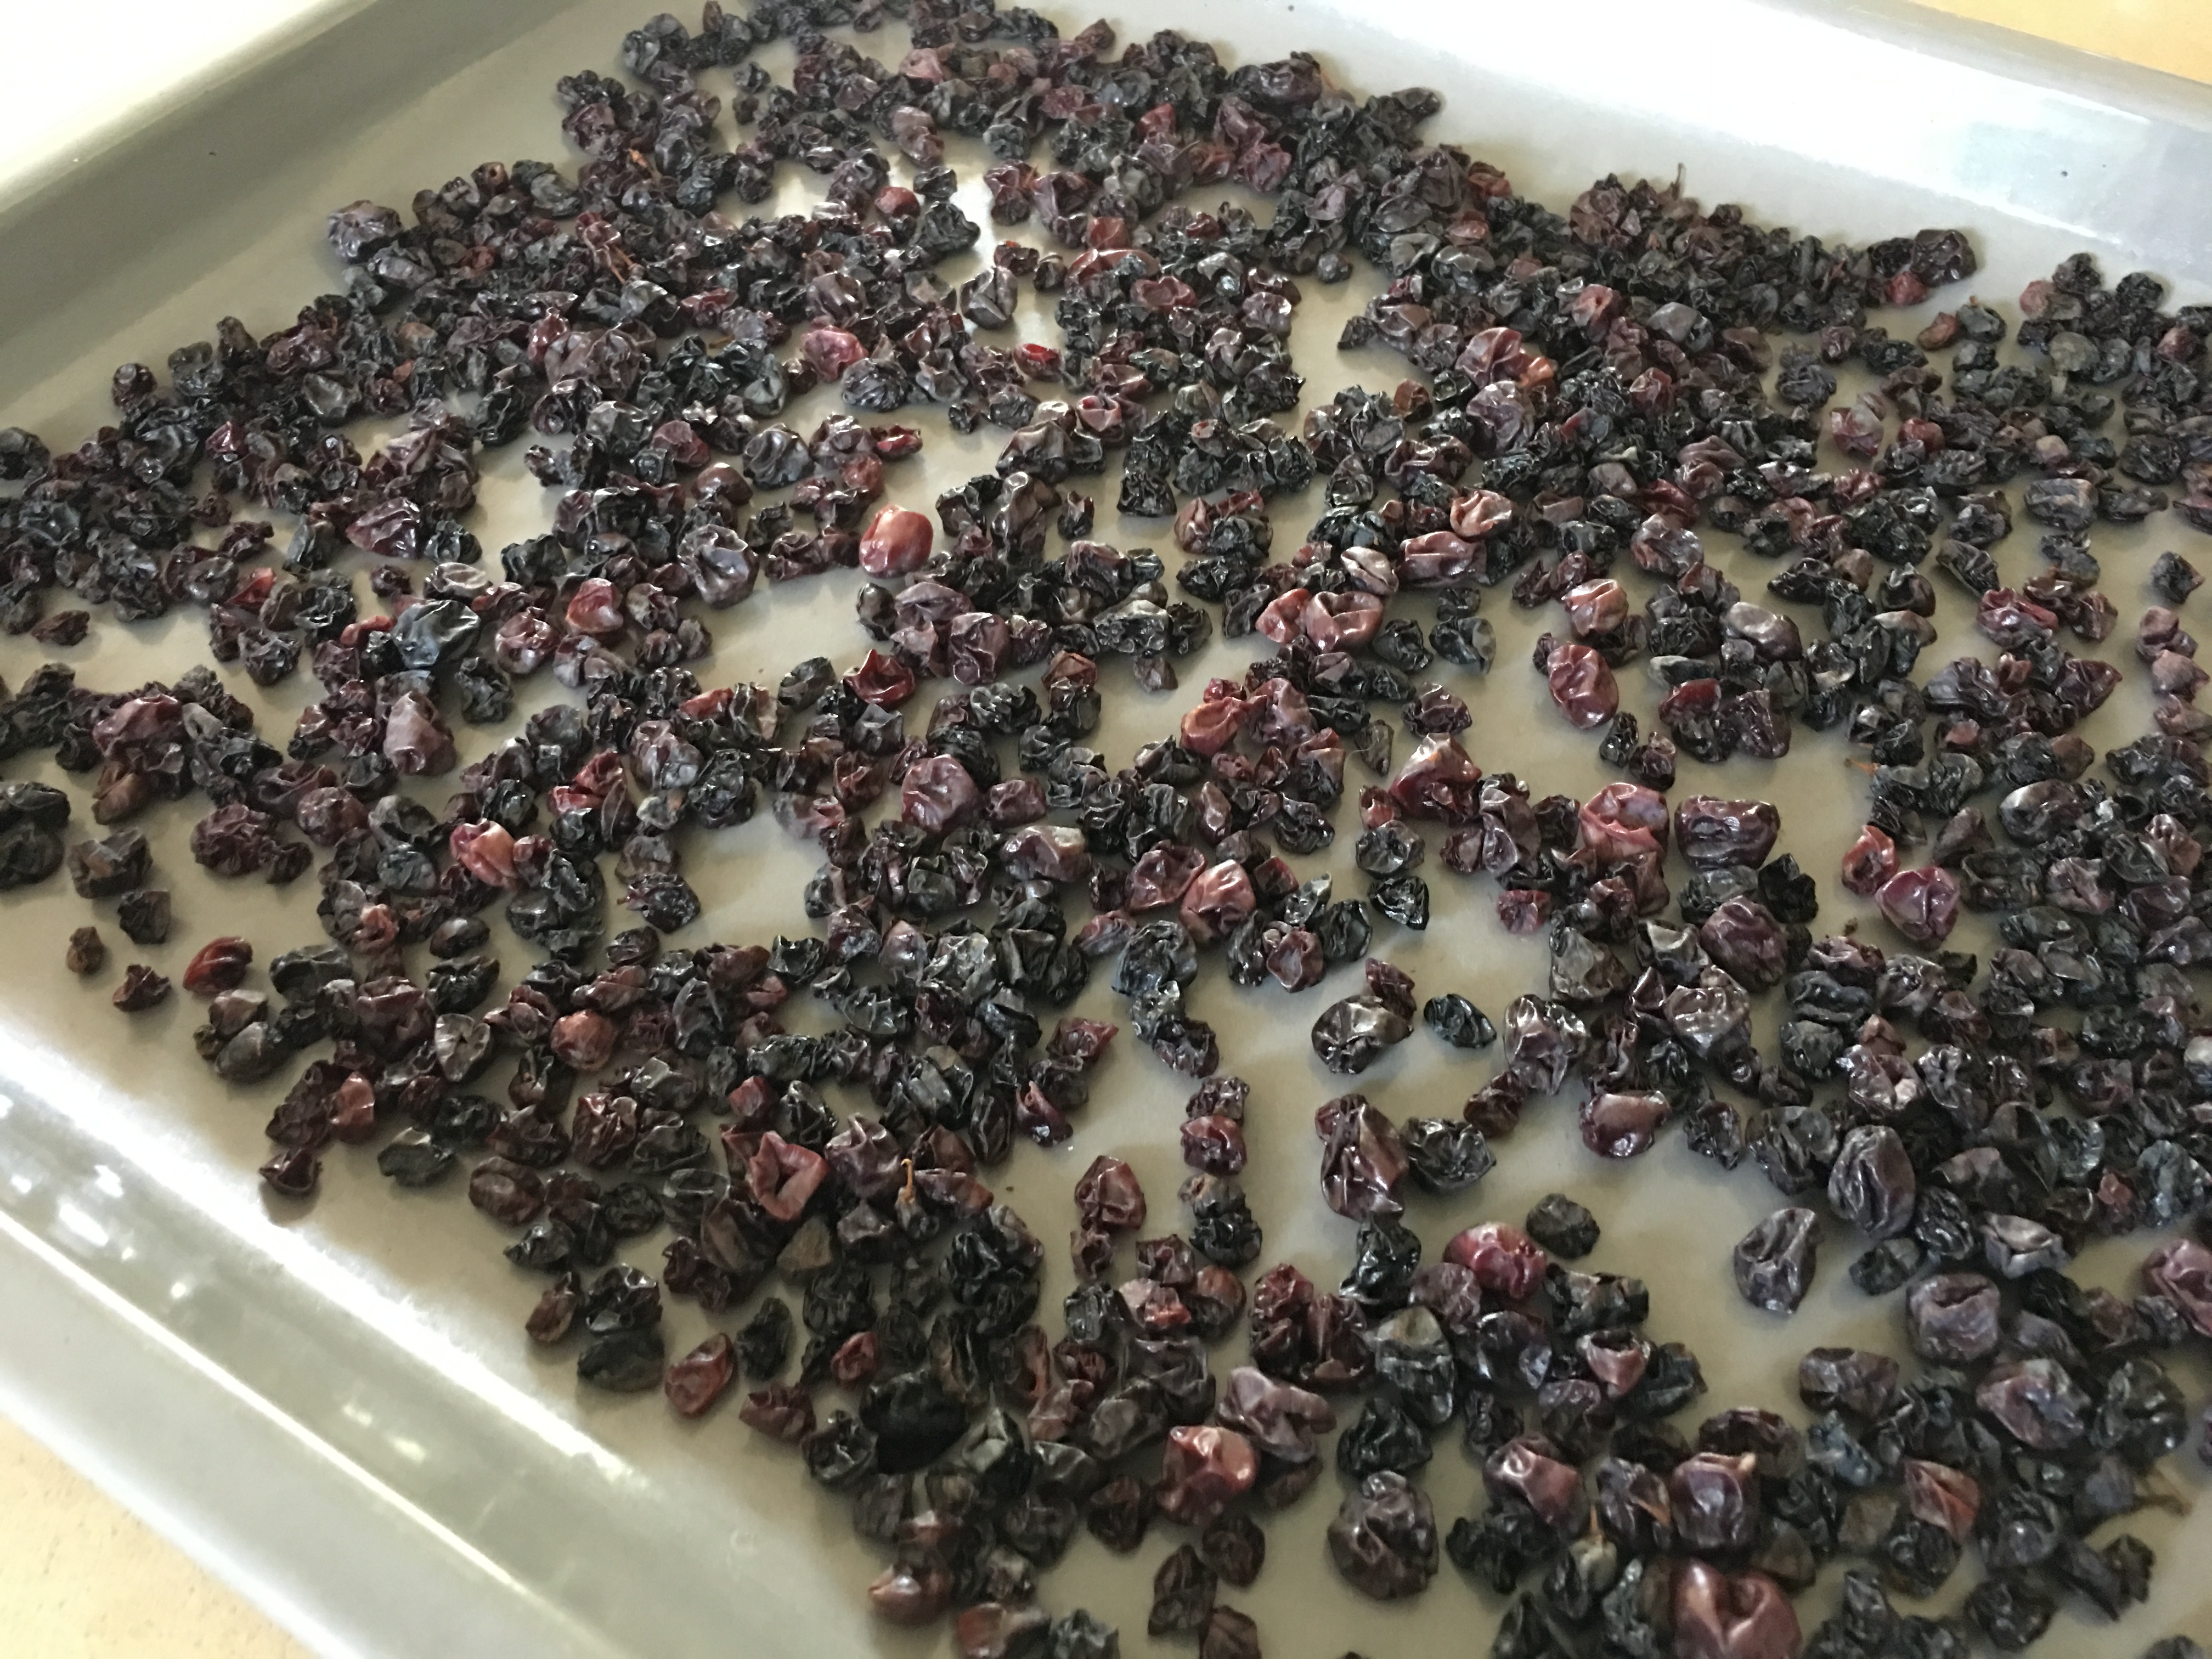
We’ve been eating these small sweet grapes fresh for dessert or breakfast, with a dollop of Greek yoghurt. I also dried a few as you can see in the photo. Left on a tray in a sunny spot they were ready in a few days.
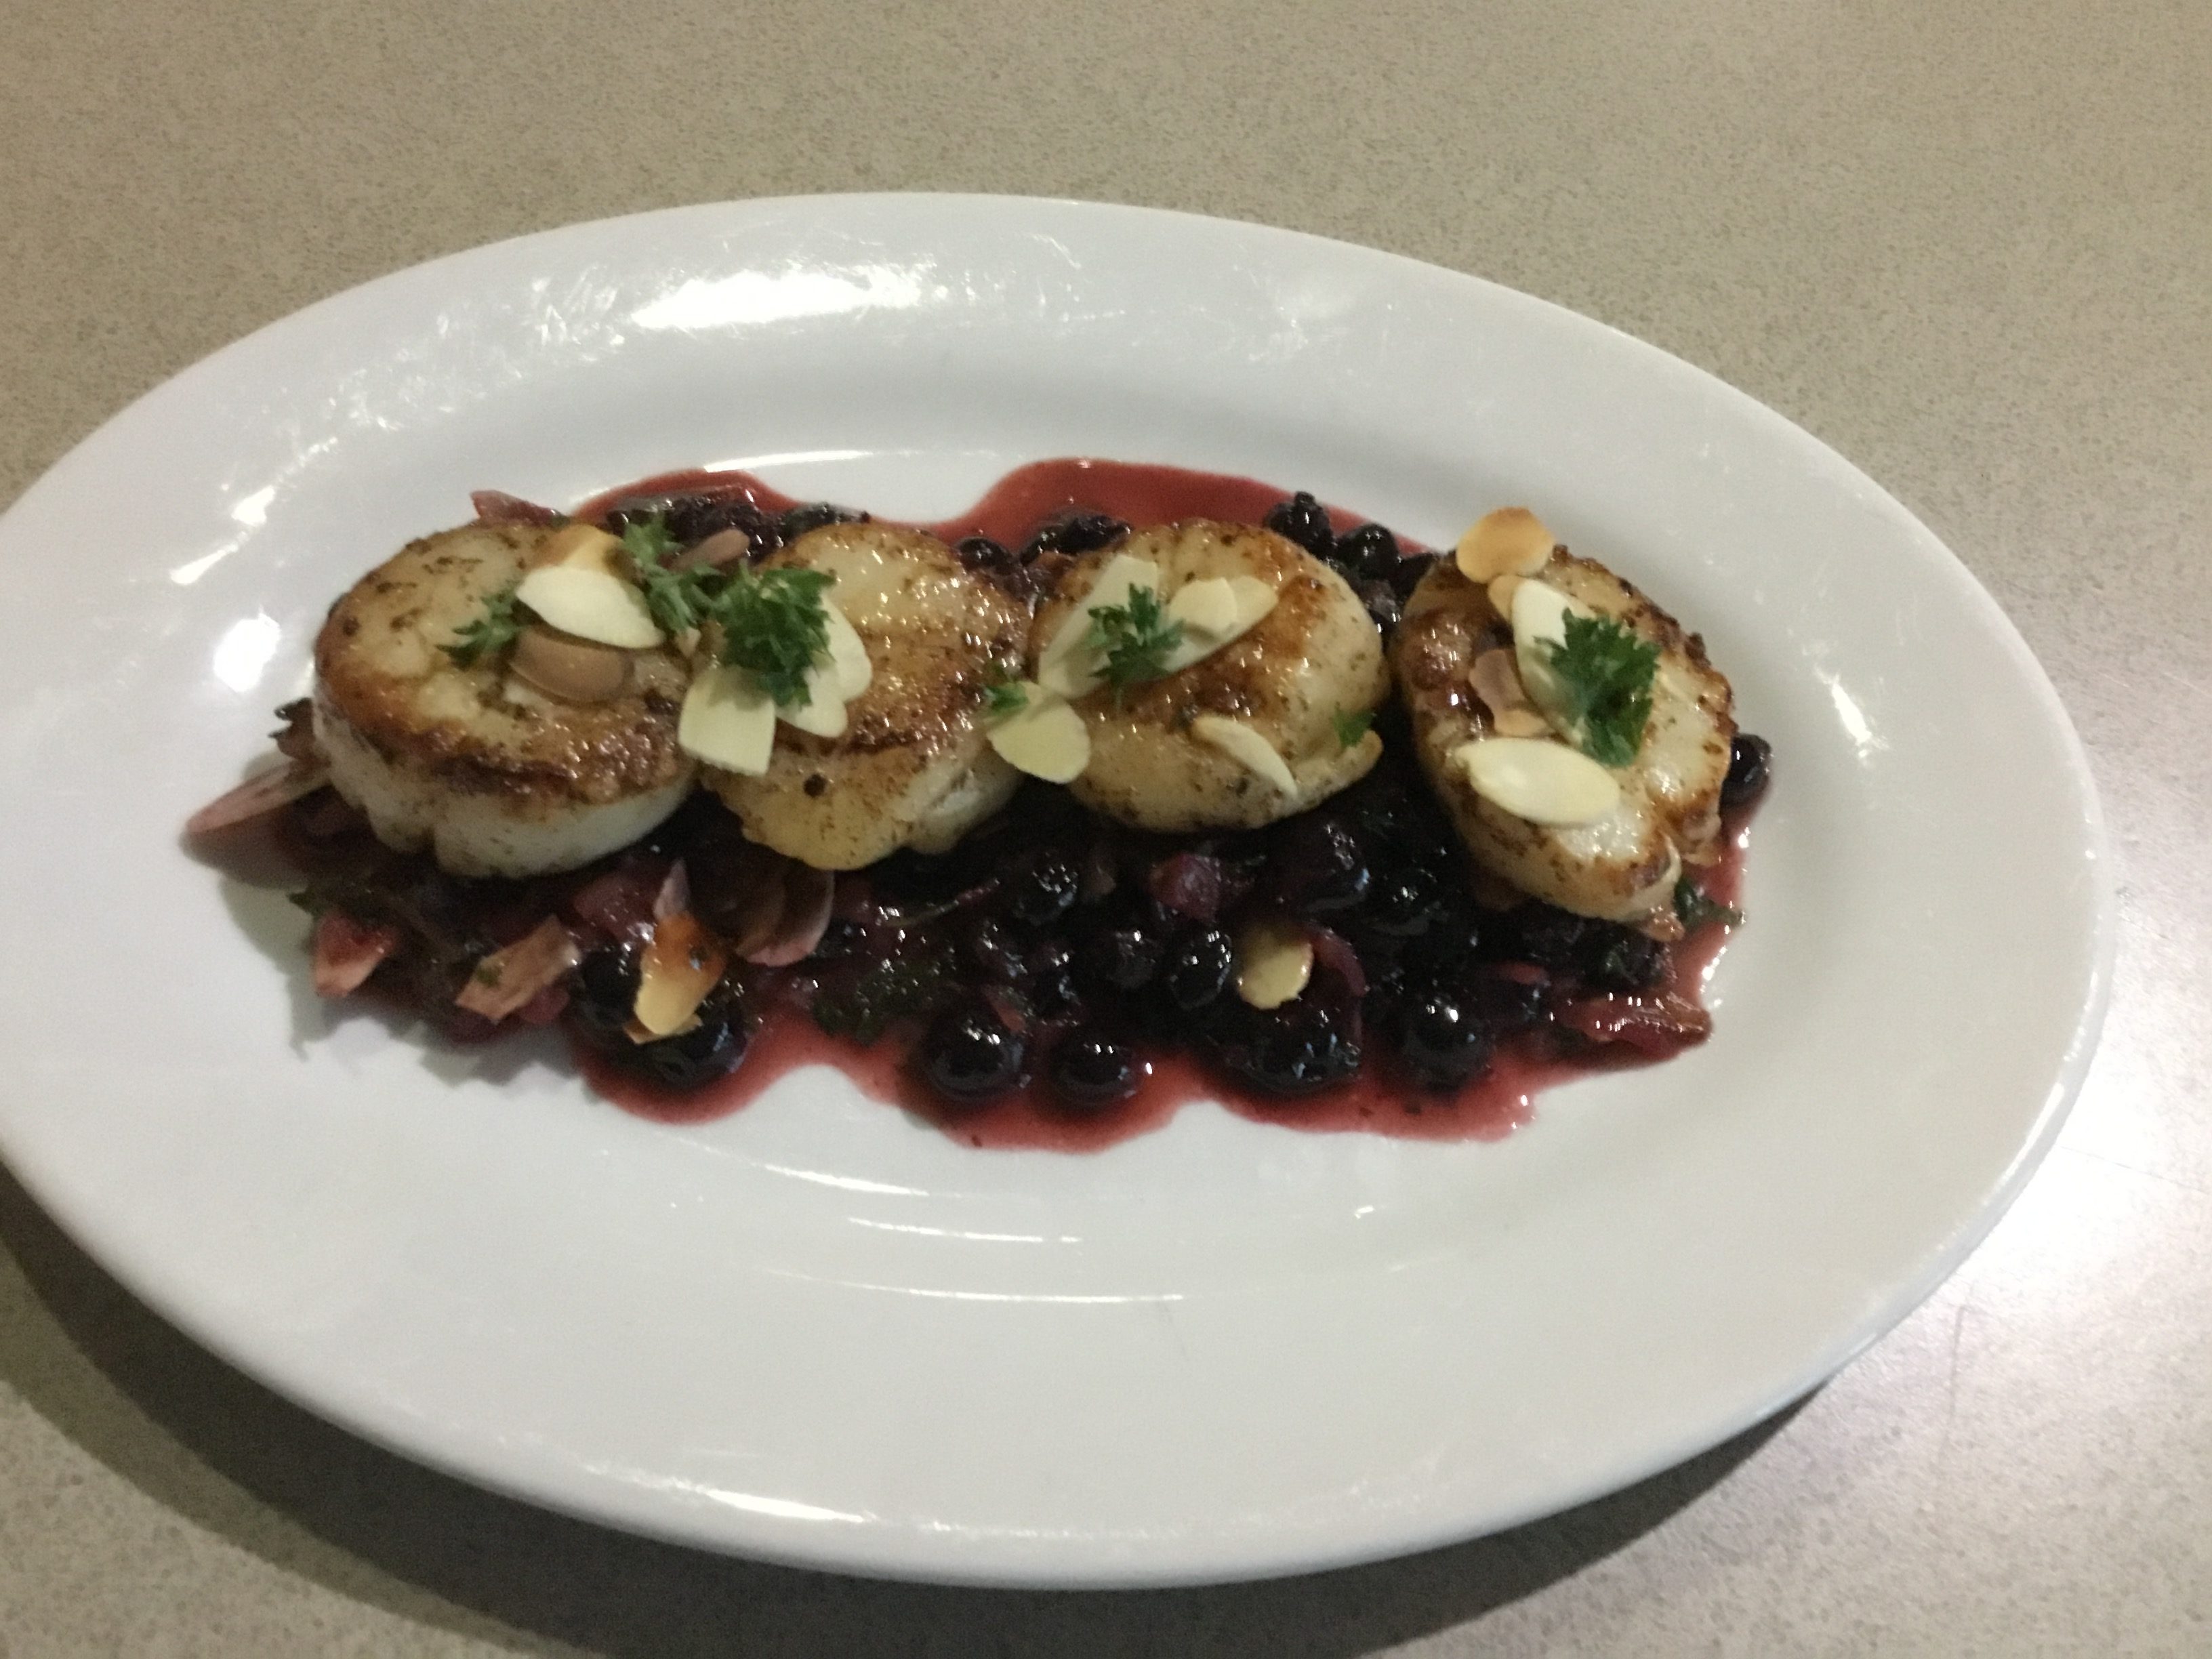
The last few Champagne grapes went into this recipe for scallops from a New Zealand website called Epicurious. Matthew declared it was Business Class food, which I think he meant as a compliment – something Neil Perry who plans the menus for QANTAS might approve of?
8 to 12 large scallops without roe (see note below), thawed if frozen
Salt and freshly ground black pepper
4 Tbs butter
3 shallots, peeled and finely chopped
2/3 cup Champagne grapes (or small seedless black grapes, halved)
1½ Tbs lemon juice
1/3 cup flaked almonds, toasted
2 Tbs chopped parsley

Dry scallops thoroughly with paper towels then season with salt and pepper on both sides. Heat half the butter in a frying pan large enough to cook the scallops in one layer. Let the butter brown slightly then add the scallops and cook them for 2 minutes each side over moderately high heat, until nicely browned. Remove scallops to a warm plate and cover with foil.

Turn the heat down a bit then add the remaining butter to the pan with the shallots. Cook, stirring for 2 minutes or until soft. Champagne grapes are the size of blueberries so if yours are bigger cut them in half. Add grapes to the pan with the lemon juice and most of the almonds and cook, stirring for about 2 minutes. Add most of the parsley and any juices which have accumulated on the scallop plate, then divide among 2 plates (main course) or four plates (starter) and top with the scallops, the reserved nuts and parsley to garnish.

Serves 2 as a main course or 4 as a starter

Note: as a main course for 2 you will need 8-10 scallops and as a starter for 4 you will need 12.

Substitutions: use the white part of spring onions (scallions) instead of shallots; use dried currants, (reconstituted in some hot water for 30 minutes, then drained) instead of the grapes; use pine nuts instead of almonds.
Roast Chicken with Walnut and Bacon Stuffing

A whole chicken cooks more quickly if you butterfly it. While some supermarkets sell butterflied chickens, it’s easy enough to do it yourself. Cut along each side of the backbone with poultry shears and discard it, then flatten the chicken by pressing it with the flat of your hand.

I hate throwing food away, so whenever I have any stale bread, especially delicious sourdough, I whiz it in the food processor, then tip the coarse crumbs into a plastic bag and keep them in the freezer. They are useful for making stuffing or for topping recipes such as Seafood Mornay, one of my all-time favourites.

This makes a tasty family meal, served with salad, and any leftovers are good for sandwiches next day.

1 whole chicken, butterflied (as described above)
1 cup chunky stale breadcrumbs
½ cup chopped walnuts or pecan nuts
½ cup finely chopped parsley
½ cup diced bacon
Salt and freshly ground pepper to taste
2 Tbs olive oil
2 Tbs soy sauce

Preheat oven to 180°C. Place chicken in a roasting pan. Mix breadcrumbs, nuts, parsley and bacon and season to taste. Run your fingers under the skin of the chicken, to separate it from the flesh. Go as far as you can into the thighs and drumsticks, being careful not to break the skin.

Push the stuffing under the skin, spreading it out as evenly as you can. Mix olive oil with soy sauce and brush all over the chicken. Roast for 45 minutes to an hour, or until cooked and nicely glazed. Check by piercing the thickest part of the thighs – juices should run clear.

Serves 4-6

Creamy Tuscan Prawns with Spinach

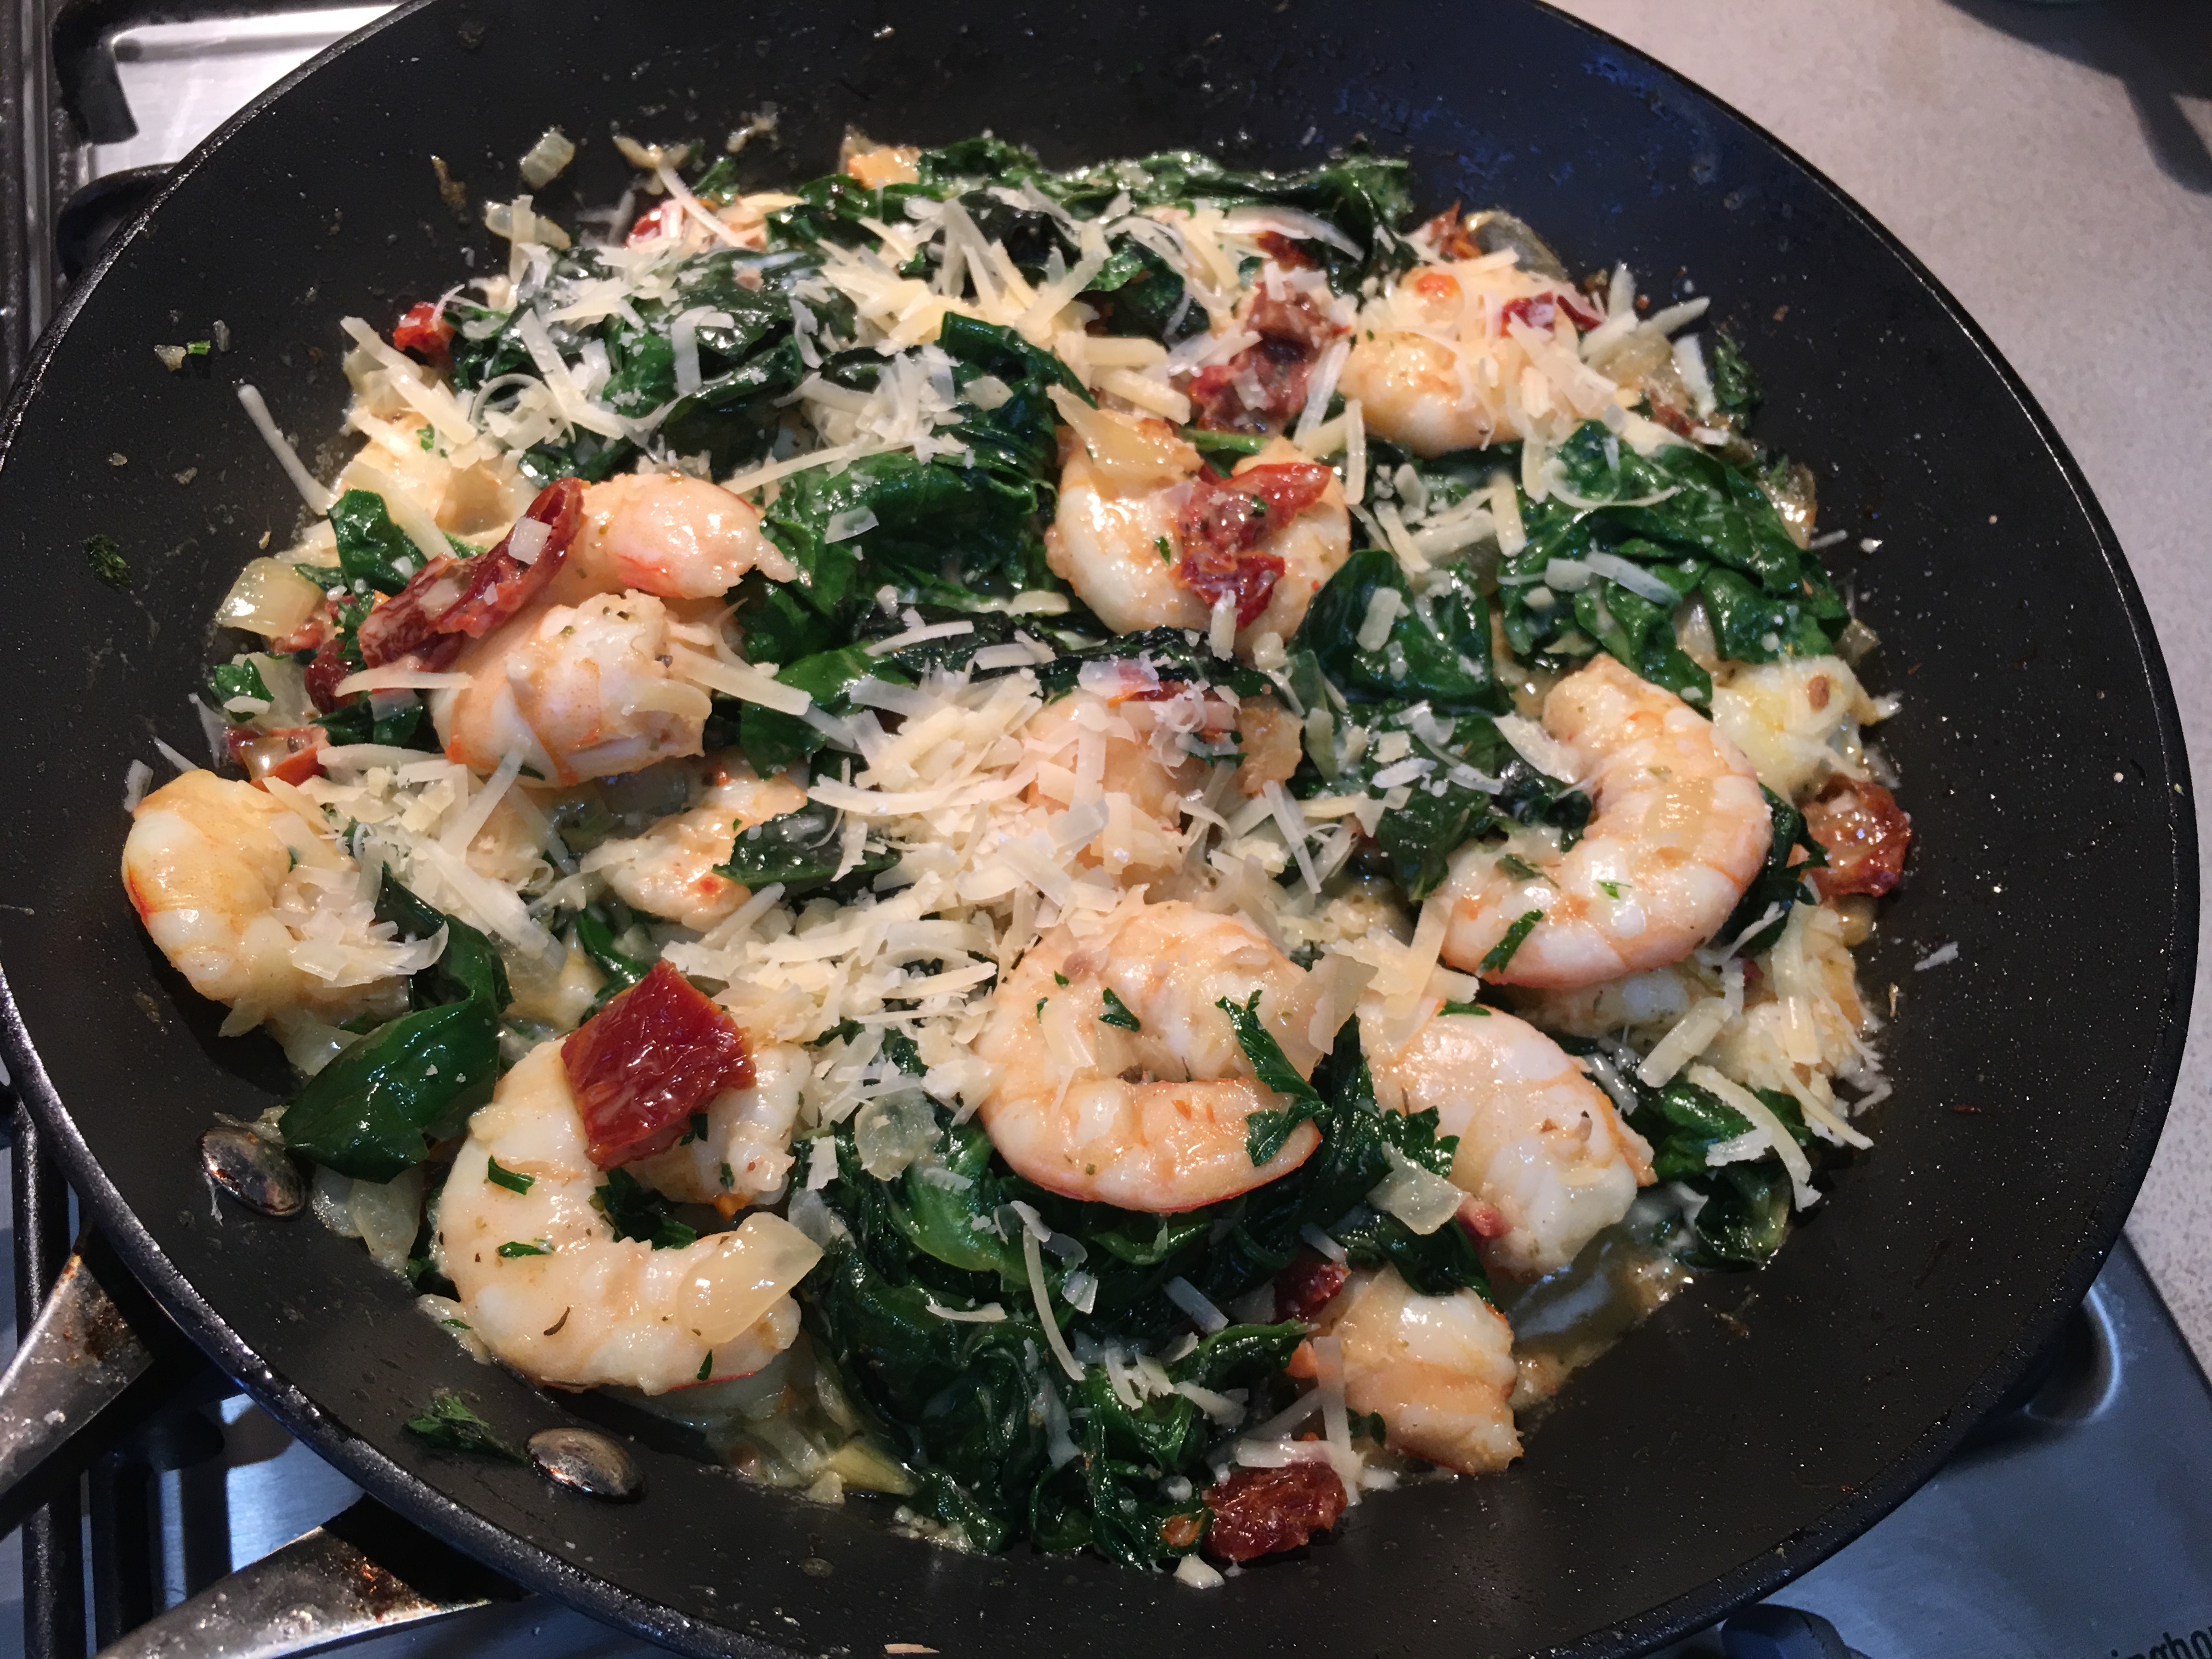
This quick prawn dish is delicious on its own or served with rice, pasta or crusty bread. I made half the recipe.

2 Tbs butter or olive oil
6 cloves garlic, finely chopped
1 small onion, finely chopped
1 kg green prawns (About 500g peeled weight)
½ cup white wine (if preferred use some stock)
100g sun dried tomatoes
3-4 cups baby spinach leaves, or big leaves torn up
1 tsp dried oregano (or 2 tsp fresh)
1 tsp dried thyme (or 2 tsp fresh)
1 Tbs chopped fresh basil
1 Tbs chopped fresh parsley
1 cup cream or coconut cream
Salt and freshly ground black pepper to taste
2/3 cup grated Parmesan cheese

In a large frying pan, melt butter and fry garlic and onion until soft but not brown. Add the prawns and cook, stirring, until they turn pink. Add the wine and cook for 2-3 minutes over high heat to reduce a bit. Add sun dried tomatoes, cut into thin strips, spinach, herbs and cream. Cook, stirring for 2-3 mins or until spinach has wilted and sauce has thickened a bit. Season to taste then serve topped with the grated cheese.

Serve with rice, pasta or crusty bread.

Serves 4

Variation: use cubes of chicken breast instead of the prawns.

The Perfect Quiche

A friend I’ve known for ages who is a very good cook told me the other day that she can’t make pastry, so I’ve offered to invite her round one day for a quick demo. Pastry was one of the first things I learnt from my paternal grandmother, when I was about 11, although being Scottish she didn’t teach me to make a quiche.

Quiches can be made with a variety of fillings, but the best known is Quiche Lorraine, made with bacon, eggs and cream. It’s definitely the most popular in our house, closely followed by Onion Quiche.  Quiche Lorraine originates in Alsace-Lorraine. My French friend Sigrid, who comes from that region of France, says that a true Quiche Lorraine doesn’t have any cheese in it, but I always add a bit.

Quiches can be frozen at any stage of the preparation. You can freeze the uncooked pastry, the uncooked quiche shell or the partly cooked quiche shell, with or without the uncooked filling poured in. While you can freeze a fully cooked quiche, I prefer to freeze them at the point where the filling has just been poured into the partly-baked pastry case. Place the quiche in the freezer until it has frozen completely. Then wrap it in a plastic bag to stop the filling from sticking to the bag which would happen if you wrapped it before it had frozen.

When needed, put the quiche straight from the freezer into the oven and allow about 25% longer cooking time. Use a dish which can go straight from the freezer to the oven – most dishes are fine and you can of course make quiches in metal pans rather than ceramic.

Alternatively you can make lots of mini quiches for drinks parties, lunch boxes or picnics. Follow this recipe for Mini Leek Quiches and if preferred use a different filling such as the Lorraine or Onion fillings below. With mini quiches it’s not necessary to bake the pastry cases blind before filling them and rather than putting the grated cheese on top, which is a bit fiddly, mix it into the rest of the filling.

If you make two batches of the shortcrust pastry recipe below and divide it into 3 equal balls it will be just enough to make three large quiches. I usually do that and use one ball and freeze two for another time, wrapped in plastic wrap. If you only make one batch of pastry you will have enough for one large quiche with some leftover. Use this to make some little tart cases. Cook them completely while empty, then fill with Lemon Curd or Raspberry Jam.

The following three recipes each fill a quiche dish 25cm in diameter and 3.5 cm deep. Serve warm or at room temperature, not piping hot. The first photo shows mini Onion Quiches ready to go into the oven, the second is a Quiche Lorraine and the third is a Cauliflower Cheese and Bacon Quiche.

With large quiches baking the pastry case blind – before you add the filling – is the secret to avoiding a soggy bottom!


Quiche Lorraine
1 batch of shortcrust pastry
4 eggs
1½ cups cream
½ cup milk
Salt and freshly ground black pepper to taste
200g lardons (chunky bits of bacon cut from smoked speck)
60g grated cheese, traditionally Gruyere or Emmental but Cheddar will do

Preheat oven to 180°C. Roll out pastry and line quiche dish then bake it blind. To bake blind, line the pastry case with a piece of aluminium foil, pressing it down to fit, then tip in something to weigh it down and stop the pastry from rising in the middle. I use corn kernels which I keep in a jar and use over and over again. Dried beans or rice will also do the trick.

Bake quiche shell for 5-10 mins, then remove the foil and corn and bake it for a few more minutes until pale golden brown.

Heat a smidgen of oil in a non-stick frying pan. Add lardons and cook until golden then drain and sprinkle over the partly cooked quiche shell. Don’t overcook or they will shrivel up to nothing. Beat eggs with cream and milk, season to taste and pour in. Can be frozen at this stage.

Sprinkle with grated cheese and bake for about 45 minutes or until puffed and golden brown. Serve cold or at room temperature.

Serves 6-8

Onion Quiche
1 batch of shortcrust pastry
1 kg onions, thinly sliced
50g butter
1 Tbs olive oil
1 Tbs flour
2 eggs
¾ cup cream
1 tsp salt
¼ tsp nutmeg
Freshly ground black pepper
60g grated cheese, preferably Gruyere or Emmental

Preheat oven to 180°C. Roll out pastry and line quiche dish then bake it blind. To bake blind line the pastry case with a piece of aluminium foil, pressing it down to fit, then tip in something to weigh it down and stop the pastry from rising in the middle. I use dried corn kernels which I keep in a jar and use over and over again. Dried beans or rice will also do the trick.

Bake the quiche shell for 5-10 mins, then remove the foil and corn and bake it for a few more minutes until very pale golden in colour.

Meanwhile for the filling heat butter and oil in a large frying pan, add onions and cook very gently for about 45 minutes, or until tender and pale golden, stirring regularly. Add flour and cook, stirring, for 1-2 minutes, then cool.

In a mixing bowl beat eggs with cream, add the cooled onions, salt, nutmeg and black pepper to taste and pour into pastry case. Can be frozen at this stage.

Sprinkle with grated cheese and bake for 45 minutes or until puffed and golden brown. Serve warm or at room temperature.

Serves 6-8

Cauliflower Cheese and Bacon Quiche
1 batch of shortcrust pastry
1 small cauliflower or half a very big one
1 Tbs olive oil
1 medium onion, finely chopped
100g bacon, chopped
300ml thick cream
3 eggs
180g grated cheddar cheese
Salt and freshly ground black pepper to taste

Preheat oven to 180°C. Roll out pastry and line quiche dish then bake it blind. To bake blind line the pastry case with a piece of aluminium foil, pressing it down to fit, then tip in something to weigh it down and stop the pastry from rising in the middle. I use dried corn kernels which I keep in a jar and use over and over again. Dried beans or rice will also do the trick.

Bake the quiche shell for 5-10 mins, then remove the foil and corn and bake it for a few more minutes until very pale golden in colour.  For the filling, cut the cauliflower into large florets and cook in boiling salted water for about 5 mins or until just tender. Drain well. Heat olive oil in a non-stick pan and cook the onion and bacon for 3 mins or until onion is soft and bacon starts to brown. Spread into the partly baked pastry shell and arrange the cauliflower over the top. Beat eggs with cream and season to taste. Pour into the quiche and top with the grated cheese. Bake for 35-45 mins or until nicely browned all over.

Serves 6-8

Tips:

  1. To avoid ending up with tough pastry don’t over-roll it,  treat it gently – not like bread dough – and don’t use too much flour.
  2. A problem some people encounter with quiche shells is that it looks fine until it’s been baked blind. You take it out of the oven only to find that it has shrunk down at the sides so there’s nowhere to put the filling! The way to avoid this is as follows. When rolling out the pastry to line the quiche dish, make sure you don’t put it in when it’s just been stretched because it will ping back again as it cooks. Lift the pastry each time you’ve rolled it, so it can relax. Make sure the pastry goes right to the edges of the dish, then up the sides, then fold it back down again, so the sides are double thickness. Then go round with fingers and thumb, squeezing the sides so they are not quite so thick, but still slightly thicker than the base. Then go round with a sharp knife and, cutting away from you, cut off the excess pastry. Another way to avoid shrinkage is to put the dish into the fridge for a while after you’ve lined it with pastry. This may sound like a long-winded explanation, but it’s much easier to show someone than to explain in writing.


Mango and Passionfruit Ice Cream Cake

The December/January edition of Delicious magazine had a photo on the front of a really quick and easy Mango and Passionfruit Ice Cream Cake which was just perfect for a recent birthday party we hosted.

The recipe uses a bought pavlova so it’s only possible for readers who live in Australia, where you can buy a pavlova base in any supermarket. Readers elsewhere will have to make their own pavlova or modify the recipe and mix 500g of broken up store-bought meringues into the ice cream. The recipe also uses a four litre carton of store-bought ice cream. Easy peasy.

It was absolutely delicious, but a number of variations occurred to me, so I have listed them below. You will no doubt come up with a few of your own.

If you use homemade ice cream rather than store-bought you will need to take the cake out of the freezer 10-15 minutes before serving because homemade ice cream always freezes much harder than store-bought and the cake will be too difficult to slice.

1 x 500g store-bought pavlova base
4L vanilla ice cream
12 passionfruit
A few drops of yellow food colouring (optional)
1/3 cup whisky or water
½ cup sugar
300ml whipping cream
2 ripe but firm mangoes, thinly sliced

You will need a springform cake pan 25cm in diameter with a clip closure – i.e. the same diameter as the pavlova. Choose a flat serving plate which will fit in the freezer. Place the pavlova on the plate then undo the springform pan and take out the base, which you don’t need. Place the ring over the pavlova so it sits down on the plate, then close it.

Spoon the ice cream into a large mixing bowl and let it stand for a few minutes to soften slightly while you add the pulp of 8 of the passionfruit and, if liked, a few drops of yellow food colouring. Mix gently but thoroughly then spread on top of the pavlova, smoothing the top. Freeze overnight – no need to cover.

Place whisky or water, sugar and pulp from the remaining 4 passionfruit into a small saucepan. Heat gently, stirring, till sugar has dissolved then simmer for 6-8 minutes or until thickened, then cool. Can be made ahead and kept in a jug or jam jar.

To serve, whip cream until stiff and slice mango thinly. Remove ice cream cake from freezer. Briefly hold a tea towel wrung out in very hot water around the sides, run a thin knife around the outside of the cake, then release the clip and lift off the tin. Spread whipped cream over the top, cover with sliced mango and drizzle with passionfruit sauce. Serve immediately.

Serves 16

Four Variations: 

  • Use chocolate ice cream, cover the whipped cream with strawberries, whole or sliced if large, then drizzle with chocolate ganache
  • Use plain vanilla ice cream or Quick Raspberry Ice Cream, cover the whipped cream with fresh raspberries, then drizzle with raspberry coulis
  • Dissolve 4 Tbs instant coffee in 2 Tbs hot water then mix thoroughly into the ice cream, mix about 200g broken up Halva into the whipped cream and drizzle with chocolate sauce
  • Use caramel or salted caramel ice cream, cover the whipped cream with sliced bananas and toasted macadamias or peanuts (optional), then drizzle with caramel sauce


Ottolenghi’s Rice Salad with Nuts, Sour Cherries & Grilled Salmon

While staying with our son and daughter-in-law in London they served this unusual rice salad from Yotam Ottolenghi’s latest cookbook Plenty More.

It’s delicious on its own, but they served it on individual plates, topped with a portion of pan-fried salmon with crispy skin. For a recent buffet dinner I made one and a half times the rice salad, then baked a one kilo side of skinned and deboned salmon (from Costco), brushed with Thai sweet chilli sauce, at 200°C for 8-10 minutes and placed it on top of the salad. I prepared all the ingredients for the salad earlier in the day and mixed everything together 10 minutes before serving. The salmon can be hot or at room temperature.

I couldn’t find wild rice in Coles, Woolworths or Aldi. The health food store had a packet of 125g for $9.95 which works out at $80 a kilo. Ridiculous! Black rice, which costs around $10 a kilo can be found in all major supermarkets in Australia. It’s a very good substitute and a great colour contrast to the basmati, so I used that.

Ottolenghi cooks the basmati rice by the absorption method. I prefer to cook it in plenty of boiling water, the same as the wild/black rice and the quinoa, so you have more control over when to stop the cooking process. You want all the grains to have a bit of bite to them – al dente as the Italians say.

1 cup wild rice or black rice
1¼ cups basmati rice
4 Tbs olive oil
2/3 cup quinoa
60g almonds, skins on, coarsely chopped
60g pine nuts
3 Tbs sunflower oil
2 medium onions, thinly sliced
1 cup chopped flat leaf parsley
2/3 cup chopped basil leaves
1/3 cup chopped tarragon leaves
2 cups rocket leaves
2/3 cup dried sour cherries (I bought them in Costco)
¼ cup lemon juice
Grated rind 1 lemon
2 cloves garlic, crushed
Salt and freshly ground black pepper
Grilled salmon portions to serve (optional)

Place wild rice in a pan, cover with plenty of water, bring to the boil then simmer for 35 minutes until cooked but firm. Drain, rinse under cold water, drain again. Cook basmati rice in plenty of boiling salted water until cooked but firm. Drain, rinse and drain.

Cook quinoa in boiling water for 9 mins then drain, rinse and leave to drain. Place the almonds and pine nuts in a small frying pan with one tablespoonful of olive oil and a pinch of salt. Cook stirring until just starting to colour then set aside. Heat sunflower oil in a large frying pan and add the onions, a pinch of salt and some ground black pepper. Cook over high heat for 5-8 minutes, stirring often, until onions are soft with a few crispy bits. Drain on paper towels.

In a large salad bowl place all the grains, chopped herbs, rocket, fried onion, nuts and sour cherries. Add the lemon juice and zest, the remaining 3 Tbs olive oil, the garlic, half a teaspoon of salt (or to taste) and some pepper. Mix well then stand for 10 minutes before serving.

Serve the salad as it is or topped with grilled, pan fried or baked salmon.

Serves 8

Substitutions: 

  • use dried cranberries instead of sour cherries
  • use black rice or brown rice instead of wild rice
  • use skinned almonds if that’s all you have
  • use more parsley and basil if you don’t have any tarragon
  • if you don’t have any quinoa just leave it out