Barbecued Baby Octopus

Whenever I serve baby octopus I think of my dearly departed Dad.

Kenf

His name was Kenneth but in the family he was always known as Kenf. For someone brought up on a very traditional British diet Kenf was quite adventurous when it came to eating. He loved Chinese food and spicy curries. In fact he pretty much ate anything you put in front of him.

My parents came over from the UK to visit us in Paris and I decided to serve baby octopus. As we finished our meal I glanced up and although he didn’t say anything I could tell that he wasn’t impressed.

“What do you think?” I enquired. “Well if you really want to know” he replied “I thought it was like eating Dunlop rubber”.

Maybe they were a bit chewy, but I didn’t think they were that bad! Since then I’ve found this recipe which isn’t chewy (thanks to the red wine) and I often wonder if it would have met with Kenf’s approval.

If you like things spicy add a bit of finely chopped fresh chilli.

IMG_0156

1 kg baby octopus (fresh or frozen)
2 Tbs balsamic vinegar
250ml (1 cup) red wine
1 Tbs soy sauce
2 Tbs sweet chilli sauce
1 Tbs tomato sauce (ketchup)
1 Tbs olive oil
To serve:
Chopped fresh coriander
Olive oil

If using fresh octopus clean thoroughly, rinse and drain well. If using frozen octopus thaw, rinse and drain.

Place balsamic vinegar and wine in a saucepan with the octopus. Bring to the boil then reduce the heat to low and simmer for 20 mins. Drain, discard the wine and place octopus in a bowl with the soy, chilli sauce, tomato sauce and olive oil. Stir to combine.

Heat BBQ to high and cook the octopus for 5-6 mins, turning occasionally, until lightly charred and crispy on the edges. Serve on a bed of rocket or with steamed rice, garnished with coriander and a drizzle of oil.

Serves 2 as a main or 4 as a starter

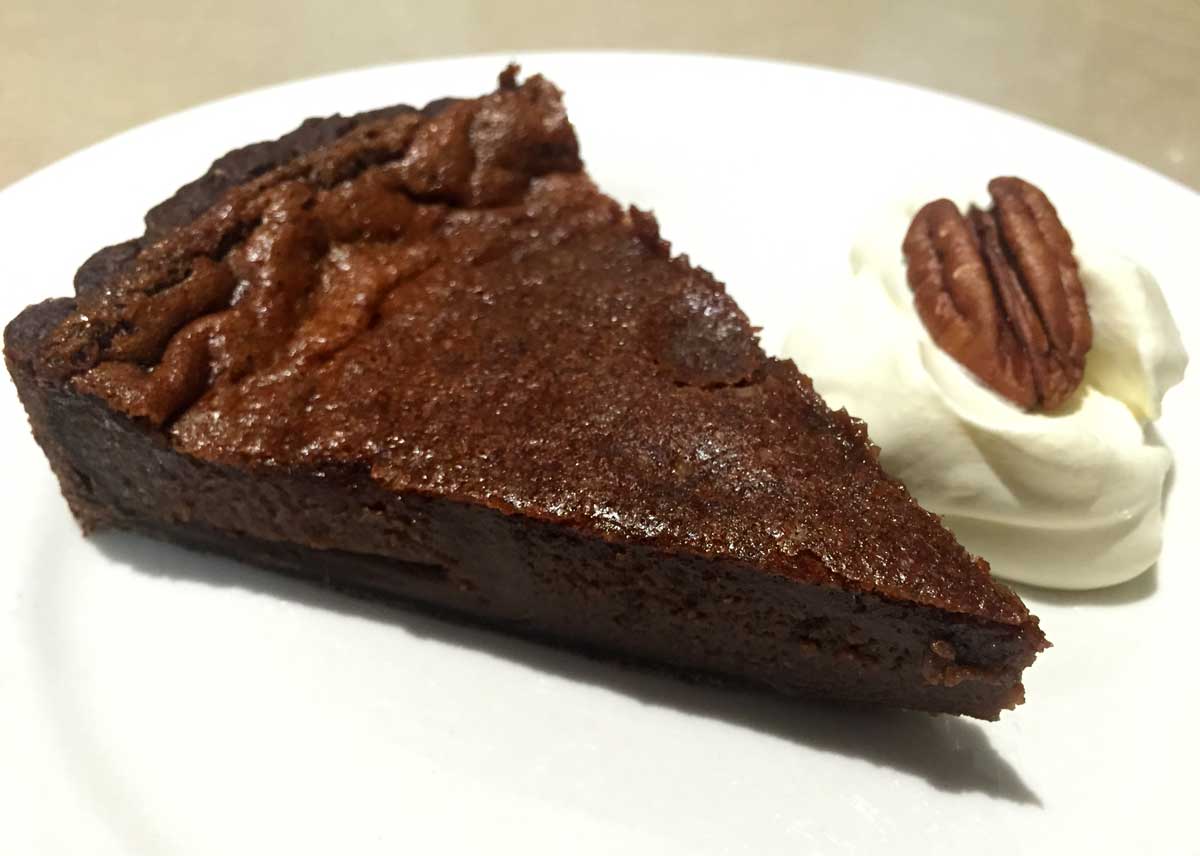
Nutella Tart

Some of the grandkids like Nutella. I’m not a fan, but usually have it in the pantry for visiting Nutella eaters.

This recipe makes a quick dessert and was a good way to use up a jar which had been sitting there for a month or two since the last visit. To save time you can use bought shortcrust pastry, but this home-made chocolate crust is very quick to make in a food processor.

Nutella Tart

Pastry:
3 heaped Tbs plain flour
1 heaped Tbs cocoa
1 level Tbs caster sugar
55g butter
3-4 Tbs water
Filling:
300g (about one heaped cup) Nutella or other chocolate spread
2 eggs
¾ cup cream
To serve:
Whipped cream
Optional: Toasted hazelnuts, walnuts or pecans

For pastry place first four ingredients in food processor and whiz until it forms crumbs. Slowly add water through the feed chute, with motor running. Stop as soon as mixture forms a ball. Remove and press into a ball, then roll out thinly and use to line a 20cm (8″) metal tart tin. Refrigerate for up to an hour. If in a hurry stick it in the freezer for a few minutes.

Preheat oven to 180°C. Line tart with foil and fill with dried beans or corn to stop it rising. Bake for about 8 minutes, then remove foil and beans (which can be kept to use again and again) and put back in the oven for 5-10 mins or until set. Remove from the oven and turn it down to 150°C.

Meanwhile for the filling, place eggs in a bowl and beat with a hand whisk. Whisk in Nutella and cream and when smooth pour into the tart case. It should come almost level with the top of the pastry. Bake for 30-40 minutes or until set, but still wobbly in the middle. Don’t overcook.

Cool then refrigerate till serving time. Serve with whipped cream and toasted nuts.

Serves 8


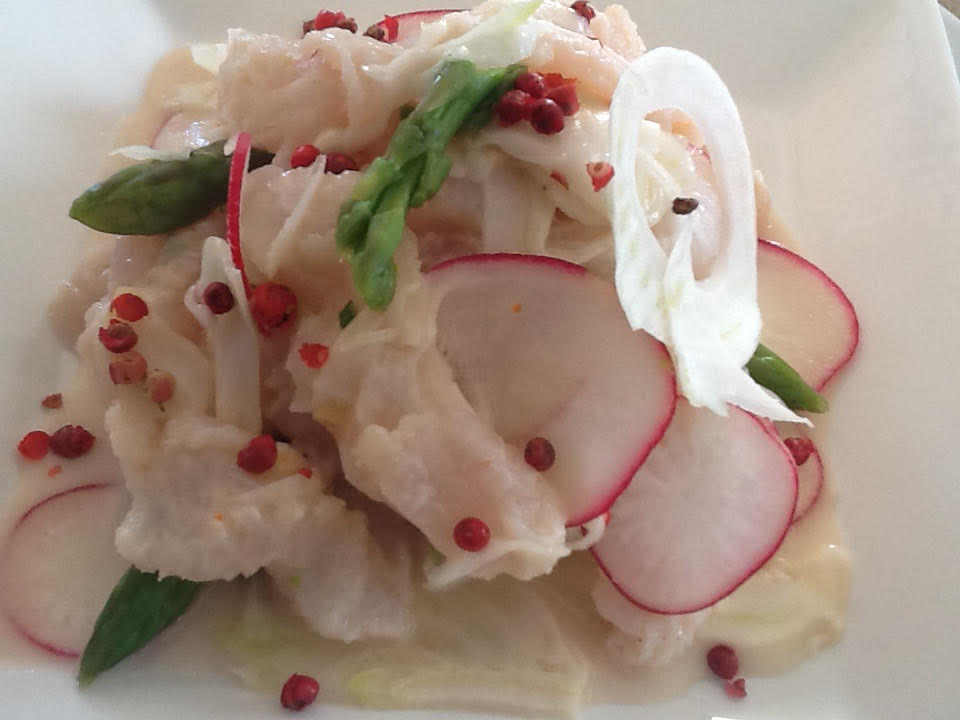
Asian Style Kingfish Ceviche

When we were in Newcastle recently we dined at a restaurant called Sprout. The Kingfish Ceviche ordered by one of our party was so good we all had a taste!  I decided to try and recreate it on return to Canberra. I added the pink peppercorns (see note below) which were a definite plus to the flavour and colour combination.

Asian Style Kingfish Ceviche

300g Kingfish fillets (or other firm white fish)
Juice of 1 lime or half a large lemon
1 small bulb of fennel, trimmed and thinly shaved
3-5 radishes (depending on size) thinly shaved
2 spring onions, very finely sliced on the diagonal
4 stalks asparagus, blanched and cut into 2-3cm lengths
2-3 tsp very finely sliced lemon grass
1 cup coconut milk
2-4 tsp fish sauce, to taste
2 tsp grated ginger
1 tsp finely chopped fresh chilli (or to taste)
2 tsp brown sugar
1 Tbs vegetable oil
Salt and freshly ground black pepper to taste
To garnish:
Pink peppercorns

Cut fish into bit size slices and mix with the lime or lemon juice. If you like your ceviche very lemony add more lemon juice. To blanch the asparagus, cook them in boiling water for 1-2 minutes then refresh under cold water, drain and pat dry with paper towel.

Leave fish for an hour or so, stirring from time to time, then mix in remaining ingredients, keeping some fennel, radish and asparagus for garnish. Season to taste then arrange on serving plates and garnish with the reserved vegetables and a few pink peppercorns.

Serves 6 as a starter

Note: A pink peppercorn (baie rose in French) is the dried berry of the Peruvian Peppertree. They were so-named because they look like peppercorns. The flavour is aromatic and only slightly peppery. They go well with all kinds of fish dishes, including Gravlax and smoked salmon. Available at specialty shops such as The Essential Ingredient.

Boris and the Barbecue

Early in our marriage we were posted to Israel where we lived in the leafy suburb of Herzliyah Pituach, on the outskirts of Tel Aviv. It was one of the few times in our lives that we didn’t have a dog, but our neighbours had a boxer called Boris. They travelled a lot and Boris got lonely, so he spent as much time at our house as he did at theirs. When he felt the need for company he’d just turn up and we were always pleased to see him. Well, almost always.

A Minister was visiting from Queensland with his wife and secretary, so we invited them to join us for a very informal barbecue lunch. Matthew headed off late Saturday morning to pick them up, wearing jeans and an open-neck shirt.

Our guests arrived dressed to kill in white linen suits or similar attire. We sat in the garden sipping a glass of wine while Matthew lit the barbecue. Within five minutes Boris had arrived, his little stubby tail wagging excitedly as he sniffed the air in anticipation of things to come. He could smell a barbecue from a mile off.

Boris was a friendly soul and his usual way of greeting new friends was to slobber his way along their knees. As Matthew tried to stop him and apologise Mrs Minister said through clenched teeth “It’s okay we don’t mind dogs.” Her face said differently as she studied the remains of Boris’s breakfast, now smeared all over her white pants.

Matthew poured more wine, everyone relaxed and we moved to the table for lunch – barbecued lamb cutlets and salad, followed by apple strudel. Boris was starting to be a pain, snuffling under the table looking for scraps. Matthew escorted him home twice, but he kept coming back. We decided to give him a couple of chop bones at the far end of the garden, to keep him quiet.

Suddenly the sound of Boris choking interrupted the conversation. Matthew leapt up, rolled up his sleeve and thrust his hand down the dog’s throat to retrieve the bone. Our guests looked on in horror.

You will be relieved to know that Boris survived the ordeal and went on to attend many more barbecues, although bones were strictly off the menu. In honour of our dearly departed four-legged friend here’s a barbecue recipe without bones. It was given to me by an Australian friend in Israel and is very simple but always a winner. The quantities are flexible – if you use more pork just add more soy sauce, garlic and ginger!

Candy’s Barbecued Pork Rashers Candy's Barbecued Pork Rashers

800g to 1 kg pork belly rashers/slices
1/3 cup soy sauce
4 cloves garlic, crushed
1 Tbs grated or very finely chopped fresh ginger

If the pork slices have skin, remove it. If they’re very thick slices hammer them out a bit with a meat hammer. Mix soy sauce, garlic and ginger in a shallow dish. Add the pork and turn to coat thoroughly. Leave to marinate for a couple of hours or overnight. Cook for about 15 minutes or so on a hot barbecue, turning a couple of times, or until well cooked and crispy.

Serves 4

The Best Guacamole

Many years ago I tried a fabulous Guacamole at the house of a Mexican diplomat. It’s so long ago I can’t even remember her name, but she gave me the recipe and I’ve been making it ever since. I guess you’d expect a Mexican to know how to make Guacamole.

I had been making my own version for years, but this authentic recipe taught me a couple of tricks. Firstly, don’t puree the avocados – mash them roughly with a fork so they remain a bit chunky. Secondly, a dash of cumin powder works wonders, although if you don’t like cumin you can always leave it out. Another tip is not to use overripe avocados as the dip will discolour very quickly if you do.

IMG_4089

2 large ripe but not overripe avocados, seeded and peeled
1 very small onion, grated (or ¼ medium onion)
½ clove garlic, crushed
2-3 tsp lime juice
2-3 tsp olive oil
2 Tbs chopped coriander
Salt and freshly ground black pepper, to taste
1 tsp ground cumin
½ tsp dried oregano
1 large tomato, peeled, seeded & diced (optional)
To serve:
Corn chips

Mash avocados roughly with a fork, then gently mix in remaining ingredients, except tomato. Cover with plastic wrap and chill. Fold in tomato just before serving. Garnish with extra chopped coriander or a few pieces of tomato and serve with corn chips.

Makes 1-2 cups

Note: instead of one large tomato use 3-4 baby ones (I used baby Roma). No need to peel, just remove seeds and dice.

Australia’s Oyster Coast

Australia’s Oyster Coast farmers operate across eight estuaries from the Shoalhaven River to Wonboyn Lake on the pristine south coast of New South Wales. A group of passionate artisans, they are committed to growing oysters of the highest quality in estuaries so well-managed they can be eaten straight out of the water.

Australia's Oyster Coast

Three different species, each with different characteristics influenced by the water in which they live, are being produced. Going from left-to-right in the photo, the Sydney Rock is a native oyster with a firm, creamy texture and incredible flavour. Highly prized by top restaurants, it can only be found along the South Eastern coastline of Australia. Next comes the Angasi, another native oyster which is rarer than its Sydney cousin and recognised by its flat shell and stronger flavour. The Pacific Oyster is significantly bigger than the other two. Introduced into Australia from Japan, it’s the mostly widely-consumed oyster in the world. Fast-growing and plump with a clean, salty flavour.

Australia’s Oyster Coast has partnered with a number of restaurants and wineries to sell their products in Australia. To place an order contact: sales@australiasoystercoast.com

They have also started exporting to a number of countries in Asia, including China, Hong Kong and Singapore and plan to expand to other countries in the region in the near future. They are also developing a domestic tourism trail along Australia’s Oyster Coast, with lease tours, restaurants, accommodation, sea planes and kayaks. This is still under development, but will take on greater importance once direct air flights between Canberra and Singapore commence.

Each of the three oysters requires a slightly different opening technique. You need a special knife and it’s also a big plus to have a family member who knows what they’re doing. Our son-in-law Sacha is our oyster expert. An Australian of Chilean origin Sacha has eaten more oysters than I’ve had hot dinners and says the only way to eat them is plain, or with a squeeze of lemon juice.

For those who like something a bit different I made this simple Asian sauce from Jamie Oliver.

Australia's Oyster Coast1 piece of peeled fresh ginger the size of a small walnut, grated
6 Tbs rice wine vinegar
1 small red chilli, de-seeded and finely chopped
1 Tbs finely chopped coriander
1 tsp sugar

Shake in a jar with a lid.

Lemon Slice

Having offered to take a dessert to a family picnic for more than twenty people I decided that a slice, which could be cut into 20 or 30 squares, was the answer.

For some time I’ve been wanting to create a lemon version of Galaktoboureku, the traditional Greek Custard Slice. I thought I would make a lemon-flavoured custard instead of the usual vanilla one, sandwich it between layers of crispy fillo pastry and drizzle it with lemon syrup, rather than a plain syrup which the Greek version uses.

Well here is the result. Matthew enjoyed the leftovers which I called Lemon Slice for his benefit. Any mention of custard would have put him off. For a smaller version just halve the recipe and make it in a standard 22cm cake tin.

Lemon Slice

125g butter, melted
About half a packet of Fillo pastry, thawed if frozen (about 16 sheets)
2½ cups milk
2 cups cream
1 cup sugar
1¼ cups (200g) semolina
4 eggs, beaten
2 cups Lemon Curd (preferably home-made)
Syrup:
Juice of 1 large or 2 smaller lemons
¾ cup sugar
To serve:
Whipped or pouring cream (optional)

Line a buttered 20x30cm roasting pan or deep baking tin with about 8 layers of fillo pastry, brushing each sheet with melted butter and cutting or overlapping the sheets as necessary. If the pan is non-stick you don’t need to line it with baking paper, but if in doubt you’re better off doing so.

Preheat oven to 160°C. Heat milk, cream and sugar until simmering point, then add semolina and cook, stirring, until thickened. Add lemon curd and beaten eggs and mix thoroughly. Pour into the pan and spread evenly. Cover with another 8 layers or so of fillo pastry, brushing each one with melted butter.

Bake for 45 mins or until set and lightly golden. Meanwhile heat lemon juice and sugar in a small saucepan and simmer the syrup for a minute then cool a bit.

Remove slice from the oven and drizzle the warm lemon syrup evenly over the top. Cool then cut into squares. Serve warm or cold, with or without whipped cream or pouring cream.

Cuts into about 20 or more small squares

Quick and Easy Pita Bread

I found this recipe in a book of Greek recipes called Taking you Home that I borrowed from the public library. It’s not proper pita bread because it doesn’t contain any yeast and when cooked it doesn’t form a pocket. To make proper pita bread use this recipe.

However, they taste good and you can make them in less time than it takes to nip down to the shops and buy some. A great accompaniment to dips and to serve at BBQs. Another big plus is that they reheat extremely well the following day in the oven, in a frying pan or in the toaster.

The original recipe calls for 500g self-raising flour and 500g Greek yoghurt, plus a tablespoon each of baking powder and salt. I decided to make just over half the recipe and next time I will cut down on the baking powder and salt as they were a bit too overpowering. My adjusted quantities are below.

They would make perfect individual pizza bases.

Easy Pita Bread300g self-raising flour
300g thick Greek yoghurt
1-2 tsp salt, to taste
1 rounded tsp baking powder
Extra flour for dusting
Olive oil or Canola spray

Mix flour, yoghurt, salt and baking powder in a bowl until combined. If it seems too stiff add 1 or 2 tablespoons of water – just enough to get it all to stick together. Tip onto a floured surface and knead gently for 30 seconds – just enough to get it all combined. Cut dough into six and with a floured rolling pin roll each piece into a circle about 15cm (6 inches) in diameter. If you want them smaller cut dough into 8 or 10 pieces.

Heat a non-stick frying pan over medium heat and spray the bottom with oil. Cook the pita for about 2 minutes on each side, or until nicely browned. Cook remaining pitas, making sure you spray each side with oil.

Serve warm.

Makes 6-10 pitas

Note: store any leftover pita in a plastic bag in the fridge. Reheat for a few minutes in a moderate oven or for a minute or two on each side in a dry frying pan. Or cut them in half and zap them in the toaster.

Bread & Butter Pudding with Caramelised Bananas

Matthew doesn’t like bananas or custard, especially if they’re served together as Banana Custard. A few years at boarding school in the UK during his impressionable youth is to blame. He describes over-ripe greenish-black banana slices mixed into lumpy, cold, congealed custard. You can just imagine it.

I grew up in the UK with my mother’s version of this traditional British dessert – hot, creamy custard with perfect slices of banana folded through, all topped with lightly toasted coconut flakes. Delicious.

In the early days of our marriage I tried to persuade Matthew that my banana custard was different. He would love it. But no-way-José could I persuade him to try it. I had never been to boarding school, he said, so I had no idea how strongly these culinary disasters were etched on his soul.

For the first six months of married life we lived in a granny flat tacked onto a large house which was owned by an elderly widower. From time to time we invited Tom for dinner and once or twice he invited us back. He wasn’t much of a cook and his repertoire was fairly basic. Roast hogget (somewhere in age between lamb and mutton) with vegetables, cooked in a pressure cooker to within an inch of their lives, by which time they all took on the same greyish hue, followed by a simple dessert.

As I helped Tom to clear away the dishes from the main course I spotted the dessert on the sideboard. Banana Custard. This is going to be fun, I thought.

Now it’s important to point out that Tom had quite clearly used the boarding school recipe book. And for those who don’t know him, I should also point out that Matthew was about five years into what ended up being a successful career in diplomacy.

Tom served three generous helpings of Banana Custard. Matthew glanced at me and rolled his eyes. He could see I was on the verge of uncontrollable laughter. He was not even slightly amused. Well, the diplomat rose to the occasion and you would have been proud of him. He ate the lot, then looked at me with an expression of relief that clearly said “Thank God that’s over.”

I really don’t know what came over me, but I heard myself saying “That was delicious Tom, Banana Custard is Matthew’s absolute favourite.” And with that Tom served Matthew a huge second helping.

By the time he had finished the second bowl Matthew was looking somewhat green around the gills. But he didn’t follow through with his threat to kill me when we got home, divorce proceedings were avoided and we’re still together 40 years later.

This Bread and Butter Pudding with Caramelised Bananas, from one of my favourite UK food writers Nigel Slater, is a 21st century update on Banana Custard. So delicious even Matthew eats it!

Bread & Butter Pudding with Caramelised Bananas

300g brioche or croissants
1 vanilla pod or 1 tsp vanilla extract
6 cardamom pods
½ tsp cinnamon
400ml can coconut milk
400ml milk (or use half milk and half cream)
3 eggs
3 Tbs brown sugar
Pinch salt
A sprinkle of sugar for the topping
For the bananas:
2 Tbs sugar
50g butter
4 large bananas
Zest of one orange
To serve:
Thick cream (optional)

Preheat oven to 180°C. Butter a baking dish (approximately 22cm) or 6-8 individual ones. Lightly toast the sliced brioche or halved croissants until golden-brown. Arrange in dish, overlapping slightly. If using small dishes you will need to cut the brioche or croissants into smaller pieces.

Remove cardamom seeds from the pods and crush with a mortar and pestle or a rolling pin. Slice the vanilla bean in half and scrape out the seeds. With a hand whisk, beat cardamom, vanilla seeds or extract, cinnamon, both milks, eggs and sugar in a large bowl until combined.

Pour custard over brioche and sprinkle a little more sugar over the top. If using individual dishes you can fill them to almost the top, but you may have some custard left over. Dessert can be made ahead to this point and kept in the fridge for several hours. Bake for 25 minutes or until nicely browned and the custard is just set. Cool for 10-15 mins then serve with the bananas.

For the bananas: cut in half length-ways or slice on the diagonal. Heat sugar in a large non-stick frying pan. Swirl it around and when melted and caramel colour add the butter and swirl to combine. Add the bananas and turn to coat them with caramel on both sides. Cook very briefly or they will become too soft. Sprinkle with orange zest and serve immediately with the bread pudding and thick cream if liked.

Serves 6-8

Gluten-free Christmas Pudding

Christmas puddings keep for months and improve with age, so I usually make them in October or November. One for the family and a couple of smaller ones to give to friends. I collect pudding bowls in second hand stores for this purpose.

In cooler climates you can store them in the pantry, but in Australia I prefer to keep them in a second fridge we have in the garage. Sometimes I make two large puddings and keep one to serve at a “Christmas in July” dinner party. And if that doesn’t happen the second pudding will still be delicious the following Christmas, more than 12 months after it was made!

I decided to adapt my traditional recipe to make it gluten-free. Still perfectly nice for everyone, but suitable for a growing percentage of the population who don’t tolerate gluten. A food processor makes quick work of the breadcrumbs, grated apple, chopped figs and pureed orange. Some people don’t like mixed peel and glacé cherries, so I have included substitutions for these.

The number of puddings you end up with from this recipe depends on the size of the bowls – two big ones, or one big one and two small ones, or four small ones. This year I doubled this recipe and ended up with 8 puddings of various sizes as you can see in the photo.

Gluten-free Christmas Pudding150g currants
200g dried figs, stalks removed then chopped
200g sultanas
200g raisins
60g dried mixed peel or dried apricots, chopped
60g glace cherries or dried sour cherries
60g blanched slivered almonds (or walnuts or macadamias)
2 Granny Smith apples, unpeeled, cored & grated
½ tsp salt
1 tsp each ground cinnamon, nutmeg and cloves
350g gluten-free bread made into crumbs in food processor
4 eggs, beaten
150-200g dark brown sugar
½ cup brandy or rum
1 cup gluten-free beer or sherry
1 Tbs black treacle
250g unsalted butter, melted
1 tsp bicarbonate of soda
1 orange, blitzed in food processor, skin and all
Brandy Butter to serve

Place all the ingredients in a very large bowl and mix well. Choose 2 to 4 pudding bowls, depending on size, grease lightly then fill with pudding mixture. They don’t rise much so bowls can be filled almost to the top.

Cover puddings with buttered baking paper, butter side down, and tie down with string. Steam puddings (see below) for about 5 hours or until evenly browned. Cool then cover with a fresh piece of baking paper or wrap in foil and store in the fridge.

Steaming the puddings: If you have a very large stock-making saucepan you can steam two puddings at the same time, one on top of the other. Place a metal trivet or an upturned saucer in the bottom of the pan, then the first pudding, then an upturned side plate and then the second pudding. Pour hot water in to come halfway up the bottom pudding. Hopefully everything fits and you can put the lid on. If not use two pans, or make half the recipe and just one pudding. Turn on the heat and let the water simmer for 5 hours, topping up from time to time as necessary.

The other way to steam puddings is in the oven. Choose a deep roasting pan into which the puddings all fit. Pre-heat oven to 150°C. Place bowls in roasting pan. Pour in enough hot water to come halfway up the bowls. Cover the entire roasting pan with foil and crimp it under to seal. You may need two pieces if it’s not very wide. Place in the oven for 5 hours. Check after 2  hours and top up the water as necessary.

To serve, steam puddings again for 2-3 hours and serve with Brandy Butter.

Makes 2-4 puddings