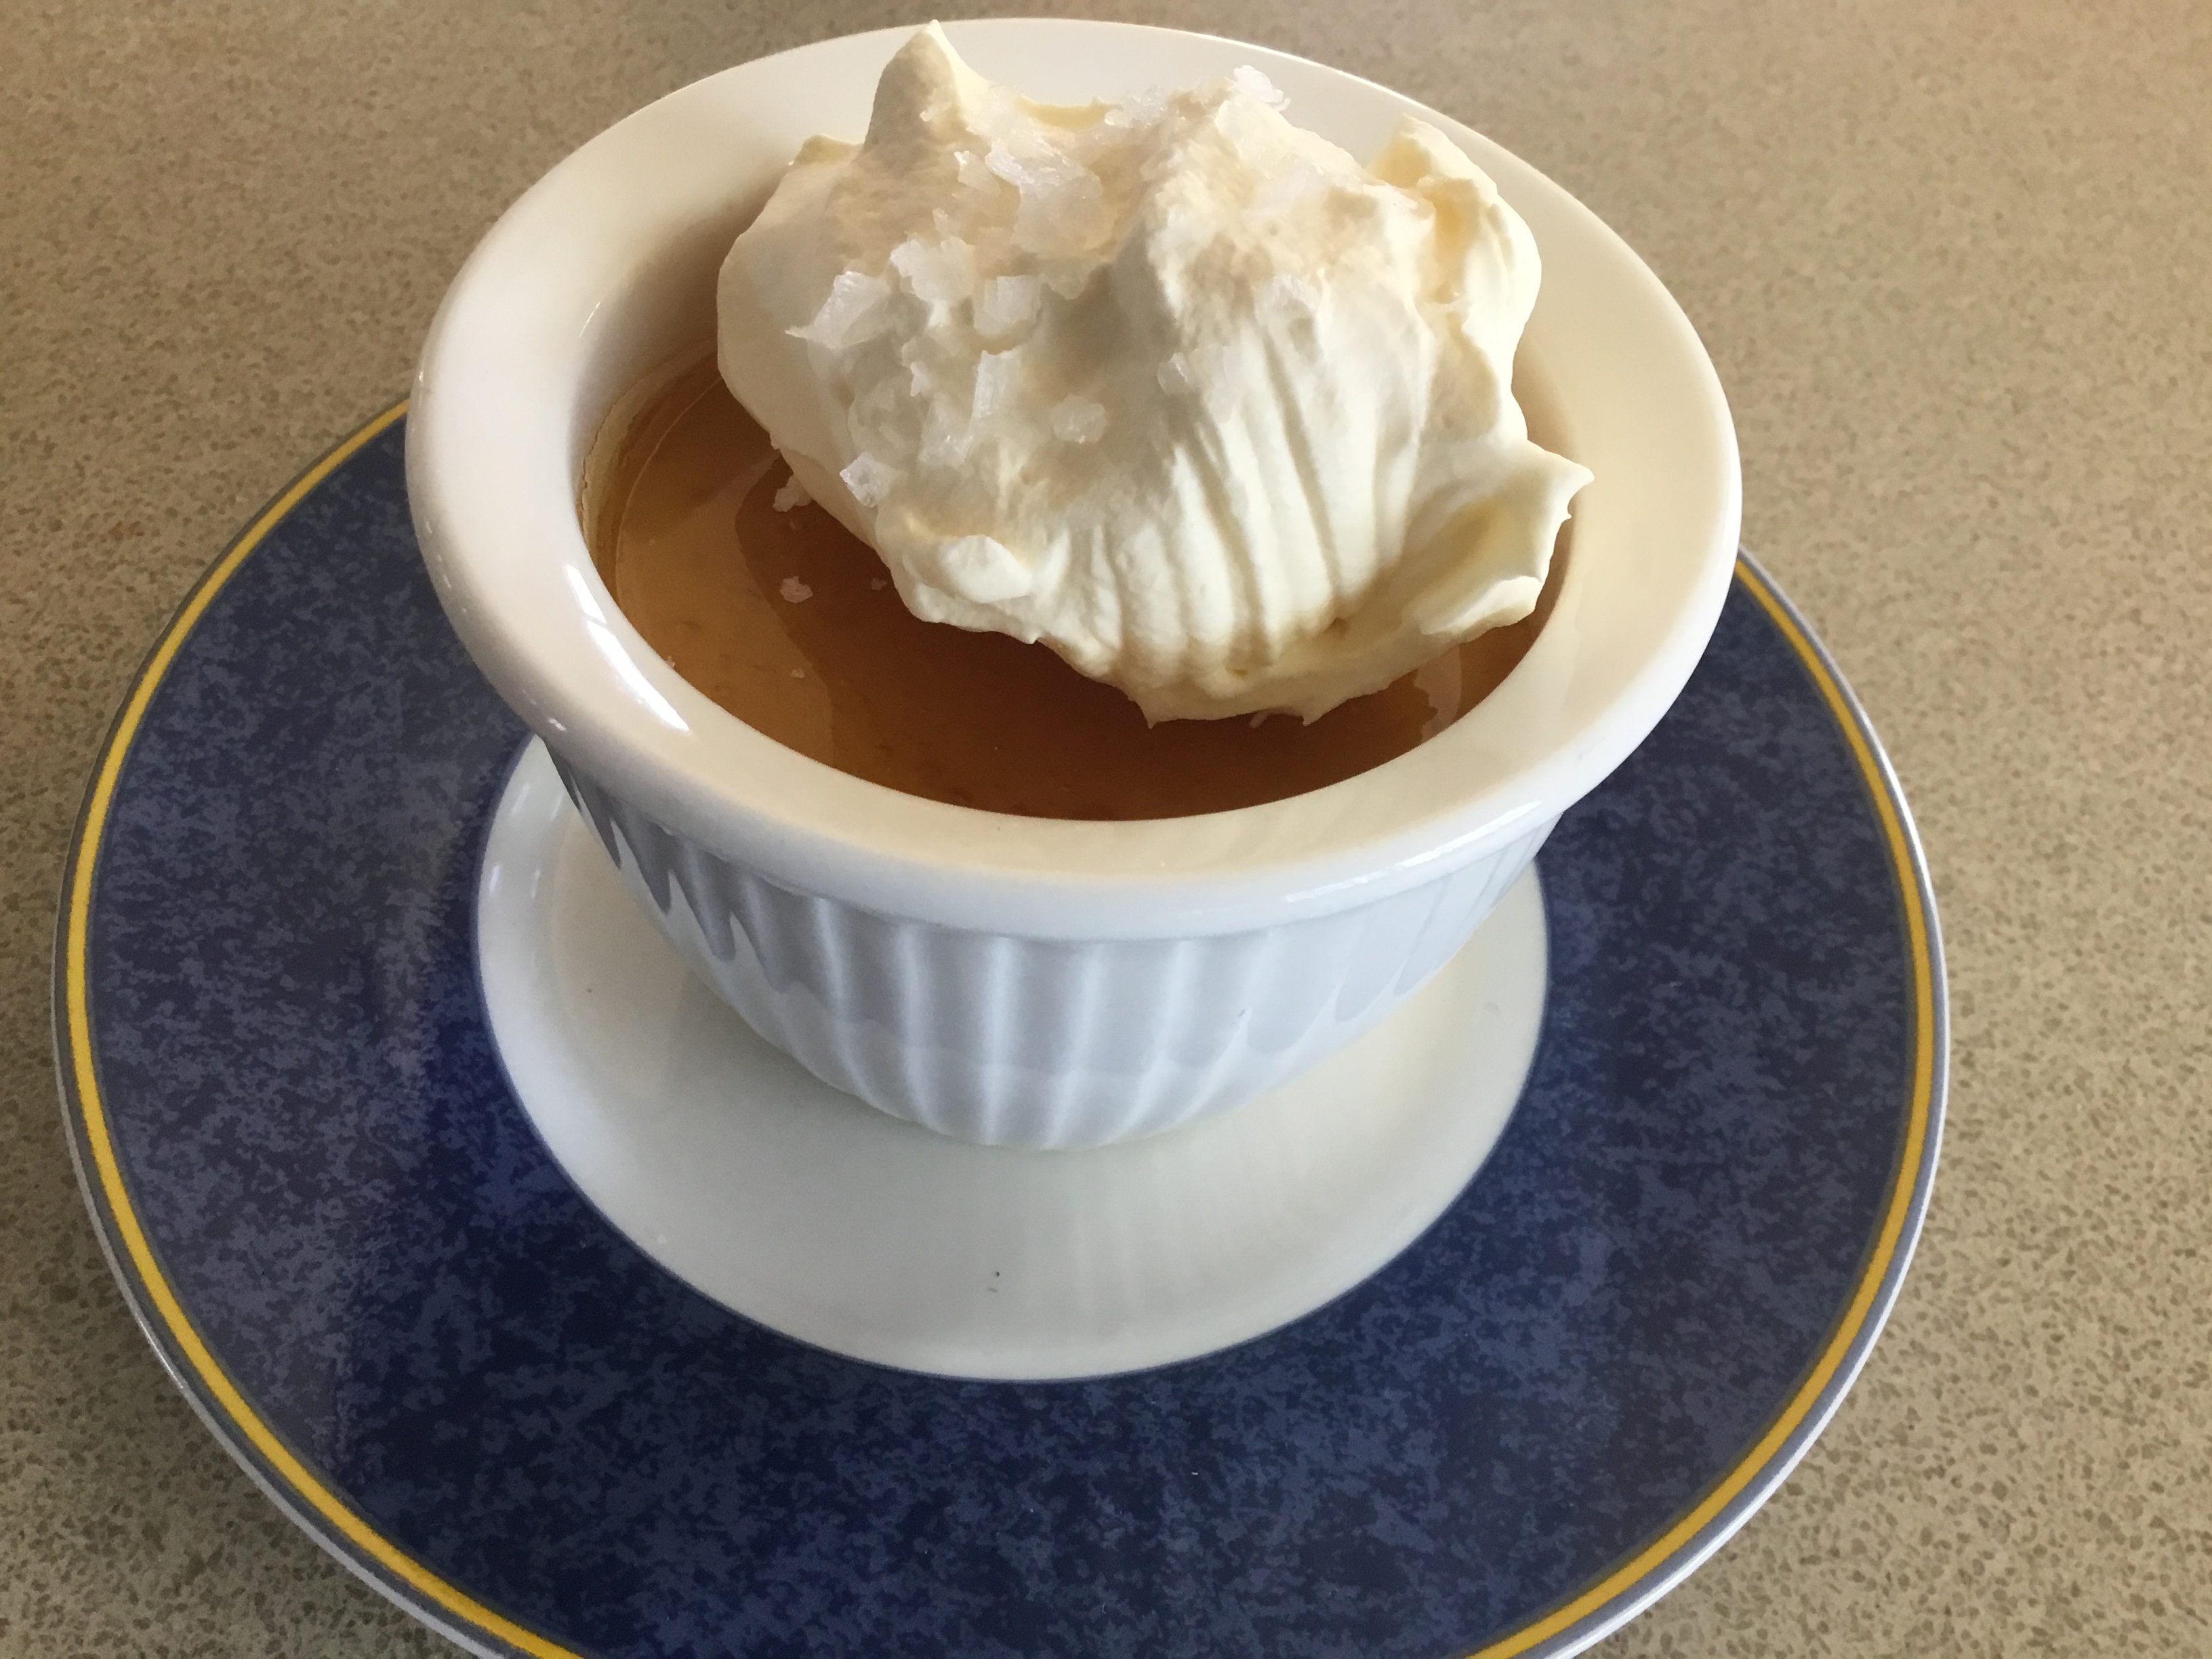
Matthew loves anything with salted caramel, so I knew this would be right up his alley.
I used a 28 cm metal flan tin with a loose bottom. If your tin is a bit smaller the filling will be thicker and you may have a bit more pastry left. Use a shallow tin rather than a deep one you would use for a quiche.
1 batch of Sweet Shortcrust Pastry made into a 25-30 cm pastry shell
Or 1 bought pastry shell
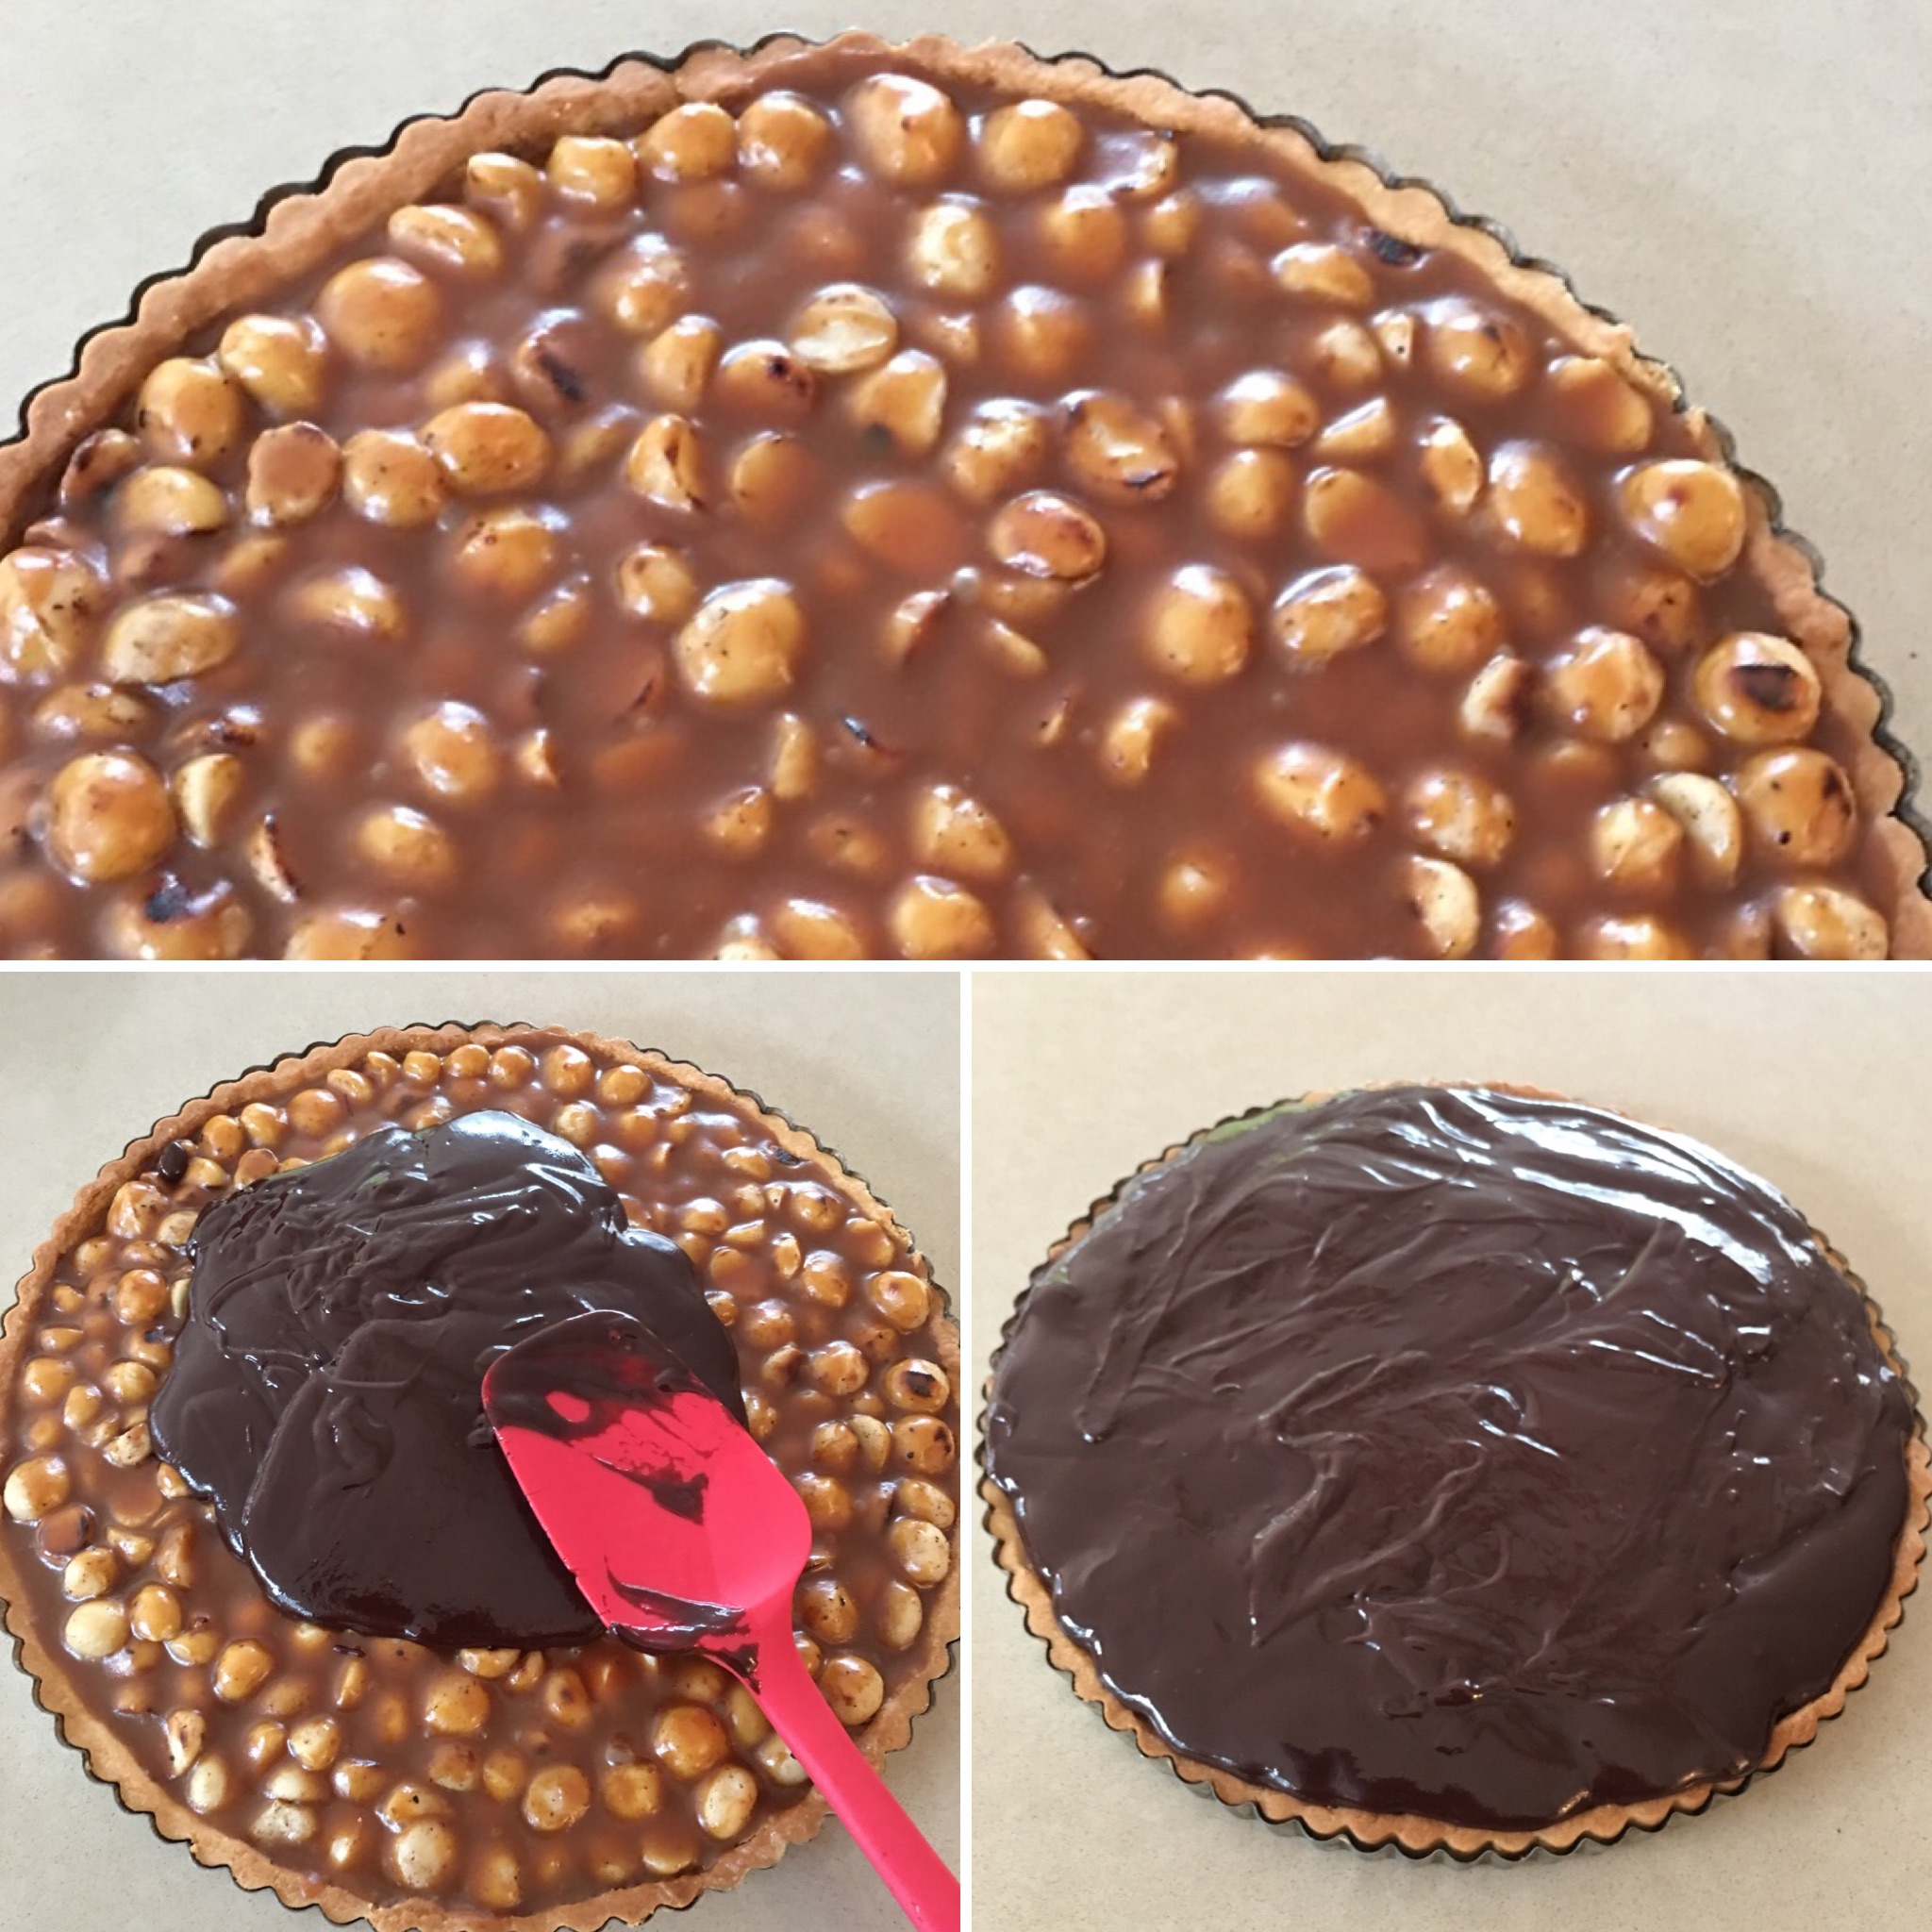
400g macadamia nuts
Salted Caramel:
1 cup sugar
¼ cup water
1 cup cream
80g unsalted butter
1 tsp salt
Chocolate Ganache:
1 cup cream
1 Tbs liquid glucose (corn syrup)
300g dark chocolate
30g unsalted butter
To serve:
Sea salt flakes
Whipped cream
Make pastry according to the recipe at the link. Follow the instructions down as far as refrigerating for 15 mins. Bake 10 mins, remove paper and weights, then bake for a further 8 minutes (instead of 3 minutes), or until fully cooked and golden. Place macadamia nuts in a large non-stick frying pan and stir over moderate heat until slightly coloured. Spread over the base of the pastry shell.
For the salted caramel, heat sugar and water in a saucepan over medium heat until sugar dissolves, then cook, without stirring but swirling from time to time, until it turns into a rich amber caramel (10-14 minutes). Carefully add cream and stir until smooth. Remove from heat and stir through butter and salt. Spoon evenly over the nuts in the tart shell, then leave to set.
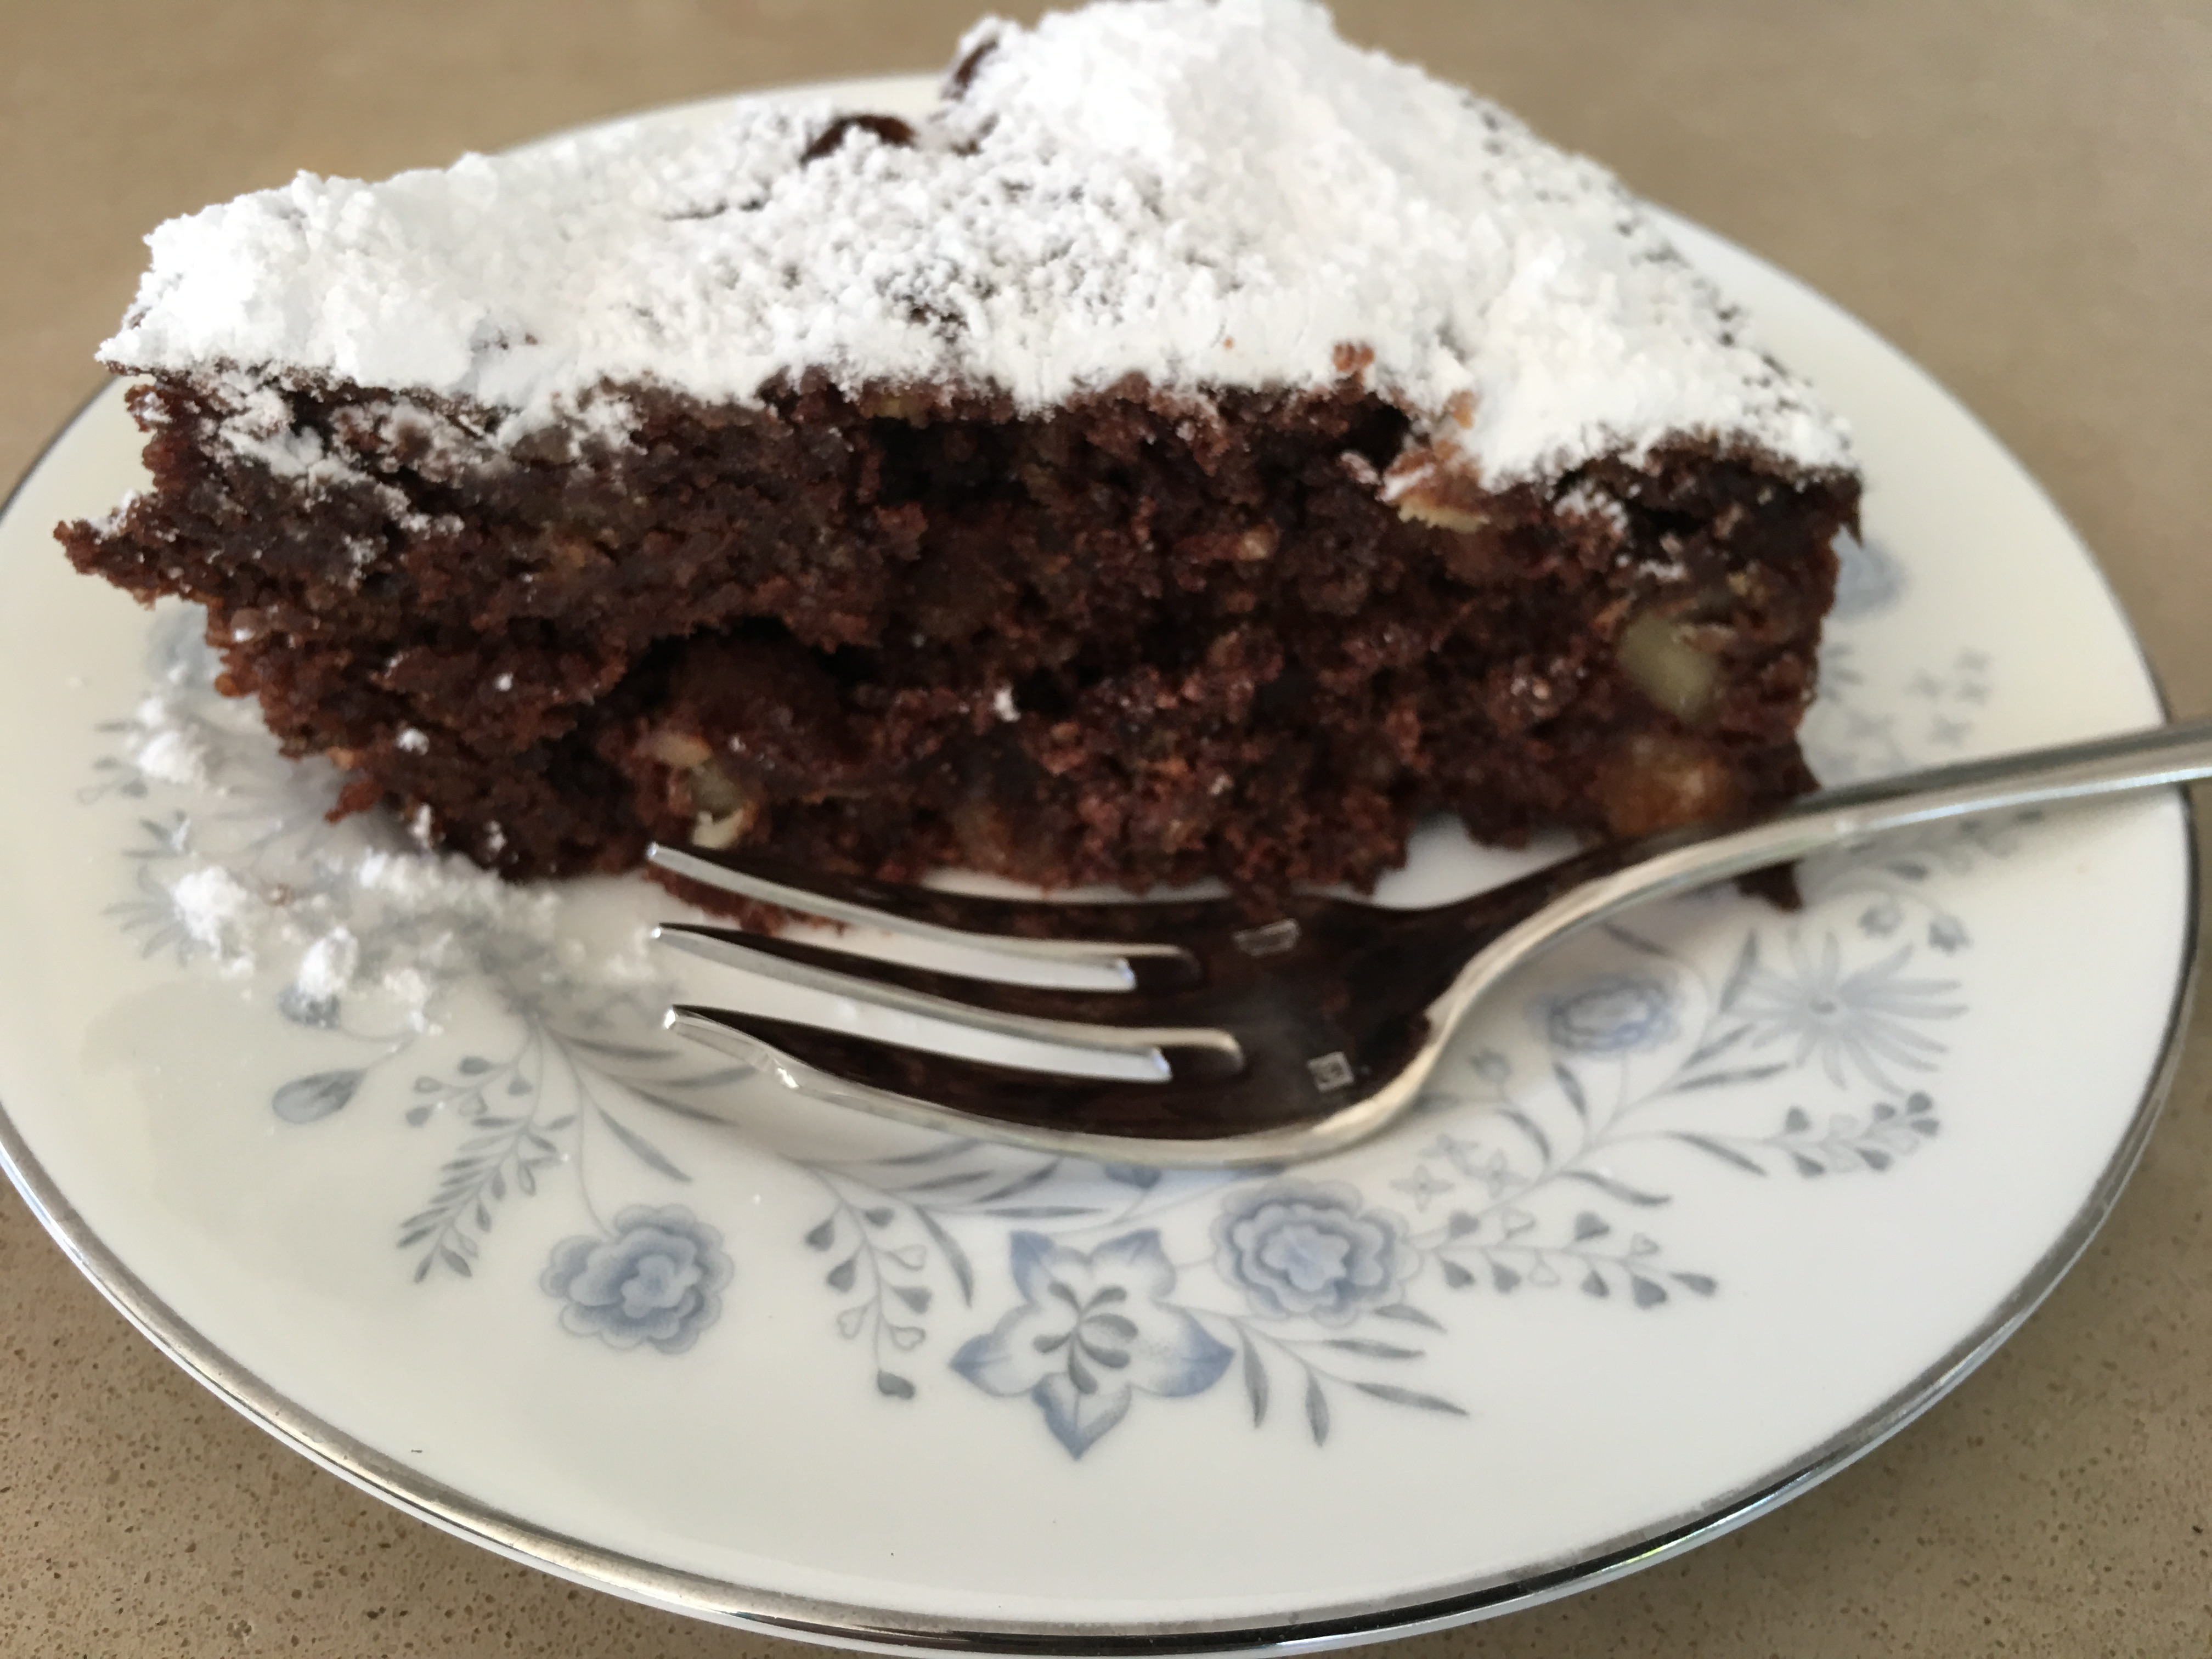
For chocolate ganache, bring cream and glucose to the boil in a saucepan then remove from heat. Add chocolate broken into squares and butter, stirring until melted. Allow to cool for a few minutes, stirring occasionally, until glossy. Spread ganache over the salted caramel, then stand in a cool place until set. Serve at room temperature or chilled with flakes of sea salt scattered on top. It’s very rich so cut into small servings. Whipped cream is optional.
Serves 12-16
 ½ cup sugar