When we lived in Chile in the 1990s I was President of Santiago Stage, an amateur theatre group which produced 3 or 4 plays a year in English. We raised money for a hospital which treated burnt children called Coaniquem and over two years we completely transformed a children’s home for 130 orphans called Los Girasoles. It was very satisfying and we had a lot of fun doing it. Our sitting room became the set for rehearsals for weeks on end. Fortunately I have a very tolerant husband.
While I was in Santiago recently my dear friend Elaine hosted a lunch to reunite our thespian friends. Elaine and I met in 1992 when we both had parts in a play called Home by David Storey. It’s about a home for people who are not quite right in the head, so we were definitely type cast. Elaine’s paternal uncle was the famous British actor Quentin Crisp and she has inherited his ability to tell a good story and make people laugh. When we took the play on tour to Concepcion (yes, we were very proud telling everyone that!) Elaine and I spent several hours in the dining car of the overnight train, drinking pisco sours and telling each other stories. We laughed so much I had a pain in my side. How we managed to get back to our carriage and into our narrow bunks I will never know. Elaine says I made her climb the ladder and sleep in the top bunk, but I honestly can’t remember.
When we arrived in Concepcion we were met by the head of the British Council. He had undertaken to book the theatre and sell tickets and we were staying at his house. As Elaine and I unpacked we could hear him making frantic phone calls. He had completely forgotten we were coming and hadn’t sold any tickets. We performed to an audience of about 20, but fortunately they all clapped loudly.
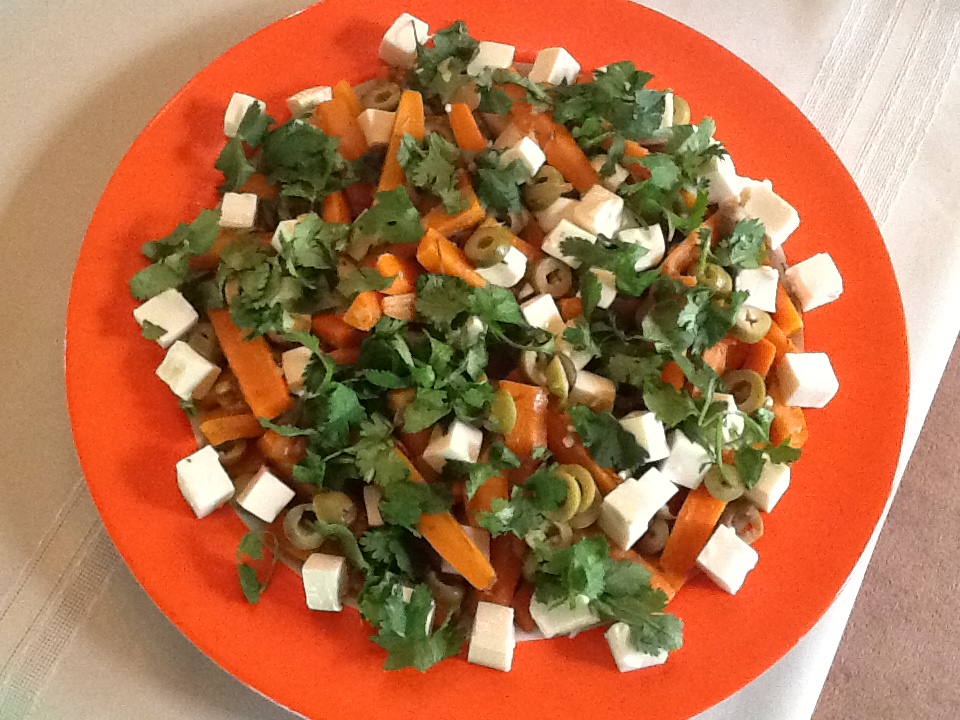
The day of the Santiago Stage reunion lunch was warm and sunny so we were able to sit outside. Elaine decided to do a buffet, consisting of quiches and lots of different salads and I helped. This carrot salad has been in my repertoire for many years and it’s always a good addition to a buffet, being both unusual and filling. Elaine had a lovely orange plate which was perfect to serve it on. Using whole baby carrots, if you can get them, makes it look even snazzier.
1 kg carrots peeled and cut into fat sticks
2 large onions, chopped
2-3 bay leaves
2 Tbs fresh thyme or 4 tsp dried thyme
1 tsp sugar
1 tsp cumin powder
4 Tbs olive oil
Salt and freshly ground black pepper
2 Tbs sherry vinegar (or substitute another vinegar)
100g stoned green olives (I use pimento stuffed ones, cut in halves)
100g feta cheese (or substitute soft goat’s cheese)
Juice of one lemon or lime
Chopped fresh coriander
2 Tbs finely chopped preserved lemon, skin only (optional)
Heat oil in a large frying pan and cook the onions gently until soft – 5 minutes or so. Add the carrots and cook, stirring for 5 minutes more. Add thyme, sugar, cumin, salt and pepper, cover and cook for another 5 minutes, stirring from time to time. Add vinegar and cook for 15 minutes, stirring once or twice. Add olives, cover again and cook for another 10-15 minutes. Carrots should still have a bit of bite left in them. Place in a serving dish. Add the feta cubes and squeeze over the lemon or lime juice at the last minute. Garnish with the coriander and preserved lemon, if using. If preferred, keep the olives till the end and sprinkle them over with the coriander as a garnish as I did in this photo. Serve at room temperature.
Serves 8-12 as part of a buffet